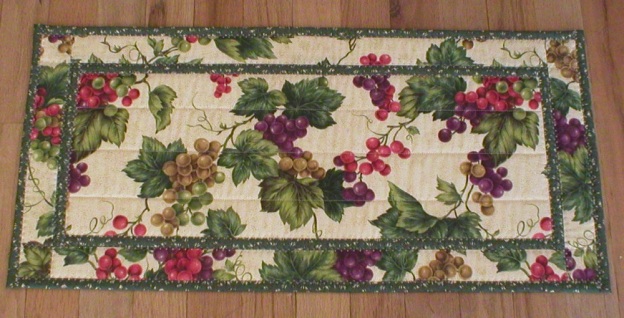
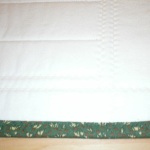
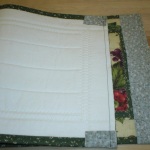
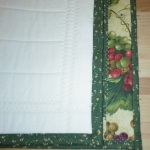
I’ve been enjoying making table mats of all sizes (from long runners to mini mug rugs), including hot pads and pot holders. When I first got started, the big issue was how to sew on the binding. I researched and found most people did all their assembling and quilting on a sewing machine, while finishing their binding by hand. I’m not sure why this trend took hold. It seems odd to me to do everything on the machine while reserving the final touch to hand sewing. I suppose people think that makes their quilt extra special. For me, it’s either all hand sewing or none. After doing one entire quilt by hand, I now opt for no hand sewing (time just won’t allow otherwise!).
So I came up with my own way to secure quilt binding. Since I do all the other work on the sewing machine, I saw no reason not to finish the binding likewise. I add decorative stitches (with the sewing machine) that give the binding a special touch. I’ve sold plenty of them in recent times and literally NO CUSTOMER complained about my not hand sewing the binding. Truly, I don’t think they care! They’re more interested in how the front/top looks…if it’s neat and clean, if the colors will go well with their decor, if it’s the right size for where it’s needed, etc. NOT ONE CUSTOMER has refused to purchase a mat because I didn’t hand sew the binding! So…why bother???
Here’s how I do it…see the steps detailed below. This technique is designed for projects with squared corners. If all that reading isn’t for you, skip to the bottom and view the video I recorded so you can see how it’s done.
Quilt then trim your project. Of course, all the quilting must be done first before thinking of binding your project! Once all the quilting is finished, use a square block board and trim off all extra fabric, batting and backing, squaring your project and making sure all edges are straight.
Cut your binding. For this technique, I cut binding in 2″ strips. If the strips aren’t long enough for any one side, it can be pieced together. Press seam open.
Finish long edges first. Place the binding fabric face down against the top of the project (right sides together). Using a straight stitch, sew the binding to the front of the project, long edges first. I use a 3/8″ seam allowance. (This is easy as I use the edge of my walking presser foot as my guide line.) Trim your binding to be flush with the edges of your project.
Next, press the binding against the project (right sides together). This step is simply to remove any wrinkles in the binding and to “crisp” up the seam. Then, flip the binding upward and press it, so that you’re pressing the right sides of both the binding and the project.
Now, flip the project over so the backing is facing upward. Fold the binding upward, so that there is about 1/8″ gap between the raw edge of the binding and the raw edge of the project. Press this fold.
Now fold the binding up over the raw edge of the project, covering the seam stitches. Make the fold firm, so there is no gap between the binding and the project edge. Press the binding in place.
While holding the binding in place, flip the project so the top side is up. Pin the binding into place ON THE RIGHT SIDE OF THE PROJECT.
Change your bobbin thread to a color that will match your binding color. For contrast, use a thread color on the TOP that will nicely contrast with some of your fabric in your project (usually a color you’ve been using for the quilting). I usually have light fabric against a dark, coordinating fabric. I choose whatever thread I want to have the decorative stitching show up on the opposite fabric (dark thread shows up on the light fabric, light thread shows up on the dark fabric).
Align your project in your machine so when the needle is in the center, it’s aiming directly at the seam where the binding meets the main fabric. Using a decorative stitch on your sewing machine (or even a zigzag stitch will do), stitch the entire length of the binding, removing pins as you sew. Do this for both long sides. If this was done correctly, you should see very little of your stitches on the back of the project. The front stitches will look decoratively nice and enhance the character of the project. Trim the ends of each binding piece to be flush with the short sides of the project.
Finish the short sides of the project. Place binding fabric right sides together with the top of the project. Allow about 1-1/2 inches of fabric to overlap each end. Fold under to the back of the project the excess binding at the end where you will start sewing. Hold this in place as you sew down the seam. Stop sewing about 4 inches from the end of the project. Fold under about 1-1/2 inches of binding at the end of the project so that it snugs up against the project. Hold this in place (or pin it) as you finish sewing the seam.
Return to the ironing board. Flip the binding upward and press it flat. Now turn the project over so the backing is facing upward. Press the folded pieces of binding slightly inward so there is a slight angle inward along the edge. Fold and press the binding as was done earlier on the long sides.
Flip the project over and pin the binding in place as before, ON THE RIGHT SIDE OF THE PROJECT. Align your project in the sewing machine so when the needle is in the center position, it will be aiming directly at the seam where the binding meets the fabric. Sew all the way across the binding, securing stitches at both ends.
DONE! I realize all this reading makes it seem complicated. But, it’s really not. Watch the video to get the idea of what I do. You’ll be glad you did! Judi

