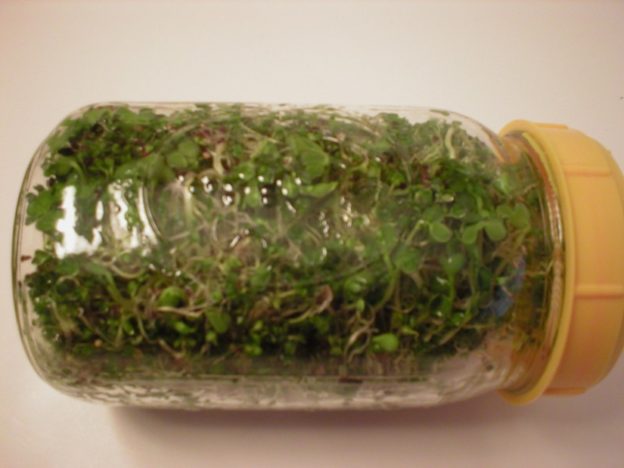
Growing jar sprouts is not hard. It’s something I’ve been doing for well over 20 years! Yet, if certain steps are not followed, you will not have a successful harvest and your sprouts may spoil along the way. That’s a waste of your time and hard-earned money. So, follow the simple steps discussed in the video below and read through the tips for successful sprouting following the video. Enjoy!
I hope this helps!
Judi
Tips for Growing Jar Sprouts
* Although any type of glass jar will work when growing sprouts, a quart-size wide-mouth mason jar is easiest when rinsing, draining and removing grown sprouts, so start with this type if you have one. Be sure your jars are well washed. Some people prefer to sanitize them in boiling water first.
* Whatever lid you use, be sure it will allow for air flow because your seeds and growing sprouts need air. If you don’t have a sprouting lid, use cheesecloth or a piece of clean nylon screen secured around the rim of the jar with a rubber band. Also, a piece of needlepoint mesh can be cut to fit inside a metal mason jar rim and used in place of a purchased sprouting lid.
* Use seeds only intended for sprouting. Although any seeds can be sprouted, seeds intended for soil planting are often treated with chemicals. This makes them undesirable for eating. Seeds designated for sprouting are not treated and are thereby safe to eat.
* Seeds will last the longest with the best germination rate when kept in a cold environment. Store seeds in your freezer for the longest life.
* When sprouting small seeds such as broccoli or alfalfa seeds, use 1 to 2 tablespoons of seeds. More will overcrowd the jar, not allowing them to grow to their fullest potential.
* When sprouting large seeds, such as lentils or mung beans, you could grow ¼ cup to ½ cup of seeds at a time in a quart-size mason jar.
* Rinse seeds well at the start of the sprouting process to remove any dust, debris and/or pathogens. Then cover them with cool filtered water and allow them to soak in a cool location according to the directions on the seed package (different types of seeds need different soaking times).
* Rinse and drain your growing sprouts twice a day with cool water at roughly 12-hour intervals. (Some growers prefer to rinse/drain sprouts 3 or 4 times per day. See the recommendations that came with your seeds.) Seeds may grow better being rinsed 3 or 4 times a day when in a warmer climate, especially in the early stages of growth.
* Prop your sprouting jar at a 45-degree angle to allow water to completely drain out before laying the jar on its side. Laying it on its side allows air to flow in and out of the holes in the lid while also exposing your sprouts to as much light as possible.
* For optimal growth, after your seeds/sprouts are rinsed and drained, place the jar in a sunny or well-lit location that is cool, not warm.
* Sometimes during the growing process you may notice white fuzzy areas in your sprouts. It looks like mold, but more likely is simply root hairs reaching out for water. If this happens, your sprouts are thirsty. If you rinse and drain them, the fuzzy root hairs should disappear.
* Different types of seeds may take different timeframes to grow, usually ranging from 2 days to about a week. See your seed package to know about how long you should allow your seeds to sprout.
* If your sprouts develop a foul odor or peculiar, wilted appearance, do not eat them. They need to be discarded and the jar and lid should be sanitized before starting over.
* Don’t water your grown sprouts right before storing them in the refrigerator. The excess water may cause them to spoil. Although it is not mandatory, some people prefer to remove ungerminated seeds before storing the sprouts. To do this, place all the jar contents (your grown sprouts) in a large bowl of water. Swish them around and the ungerminated seeds will float to the top. Scoop them off and discard them. Drain the sprouts very well to be sure there is no excess water left in them, as it will cause them to spoil. Store them in the refrigerator in a container with a lid. Line the container first with a cloth or paper towel to soak up any extra water. To help avoid the possibility of excess water in your storage container, you could simply rinse sprouts in a bowl of water, removing the ungerminated seeds, as you need them for your salads or snacks.
* Put a paper towel or napkin in the bottom of your storage container for your finished sprouts. That will soak up any extra water yet help to maintain a humid environment, which will keep the sprouts from drying out. Store them in a container with a lid, in the refrigerator. They should be used within a few days.
* If you want to remove unsprouted seeds from your finished sprouts, here’s a way to do it…
About Judi
Julia W. Klee (Judi) began her journey enjoying “all things food” in elementary school when she started preparing meals for her family. That love of food blossomed into a quest to learn more and more about health and wellness as related to nutrition. She went on to earn a BS Degree in Food and Nutrition, then an MS Degree in Nutrition. She has taught nutrition and related courses at the college level to pre-nursing and exercise science students. Her hunger to learn didn’t stop upon graduation from college. She continues to research on a regular basis about nutrition as it relates to health. Her hope is to help as many people as possible to enjoy foods that promote health and wellness.

