Category Archives: Uncategorized

Cabbage

Inexpensive Foods with Tips for Healthy Eating When Money is Short

We’ve all had times when money is tight. It’s never fun, but in the vast majority of cases, things WILL get better. It’s usually a matter of “hanging in there” until it does. In the meantime, here is a list of inexpensive foods and tips for healthy eating that can help you make it through the tough times.


Vegetables…

Fresh Carrots

Fresh carrots are a great buy year-round. A one-pound bag is under a dollar in most grocery stores and can go a long way in servings. There is little waste, especially if they are not peeled. Simply wash them very well and cut off the ends and any area that doesn’t look good. They can be eaten raw in salads or as a snack, added to soups, stews, and casseroles, served as a side dish, and included in main dishes. A pound of carrots yields about 3-1/2 cups when sliced. Assuming a serving is about one cup, and the cost of one pound of carrots is $0.75, that brings the cost per serving to about $0.21. The cost of a half-cup serving of cooked carrots, at $0.75 per pound would be about $0.11 each.

Fresh Cabbage

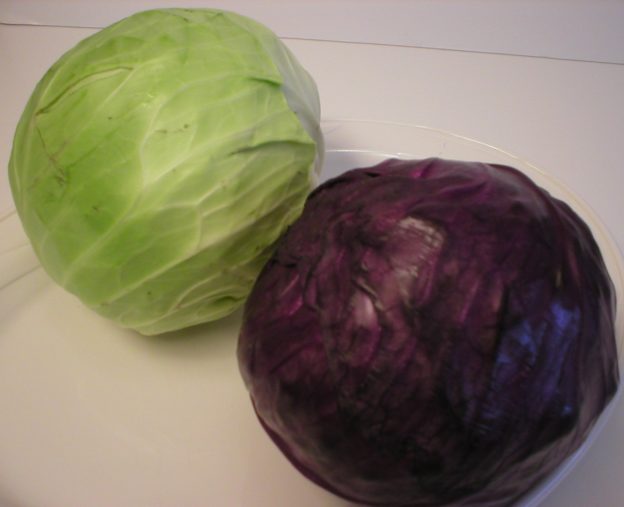
A head of fresh cabbage packs a lot of food within its head. Whether it’s chopped, shredded, fermented, stir-fried, boiled, roasted, sautéed, or used as a wrap, we can get a lot of mileage out of one head of cabbage. One pound of shredded cabbage yields about 4-1/2 cups. Most cabbages weigh well over one pound, so if you opt for a heavy cabbage, you’ll get a lot of servings out of it. Assuming one serving is one cup of shredded cabbage, and assuming that cabbage cost $0.68 per pound, that brings the cost per serving to a mere $0.15.

White Potatoes

A five-pound bag of white potatoes can often be found for around $2.50, or even less. One pound of potatoes yields about 3-1/2 cups chopped or 2-3 cups mashed. Assuming a serving size is 2/3 cup, at $2.50 for five pounds, that brings the cost per serving of chopped potatoes to around $0.09, and mashed potatoes to around $0.13.

Sweet Potatoes

Fresh. Fresh sweet potatoes are usually around $1.00 per pound (sometimes less). As with white potatoes, one pound yields about 3-1/2 cups chopped. So comparisons are equal, assuming a serving size is 2/3 cup (which is what is listed as a serving size on the canned sweet potatoes), at $1.00 per pound, that brings the cost per serving to about $0.19.

Canned. A 40-ounce can of yams sells for about $2.25. The Nutrition Facts panel lists a serving size as being 2/3 cup with 7 servings being in the can (including the liquid). At that rate of usage, the cost per serving is about $0.32. Note that canned yams are usually packed with added sweeteners. If you are trying to avoid such additives, fresh sweet potatoes would be your best option.
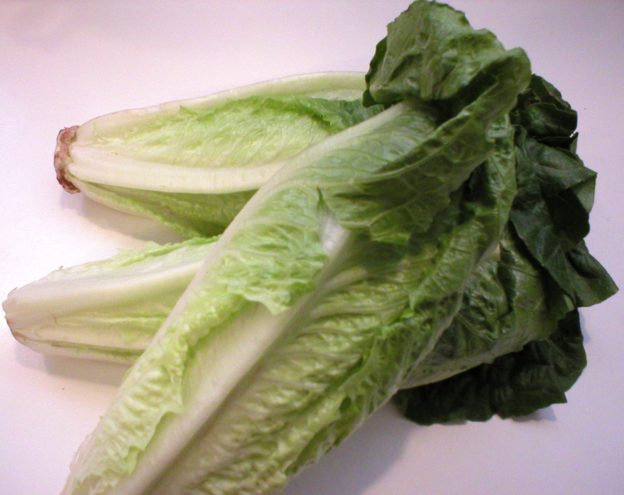
Lettuce

Whole heads of lettuce are usually your cheapest option when buying lettuce. They are often the freshest to choose from, offer the most lettuce for your money, and have been shown to have the lowest bacterial count among the options, even when compared with triple-washed lettuce and lettuce blends in bags and plastic boxes. A whole head of non-organic lettuce averages about $1.50, with organic options up to twice that amount.

One head of lettuce yields from 4 to 6 cups when torn, depending upon the variety. For the sake of comparison, we’ll assume one head of lettuce yields 5 cups of torn leaves. Assuming 1 cup is a serving, that brings one serving of torn lettuce leaves to about $0.30. When comparing head lettuce to spring mix baby leaves in an 11-ounce tub that sells for $4.84, a one cup serving comes to $0.69 each.

Cauliflower (Fresh Whole Head vs Frozen Florets)

Fresh. The advantage to buying a whole head of cauliflower is that they are usually priced individually rather than by the pound. Choose a fresh cauliflower that feels very heavy for its size, with no browning on the surface, and you’ll get a lot of bang for your buck. A medium head of cauliflower yields about 6 servings and averages about $2.75 in cost. That brings the cost per serving to $0.46.

Frozen Cauliflower Florets. Frozen cauliflower florets may be found in some stores. When writing this, I found a 12-ounce bag of frozen cauliflower florets for $1.79. The Nutrition Facts panel suggested a serving size as being ¾ of a cup, with 3 servings in the bag. That brings the cost to $0.60 per serving.

Fresh Kale or Other Greens by the Bunch

A one-pound bag of fresh (not organic) kale costs about $2.94. The bag lists about 6 servings per bag. That comes to $0.49 per serving.

Bunches of fresh greens, such as kale, turnip greens, and collard greens often sell for about $1.48 each. Bunch sizes vary, so it’s impossible to precisely state the cost per serving. However, assuming one bunch offers 4 servings, at $1.48, it comes to $0.37 per serving. With that, the individual bunches of greens are cheaper per serving than the prepackaged one-pound bags.

Canned Tomatoes and Tomato Paste

Canned tomatoes and tomato paste are available in just about any grocery store year-round. They are inexpensive and flavorful additions to many foods. They can be added to soups, stews, casseroles, sauces, dressings, and even beverages. Unless you grow your own tomatoes, the canned varieties are usually cheaper than buying fresh tomatoes for the same applications. The price of canned tomatoes (14.5-ounces) usually starts around $1.00 a can, with name brands being a little higher. Generic (6-ounce) cans of tomato paste may start as low as $0.42 a can with name brands being higher than that. Whichever you choose, they are a great buy and can add a lot of flavor to foods.

Frozen Vegetables

Frozen vegetables are a very easy and convenient food to have available. They can be used as side dishes and included into a wide array of other foods like salads, soups, stews, casseroles, etc. Many people are now buying frozen vegetables in steamable packaging, which makes cooking them in the microwave very easy and convenient. However, when comparing the cost per serving, the steamable packaging often adds extra expense to the vegetables. Notice that I said “often.” That is because this is not always the case. In this case, it’s helpful to compare cost per serving to determine which is cheaper…frozen vegetables in steamable packaging or those in regular packaging that cannot be placed in the microwave. Usually, those packaged in regular packaging are cheaper per serving, but not always, especially when comparing like items in a generic brand. That being said, however you buy them, frozen vegetables can go a long way in helping to stretch the food budget, depending upon how they are used.

Fresh Celery (Whole Bunch, Not Celery Hearts)

When shopping for celery, choosing the entire bunch will be cheaper than selecting a package of celery hearts. The whole bunch includes the leaves and root end. Many people cut off and discard the leaves, however, they are completely edible and add celery flavor to any dish they’re added to. If you have aversion to eating the celery leaves, place them in the freezer and save them for soup or stock. The entire bunch of celery often can be purchased for about $1.50, whereas the celery hearts will cost more than that, sometimes up to $3.00 for organic varieties.

Fresh Onions

One 3-pound bag of yellow onions can be found at many grocery stores for around $1.50 a bag. Onions are essential for flavoring some foods, and a 3-pound bag of onions can go a long way when being added to freshly prepared foods. They can be used raw in salads and on sandwiches, added to a huge array of cooked foods, and even caramelized and eaten as a side dish with a uniquely sweet flavor. For anyone who prepares food “from scratch” onions are a very inexpensive essential ingredient.

Fresh Garlic

Fresh garlic may appear to be expensive, since it is usually priced by the pound. However, a bulb of garlic is small and lightweight, bringing the cost per bulb down more than you would think at first glance. When priced by the “each,” garlic bulbs can be found for $0.50 each. Like onions, garlic is an essential ingredient in many home-cooked foods and there simply is no substitution. Considering that many recipes call for only one or two garlic cloves at a time, you can get some flavor bang for your buck when buying garlic.


Fruit…

Bananas

Bananas are one of the cheapest fruits available, often selling for around $0.69 a pound (and sometimes less). One medium banana will usually cost around $0.25 each, of course depending upon its size. They are filling and nutritious, so bananas are excellent options when on a tight budget. Even better is the fact that you can buy whatever number of bananas you want, down to only one, if needed.
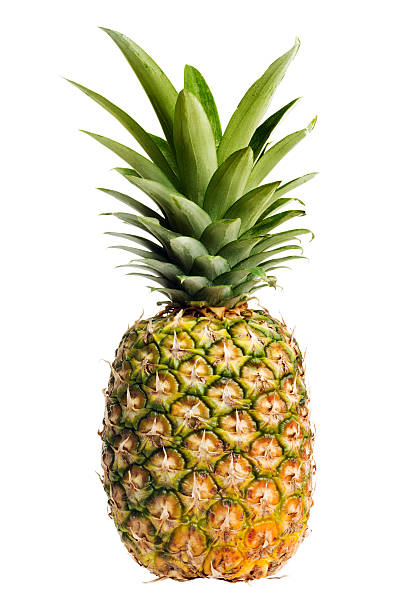
Fresh Pineapple

Fresh pineapple is a fruit you may not think of when on a tight budget. However, they can often be found for around $2.25 each. Considering how much fruit you get from one whole pineapple, it’s a good buy, especially when comparing it to the cost of canned pineapple. One fresh pineapple contains about 5 cups of pineapple when cut into cubes. One-half cup is considered to be a serving, so one whole pineapple has about 10 servings of fruit. At $2.25 each, one serving of fresh pineapple comes to about $0.23. One 20-ounce can of pineapple chunks (packed in juice) sells for about $1.28. The can holds about 4-1/2 (1/2 cup) servings, bring the cost per serving to $0.28, so fresh pineapple is a better buy.

Watermelon (when in season)

One large watermelon in season offers a lot of servings and is a great bargain when considering the number of servings you get per fruit. When in season, they are usually sold by weight and are very inexpensive since they are usually plentiful. When off-season, many stores still carry them, but they are much more costly and would not be the cheapest option during the winter months and early Spring. Choose a melon that is heavy for its size, sounds hollow when tapped, and is yellowish on the side where it rested on the ground. There may be pre-cut melons available, but they will cost more per pound than the whole melons.

Frozen Mangoes

When thinking about inexpensive foods, mangoes usually don’t come to mind. However, when comparing the cost of a fresh mango to a large bag of frozen mango chunks, the frozen bag wins the prize. I found a 48-ounce bag of generic brand frozen mango chunks for $6.47. That may sound a bit pricey, but when considering the contents vs buying that same amount in fresh mangos, I considered the frozen option to be a good buy. The large bag had 10 each 1-cup servings, which is equivalent to about 10 average size mangoes. With the price of the large bag, that comes to about $0.65 per mango or per 1-cup serving. Where I live, fresh mangos usually sell for about $1.00 each. Sometimes they sell for less, but it’s not often that I can find them for as low as $0.65 each. So, with all things considered, if you enjoy mangoes, the frozen option may be a good choice for you. Also, the advantage of the frozen option is that you won’t be in a rush to eat them before they go bad. You can simply take what you need from the bag without issue.


Grain Products…

Oats

Oats have become increasingly more popular these days. They can be used as a traditional breakfast porridge, eaten soaked with milk of choice, made into oat milk, added to burgers and other foods, and even eaten in savory dishes at meals other than breakfast. When comparing prices, I focused on old fashioned rolled oats, either regular or quick cooking. Prices varied a lot, with $0.11 to $0.13 being the lowest cost per ½-cup serving (when measured dry) of rolled oats.

When comparing the price of steel cut oats, the cost per serving was about $0.18.

Rice

White Rice Long-Grain. There are many types of rice on the market, and they each have their own price points. For the most part, whichever type of rice you buy, it will have a relatively low cost per serving. When comparing the ever-popular long grain white rice, the cost per serving ranged from $0.04 to $0.08. This is an EXTREMELY low-cost food when considering cost per serving and can be a staple for many meals when on a tight budget.

Brown Rice, Long-Grain. When comparing the price per serving of brown rice, it was very comparable to the long-grain white rice, averaging about $0.06 per serving.

Pasta

Pasta is a standard low-cost food, often being sold for around $1.00 to $1.30 a pound (for traditional wheat-based pasta). It can be used in salads, side dishes, main dishes, soups, casseroles, and even as a crust for pizza. Food processors often list 2 ounces of dry pasta as a serving. From my personal experience, I find that to be about half what I would normally eat when having pasta as a main course. So, assuming pasta is the main course, we’ll count 4 ounces (dry) as one serving. At $1.30 a pound, that brings the cost of one serving to $0.33. If serving pasta as a side dish, using 2 ounces (dry) per serving, the cost would be about $0.16.

Bread

Bread can serve as a foundational element of many meals, from sandwiches to French toast to being used as a pizza base. Assuming a loaf of traditional bread costs about $3.00 and has 22 slices, the cost per slice is $0.14. The cost of specialty bread such as gluten-free bread is usually twice that of traditional wheat bread, and often has fewer slices per loaf. Assuming the cost of such a loaf is $6.00 with only 12 slices, the cost per slice is much higher at $0.50. If you’re on a tight budget and must eat gluten-free, then such bread may be too costly when money is tight. Opting for something else may be preferred.


Protein Foods…

Peanut (and Nut) Butter

Peanut butter can be used as a sandwich and snack filling, and even as a thickener and flavoring agent in sauces, dressings, and other foods. All nut/peanut butters are considered to be good sources of protein and may help meet nutritional needs, especially when dollars are short. Peanut butter is usually cheaper than nut butters, and is available in most grocery stores. Prices per 2-tablespoon serving vary widely among different types of peanut butters. One name brand all-natural peanut butter sold for $4.86 for a 26-ounce jar. The price per serving came to $0.21. Another name brand option of traditional peanut butter sold for $5.44 for a 40-ounce jar, bringing the cost per serving to $.16. A generic brand of traditional peanut butter sold for $4.68 for a 64-ounce jar, bringing the cost per serving to $0.08. DO read the labels because all peanut butters are not created alike. Ingredients DO vary, so be sure you’re getting what you need before making your purchase.

Nut butters vary in price depending upon the type of nut or seed used in the butter. When comparing a name brand of almond butter with a generic brand, of course the generic brand was cheaper per serving. The name brand sold for $6.97 for a 12-ounce jar, with 11 servings, bringing the cost per serving to $0.64. That may be too high when money is tight. The generic brand of almond butter was a little cheaper, selling for $4.98 for 12 ounces, bringing the cost per serving to $0.45. That is still not an extremely cheap food, but it is less costly than meat. So, it may or may not work for you when money is tight.

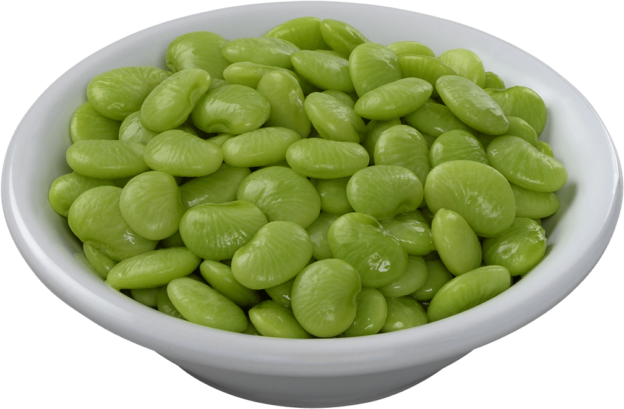
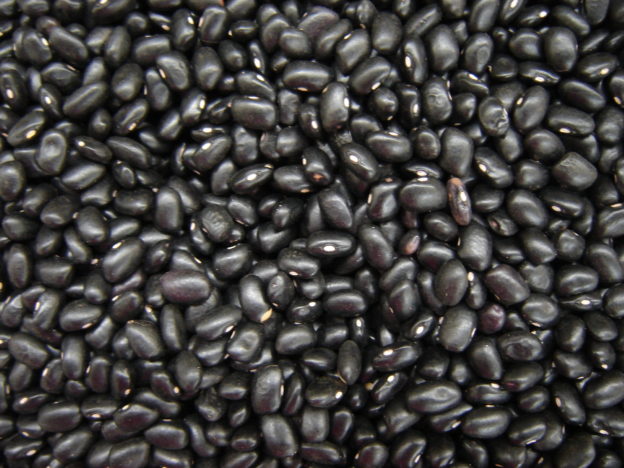
Dried Beans, Lentils, and Chick Peas

Dried legumes are well known for being inexpensive sources of protein. They can be cooked and used as a main dish or side dish, and added to soups, stews, casseroles, burger, tacos, burritos, and even salads. The prices will vary among the different varieties, but any way you go, you’ll get a lot of food for your dollar. Yes, they must be soaked and cooked, but there is not a lot of hands-on time spent in the process, and it’s actually very easy. Extras can be stored in the refrigerator or in the freezer for a longer period of time. Dried beans, lentils and peas should be a first-choice for a protein source when on a tight budget.

Canned Baked Beans

Canned baked beans are a very inexpensive choice when planning meals on a tight budget. Simply open the can and they are ready to use. They can be used as-is or more flavorings added, if desired, although that is not mandatory. One name brand of baked beans was sold for $1.50 for a 28-ounce can. The can held 6 each ½-cup servings, bringing the cost per serving to $0.25. Putting together a main dish with canned baked beans can’t be any easier when on a tight budget!

Canned Tuna

Canned tuna is another very quick and easy protein option when planning meals on a tight budget. When comparing prices, a 12-ounce can of name brand tuna sold for $2.08. There were three servings listed on the Nutrition Facts panel, bringing the cost per serving to $0.69. Not bad for a complete protein, and it’s cheaper than meat.

Eggs

A dozen eggs can be found in just about any grocery store. They often sell for around $1.50 a dozen, coming to about $0.13 each. This is REALLY inexpensive considering they can be used as a main course, boiled and added to salads and other dishes, used as binding agents in breads, pancakes, and other cooked or baked foods, and even eaten as snacks. When on a tight budget, having a dozen eggs in the refrigerator can help to stretch your dollars in a lot of ways!


Dairy…

Milk

Buying milk by the gallon is cheaper than buying it in smaller containers. If you’re a milk drinker, this may be your preferred option. Nonfat dry milk is usually cheaper than fluid milk, but the flavor is certainly not the same. If you don’t use a lot of milk, but want to have some available, consider buying a small box of dry milk and mix up only what you need at the moment.

Non-Dairy Milk

Non-dairy milks are without a doubt more expensive than cow’s milk. However, there are many reasons why some people avoid cow’s milk and opt for plant-based milks. If you prefer plant-based milks yet find them to be too expensive at the moment, consider making your own oat milk. It’s not hard to make, and you can easily make as much or as little as you want at a time. This saves money and allows you to use what you probably already have in your pantry.


Tips for Healthy Eating When Money is Short…

Plan Home-Cooked Meals and Make a Grocery List

Take time to plan your meals in advance, if at all possible. When money is tight, it’s far cheaper to prepare meals yourself than ordering take-out or going to your favorite restaurant. Take a look in the refrigerator, pantry and freezer and incorporate what you can that you already have into the next week’s meals. This will not only save money, but will help to rotate your food so it’s used before it gets stale or goes bad. Make a grocery list of what you’ll need (that you don’t already have) to make those meals. Try to avoid adding too many extra things that won’t be needed for the next week.

Stick with Your Grocery List When Shopping

When you’re at the store do your best to stick with your grocery list. When choosing items, look for the cheapest option and choose that, if it will work for you. This might be the least cost per ounce, pound, or by the “each.” Sometimes the label on the store shelf will list the price per unit. This can make shopping easier than trying to do the math yourself. If you see something you forgot to add to the list that you know you don’t have at home and will need for the meals you’ve planned, then get it. If it’s not needed for the next week, let it wait and save those few dollars for the moment.

Save Time by Fixing Large Meals and Using the Leftovers

This saves time over the course of the week. Leftovers can be used for lunches the next day, or used as small portions along with a salad for another main meal. They can also be frozen in individual serving size containers for use later when time and/or money is short.

Avoid Shopping When You’re Hungry

Shopping when you’re hungry is a BIG way to add to the grocery bill. It’s all-too-easy to pick up extra items when you have an empty stomach. Before you know it, you’ve gone way over budget. So, try to arrange your shopping trips after having eaten a substantial meal. It’ll do a budget good!

Buy Less Processed Foods (Strive for None)

Less processed, whole foods are healthier to eat than processed. Sometimes, they are cheaper. For instance, a brick of cheese is usually less costly than shredded packaged cheese. A whole cauliflower is cheaper than packaged cut cauliflower. A whole melon will be cheaper per pound than a cut melon. Nevertheless, many people swear that processed foods are cheaper when groceries are tallied. In some cases, that may be true. However, when considering the toll processed foods have on your health, eating whole, unprocessed foods (and preparing meals yourself from plain ingredients) will help to regain and preserve your health far better than their processed counterparts. There’s an adage that applies here… “You either pay for it at the grocery store, or pay later at the doctor’s office.” Truer words could never be spoken when it comes to food. If you want to keep or regain your health, remember that motto and opt for less processed foods any time you can. Your body will thank you for it. AND, so will your pocketbook in the long run!

Buy Generic Brands When You Can

Buy generic brands if you can. Read the labels to be sure they will meet your needs. Sometimes the ingredients in generic brands will differ than those in the name brands. This may or may not be right for you. If possible, use the generic brands since they will almost always be cheaper.

Avoid Junk Food

If a food won’t promote good health, then it’s not worth spending your precious dollars on. If you yearn for a dessert after a meal, choose fresh fruit instead of something laden with added sugars, fat and empty calories. Those foods are unhealthy to eat and are expensive too. Enjoy a piece of fresh fruit and savor it as you eat it. Slow down, enjoy the moment, taste the natural sweetness, chew slowly, and enjoy nature’s bounty as it is intended to be enjoyed.

Take Advantage of Sales

If items you use on a regular basis are on sale, buy a few extra to save dollars over time. If the items are perishable, make sure you can use them before they go bad. Otherwise, you’re simply tossing your hard-earned dollars in the trash.

Eat More Plant Proteins

Plant proteins such as beans, peas, lentils, nuts and seeds are cheaper per serving than most animal proteins. Such foods also provide an array of vitamins and minerals, along with fiber that is not found in animal foods. Even if you enjoy meat, fish and poultry, making one or two days a week “meat-free” will boost your health in many ways as well as giving your budget some relief.

Shop in Season

Fresh foods in season will often be cheaper than those that had to be shipped half way around the world to reach you during off-season months. Foods in season will also be higher in nutrient value than older ones that had to be shipped long distances to reach your grocery store. So, shopping in season and buying locally when possible not only gives your wallet a break, but also boosts your nutritional intake too.

Don’t Forget Frozen Fruits and Vegetables

Fruits and vegetables are usually frozen soon after being harvested. So in some ways, they may be fresher than their counterparts in the fresh produce isle. There may be some nutrient loss during the freezing process, but there is also nutrient loss over time in fresh fruits and vegetables. The only way to get around that is to pick your own from your personal garden or a local farm. Shopping at a local farm market is the next best thing, but in many areas they are not available year-round. Your next best option would be to choose frozen fruits and vegetables. Frozen fruits and vegetables can be used in meals, added to smoothies, used as a topping for morning porridge, thawed and used in salads and desserts. They are very convenient since they will be there when you’re ready for them, with no worries about perishability in the refrigerator.

Buy in Bulk When You Can

If you have storage room, buying in bulk can save money over time since many foods are cheaper by the “unit” when purchased in bulk. Grains are an excellent example. Rice, millet, barley, and oats can often be found in bulk, whether online or in some grocery stores.

Start a Garden, If Possible

Growing your own food is not only rewarding, but cheaper than buying it in grocery stores. Seeds are inexpensive, considering the yield you get from a mere seed or two. Extra seeds can be kept in the freezer to prolong their life, so they can be good for more than one growing season. Also, freshly grown produce often tastes better than store-bought, and its nutrient content should be higher than that of store-bought counterparts since they are not as old. So, get venturesome and start a garden if you can. Start small as you learn, then plant larger gardens as time, space, and knowledge allows.

Pack Your Lunch

Taking your own lunch ensures you have complete control over what’s in your meals. You’ll very likely be eating more nutritious meals than you would have if buying your lunch out, AND you’ll be saving money too. If you’re used to buying lunch out on a regular basis, taking your own lunch may seem like a daunting task. However, it doesn’t have to be. Make extra food in the evenings, pack it up in a to-go container, and place it in the refrigerator for the night. In the morning, simply take your lunch container to work with you and store it in the refrigerator there, if there is one. If not, put it in an insulated bag with ice packs and it should keep well for you until lunchtime. Most offices have a microwave available, so if it needs to be heated, use the microwave. Packing lunch for the next day while preparing supper (OR packing some leftovers when you’re finished eating supper) makes taking your lunch extremely easy and doesn’t take any extra time in the morning. Simple planning ahead makes this very do-able.


Resources
https://www.healthline.com/nutrition/29-cheap-healthy-foods#section2

https://tuppennysfireplace.com/best-frugal-foods-buy-broke/

https://money.usnews.com/money/personal-finance/spending/articles/cheap-foods-to-buy-when-youre-broke

https://familiesforfinancialfreedom.com/cheapest-groceries-list/

https://greatist.com/health/44-healthy-foods-under-1#Drinks

https://www.mymoneyblog.com/cheapest-vegetables.html

https://www.thekitchn.com/best-cheap-fruits-vegetables-258057

https://www.backyardboss.net/cheapest-fruits-and-vegetables/

https://www.almanac.com/content/measuring-vegetables-recipes-pounds-cups#

https://www.walmart.com/

https://www.healthline.com/nutrition/19-ways-to-eat-healthy-on-a-budget#section5

https://www.wisechoicemarket.com/blog/-the-true-cost-of-processed-foods/


About Judi

Julia W. Klee (Judi) began her journey enjoying “all things food” in elementary school when she started preparing meals for her family. That love of food blossomed into a quest to learn more and more about health and wellness as related to nutrition. She went on to earn a BS Degree in Food and Nutrition, then an MS Degree in Nutrition. She has taught nutrition and related courses at the college level to pre-nursing and exercise science students. Her hunger to learn didn’t stop upon graduation from college. She continues to research on a regular basis about nutrition as it relates to health. Her hope is to help as many people as possible to enjoy foods that promote health and wellness.

Blueberries

How to Keep Blueberries Fresh

Fresh blueberries are certainly seasonal. But with the wonders of modern transportation, we can find fresh blueberries in most grocery stores year-round. To say the least, they’re healthful to eat and most of us would benefit from including them in our foods as much as possible. Yet, we’ve all experienced the disappointment of having our prized fresh blueberries turn to moldy mush in the refrigerator. AND, this happens FAR earlier than expected. So, what can we do to remedy this situation? I found a way…read on!

First, moisture is the problem with fresh blueberries. With these delicious berries, moisture invites mold and decay. So, it’s important to keep your fresh berries as dry as possible. Absolutely don’t wash them until you’re about to use them! “OK, I know that” you say.

Here’s the key…When you get your fresh pack of blueberries home, before putting them in the refrigerator, look at the bottom of the carton. If it has a moisture absorber in it, great! Some packages have them whereas others do not. So, that’s Tip #1…look for a moisture absorber.

Tip #2…If it doesn’t have a moisture absorber at the bottom of the container, OR if the moisture absorber looks damp, you’ll need to add your own moisture absorber. It’s really simple. Gently transfer the berries to a clean, DRY bowl. Fold a paper towel or two to fit the bottom of the container and lay the folded paper towel in the container. Gently transfer the berries back into their original container and store them in the refrigerator. It’s THAT simple. They WILL last longer because the paper towel will help to absorb moisture that is released from the berries as they sit in their box.

Tip #3…To take this one step further and help the berries to last even longer, save a container from berries that you’ve finished up. Wash the container well and allow it to dry completely. When you purchase your next box of fresh berries, follow the same procedure as Tip #2, but also place a folded paper towel in the bottom of your extra container. When you return your newly purchased berries back to their container, divide the berries between the two containers, leaving each container only about half full. This allows for more air flow around the berries, helping them to keep fresh even longer.

I’ve tried these methods and trust me, they work! Our fresh berries have lasted much longer than when we simply put the containers directly in the refrigerator. Now, please don’t ask me exactly how long the berries will keep like this. That depends upon how old the berries are to begin with, so I can’t predict that. Nevertheless, we have not had to toss moldy berries in the trash since I started doing this simple trick.

Below are videos where I demonstrate these tips. I hope this helps!

Enjoy,
Judi

Keep Blueberries fresh longer…

About Judi
Julia W. Klee (Judi) began her journey enjoying “all things food” in elementary school when she started preparing meals for her family. That love of food blossomed into a quest to learn more and more about health and wellness as related to nutrition. She went on to earn a BS Degree in Food and Nutrition, then an MS Degree in Nutrition. She has taught nutrition and related courses at the college level to pre-nursing and exercise science students. Her hunger to learn didn’t stop upon graduation from college. She continues to research on a regular basis about nutrition as it relates to health. Her hope is to help as many people as possible to enjoy foods that promote health and wellness.

Lettuce

Lettuce 101 – The Basics

Lettuce is a leafy green vegetable that we’re all familiar with. Many of us eat lettuce every day, whether it’s in a salad or included in a sandwich of some sort. It’s simply everyday fare. Yet, it’s a vegetable we can do more with than we think, and it often has more nutritional value than we give it credit for. I invite you to explore the possibilities of what you can do with lettuce and use more of it where you can. It’s more than just water packed in a green leaf! Check out the information below to learn more about this humble, noteworthy leafy vegetable!

Enjoy,
Judi

About Lettuce
Lettuce is an annual leaf vegetable of the aster family, Asteraceae. There are four varieties that are commonly grown: (1) asparagus lettuce with narrow leaves and a thick stem (i.e. celtuce, popular in China), (2) head or cabbage lettuce with leaves folded into a compact round head (i.e. iceberg), (3) leaf or curled lettuce, with leaves that are loose, curled and smooth-edged or oak-leaf in shape (i.e. green leaf), and (4) cos with smooth leaves that form a tall, oblong, loose head (i.e. romaine).

There are two classes of head lettuce: (1) Butterhead types (i.e. Boston and Bibb lettuces) with soft, large leaves that separate easily from the base of the stem, and (2) crispy types (i.e. iceberg lettuce), with crispy leaves that form hard, compact heads. Lettuces can have colors ranging from different shades of green to deep red and purple. Some newer varieties have variegated colors. The crisp head varieties are very popular in the United States.

Lettuce is by far the world’s most popular salad vegetable. It is native to the eastern Mediterranean region and western Asia. Lettuce was first cultivated by ancient Egyptians who transformed the plant from a weed with seeds used to produce oil, to a food grown for its leaves and seeds. The plant was introduced to Greeks and Romans, who gave it the name “lactuca” where the name “lettuce” came from. The plants eventually made their way around the world, where different varieties were eventually developed and cultivated, especially in Holland. People in most countries eat lettuce raw, whereas celtuce lettuce is often cooked in China. Most lettuce eaten in the United States is grown in California.

Nutrition and Health Benefits of Lettuce
Lettuce is one food you can eat without guilt, with only 11 to 20 calories in 2 cups, depending upon the variety. It has extremely little fat, little carbohydrate and protein. However, the nutrient content starts to pick up with fiber, having about 2 grams in 2 cups, depending upon the variety. When comparing nutrient value of assorted types of lettuce, romaine lettuce often tops the list with higher levels of specific vitamins and minerals, while iceberg is often toward the bottom. Nevertheless, iceberg lettuce does have nutritional value.

Romaine is the lettuce to choose when shopping for the most nutrient-dense lettuce. It supplies good amounts of Vitamin A (carotenoids), Vitamin K, folate, molybdenum, dietary fiber, manganese, potassium, biotin, Vitamin B1, iron, copper, Vitamin C, Vitamin B2, omega-3 fatty acids, Vitamin B6, phosphorus, chromium, magnesium, calcium, and pantothenic acid. Despite its high water and low calorie content, that’s a lot to be said for romaine lettuce!

Heart Health. Considering the wide range of nutrients provided by romaine lettuce, this lettuce in particular, can be considered a heart-healthy food. The Vitamin C and beta-carotene work together to help prevent oxidation of cholesterol, which would cause it to become sticky and cling to arterial walls forming plaque. The fiber in romaine lettuce helps to remove bile from the body, forcing the production of more bile. This in turn, lowers blood cholesterol. The folate in romaine helps to keep the amino acid homocysteine in check, thereby lowering the risk of heart disease. Furthermore, the potassium in romaine helps to keep blood pressure in check. There’s plenty of reason to opt for romaine lettuce when you can!

How to Select Lettuce
No matter what type of lettuce you’re buying, you want your lettuce to be as fresh as possible. Look for brightly colored leaves that appear crisp, not wilted, and are free of blemishes. If possible, choose heads with stems that are not browning from the base.

How to Store Lettuce
To stay crisp and fresh, lettuce needs moisture and air. Here are the steps to keeping lettuce fresh and crisp, according to https://thespruceeats.com:

Loose Leaf Lettuce. Remove any damaged leaves, then wash your lettuce. Dry it in a salad spinner or on paper towels. Wrap the lettuce in dry paper towels or a clean cloth and place it in a rigid storage container with a lid. The towel will absorb any excess water while helping to maintain a humid environment. It’s helpful to store the washed lettuce in the crisper drawer of the refrigerator for proper temperature during storage. If not possible, store them toward the bottom of the refrigerator and try to keep the container from resting against the back of the refrigerator where the lettuce might freeze. Replace the paper towel or cloth when it feels wet. Check the lettuce every day or two and remove any leaves that are not at their best. Use loose leaf lettuce within 7 to 10 days for best quality.

Head Lettuce (Unwashed).  Remove any outer leaves that are wilted or damaged. Leave the heads intact and do not wash them until you are ready to use the lettuce. Store the head of lettuce wrapped in paper towels or a clean cloth in the crisper drawer of the refrigerator. Replace the towels when they appear wet. Head lettuce can last from one to three weeks when stored like this. If the outer leaves start to look bad, remove and discard them until you reach inner leaves that look good. Use them as soon as possible.

Storing Washed and Cut Lettuce. Wash and spin dry cut lettuce. If you do not have a salad spinner, allow the lettuce to air dry on paper towels or a clean cloth towel. Wrap your washed/dried lettuce in a dry paper or cloth towel and place it in a rigid covered container. A plastic bag may be used, but they may keep better in a covered container since that will protect them from getting bumped and bruised. Store it in the crisper drawer if possible, for optimal temperature. Replace the towel if it gets wet, and remove any damaged/aging leaves for optimal storage life.

Tips for Lettuce Storage. (1) Lettuce bruises or gets damaged easily. So, try not to shove other foods or containers against your lettuce in the refrigerator. That’s why storing lettuce in a container can be helpful. (2) Try not to push your lettuce to the back of the refrigerator, where it might freeze. If this happens, it will not be good for salads, as freezing lettuce makes it mushy. (3) If you’re slow to eat your lettuce, choose romaine or iceberg, which seem to keep the longest.

Reviving Wilted Lettuce. If your lettuce starts to wilt, revive it by placing it in a bowl of ice water for a few minutes before you use it. Dry the soaked lettuce, then use it as planned.

When to Discard Lettuce. If your lettuce starts to look slimy, brown, moldy, and/or develops a bad odor, it’s time to toss it out.

Quick Ideas and Tips for Using Lettuce
* Add lettuce of any type to your sandwiches, burgers, or wraps for added crunch, flavor and a little nutrient boost.

* Just about everything goes with lettuce. When making a meal salad, get creative! Add a variety of your favorite foods from different categories…proteins, fruits, other vegetables, grains, dairy and non-dairy. Add your favorite dressing and enjoy! Change it up as often as you can for variety and nutrient balance.

* Enjoy a lettuce wrap with your favorite foods. Use large lettuce leaves, and double or triple them for strength if needed. Fill with your favorite sandwich, taco or burrito filling, wrap and enjoy!

* Years ago, lettuce was always cooked…mostly in soups. If you’re really looking for something different to try, add some lettuce to a vegetable soup at the end of cooking! The heat will wilt the lettuce while it still maintains some of its crunch. The same thing can be done with arugula and spinach.

* If you’re concerned about bacteria or other microbes on your food, opt for whole heads of lettuce (those with leaves still attached to the base). Researchers have found that whole heads of lettuce had FAR less bacteria on them than the cut, bagged varieties. This is true, even for those labeled as being “triple washed” and “ready to eat.”

* Lettuce can bruise easily. When washing/cutting lettuce in advance to be stored in the refrigerator, either tear the lettuce or cut it with a plastic lettuce knife (rather than a metal knife). Cutting lettuce in advance with a metal knife can bruise the lettuce, causing brown edges on the leaves where it was cut. This is not a problem if you will be eating your lettuce right away, but may be noticeable for stored prepared lettuce.

* When storing lettuce, keep it away from ethylene-producing fruit, which would cause the lettuce to age prematurely. Such fruit includes apples, bananas, tomatoes, avocados, kiwi fruit, and cantaloupe. [Note that this is not an all-inclusive list.]

* Lettuce contains a lot of water. Why not add some to your next smoothie?

* Try adding some shredded crisp lettuce to your next vegetable stir-fry!

* Next time you grill something, take a head of lettuce like iceberg or radicchio, slice it in half through the core, and grill it, cut side down. It will have grill marks, and a hint of smokiness what will add an interesting flavor twist to your next salad.

* When you’re braising something, try adding some crispy romaine along with or instead of cabbage. Lettuce absorbs other flavors readily, so this should enhance the flavor of your dish.

* When you want a quick snack, top some crispy lettuce leaves with your favorite cracker topping, like nut butter and fruit, hummus, egg salad, chickpea salad, refried beans, cheese, or anything like that.

*Are you wondering what those brown spots toward the base of lettuce stems are and if it’s safe to eat? Check out my video about lettuce rust…what it is, if it’s safe, and how to prevent it… https://youtu.be/BfCfn1iCxDo

Herbs/Spices That Go Well with Lettuce
Basil, capers, cayenne, chervil, cilantro, cumin, dill, garlic, ginger, lovage, mint, mustard, parsley, pepper (black, white), salt, tarragon, thyme

Foods That Go Well with Lettuce
Proteins, Legumes, Nuts, Seeds: Almonds, beans, beef, cashews, chicken, chickpeas, eggs, hazelnuts, pecans, pine nuts, pistachios, seafood, seeds (i.e. pumpkin, sesame, sunflower), tahini, tempeh, tofu, turkey, walnuts

Vegetables: Arugula, beets, bell peppers, carrots, cauliflower, celery, celery root, chayote, chiles, chives, cucumbers, fennel, greens (baby and other salad greens), jicama, leeks, mushrooms, nori, onions, parsnips, peas, potatoes, radicchio, radishes, scallions, shallots, sprouts, squash (summer and winter), sugar snap peas, tomatoes, watercress

Fruits: Apples, avocados, citrus fruits (lemons, lime, grapefruit, oranges, tangerines), cranberries (dried), mangoes, olives, pears, pomegranates, persimmons, raisins

Grains and Grain Products: Bulgur, corn, corn chips, corn tortillas, croutons, quinoa, rice

Dairy and Non-Dairy: Buttermilk, cheese (dairy and nondairy), crème fraiche, yogurt

Other Foods: Honey, mayonnaise, miso, oil, soy sauce, tamari, vinegar, Worcestershire sauce

Lettuce has been used in the following cuisines and dishes…
Lettuce wraps, salads, sandwiches, soups

Suggested Flavor or Food Combos Using Lettuce
Use lettuce with any of the following combinations…

Almonds + Avocado + Carrots + Smoked Tofu + Tomatoes
Almonds + Jicama + Orange
Apples + Celery + Lime + Raisins + Walnuts
Avocado + Grapefruit + Pecans + Radicchio
Carrots + Cucumbers + Dill + Feta Cheese
Chickpeas + Cucumbers + Feta Cheese + Olives + Red Onions + Tomatoes
Dill + Garlic + Lemon + Scallions
Dijon Mustard + Lemon + Olive Oil + Scallions
Fennel + Grapefruit
Figs + Goat Cheese + Tarragon
Gorgonzola Cheese + Hazelnuts + Lemon + Olives
Pears + Sherry Vinegar + Walnuts

Recipe Links
Stir-Fry Lettuce https://www.thespruceeats.com/stir-fry-lettuce-recipe-695327

Thai Basil Chicken Lettuce Wraps https://www.thespruceeats.com/thai-basil-chicken-lettuce-wraps-3217221

Classic Wedge Salad https://www.thespruceeats.com/classic-wedge-salad-4688322

Stir-Fried Garlic Lettuce (vegan) https://www.theperfectpantry.com/2009/10/shao-hsing-wine-recipe-stirfried-garlic-lettuce.html

Strawberry, Blueberry & Greens Salad with Honey Vinaigrette https://www.thekitchenismyplayground.com/2015/05/strawberry-blueberry-greens-salad-with.html

Parmesan Crusted Romaine and Chicken https://sweetphi.com/parmesan-crusted-romaine-chicken-eating-better-health-key/

Lettuce Salad with Tomato and Cucumber https://ifoodreal.com/lettuce-salad/

38 Recipes using Salad Greens https://www.bonappetit.com/test-kitchen/ingredients/slideshow/lettuce-recipes

Orange Romaine Salad https://www.allrecipes.com/recipe/89712/orange-romaine-salad/?internalSource=rotd&referringId=16350&referringContentType=Recipe%20Hub

Roasted Lettuce, Radicchio, and Endive https://www.allrecipes.com/recipe/246655/roasted-lettuce-radicchio-and-endive/?internalSource=staff%20pick&referringId=16350&referringContentType=Recipe%20Hub&clickId=cardslot%201

Strawberry and Feta Salad https://www.allrecipes.com/recipe/62686/strawberry-and-feta-salad/?internalSource=hub%20recipe&referringId=16350&referringContentType=Recipe%20Hub&clickId=cardslot%208

Holiday Lettuce Salad https://www.tasteofhome.com/recipes/holiday-lettuce-salad/

40 Lettuce Recipes You Can Get Excited About https://www.tasteofhome.com/collection/lettuce-recipes/

Cranberry Almond Lettuce Salad https://www.food.com/recipe/cranberry-almond-lettuce-salad-105318

Resources
https://www.britannica.com/plant/lettuce

http://justfunfacts.com/interesting-facts-about-lettuce/

https://www.tasteofhome.com/collection/protein-packed-lettuce-wrap-recipes/

https://www.thespruceeats.com/store-lettuce-for-freshness-996048

https://www.thespruceeats.com/all-about-lettuce-2217514

https://www.thespruceeats.com/how-to-wash-lettuce-and-greens-2216968

https://www.thekitchn.com/we-tried-3-ways-to-store-salad-greens-and-heres-our-winner-tips-from-the-kitchn-211770

https://www.thekitchn.com/lettuce-is-so-much-more-than-salad-here-are-10-more-ways-to-eat-it-tips-from-the-kitchn-220136

https://www.thekitchn.com/lettuce-is-so-much-more-than-salad-here-are-10-more-ways-to-eat-it-tips-from-the-kitchn-220136

Page, Karen. (2014) The Vegetarian Flavor Bible. New York, NY: Little, Brown and Company.

About Judi

Julia W. Klee (Judi) began her journey enjoying “all things food” in elementary school when she started preparing meals for her family. That love of food blossomed into a quest to learn more and more about health and wellness as related to nutrition. She went on to earn a BS Degree in Food and Nutrition, then an MS Degree in Nutrition. She has taught nutrition and related courses at the college level to pre-nursing and exercise science students. Her hunger to learn didn’t stop upon graduation from college. She continues to research on a regular basis about nutrition as it relates to health. Her hope is to help as many people as possible to enjoy foods that promote health and wellness.

Lima Beans

Lima Beans 101 – The Basics

About Lima Beans
Lima beans, often called butter beans because of their buttery texture, are thought to have originated in South America. Early European explorers first discovered them in Lima, Peru. With that, their name as “lima beans” was established. It is believed that the beans have been cultivated in Peru for over 7,000 years. They were carried around the world by explorers and have since become an important crop in Africa and Asia. In the United States, most commercial production is in California.

There are many types of lima beans, with the most popular in the United States being the Fordhook (also known as the butter bean), and the baby lima bean. The pod is flat, oblong, slightly curved, and usually about three inches long. The pods often contain two to four seeds that have come to be known as lima beans. The seeds are usually a cream to green color. However, some varieties can have white, red, purple, brown or even black seeds. Limas have a starchy, potato-like flavor and a grainy yet slightly buttery texture.

Nutrition and Health Benefits of Lima Beans
Lima beans are an excellent source of molybdenum, with one cup providing 313% of our daily needs of this important trace mineral. Limas are a very good source of dietary fiber, copper and manganese. They are also a good source of folate, phosphorus, protein, potassium, Vitamin B1, iron, magnesium and Vitamin B6. One cup of cooked lima beans has 216 calories, 13 grams of fiber, and almost 15 grams of protein. They have very little fat, zero cholesterol, and are very low in sodium.

Caution. Lima beans should never be eaten raw. This includes grinding them for flour, which should not be done. They contain compounds that, when damaged, can release cyanide. To destroy the enzymes that release these compounds, it is extremely important to soak and completely cook your lima beans before eating them. Once this is done, they can be a very beneficial addition to a healthy diet.

Iron. One cup of cooked lima beans provides about 25% of our Daily Value of iron. This can be important, especially if you have low iron levels. Serve your lima beans with a Vitamin C-rich food (such as bell peppers or citrus fruits) in the same meal and your iron absorption will be increased.

Heart Health. Lima beans are rich in fiber, folate, potassium, and magnesium, all of which contribute in unique ways to improve and maintain heart health. Limas are rich in soluble dietary fiber which helps to remove cholesterol from the body, helping to reduce the risk of heart disease. Folate, which is plentiful in lima beans, is known to help keep homocysteine levels in check, thereby helping to reduce the risk of heart disease. Limas are rich in potassium and magnesium. These are important in helping blood vessels to relax, maintaining proper blood pressure.

Free Radical Protection. Limas are a very good source of manganese. This mineral is a key factor in antioxidant compounds that seek out and destroy harmful molecules in the body, reducing oxidative stress. This helps the immune system to function at its best warding off disease and helping to prevent various health conditions.

Sulfite Sensitivity. Lima beans are an excellent source of molybdenum, a trace mineral that is part of the enzyme that metabolizes sulfites. Sulfites are added to many foods and even medications as preservatives. Yet, some people are sensitive to sulfites, causing a rapid heartbeat, headache and disorientation. Those who react to sulfites may be deficient in molybdenum. If this is the case, lima beans may help alleviate that problem.

How to Select and Store Lima Beans
Fresh Lima Beans. Fresh lima beans are not easily found, and are usually sold in specialty markets or farmer’s markets where they are locally grown. If you find fresh lima beans, look for ones that are firm, dark green and glossy, and without blemishes, wrinkling or yellowing. They are extremely perishable, so if they are shelled, examine them closely for mold or decay.

Fresh lima beans in their pods should be refrigerated and used within a few days. For optimal storage, shell the beans, blanch them, then freeze or dehydrate them. Frozen lima beans do not need to be thawed before being cooked. Once cooked, they should be used quickly as they will only keep refrigerated (in a covered container) for 3 to 4 days.

Dried Lima Beans. Many grocery stores carry dried lima beans, as prepackaged or in bulk bins. Make sure there is no evidence of moisture or insect damage. Store your dried lima beans in an airtight container in a cool, dry, dark place, where they will keep at good quality for 2 to 3 years. However, when stored properly, they will be safe to eat well beyond that.

Canned Lima Beans. Most grocery stores stock canned lima beans, and they are usually stamped with a “best by” date. For long-term storage, look for a stamped date as far in the future as you can find. Read ingredient labels, as some canned lima beans may contain additives that you may or may not want. Salt, coloring agents, firming agents, and flavorings may be added. Organic lima beans may not have coloring or firming agents, but still may have some flavorings added, so it’s important to read the ingredients list to be sure the contents will meet your needs. Also, some canned foods still contain liners made with BPA (Bisphenol-A), an anticorrosive agent, whereas others are not. If BPA is a concern to you, be sure to read the label carefully and also check for information stamped on either end of the can itself. If there is no mention of BPA anywhere on the can, it most likely has a liner that contains BPA.

Canned lima beans should be stored in a cool, dry place. If you notice rust, leaking, extreme damage to the can, or bulging, discard the can. The contents may not be safe to eat. If your canned beans have an off odor, flavor or appearance, or if there is mold in them, they should be discarded. Unopened, properly stored cans of lima beans will maintain a good quality for 3 to 5 years, but will be safe to eat beyond that, even if it is beyond the “best by” date. Note that over time, even though the beans will be safe to eat, the flavor, texture and color may change.

Once opened, canned lima beans should be stored in the refrigerator in a covered container and used within 3 to 4 days. If you cannot use them within that time, simply place the lima beans in a covered, airtight container and store them in the freezer. They will maintain their best quality for 2 months, but will be safe to eat beyond that.

Frozen vs Canned vs Dried Lima Beans
Cost. When comparing the cost per serving, there were a number of options to compare: frozen limas in steamable packaging, frozen limas in non-steamable packaging, dried lima beans (baby and large), and canned lima beans (non-organic (baby and large), organic, and seasoned). There was a wide swing in price per serving based on prices I found at the moment and the type of bean, brand, vendor and organic vs non-organic options available. Because prices can vary so much considering all the variables, the best way to find the cheapest price per serving would be to carry a calculator to the store with you and compare among what is available at the time. However, here are my findings that could very likely apply to most scenarios.

Cost per 1/2 cup serving:
$0.13 Baby dried lima beans (generic brand) at $1.72 per 16 oz bag
$0.17 Large dried lima beans (generic brand) at $2.22 per 16 oz bag
$0.27 Frozen lima beans (generic brand) in regular packaging at $1.34 per 16 oz bag
$0.27 Canned large butter beans (Bush’s) at $0.94 per 16 oz can
$0.33 Canned seasoned lima beans (Margaret Holmes) at $1.16 per 15 oz can
$0.34 Frozen lima beans (generic brand) in steamable packaging at $1.34 per 12 oz bag
$0.67 Canned organic butter beans (Eden brand) at $2.34 per 15 oz can

Overall, the dried lima beans were the cheapest per serving, with BABY limas, generic brand, at a large discount store being the cheapest at $0.13 per serving. Considering the difference in cost per serving between the dried lima beans and the next in line with respect to cost, it seems safe to assume that dried lima beans are your cheapest option. Even when considering the cost of electricity or gas and water to prepare the beans, the dried beans will probably still be your least costly.

When comparing canned vs frozen lima beans, the frozen generic brand in regular (not steamable) packaging tied in price per serving with Bush’s brand canned large butter beans. This was an interesting discovery and makes some brands of canned beans worth adding to your pantry for an emergency food or when time for food preparation is short.

Price per serving increased with specialty packaging (steamable) or treatment of the beans (seasoned or organic). So, it’s helpful to have this knowledge when shopping for lima beans, understanding which would be your least expensive per serving, and knowing that you’ll pay more per serving for specific options, especially organic.

Overall winner = Dried baby lima beans

Convenience. Needless to say, canned beans are more convenient than dried beans, and even frozen lima beans since they still need to be cooked. You simply open the can, rinse and drain the beans, and they’re ready to use. The canned beans are an excellent choice if you’re always short on time and can’t (or don’t want to) take the time to cook dried beans. However, it does not take a lot of time to prepare frozen lima beans. They usually cook in about 15 minutes. They can be put on the stove first to cook as other foods are being prepared. So, they are a close second to canned beans with regard to convenience. With that being said, canned beans should be a staple item kept in your pantry in case of an emergency. If the power goes out or if you temporarily lose your water supply, canned beans can be eaten straight from the can (where frozen or dried beans cannot be eaten without being cooked first). Canned beans can be a lifesaving source of food when there is no way to cook. It’s better to be prepared, and not need it, then need it and not be prepared!

Many people believe cooking dried beans is a big ordeal. However, when considering “hands on” time, it’s actually very little. It takes little time to sort and rinse the beans then cover them with water in a pot. After being soaked, it takes little time to drain them then refill the pot with water. The cooking process pretty much takes care of itself. Then draining them takes little time, again. So, it’s really not hard nor time-consuming to cook dried beans when considering actual hands-on time. Furthermore, they can be cooked in a slow cooker or pressure cooker to make things a little simpler.

Overall winner = Canned lima beans

Nutritional Value. The nutritional value of canned or frozen lima beans is about the same as cooked dried lima beans. Either way, the beans need to be cooked completely before being eaten or canned, so they should have about the same nutrient content. So, this factor should not be a determinant when considering which form of lima bean to buy.

Overall winner = Three-way tie

Additives. If you want to avoid any additives in your foods, cooking dried or frozen lima beans is an excellent option. In this case, you can control what is added to the beans. Canned beans may have added salt and other ingredients as firming or color retention agents. Organic canned beans will not have firming or color retention agents, but still may have added salt. Some beans are canned without salt, so read the label to be sure. So, organic beans may be a good choice for you. Otherwise, cooking dried beans gives you complete control as to what is added to your beans. Frozen lima beans usually do not have any additives in them, so they are another excellent option if you’re avoiding additives of any sort. When in doubt, read the label to be sure.

Overall winner = Tie between dried and frozen lima beans

BPA. BPA (bisphenol-A) is an anticorrosive agent that has been used in can linings and other applications such as water bottles, bottle caps, water supply lines and even dental sealants. Research has found that this agent may cause harmful effects such as increased blood pressure and damage to unborn fetuses and young children. If you’re concerned about the possible harmful effects of BPA, it’s wise to look for cans labeled as BPA-free. Progressively, more manufacturers are using BPA-free cans, but not all. So, it pays to read the label or the information that was stamped on the end of the can. To avoid BPA from cans, cooking dried or frozen beans ensures you’re not ingesting any of the chemical.

Overall winner = Tie between dried and frozen lima beans

Flavor and Texture. Taste perception is subjective and differs from person to person. However, the overall consensus is that cooked dried beans taste better than canned beans. I agree with that statement (in my humble opinion). When adding frozen lima beans to the comparison test, I personally find the flavor of frozen lima beans to be the best among the three options (canned, frozen, dried and cooked). If flavor is a big factor for you, then cooking frozen lima beans may be your best option, followed by cooked dried, then canned. The advantage of cooking your own frozen or dried beans gives you the opportunity to flavor them to your liking. Adding onions, garlic, and/or herbs during the cooking process allows flavors to infuse in the beans that would not otherwise happen. If you still need the convenience of canned beans, adding them to soups, stews or other dishes where they will be combined with a lot of other foods, may mask the flavor difference of canned beans.

Overall winner = Frozen lima beans

How to Prepare Dried Lima Beans
First sort through your dried beans to remove any stones, debris, or damaged beans. Then give them a good rinse, and drain the beans. Then they need to be soaked. There are two ways to soak your dried lima beans…

Long Soaking Method. Simply place your sorted and rinsed beans in a large pot with a lid. Cover them with at least two inches of water and allow them to sit in the covered pot for 6 to 8 hours or overnight. Drain the water and cover them by at least one inch of fresh water. Cook as directed below.

Quick Soaking Method. Place your sorted and rinsed beans in a large pot with a lid. Cover them with at least two inches of water and bring them to a boil. Boil the beans for two minutes, then remove the pot from the heat. Cover the pot with its lid, then allow them to sit for two hours. Drain the water and cover them by at least one inch of fresh water. Cook as directed below.

Cooking Your Soaked Beans. Bring your soaked beans that have been covered with fresh water to a boil. Lower the heat to simmer and tilt the lid on the pot. Allow them to simmer slowly until the beans are tender. This will usually take about 45 minutes. Skim off any foam that forms as they are cooking.

Important! Do not add any salty or acidic ingredients to your beans as they are cooking. This will cause them to become firm and will be hard to cook properly. If seasoning is desired, add any salty or acidic ingredients toward the end of cooking time. If desired, aromatic ingredients such as onions, garlic, and herbs may be added at the start of cooking to flavor your lima beans.

Quick Ideas and Tips for Using Lima Beans
* Try a succotash burrito or taco filling. Combine cooked lima beans with corn, chopped tomatoes and scallions. Top with diced avocado, cilantro, and a little hot pepper if desired. Enjoy!

* Blend cooked lima beans and sweet potatoes together. Serve with your favorite grain and vegetable.

* Add lima beans to your favorite vegetable soup.

* Lima beans are very versatile. Use them as a main dish, a side dish, in soups, stews, and curries, and even in salads. Get creative!

* Try roasted lima beans! Dry cooked lima beans on a cloth or paper towel. Transfer them to a bowl, coat them with a little olive oil, and sprinkle with salt, lime juice, and some cayenne powder or paprika. Spread on a baking sheet and roast at 425F until they are slightly browned. Watch carefully, as they can burn easily. Enjoy them hot or at room temperature. Store extras in the refrigerator to enjoy later.

* For easy and flavorful lima beans, cook a pack of frozen lima beans in stock or broth of your choice. Add in a little onion, garlic, thyme, salt and pepper and you’re done!

Herbs/Spices That Go Well with Lima Beans
Basil, bay leaf, chervil, chili pepper flakes, cilantro, dill, fennel seeds, garlic, horseradish, marjoram, mint, nutmeg, oregano, parsley, pepper (black), rosemary, sage, salt, sorrel, sumac, thyme

Foods That Go Well with Lima Beans
Proteins, Legumes, Nuts, Seeds: Bacon, beans (green), chicken, ham, pork, seafood

Vegetables: Bell peppers, carrots, chives, cucumber, eggplant, fennel, kale, leeks, lettuce, mushrooms, onions, scallions, spinach, squash (winter and summer), tomatoes and tomato paste

Fruits: Lemon, olives

Grains and Grain Products: Corn, quinoa, rice

Dairy and Non-Dairy: Butter, buttermilk, cheese (esp. cheddar, feta, Parmesan), cream, yogurt

Other Foods: Molasses, oil (esp. olive), tamari, vinegar (esp. cider, red wine), wine (dry white)

Lima Beans have been used in the following cuisines and dishes…
Casseroles, dips, purees, salad (i.e. three bean), soups, Southern (U.S.) cuisine, spreads, stews, succotash

Suggested Flavor or Food Combos Using Lima Beans
Add lima beans to any of the following combinations…

Chili pepper flakes + garlic + lemon juice + olive oil
Corn + tomatoes (succotash)
Corn + garlic + rosemary + tomatoes (succotash)
Fennel + garlic
Feta cheese + olives + tomatoes
Feta cheese + spinach
Garlic + lemon + olive oil + oregano
Garlic + onions
Scallions + yogurt

Recipe Links
Corn and Lima Bean Salad https://www.myrecipes.com/recipe/corn-and-lima-bean-salad

Garlicky Lima Bean Spread https://www.myrecipes.com/recipe/garlicky-lima-bean-spread

Bacon-Wrapped Chicken with Basil Lima Beans https://www.myrecipes.com/recipe/bacon-wrapped-chicken-beans

Herbed Lima Bean Hummus https://www.epicurious.com/recipes/food/views/Herbed-Lima-Bean-Hummus-103043

Southern Lima Beans with Rice https://www.food.com/recipe/southern-lima-beans-with-rice-51795

Baby Lima Beans (Butterbeans) https://www.foodnetwork.com/recipes/trisha-yearwood/baby-lima-beans-butterbeans-recipe-2116626

Lemon Salmon with Lima Beans https://www.foodnetwork.com/recipes/food-network-kitchen/lemon-salmon-with-lima-beans-recipe-2106927

Lima Bean Tahini Dip https://www.foodnetwork.com/recipes/food-network-kitchen/lima-beantahini-dip-8246428

Farmer’s Caviar https://www.foodnetwork.com/recipes/farmers-caviar-5407929#reviewsTop

Butterbeans with Butter, Mint, and Lime https://www.epicurious.com/recipes/food/views/butter-beans-with-butter-mint-and-lime-51238420

Greek Style Baked Lima Beans https://holycowvegan.net/greek-style-baked-lima-beans/#wprm-recipe-container-13108

Resources
http://www.whfoods.com/genpage.php?tname=foodspice&dbid=59#descr

https://www.stilltasty.com/fooditems/index/17565

https://www.stilltasty.com/fooditems/index/17564

https://www.livestrong.com/article/42153-lima-beans-nutrition-information/

https://www.organicfacts.net/lima-beans.html

https://www.healthline.com/nutrition/foods-high-in-soluble-fiber#section2

https://www.dovemed.com/healthy-living/natural-health/7-health-benefits-of-lima-beans/

https://www.livestrong.com/article/280126-health-benefits-of-lima-butter-beans/

https://www.foodnetwork.com/recipes/roasted-lima-beans-recipe-1969781

https://healthyeating.sfgate.com/dried-beans-vs-canned-beans-nutritional-values-3026.html

https://cooking.stackexchange.com/questions/67651/do-frozen-lima-beans-contain-cyanide/67660

Page, Karen. (2014) The Vegetarian Flavor Bible. New York, NY: Little, Brown and Company.

About Judi
Julia W. Klee (Judi) began her journey enjoying “all things food” in elementary school when she started preparing meals for her family. That love of food blossomed into a quest to learn more and more about health and wellness as related to nutrition. She went on to earn a BS Degree in Food and Nutrition, then an MS Degree in Nutrition. She has taught nutrition and related courses at the college level to pre-nursing and exercise science students. Her hunger to learn didn’t stop upon graduation from college. She continues to research on a regular basis about nutrition as it relates to health. Her hope is to help as many people as possible to enjoy foods that promote health and wellness.

Spring Mix Salad with Carrot-Orange Dressing

Spring Mix Salad with Carrot-Orange Dressing

Here’s a delicious, very healthful and easy salad to put together. Of course, feel free to vary the vegetables according to your preferences and what you have available. The suggested dressing is Carrot-Orange Dressing and the recipe is below. This dressing is light, with it being free of oil, salt and sugar. It’s healthful and the flavor is adjustable according to your taste. Give it a try sometime!

Below are videos showing how to make the dressing and the salad. The written recipes follow the videos.

Enjoy!
Judi

Spring Mix Salad with Carrot-Orange Dressing

This recipe is designed so you can make as much or as little as you want, and of course, change the vegetables according to your preferences. The dressing recommendation is below, but you could use any dressing you prefer.

Spring mix
Shredded red cabbage
Onion (diced red, yellow, or scallions), optional
Cucumbers
Celery
Shaved or diced carrot
Broccoli sprouts, or chopped fresh broccoli
Blueberries
Clementine segments
Fresh cilantro, chopped, optional
Garbanzo beans, or beans/peas of choice (cooked or canned, rinsed, drained)
Green peas (frozen and thawed)
Avocado slices, optional
Sliced almonds or walnuts, optional

To make the salad:
Wash all vegetables and cut them into desired size pieces. Arrange ingredients in a serving bowl and top with a few avocado slices, if desired. Mix dressing ingredients as directed and drizzle over salad. Enjoy!

Carrot-Orange Sauce, Dip, or Salad Dressing
Makes About 1-1/4 Cups

This delicious mixture can be used as a sauce over cooked vegetables or grains, as a dip, and as a dressing for green salads. The key is in the amount of lemon juice or vinegar you add. See the suggestion below!

¾ cup chopped carrots (raw, blanched, or frozen and thawed)*
2 Tbsp ground flaxseed
½ cup orange juice
½ tsp ground coriander seed
2 to 4 Tbsp lemon juice or apple cider vinegar**

Place all ingredients in a blender or food processor. (See notes below.)** Pulse or process until smooth. Transfer to a covered container, and place in the refrigerator for at least 20 minutes to allow it to thicken. Use within 1 week.

If you have a high-powered blender, the raw carrots can be pureed until smooth. If you do not own such a blender, using blanched, or frozen and thawed carrots will give you a smoother product since they will be easier to puree.

*Cook’s Note: To blanch fresh carrots, placed diced carrots in boiling water for 2 minutes. Drain and allow to cool some before processing.

** Suggestion: The amount of lemon juice or apple cider vinegar you add to this dressing transforms it from a sauce to a dip, or to a salad dressing. Use less acid (2 to 3 tablespoons) if you want to use this as a sauce over vegetables or a grain. Use a medium amount (3 tablespoons) if you want to use this as a dip. Use the full amount (4 tablespoons) if you use this as a salad dressing, so the tang will bring the flavor out above the salad greens. If you’re not sure, add just 2 tablespoons at first, taste it, and add more acid as desired.

The flavors will blend well when this mixture is allowed to sit in a covered container in the refrigerator overnight. This is especially helpful when adding 4 tablespoons of lemon juice or vinegar. When using this as a sauce with less lemon juice or vinegar, it may be used right away. However, allowing it to rest for 20 to 30 minutes gives the ground flaxseed time to thicken the mixture before it is used.

Pinto Beans

Pinto Beans 101 – The Basics

Below is a comprehensive article all about our beloved pinto beans! Everything from what they are to how to cook and use them is covered. So, if you have a specific question about what to do with pinto beans, you should find what you are looking for below!

Enjoy,
Judi

About Pinto Beans
Most people are familiar with pinto beans, with their beige color with splashes of brown. When cooked, they become pinkish in color with a creamy texture. Pinto beans are among the “common beans” that appear to have originated in Peru. From there, they spread throughout the Americas, then to Europe when Spanish explorers introduced them after returning from voyages to the New World in the 15th century. Spanish and Portuguese traders introduced them to Africa and Asia. Today, the world’s largest producers of dried common beans are India, China, Indonesia, Brazil, and the United States.

Since beans are an inexpensive source of protein, they have become popular in many cultures around the world. Today, pinto beans are the most commonly eaten bean in the United States. They can be eaten whole, mashed, pureed, refried, simmered and stewed.

Nutrition and Health Benefits of Pinto Beans
Pinto beans are an excellent source of the essential trace mineral molybdenum. They are also a good source of fiber, folate, copper, manganese, phosphorus, protein, Vitamin B1, Vitamin B6, magnesium, potassium, and iron. One cup of cooked pinto beans has about 245 calories. Pinto beans are also a good source of some phytonutrients that have been shown to help prevent some cancers, notably stomach cancer.

Fiber. Like other beans, pinto beans are high in fiber. A one cup serving provides 15 grams of fiber. Of that, 4 grams are soluble fiber. This type of fiber forms a gel-like substance in the digestive tract and binds with bile removing it from the body. The body is then prompted to make more needed bile acids, and it uses cholesterol in the process. So, in an indirect way, soluble fiber helps to reduce blood cholesterol. Translation…eating pinto beans helps to lower your cholesterol!

The remaining fiber in pinto beans is the insoluble variety. This is known to help speed the movement of gastrointestinal contents, warding off constipation. It also helps to prevent digestive disorders such as irritable bowel syndrome and diverticulosis.

Heart Attack Risk. In a study that compared the food intake of over 16,000 middle-aged men in various countries, researchers found an 82% decrease in heart attack risk in those who ate the most legumes. In another study published in the Archives of Internal Medicine, researchers followed about 10,000 Americans for 19 years. Those who ate the most fiber (21 grams per day) had far less risk of heart disease than those who ate the least fiber (about 5 grams daily).

The nutrient profile in pinto beans also contributes to their aid in reducing the risk of cardiovascular disease. Folate is known to lower homocysteine levels. Homocysteine is an amino acid that is known to be an independent risk factor for heart disease when its levels are elevated. Having an adequate amount of folate in the diet helps to keep homocysteine levels in check, and eating pinto beans can help with that.

Furthermore, magnesium, also found in pinto beans, acts as nature’s calcium channel blocker. This helps to improve blood flow and the transport of oxygen and nutrients around the body. Researchers have found that a deficiency in magnesium is associated with heart attacks.

Potassium, also plentiful in pinto beans, is an important electrolyte in the body, used in nerve transmission and muscle contraction. This makes potassium important for maintaining normal blood pressure and heart function. A one cup serving of pinto beans provides 746 mg of potassium and only 1.7 mg of sodium, making them a noteworthy food to eat for preventing high blood pressure and preventing atherosclerosis and stroke.

Blood Sugar Control. The benefits of the fiber in pinto beans doesn’t stop with GI transit time and cholesterol removal from the body. It also helps to stabilize blood sugar levels. This is especially helpful for those with insulin resistance or diabetes. People eating high fiber diets have been shown to have lower blood sugar and insulin levels, and lower total cholesterol, triglycerides, and VLDL (very low-density lipoproteins) blood levels. These are all markers for heart disease and are often elevated in those with diabetes and insulin resistance.

Sulfite Sensitivity. Pinto beans are an excellent source of molybdenum, a trace mineral that is part of the enzyme that metabolizes sulfites. Sulfites are added to many foods and even medications as preservatives. Yet, some people are sensitive to sulfites, causing a rapid heartbeat, headache and disorientation. Those who react to sulfites may be deficient in molybdenum. If this is the case, pinto beans may help alleviate that problem.

Iron. Pinto beans are a good source of the essential mineral iron. Iron is a crucial part of hemoglobin, the molecule that transports oxygen in the blood. Iron deficiency leads to fatigue because not enough oxygen is reaching tissues around the body. Furthermore, the mineral copper (which is plentiful in pinto beans) is used in the making of hemoglobin. Anyone who suffers from low iron levels would benefit by including pinto beans in their meals when possible.

Energy Production and Antioxidant Defense. If all that’s not enough, pinto beans are a good source of manganese and copper. These two minerals are key components of an enzyme (superoxide dismutase) that disarms free radicals in the mitochondria (the cellular organelle where energy is produced). Copper is also used in another enzyme (lysyl oxidase) used in the production of collagen and elastin, important in making our blood vessels, bones and joints.

Memory. Vitamin B1 (thiamine) is critical for proper cognitive brain functioning. Thiamine is used in the making of acetylcholine, a vital neurotransmitter used in the memory function. Low levels of acetylcholine have been associated with age-related senility and Alzheimer’s disease. Since pinto beans are a good source of thiamine, it’s another powerful reason to eat these beans when you can!

Protein. Eating pinto beans is an easy way to add protein to your menu when looking for a meat alternative. Combine them with a grain product, like rice, pasta, or a tortilla, and you have an amino acid combination that will rival any animal food you can name. Furthermore, it will be free of cholesterol and saturated fat, and have fewer calories. One cup of pinto beans provides over 15 grams of protein. When combining 1 cup of cooked pinto beans with 1 cup of brown rice, the protein level jumps to 21 grams!

How to Select Pinto Beans
Dried Pinto Beans. Dried pinto beans are usually found pre-packaged in most grocery stores in America. They may also be found in bulk bins. As when purchasing any dried food, whether it is pre-packaged or in bulk bins, be sure there is no sign of moisture or insects in the beans. When purchasing from bulk bins, it’s best to purchase from a store than has a good turnover of product to be sure they are not old.

Canned Pinto Beans. Canned beans are a very convenient alternative to their dried counterparts. Most grocery stores carry them. Read the ingredients list because some canned beans are processed with additives and flavorings that you may or may not want.

If you’re concerned with BPA (bisphenol A) that has been a common anticorrosive component of can liners and other products, check the label or information that was stamped on the can. Many processors are now using BPA-free liners. If the label or can does not state BPA-free, it may contain BPA.

How to Store Pinto Beans
Dried Pinto Beans. Store dried pinto beans in an airtight container in a dry, cool, dark place. They should keep well for 1 to 3 years. Depending on conditions, they may keep well for longer than that, but their quality may deteriorate over time, although they should still be safe to eat. If they have any signs of mold or moisture on them, or insect or rodent damage, they should not be eaten. [Note that the longer dried beans are stored, the longer they may need to cook to get tender. They absolutely should be soaked before being cooked, which will help to shorten the cooking time.]

Canned Pinto Beans. For the longest shelf life, store canned pinto beans in a cool, dry place. An unopened commercially processed can will usually last 3 to 5 years for best quality. They are still safe to eat after the expiration date if the can is not damaged and they were stored in a cool, dry place. Note that the quality may decline with age, with changes in color, flavor, and texture. If the can was bulging, rusting, severely damaged, or if you notice an “off” odor, flavor, or appearance when opened, the beans are not safe to eat and should be discarded.

Cooked pinto beans or unused beans from opened cans will keep well in a covered container in the refrigerator for 3 to 5 days.

How to Preserve Cooked Pinto Beans
If you’ve cooked more dried pinto beans then you can eat within a reasonable amount of time, the extra beans may be frozen. Simply transfer them to a freezer container or bag. Label them with the contents and date and store them in the freezer for up to 6 months for best quality. They will be safe to eat beyond that, but their quality may decline over time.

Dried vs Canned Pinto Beans
Cost. When comparing cost per serving, dried beans are cheaper than canned beans. The cost of a serving of canned beans is usually about twice that of cooked dried beans. Even if we were to take into consideration the cost of the water and electricity used in cooking the dried beans, the dried beans would very likely still be cheaper. So, if you’re looking for ways to save on groceries, buy dried beans and take the time to cook them. To use less water and electricity in the long run, cook a big batch (a pound or two of beans) at one time and store the extra cooked beans in the freezer. They’ll be ready when you need them.

Convenience. Needless to say, canned beans are more convenient than dried beans. You simply open the can, rinse and drain the beans, and they’re ready to use. The canned beans are an excellent choice if you’re always short on time and can’t (or don’t want to) take the time to cook dried beans. Also, canned beans should be a staple item kept in your pantry in case of an emergency. If the power goes out or if you temporarily lose your water supply, canned beans can be eaten straight from the can. They can be a lifesaving source of food when there is no way to cook. It’s better to be prepared, and not need it, then need it and not be prepared!

Many people believe cooking dried beans is a big ordeal. However, when considering “hands on” time, it’s actually very little. It takes little time to sort and rinse the beans then cover them with water in a pot. After being soaked, it takes little time to drain them then refill the pot with water. The cooking process pretty much takes care of itself. Then draining them takes little time, again. So, it’s really not hard nor time-consuming to cook dried beans when considering actual hands-on time. Furthermore, they can be cooked in a slow cooker or pressure cooker to make things a little simpler.

Nutritional Value. The nutritional value of canned pinto beans is about the same as cooked dried pinto beans. Either way, the beans need to be cooked completely before being eaten or canned, so they should have about the same nutrient content. So, this factor should not be a determinant when considering which form of pinto bean to buy.

Additives. If you want to avoid any additives in your foods, cooking dried beans is your best option. In this case, you can control what is added to the beans. Canned beans may have added salt and other ingredients as firming or color retention agents. Organic canned beans will not have firming or color retention agents, but still may have added salt. So, if salt is no issue, organic beans may be a good choice for you. Otherwise, cooking dried beans gives you complete control as to what is added to your beans.

BPA. BPA (bisphenol-A) is an anticorrosive agent that has been used in can linings and other applications such as water bottles, bottle caps, water supply lines and even dental sealants. Research has found that this agent may cause harmful effects such as increased blood pressure and damage to unborn fetuses and young children. If you’re concerned about the possible harmful effects of BPA, it’s wise to look for cans labeled as BPA-free. Progressively, more manufacturers are using BPA-free cans, but not all. So, it pays to read the label or the information that was stamped on the end of the can. To avoid BPA from cans, cooking dried beans ensures you’re not ingesting any of the chemical.

Taste. Taste is subjective and differs from person to person. However, the overall consensus is that cooked dried beans taste better than canned beans. I agree with that statement (in my humble opinion). If taste is a big factor for you, then cooking dried beans is your best option. Also, the advantage of cooking your own dried beans gives you the opportunity to flavor them to your liking. Adding onions, garlic, and/or herbs during the cooking process allows flavors to infuse in the beans that would not otherwise happen. If you still need the convenience of canned beans, adding them to soups, stews or other dishes where they will be combined with a lot of other foods, may mask the flavor difference of canned beans.

How to Prepare Dried Pinto Beans
Dried pinto beans should be soaked before being cooked. This makes them more tender, reduces cooking time, and also reduces their gas-producing tendencies when eaten. Preparing dried pinto beans is not hard, but does take some time.

First, place your dried beans in your cooking pot or a bowl. Sort through them to remove any stones or other debris that may be among them, and any beans that don’t look good. Then rinse the beans and drain the water. Next, cover the beans with fresh water in your pot by at least two inches. There are two methods of soaking to choose from at this point…

Overnight Method. Cover the pot and allow the beans to soak overnight or for at least 6 hours. Drain the water and cover the beans with fresh water by at least two inches. Cook your beans (see directions below).

Quick Soak Method. Cover your sorted, rinsed, and drained beans in your cooking pot with fresh water. Place the lid on the pot and bring them to a boil. Boil them for two minutes. Remove the pot from the heat and allow them to rest in the covered pot for two hours. Drain the water, then fill the pot with fresh water. Cook your beans (see directions below).

Cooking Your Soaked Beans. Place your pot filled with fresh water and soaked beans on the stove. The water level should be at least one inch above the soaked beans. Cover the pot and bring them to a boil, then lower the heat. Tilt the lid on the pot and allow the beans to simmer until they are soft. This can take anywhere from 45 minutes to 2 hours depending upon how fast they are cooked and how long they soaked. Stir them occasionally. Be sure they remain submerged. If needed, add more hot water to the pot. Do NOT add salt or acidic ingredients like vinegar or lemon juice to the water at first. This will cause the beans to be tough and will make them hard to cook. If salted or flavored water is desired, add flavorings when the beans are close to being done. When they are soft, drain the water and use them as desired.

If you want to flavor your beans as they cook, aromatic ingredients such as onions, garlic and herbs may be added to the cooking water from the start. This will infuse a rich flavor into your beans that they would not otherwise have. However, just remember to save the salt and acid ingredients until VERY late in the cooking process. In this case, the bean broth can be saved and stored in the freezer to be used in soups and stews for extra flavoring.

Soaked dried beans may also be cooked in a pressure cooker or slow cooker. Follow the manufacturer’s directions for cooking soaked, dried beans in your appliance.

Quick Tips and Ideas for Using Pinto Beans
* Try using cooked or canned pinto beans in chili recipes instead of kidney beans.

* Make an easy sandwich or tortilla filling or dip by blending pinto beans with sage, oregano, garlic, and black pepper.

* Make a yummy wrap by layering cooked pinto beans, chopped tomatoes, and chopped onions on a tortilla. Top with shredded cheddar cheese. Broil briefly until the filling is hot and the cheese melts. Top with diced avocado and chopped cilantro.

* Add pinto beans to vegetable soup.

* Make a simple one pot meal by heating cooked pinto beans, cooked rice, and cooked vegetables such as carrots, zucchini, and tomatoes. Season to taste and enjoy!

* When cooking dried beans, if you want to flavor them, try adding aromatic ingredients such as garlic, onions, and herbs. These ingredients can be added at the start of cooking, so the flavors will infuse the beans as they cook. Just don’t add any salt or acid ingredients until the end of cooking to avoid making the beans tough. Then save the water when you drain the beans. Freeze it in measured amounts and add the flavored bean water to soups and stews later.

* Even though some people do not soak beans before cooking them, it IS highly recommended to soak them first. This makes them easier to digest, reducing their gas-forming tendencies, and also reduces their cooking time.

Herbs/Spices That Go Well with Pinto Beans
Anise seeds, bay leaf, chili powder, cilantro, cumin, garlic, oregano, parsley, pepper (black), sage, salt, savory, thyme

Foods That Go Well with Pinto Beans
Proteins, Legumes, Nuts, Seeds: Bacon, beans (others such as black, kidney), beef, eggs, ham, pork

Vegetables: Chiles (i.e. ancho, chipotle, jalapeno, poblano, serrano), fennel, kale, mushrooms, onions, scallions, tomatoes and tomato puree

Fruits: Avocados, lemon, lime

Grains and Grain Products: Chips (tortilla), corn, quinoa, rice, spelt, tortillas

Dairy and Non-Dairy: Cheese (esp. cheddar, Jack)

Other Foods: Barbecue sauce, beer, liquid smoke, maple syrup, mustard, oil (esp. olive), stock (i.e. vegetable)

Pinto beans have been used in the following cuisines and dishes…
Burritos, casseroles, chili (meat and meatless), dips, frijoles, Mexican cuisine, nachos, pates, purees, salads (i.e. taco salad), salsas, soups, Southwestern (U.S.) cuisine, spreads, stews, tacos, Tex-Mex cuisine, tostadas, veggie burgers

Suggested Flavor Combos Using Pinto Beans
Add pinto beans to any of the following combinations…

Chiles + Sage
Chili Powder + Cumin
Cilantro + Liquid Smoke + Onions
Cumin + Garlic + Onions + Quinoa
Oregano + Sage + Thyme

Recipe Links

Perfect Pinto Beans https://www.foodnetwork.com/recipes/ree-drummond/perfect-pinto-beans-3339174

Mexican Pinto Beans From Scratch (1 Pot) https://minimalistbaker.com/mexican-pinto-beans-scratch-1-pot/

Easy Refried Beans https://www.camelliabrand.com/recipes/easy-refried-beans/

Pinto Bean Burrito Bowl with Avocado Cilantro Dressing https://www.camelliabrand.com/recipes/pinto-bean-burrito-bowl-with-avocado-cilantro-dressing/

Chipotle Pinto Bean Tortilla Soup https://www.camelliabrand.com/recipes/chipotle-pinto-bean-tortilla-soup/

Cheesy Bean Quesadilla https://www.camelliabrand.com/recipes/cheesy-bean-quesadilla/

Pinto Bean Recipes https://www.foodandwine.com/beans-legumes/pinto-bean/pinto-bean-recipes

10 Amazing Dishes to Make with Canned Pinto Beans https://www.goodhousekeeping.com/food-recipes/g986/canned-pinto-bean-recipes/

Tuscan Pinto Bean Soup https://www.goodhousekeeping.com/food-recipes/a16075/tuscan-pinto-bean-soup-recipe-ghk0414/

Pinto Bean Burritos https://www.goodhousekeeping.com/food-recipes/a10513/pinto-bean-burritos-recipe-ghk1010/

Three Bean Vegan Tamale Pie https://www.connoisseurusveg.com/three-bean-vegan-tamale-pie/#wprm-recipe-container-13289

Vegan Pinto Bean Brownies http://www.exsloth.com/vegan-pinto-bean-brownies/

Homemade Vegetarian Chili https://cookieandkate.com/vegetarian-chili-recipe/#tasty-recipes-23997

Easy Refried Beans https://cookieandkate.com/easy-refried-beans-recipe/#tasty-recipes-28453

Loaded Veggie Nachos https://cookieandkate.com/loaded-veggie-nachos-recipe/#tasty-recipes-28532

Pinto Posole https://cookieandkate.com/pinto-posole-recipe/#tasty-recipes-28231

Mole Pinto Beans https://www.food.com/recipe/mole-pinto-beans-173251

Resources

http://www.whfoods.com/genpage.php?tname=foodspice&dbid=89#descr

https://www.healthline.com/nutrition/what-is-bpa

https://www.stilltasty.com/fooditems/index/18010

https://www.leaf.tv/articles/how-to-tell-if-pinto-beans-are-stale-or-too-old/

https://www.stilltasty.com/fooditems/index/18011

https://www.umassmed.edu/nutrition/Cardiovascular/handouts/beans/

https://beaninstitute.com/dry-vs-canned-beans-which-is-better/

https://www.bonappetit.com/story/dried-beans-worth-effort

https://www.mayoclinic.org/healthy-lifestyle/nutrition-and-healthy-eating/expert-answers/bpa/faq-20058331

https://www.niehs.nih.gov/health/topics/agents/sya-bpa/index.cfm

https://www.camelliabrand.com/dry-beans-vs-canned-whats-the-difference/

https://www.ehow.com/info_8245575_things-make-pinto-beans.html

https://foodcombo.com/find-recipes-by-ingredients/beans-pinto

https://cals.arizona.edu/fps/sites/cals.arizona.edu.fps/files/cotw/Pinto_Beans.pdf

Page, Karen. (2014) The Vegetarian Flavor Bible. New York, NY: Little, Brown and Company.

About Judi
Julia W. Klee (Judi) began her journey enjoying “all things food” in elementary school when she started preparing meals for her family. That love of food blossomed into a quest to learn more and more about health and wellness as related to nutrition. She went on to earn a BS Degree in Food and Nutrition, then an MS Degree in Nutrition. She has taught nutrition and related courses at the college level to pre-nursing and exercise science students. Her hunger to learn didn’t stop upon graduation from college. She continues to research on a regular basis about nutrition as it relates to health. Her hope is to help as many people as possible to enjoy foods that promote health and wellness.

Cumin Seeds

Cumin 101 – The Basics

Here’s a comprehensive article all about the spice cumin. If you need to know a little something about this highly prized spice that has been enjoyed throughout history, you should find your answer below. From what it is, the history of cumin, its nutritional aspects, and how to use it, is all covered, and more!

Enjoy!
Judi

Cumin 101 – The Basics

About Cumin
The spice cumin is native to the Mediterranean region. It has been cultivated in the Middle East, India, China, and Mediterranean countries for thousands of years. Throughout history, cumin has played an important part in the cuisines and medicine of the region. During Biblical times, cumin was used as a spice in soup and bread, and also as a currency to pay tithes to priests. Ancient Egyptians used cumin in the mummification process of pharaohs.

Ancient Greeks and Romans used cumin as a culinary spice, especially since it was readily available. It was often used as a substitute for black pepper, which was very expensive and hard to obtain at the time.

Cumin was commonly used in Europe during the Middle Ages. It became known as a symbol of love and fidelity. People often carried cumin seeds with them when attending weddings, and wives often sent loaves of cumin bread with husbands who were going off to war.

Cumin seeds look similar to caraway seeds. They are yellow-brown, and oblong with longitudinal ridges. Cumin belongs to the same botanical family (Umbelliferae) as caraway, parsley, and dill. It has a strong, earthy flavor that can be described as peppery with slight citrus undertones. Cumin is available in both whole seeds and a ground powder. Cumin is the world’s second most popular spice, second to black pepper. The seeds come in brown, black and white colors.

Nutrition and Health Benefits of Cumin
Cumin in an excellent source of iron, and has appreciable amounts of manganese, calcium, magnesium, phosphorus and Vitamin B1.

Cumin has some important health benefits, as follows…

Iron. Cumin is an excellent source of iron. Since iron is a vital part of hemoglobin in our blood, it plays a key role in transporting oxygen from the lungs to all cells of the body. Iron is also necessary for proper energy metabolism through its role in specific enzymes in the production of energy. Iron is also used in keeping the immune system healthy by being a key component in the reproduction and maturation of immune cells, especially lymphocytes. Two teaspoons of cumin seeds provide almost 3 mg of iron, or about 16 percent of our Daily Value of iron. That’s impressive!

Digestion. Traditionally, cumin seeds have been used to help promote healthy digestion. Recent research has backed that up by finding that cumin promotes the release of pancreatic enzymes which are critical for proper digestion and nutrient absorption.

Cancer prevention. Cumin seeds may also have anticancer properties. Research has shown that cumin protected laboratory animals from stomach and liver tumors. This anticancer effect may be due to cumin’s ability to enhance liver detoxification enzymes in addition to its powerful free radical scavenging properties. Researchers speculate these properties alone may give cumin health-promoting effects yet to be identified.

How to Select Cumin
For the longest shelf-life, select whole cumin seeds. The ground powder is convenient, but tends to lose its flavor quickly. Cumin seeds can be used whole, or ground to a powder in a spice grinder or mortar and pestle.

How to Store
Cumin seeds and powder should be kept in a tightly sealed glass container in a cool, dry, and dark place. Ground cumin keeps well for about six months. Whole seeds will stay fresh for about one year. To extend the life of whole cumin seeds, they may be kept tightly wrapped in the freezer.

How to Prepare Cumin
Whole seeds and ground cumin can be used straight from the jar. However, lightly toasting the seeds before being used brings out their full aroma and flavor.

Quick Ideas and Tips for Using Cumin
* Cumin is often combined with black pepper and honey in middle Eastern countries. This combination is often used to flavor vegetables, chicken and fish dishes.

* A warming cup of cumin tea can be made by bringing seeds to a boil in water, then letting them steep for 8 to 10 minutes. This can help reduce bloating and intestinal gas.

* Cumin is often used to flavor lentils, chickpeas, and black beans. The flavor of cumin blends well with legumes, so remember that as a flavor option the next time you cook beans.

* Flavor up rice by adding toasted cumin seeds, dried apricots, and almonds.

* Cumin goes well with just about any grain. If you want to add a little flavor, sprinkle on a little ground cumin.

* Give vegetables a North African flavor twist by adding a little cumin.

* The flavor of cumin is very strong. If you’re not sure, just sprinkle a little on your food, then taste it, and go from there.

* Whole cumin seeds can be lightly toasted in a hot, dry skillet for 5 minutes. This step intensifies the flavor, giving them a deep, smoky flavor. Keep the seeds moving in the pan so they don’t burn. Add toasted cumin seeds to salads, roasted potatoes or other vegetables, bread doughs, and soups.

* For the best flavor, toast cumin seeds before grinding them into powder.

* Tempering cumin seeds with other spices is a common technique used in Indian cooking. This step releases flavors and aromas from the spices before adding other ingredients. Simply fry them in oil briefly until they are aromatic and start to pop, then add other ingredients. This will infuse the entire dish with the cumin flavor.

* Sprinkle ground toasted cumin on avocado toast.

* Add cumin to pork and lamb dishes.

* Sprinkle a little ground cumin over a boiled egg, along with a little salt.

* Sprinkle a little cumin onto a cheese omelet as it finishes cooking.

* Add whole cumin seeds early in cooking to allow time for the flavors to be released.

* The flavor of ground cumin is more concentrated that that of the whole seeds. When switching one for the other, use less of the ground spice than the whole seed.

Herbs/Spices That Go Well with Cumin
Cardamom, cayenne, chili powder, cilantro, cinnamon, cloves, coriander, curry powder, fenugreek, garlic, ginger, mint, nutmeg, oregano, paprika, pepper, turmeric

Foods That Go Well with Cumin
Proteins, Legumes, Nuts, Seeds: Beans (in general), beef, chicken, chickpeas, eggs, lamb, lentils, peas, seafood, sesame seeds, walnuts

Vegetables: Bell peppers, cabbage, carrots, chiles, chives, eggplant, mushrooms, onions, potatoes, sauerkraut, squash (i.e. kabocha), tomatoes and tomato sauce, vegetables (root)

Fruits: Avocados, lemon, lime, tamarind

Grains and Grain Products: Bulgur, grains (in general), rice

Dairy and Non-Dairy: Cheese (i.e. cheddar, Swiss), yogurt

Other Foods: Cocoa

Cumin has been used in the following cuisines and dishes…
North African cuisines, baba ghanoush, baked goods (i.e. breads), burritos, chili, Cuban cuisine, curries, dals, enchiladas, Greek cuisine, hummus, Indian cuisine, kebabs, Latin American cuisines, marinades, Mediterranean cuisines, Mexican cuisine, Middle Eastern cuisines, Moroccan cuisine, purees, salad dressings, salads (i.e. bean, rice), salsas, sauces (i.e. tomato), soups, Southeast Asian cuisines, Spanish cuisine, stews, tacos, Tex-Mex cuisine, Turkish cuisine

Suggested Flavor Combos Using Cumin
Add cumin to any of the following combinations…

Avocado + black beans + lime + tomatoes
Black beans + cilantro + garlic
Cilantro + curry spices
Garlic + Potatoes
Paprika + tomatoes

Recipe Links
Curried Cumin Potatoes https://www.allrecipes.com/recipe/38033/curried-cumin-potatoes/?internalSource=staff%20pick&referringId=1137&referringContentType=Recipe%20Hub

Boilermaker Tailgate Chili https://www.allrecipes.com/recipe/78299/boilermaker-tailgate-chili/?internalSource=staff%20pick&referringId=1137&referringContentType=Recipe%20Hub&clickId=cardslot%203

Homemade Black Bean Veggie Burgers https://www.allrecipes.com/recipe/85452/homemade-black-bean-veggie-burgers/?internalSource=hub%20recipe&referringId=1137&referringContentType=Recipe%20Hub&clickId=cardslot%205

Refried Beans without the Refry https://www.allrecipes.com/recipe/70312/refried-beans-without-the-refry/?internalSource=hub%20recipe&referringId=1137&referringContentType=Recipe%20Hub&clickId=cardslot%206

Vegan Black Bean Soup https://www.allrecipes.com/recipe/25333/vegan-black-bean-soup/?internalSource=hub%20recipe&referringId=1137&referringContentType=Recipe%20Hub&clickId=cardslot%208

Fish Tacos with Honey-Cumin Cilantro Slaw and Chipotle Mayo https://www.allrecipes.com/recipe/149052/fish-tacos-with-honey-cumin-cilantro-slaw-and-chipotle-mayo/?internalSource=hub%20recipe&referringId=1137&referringContentType=Recipe%20Hub&clickId=cardslot%2015

Moroccan Vegetable Stew https://www.myrecipes.com/recipe/moroccan-vegetable-stew

Wilted Cabbage with Toasted Cumin https://www.myrecipes.com/recipe/wilted-cabbage-with-toasted-cumin

Chickpea Salad with Cumin Vinaigrette https://www.myrecipes.com/recipe/chickpea-salad-with-cumin-vinaigrette

Barbecue-Rubbed Pork Chops https://www.myrecipes.com/recipe/barbecue-rubbed-pork-chops

Chickpea Falafels https://www.theperfectpantry.com/2010/09/cumin-recipe-chickpea-falafel.html

Black Beans and Rice https://www.theperfectpantry.com/2011/07/quick-and-easy-black-beans-and-rice-recipe.html

Cauliflower Tacos with Cashew Crema https://www.bonappetit.com/recipe/cauliflower-tacos-with-cashew-crema

Vegetarian Taco Bowls https://www.bonappetit.com/recipe/vegetarian-taco-bowls

Mixed Bean and Avocado Salad https://www.thekitchn.com/recipe-mixed-be-18056

Resources
http://www.whfoods.com/genpage.php?tname=foodspice&dbid=91#nutritionalprofile

https://www.thekitchn.com/quick-tip-using-whole-cumin-se-47158

https://www.thehomesteadgarden.com/the-spice-series-cumin/

https://www.spicebox.co.uk/blog/cumin-seeds-top-tips-and-recipes-ideas.html

https://www.seriouseats.com/2019/05/cumin.html

https://www.helpwithcooking.com/spice-guide/cumin.html

https://www.thespruceeats.com/what-is-cumin-995638

https://www.ncbi.nlm.nih.gov/pubmed/10971835

https://www.spicesinc.com/p-483-which-spices-do-you-grind.aspx

https://www.spiceography.com/cumin-seeds-vs-ground-cumin/

https://www.mccormick.com/spices-and-flavors/cumin

Page, Karen. (2014) The Vegetarian Flavor Bible. New York, NY: Little, Brown and Company.

About Judi
Julia W. Klee (Judi) began her journey enjoying “all things food” in elementary school when she started preparing meals for her family. That love of food blossomed into a quest to learn more and more about health and wellness as related to nutrition. She went on to earn a BS Degree in Food and Nutrition, then an MS Degree in Nutrition. She has taught nutrition and related courses at the college level to pre-nursing and exercise science students. Her hunger to learn didn’t stop upon graduation from college. She continues to research on a regular basis about nutrition as it relates to health. Her hope is to help as many people as possible to enjoy foods that promote health and wellness.

Black Beans

Black Beans 101 – The Basics

Black beans are a popular and extremely health-promoting legume to include in your meals whenever you can. If you’re wondering about the health benefits of black beans or are looking for ideas on what to do with them, such as what foods, herbs, or spices go well with black beans, you’re in the right place! I’ve answered those questions and a lot more! Read onward for a comprehensive review of black beans.

Enjoy!
Judi

Black Beans 101 – The Basics

About Black Beans
Black beans are native to North, South and Central America. They date as far back as 7,000 years ago when they were a staple food for Central and South Americans. Black beans are about one-half inch long with a shape similar to a pinto bean. They are members of the plant family Phaseolus vulgaris, along with navy, kidney, and pinto beans. Black beans are sometimes referred to as turtle beans or black turtle beans. Today, black beans are grown worldwide and are enjoyed in many cuisines. Cooked black beans are soft in texture with a mild, but slightly sweet flavor.

Nutrition and Health Benefits of Black Beans
Black beans are an excellent source of molybdenum. This trace mineral is critical in the formation of enzymes used in a variety of essential functions including carbohydrate metabolism. They also contain a lot of folate, fiber, copper, manganese, Vitamin B1, phosphorus, magnesium and iron. Furthermore, a one cup serving of black beans provides about 15 grams of protein (about one-third of the day’s needs), 15 grams of fiber, and about 180 mg of alpha-linolenic acid (an omega-3 fatty acid). That’s impressive!

Blood Sugar Control and Resistant Starch. The high fiber content of black beans coupled with the high protein content makes them an excellent food for helping to control blood sugar levels. Both fiber and protein help to regulate the passage of food through the gastrointestinal tract, reducing spikes in blood sugar from absorbed carbohydrates. This property gives black beans (and other legumes) a low rating on the glycemic index.

Also, recent studies have shown that black beans have specific peptides (types of proteins) that inhibit the formation of glucose transport molecules. This further inhibits glucose absorption from the digestive tract, also helping to keep blood sugars level. This can help in the management of blood sugar issues, especially Type 2 diabetes.

In addition to the high fiber content of black beans, much of their carbohydrate content consists of resistant starch. Resistant starch is not easily broken down in the upper digestive tract. Instead, it is carried to the large intestines where bacteria feed on the starch, breaking it down into short chain fatty acids. The fatty acids become fuel for our intestinal cells and may play a key role in the prevention of metabolic syndrome, bowel disorders, and some cancers. Short chain fatty acids have been found to aid in the treatment of ulcerative colitis, Crohn’s disease, and antibiotic-associated diarrhea. These properties help to decrease the risk of colorectal cancer in those who regularly eat black beans and other legumes.

Phytonutrient Content: Black beans are an outstanding source of anthocyanins and other flavonoids. Many of these compounds contribute to the rich, dark color of black beans. Anthocyanins acts as antioxidants, fighting harmful molecules in the body. They may provide anti-inflammatory, anti-viral, and anti-cancer benefits as well.

A 2010 report published in Nutrition Reviews found that anthocyanins may help to protect heart health by improving cholesterol levels and blood sugar levels, in addition to fighting oxidative stress. All of these factors contribute to heart disease. A 2011 study published in the American Journal of Clinical Nutrition found that anthocyanins may help to prevent high blood pressure, further protecting our heart health.

Dried vs Canned Black Beans
Dried Black Beans. Dried black beans should first be soaked, rinsed and drained, then cooked before being eaten. This takes some time and may not be feasible for all cooks. However, the nutrient content of dried, soaked and cooked beans is a little higher than that of the canned variety. Dried black beans are cheaper to buy when considering the amount of cooked beans you get from a one-pound bag vs the amount in one can of beans. If the cost factor is important to you, dried beans are the best option.

Storing Dried Black Beans. Store dried black beans in a cool, dry area in a sealed container. When properly stored, they should stay fresh for 2 to 3 years, although they are usually safe to eat beyond that. If you open a container of dried black beans and do not use them all, return the remaining unused beans to an airtight, sealed container stored in a cool, dry place. Dried beans are usually safe to eat beyond their ‘best by” date, although the quality may decline over time. If your dried beans develop an “off” odor or appearance, or show signs of mold or insect infestation, it’s time to discard them.

Canned Black Beans. Canned black beans are a convenient staple food to have in the pantry, and can be found in just about any grocery store. They should be rinsed and drained before eating. Since they are fully cooked, canned black beans can be eaten cold, cooked, pureed, or baked.

The nutrient content of canned black beans is slightly less than that of their dried counterparts, but not so much that they should be avoided. They are typically sorted before processing, as you would dry beans. The beans are then pre-hydrated before being cooked in their sealed cans. Some varieties of canned black beans have added salt and/or calcium chloride to maintain firmness. If you want to avoid those additives, organic and no salt added varieties of canned black beans are available at many grocery stores. The processing of canned black beans is relatively low when compared with other foods, and are considered to be a healthy alternative to dried black beans.

Storing Canned Black Beans. The quality of unopened cans of black beans can be good for 3 to 5 years if kept in a cool, dry place. They are usually safe to eat beyond that, but the quality may decline. Canned black beans usually have a “best by” date stamped on the can. If kept properly, the beans should be safe to eat beyond that day, but the quality may decline. If you notice a bad odor, off appearance or flavor, or mold, the beans should certainly be discarded. If any canned items are leaking, rusting, bulging, or severely dented, they should be discarded.

[On a personal note…When I was young, my parents had a pantry room off the kitchen where they stored canned foods. Apparently, they didn’t check them routinely. One day, a large can of fruit cocktail exploded in the room. It was everywhere! We did the best we could with clean-up, but that room smelled like old fruit cocktail for a VERY long time after that. So…lesson learned: Monitor your canned goods to be sure they are not bulging and use them within a reasonable amount of time!]

How to Prepare Dried Black Beans
Black beans should be soaked before being cooked. This makes them more tender, reduces cooking time, and also reduces their gas-producing tendencies when eaten. Preparing dried black beans is not hard, but does take some time.

First, place your dried beans in your cooking pot. Sort through them to remove any stones or other debris that may be in the bag, and any beans that don’t look good. Then rinse the beans and drain the water. Next, cover the beans with fresh water by at least two inches. There are two methods of soaking to choose from at this point…

Overnight method. Cover the pot and allow the beans to soak overnight or for at least 6 hours. Drain the water and cover the beans with fresh water by at least two inches. Cook your beans (see directions below).

Quick soak method. Cover your rinsed and drained beans in your cooking pot with fresh water. Place the lid on the pot and bring them to a boil. Boil them for two minutes. Remove the pot from the heat and allow them to rest in the covered pot for two hours. Drain the water, then fill the pot with fresh water. Cook your beans (see directions below).

Cooking your soaked beans. Place your pot filled with water and soaked beans on the stove. Cover the pot and bring them to a boil, then lower the heat. Tilt the lid on the pot and allow the beans to simmer until they are soft. This can take anywhere from 45 minutes to 2 hours depending upon how fast they are cooked and how long they soaked. Stir them occasionally. Be sure they remain submerged. If needed, add more hot water to the pot. Do NOT add salt or acidic ingredients like vinegar or lemon juice to the water at first. This will cause the beans to be tough and will make them hard to cook. If salted or flavored water is desired, add flavorings when they are close to being done. When they are soft, drain the water and use them as desired. Soaked dried beans may also be cooked in a pressure cooker or slow cooker.

Quick Ideas and Tips for Using Black Beans
* To have a supply of freshly cooked black beans readily available, cook a pound or two of dried beans. Cool them down in cold water, drain well, then transfer them to freezer bags or containers and store them in the freezer. You’ll have plenty of cooked black beans ready when you need them.

* Make a simple salad by combining black beans with celery, bell peppers, tomatoes and your favorite spicy dressing. Serve this on its own, on a bed of greens, or with a cooked grain of your choice.

* Make a quick taco by filling shells with cooked black beans, greens of choice, chopped tomatoes, avocado slices, onions and any other veggies you want. Top with chopped cilantro, a sprinkle of cheese, a drizzle of lime juice, and a dollop of sour cream or cashew cream.

* Make a black bean hummus by blending a can of black beans with tahini or avocado, lime, chili powder, and garlic to taste.

* Add cooked blacked beans to a stuffed baked potato.

* Use black beans in a burrito in place of refried beans.

* Make an easy dip by layering black beans with guacamole, diced tomatoes, onions, and chopped cilantro.

* Make a black bean salsa by combining black beans with diced tomatoes, red onion, jalapeno, and chopped cilantro. Add lime juice and salt to taste. Let rest for 20 minutes for flavors to blend, then serve with tortilla chips.

* Stuff baked sweet potatoes with a mixture of black beans, chopped onions, corn, diced tomatoes, all flavored with cumin, chili powder, cilantro and lime juice. Place the mixture in the baked sweet potato and top with cheddar cheese and a dollop of plain yogurt, sour cream or cashew cream.

* Try a black bean and walnut lettuce wrap. In a bowl, combine black beans, chopped walnuts, paprika, chili powder, cumin, chopped onion, diced tomatoes and any other vegetables you want, some lime juice, a little cheese, guacamole, sour cream, and/or salsa. Spoon the filling into large lettuce leaves, wrap and enjoy!

Herbs/Spices That Go Well with Black Beans
Basil, bay leaf, cayenne, chili pepper flakes, chili powder, cilantro, coriander, cumin, garlic, ginger, mint, mustard, oregano, paprika, parsley, pepper, rosemary, salt, savory, thyme

Foods That Go Well with Black Beans
Proteins, Legumes, Nuts, Seeds: Beef, chicken, chickpeas, eggs, pork, seafood, tempeh

Vegetables: Bell peppers, carrots, celery, chiles, chives, cucumbers, jicama, mushrooms, onions, potatoes, scallions, spinach, squash (winter), sweet potatoes, tomatoes

Fruits: Avocado, citrus fruits (esp. lemon, lime, orange), mangoes, olives, plantains

Grains and Grain Products: Corn, grains (in general), quinoa, rice, tortillas

Dairy and Non-Dairy: Cheese, sour cream

Other Foods: Chocolate, coffee, liquid smoke, miso, oil, sherry (dry), soy sauce, stock (vegetable), vinegar

Black beans have been used in the following cuisines and dishes…
Black bean cakes, Brazilian cuisine, burritos, Caribbean cuisine, casseroles, Central American cuisines, chili (vegetarian), Cuban cuisine, dips, empanadas, enchiladas, Jamaican cuisine, Latin American cuisines, Mexican cuisine, nachos, pates, Puerto Rican cuisine, purees, quesadillas, refried beans, salads, soups, South American cuisines, Southwestern (U.S.) cuisine, spreads, stews, tacos, Tex-Mex cuisine, tostadas, veggie burgers

Suggested Flavor Combos Using Black Beans
Add black beans to any of the following combinations…

Avocado + cilantro + corn + lime juice
Avocado + cilantro + onions + rice
Bell peppers + corn + lettuce + scallions
Bell peppers + garlic + onions
Brown rice + salsa + tomatoes
Cheddar cheese + chickpeas + corn + green onions
Chiles + cilantro + coriander + cumin + lime + scallions
Cilantro + lime + oregano + red onions
Cilantro + orange
Coriander + cumin + ginger
Garlic + thyme
Kale + sweet potatoes
Mango + quinoa
Salsa + sweet potatoes + tortillas

Recipe Links
Black Bean and Rice Salad https://www.thespruceeats.com/black-bean-and-rice-salad-3051221

Crock Pot Black Bean Chili https://www.thespruceeats.com/crockpot-black-bean-chili-recipe-481139

Easy Crock Pot Santa Fe Chicken https://www.thespruceeats.com/cindys-crock-pot-santa-fe-chicken-3054743

Southwest Black Bean and Corn Salad https://www.thespruceeats.com/southwest-black-bean-and-corn-salad-3377848

Quick and Easy Vegetarian Black Bean Soup https://www.thespruceeats.com/quick-vegetarian-black-bean-soup-3378007

Grilled Bean Burgers https://www.tasteofhome.com/recipes/grilled-bean-burgers/

Texas Black Bean Soup https://www.tasteofhome.com/recipes/texas-black-bean-soup/

Black Bean and Corn Quinoa https://www.tasteofhome.com/recipes/black-bean-corn-quinoa/

Black Bean Brownies https://www.tasteofhome.com/recipes/black-bean-brownies/

Black Bean and Rice Enchiladas https://www.tasteofhome.com/recipes/black-bean-and-rice-enchiladas/

Slow Cooked Stuffed Peppers https://www.tasteofhome.com/recipes/slow-cooked-stuffed-peppers/

Taco Lasagna https://www.tasteofhome.com/recipes/taco-lasagna/

Chili Tortilla Bake https://www.tasteofhome.com/recipes/chili-tortilla-bake/

15-Minute Black Bean Salad http://www.whfoods.com/genpage.php?tname=recipe&dbid=20

Mexican Black Bean Wrap with Avocado and Tri-Colored Slaw https://hellolittlehome.com/mexican-black-bean-wrap-avocado-tri-color-slaw/

Veggie Burrito Bowls https://www.easycheesyvegetarian.com/veggie-burrito-bowls/

Resources

http://www.whfoods.com/genpage.php?tname=foodspice&dbid=2

https://www.stilltasty.com/Fooditems/index/16542

https://www.stilltasty.com/Fooditems/index/16544

https://www.thespruceeats.com/cooking-black-beans-1808034

https://www.bonappetit.com/recipes/article/12-things-to-do-with-a-can-of-black-beans

https://domesticsuperhero.com/southwestern-stuffed-sweet-potatoes/

https://www.verywellhealth.com/the-scoop-on-anthocyanins-89522

https://www.ncbi.nlm.nih.gov/pmc/articles/PMC5613902/

https://www.phlabs.com/the-benefits-of-black-beans-will-blow-you-away

https://www.thespruceeats.com/black-bean-history-1807569

Page, Karen. (2014) The Vegetarian Flavor Bible. New York, NY: Little, Brown and Company.

About Judi
Julia W. Klee (Judi) began her journey enjoying “all things food” in elementary school when she started preparing meals for her family. That love of food blossomed into a quest to learn more and more about health and wellness as related to nutrition. She went on to earn a BS Degree in Food and Nutrition, then an MS Degree in Nutrition. She has taught nutrition and related courses at the college level to pre-nursing and exercise science students. Her hunger to learn didn’t stop upon graduation from college. She continues to research on a regular basis about nutrition as it relates to health. Her hope is to help as many people as possible to enjoy foods that promote health and wellness.

Pineapple

Pineapples 101 – The Basics

Pineapples are a delicious, sweet tropical fruit that most of us are familiar with. Thanks to modern transportation, many grocery stores have fresh pineapples available year round. Yet, we also can choose from canned, dried, and even frozen pineapple too. Its availability makes it a handy fruit to have on-hand, ready to be used in oh-so-many ways! If you are looking for ideas for something different to do with pineapples, you’re in the right place. Below is a comprehensive article all about pineapples, from what they are to suggested recipe links, and everything in between.

Enjoy!
Judi

Pineapples 101 – The Basics

About Pineapples
Pineapples are delicious, with the perfect balance of sweet and tart. They are an extremely popular fruit in America, second only to bananas. Pineapples are members of the Bromeliaceae family of plants. The name stems from the enzyme bromelain, contained in the fruit. They have a wide cylindrical shape with a green, brown, or yellow scaly skin with spiny blue-green leaves on the top. The flesh is yellow with a juicy, delicious sweet-tart flavor. The area closest to the base of the pineapple has the most sugar, so it will taste the sweetest.

It is believed that pineapples originated in South America, but they were first discovered in 1493 by European explorers when they visited the Caribbean island that is now Guadeloupe. From there, the fruit eventually was carried to areas with tropical climates where they thrived.

Pineapples were first cultivated in Hawaii in the 1700s. It is currently the only U.S. state where pineapples are grown commercially. The fruit is also grown commercially in Thailand, the Philippines, China, Brazil, Costa Rica, and Mexico. Interestingly, it takes about two years for one pineapple to reach maturity, so it has a long growth cycle. Pineapples are available in most grocery stores year-round, with their peak season being in the spring and summer months.

Nutrition and Health Benefits of Pineapples
Pineapple is an excellent source of Vitamin C and manganese. It also is a good source of copper Vitamin B1, Vitamin B6, fiber, folate, and pantothenic acid. Pineapple has negligible fat, but it does contain a high amount of sugar, with a “medium” glycemic load of 56 in a ¾ cup serving. One cup of fresh pineapple chunks has about 83 calories.

Bromelain. Bromelain is a mixture of compounds found in the stem and core of pineapple. These substances have become known as bromelain and are often included in enzyme supplements. Bromelain is known for its protein digesting function. More recent research has found that bromelain extract has other health benefits, such as reducing inflammation, excess coagulation of the blood, and suppressing tumor growth. We’re not certain at this time if those same benefits can be obtained from the amounts received when the fruit is eaten in normal amounts.

Antioxidant protection and immune system support. Vitamin C is the body’s main antioxidant, protecting cells from free radical damage. This protection extends to guarding against atherosclerosis and diabetic heart disease, asthma attacks, colon cancer, and osteoarthritis and rheumatoid arthritis. Furthermore, Vitamin C is critical for proper functioning of the immune system, and a one cup serving of pineapple provides 105% of our daily needs for this vitamin. This alone makes pineapple a worthy addition to anyone’s diet!

Pineapple is an excellent source of Vitamin B1 and the trace mineral manganese. Both have vital roles in energy production and antioxidant functions. Along with Vitamin C, the nutrients in pineapple can play an important part in keeping us healthy and well.

How to Select a Fresh Pineapple
Choose a fresh pineapple that is heavy for its size. Choose one that is free of spots, bruises, and darkened “eyes” or scales, which indicates the fruit is old. Also, smell the pineapple at the stem end. It should smell sweet. Avoid one that smells sour, musty or fermented. Pineapples do not ripen after being picked, so opt for a ripe one that is still fresh and at its prime.

How to Store Fresh Pineapples
Pineapples may be left at room temperature for a day or two after purchase. It will not become any sweeter, but this will help it to soften some and be juicier. Pineapples are very perishable. So, if you do not plan to eat it soon after bringing it home, it’s best to wrap it in perforated plastic and store it in the refrigerator. It will keep like that for up to 3 to 5 days. For best flavor, allow the pineapple to come to room temperature before eating or cooking with it.

Store cut pineapple in the refrigerator in an airtight container. It will keep best if it is covered in pineapple juice. Fresh pineapple may be frozen in an airtight container and will keep for up to six months.

Dried vs Canned vs Fresh Pineapple
Dried Pineapple. Nutritionally speaking, the nutrient content of dried fruits is usually reduced when compared with their fresh counterparts. The heat and prolonged exposure to air causes these losses. Vitamin C, B-vitamins, calcium and potassium are all reduced to some degree in the drying of pineapple.

Despite the loss of some nutrients, dried pineapple retains its natural sugar content in the process so it is a deliciously sweet treat. It would be a great addition to granola, trail mix, cereal, and baked goods. Many manufacturers of dried pineapple often coat the fruit with added sugar in the process, making it even sweeter. Like this, it becomes more like a candy than a fruit. If you’re watching your blood sugar levels, you will need to restrict the amount of dried pineapple that you eat in one serving. It is possible to find dried pineapple without added sugar, so be sure to read labels carefully if you’re avoiding added sweeteners.

Canned Pineapple. As would be expected, some nutrients are lost in the canning process of pineapple. For example, almost half of the Vitamin C content of fresh pineapple is lost in the making of the canned version. However, a cup of canned pineapple still has about 28% of our daily value of Vitamin C, which can be a major contributor to the diet. Unfortunately, all of the important enzyme bromelain is lost in the canning process. Despite these losses, canned pineapple is a good staple food to add to your pantry collection. It’s available at a moment’s notice to be used any way you need, whether to be eaten as-is or used in a cooked dish.

Fresh Pineapple. If you’re looking for the highest nutritional value in pineapple, fresh is best. Fresh pineapples are found in many grocery stores most of the time, so they are usually available when needed. Although they do take some time to prepare, nothing can beat the taste of sweet and juicy fresh pineapple. They can be eaten raw or enjoyed in cooked dishes and baked items. Another advantage is that they are often inexpensive, considering how much edible fruit you get from one pineapple. Even though there are great uses for dried pineapple, and canned pineapple is very convenient, give the fresh variety a try if you haven’t already done so. You’ll be glad you did!

How to Prepare a Pineapple
First remove the top and base of the pineapple with a sharp knife. There are many ways to remove the skin. A simple way is to rest the pineapple on its base, then cut downward along the sides to remove the skin. Take a paring knife to remove the “eyes” that remain. The pineapple may also be cut into quarters, leaving the core or removing it with a knife. The quarters can then be sliced, then the skin cut away.

Pineapple corers are also found in many stores. They are a convenient way to remove the core and rind from the fruit. However, they will also likely remove a lot of edible fruit too, so they may or may not be your best choice.

Quick Ideas and Tips for Using Pineapple
Pineapples are delicious tropical fruits that can be enjoyed in many ways from breakfast to supper time desserts, and anything in between. It can be used raw or cooked, and is commonly used in American, Asian, and Caribbean cuisines. If you’re looking for ideas for something a little different, here are some suggestions…

* Make a shrimp salad with cooked shrimp, diced pineapple, grated ginger, and a drizzle of olive oil. Season to taste and serve on a bed of lettuce.

* Make a pineapple salsa with diced pineapple and chili peppers. Serve with fish.

* Drizzle maple syrup over pineapple slices. Broil until lightly browned, then top with yogurt.

* Make a quick salad with chopped pineapple, grated fennel, and chopped cashews. Serve with chicken.

* Make a tropical fruit salad with diced pineapple, papaya, kiwi, and mango.

* Add chunks of pineapple to a coleslaw or carrot salad.

* Add pineapple to your morning smoothie for a delicious flavor boost.

* Top pineapple with yogurt for a delicious, creamy dessert or snack.

* Top your favorite burger with a pineapple ring for a tropical twist.

* Add pineapple as a topping on pizza.

* The next time you fire up the grill, add some grilled pineapple rings to the menu. You’ll be glad you did! It can be served with your protein of choice, included in a dessert, or paired with a vegetable or cooked grain.

* Add pineapple to pico de gallo for a sweet flare.

* Make an easy pineapple sorbet by freezing canned pineapple with its juice in a shallow container. When frozen, remove the container from the freezer and let it sit on a counter for 10 minutes to partially thaw. Break it into chunks and place them in a food processor. Carefully process it until smooth and serve immediately. Return any leftover to the freezer and repeat the process next time.

* Make easy pineapple popsicles. Blend 3 cups of fresh or drained canned pineapple with 1/3 cup milk of choice, and ¼ cup of sugar (or sweetener of choice). Pour into popsicle molds or paper cups and insert wooden sticks. Freeze until firm and enjoy!

Herbs/Spices That Go Well with Pineapple
Basil, chili powder, cilantro, cinnamon, cloves, curry powder, garlic, ginger, lemongrass, mint, nutmeg, pepper, rosemary, sage, salt, star anise, vanilla

Foods That Go Well with Pineapple
Proteins, Legumes, Nuts, Seeds: Beans (esp. black), cashews, chicken, fish, ham, nuts (esp. almonds, hazelnuts, macadamia, peanuts, pistachios, walnuts), pork, seeds (i.e. pumpkin, sunflower), tempeh, tofu

Vegetables: Beets, bell peppers (esp. red), chiles, cucumbers, hearts of palm, jicama, mushrooms (esp. Portobello), onions, parsnips, scallions, sweet potatoes, tomatoes

Fruits: Apricots, avocados, bananas, berries (esp. blueberries, raspberries, strawberries), coconut, other fruit in general (esp. tropical fruit), grapefruit, kiwi, kumquats, lemon, lime, mangoes, melon, orange, papayas, passion fruit, raisins

Grains and Grain Products: Rice, seitan

Dairy and Non-Dairy: Butter, cheese (i.e. ricotta), coconut milk, cream, ice cream, sour cream, yogurt

Other Foods: Agave nectar, caramel, chocolate (white and dark), gin, honey, lavender, liqueurs, maple syrup, molasses, oil, rum, sugar (esp. brown), vinegar (esp. apple cider, red wine, rice, white wine)

Pineapples have been used in the following cuisines and dishes…
Baked goods (i.e. cakes, esp. pineapple upside-down), Caribbean cuisines, chutneys, curries, drinks (i.e. piña coladas), Hawaiian cuisine, salad dressings, salads (green and fruit), salsas, sauces, skewers (i.e. fruit), smoothies, sorbets, soups, stews, stir-fries, Vietnamese cuisine

Suggested Flavor Combos Using Pineapple
Add pineapple to any of the following combinations…

Almonds + vanilla
Apple + brown sugar + ginger + orange juice + soy sauce
Banana + brown sugar
Brown sugar + honey + rum + vanilla
Brown sugar + lime
Chiles + cilantro + garlic + lime + red onions
Cilantro + lime
Coconut + brown sugar
Coconut + ginger + rum
Coconut + passion fruit + white chocolate
Coconut + yogurt
Ginger + maple syrup
Honey + mint + yogurt
Peanuts + sweet potatoes

Recipe Links
Baked Ham with Pineapple https://www.thespruceeats.com/baked-ham-with-pineapple-3051040

Easy No-Bake Pineapple Cheesecake https://www.thespruceeats.com/easy-no-bake-pineapple-cheesecake-3052567

Smoked Pork Chops with Pineapple https://www.thespruceeats.com/easy-smoked-pork-chops-with-pineapple-3059345

Refreshing Watermelon Pineapple Smoothie https://www.ambitiouskitchen.com/refreshing-watermelon-pineapple-smoothie/

Coconut Pineapple Paleo Popsicles https://addapinch.com/coconut-pineapple-paleo-popsicles-recipe/

Cucumber Salad with Pineapple and Cilantro https://reluctantentertainer.com/cucumber-salad-recipe/

Baked Mahi Mahi with Pineapple Blueberry Salsa https://addapinch.com/baked-mahi-mahi-with-pineapple-blueberry-salsa-recipe/

Pineapple Fried Rice https://www.delish.com/cooking/recipe-ideas/a25102459/easy-pineapple-fried-rice-recipe/

Pineapple Salsa https://www.delish.com/cooking/recipes/a53020/pineapple-salsa-in-pineapple-recipe/

Grilled Salmon with Pineapple Salsa https://www.delish.com/cooking/recipe-ideas/recipes/a47376/grilled-salmon-with-pineapple-salsa-recipe/

Grilled Pineapple Salsa https://www.delish.com/cooking/recipe-ideas/recipes/a47362/grilled-pineapple-salsa-recipe/

Resources
http://www.whfoods.org/genpage.php?tname=foodspice&dbid=34

https://www.thespruceeats.com/history-of-the-pineapple-1807645

https://www.healthline.com/health/diabetes/pineapples-and-diabetes

https://www.healthline.com/nutrition/benefits-of-pineapple#section8

http://justfunfacts.com/interesting-facts-about-pineapple/

https://www.specialtyproduce.com/produce/Pineapple_4482.php

https://www.quickanddirtytips.com/health-fitness/healthy-eating/canned-pineapple-versus-fresh

https://www.chfusa.com/blog/fresh-pineapple-juice/

https://www.nutritionletter.tufts.edu/issues/10_7/ask-experts/1498-1.html

https://healthyeating.sfgate.com/healthy-dried-pineapple-2818.html

https://www.livestrong.com/article/530229-the-nutritional-difference-between-canned-fresh-pineapple/

https://www.wisebread.com/20-delicious-ways-to-use-pineapple

Page, Karen. (2014) The Vegetarian Flavor Bible. New York, NY: Little, Brown and Company.

About Judi
Julia W. Klee (Judi) began her journey enjoying “all things food” in elementary school when she started preparing meals for her family. That love of food blossomed into a quest to learn more and more about health and wellness as related to nutrition. She went on to earn a BS Degree in Food and Nutrition, then an MS Degree in Nutrition. She has taught nutrition and related courses at the college level to pre-nursing and exercise science students. Her hunger to learn didn’t stop upon graduation from college. She continues to research on a regular basis about nutrition as it relates to health. Her hope is to help as many people as possible to enjoy foods that promote health and wellness.

Papaya

Papaya 101 – The Basics

If you live in the tropics, you’ve probably grown up eating papaya, so it’s nothing new to you. I’m sure you could teach us a lot about this interesting fruit! However if you grew up elsewhere, papaya is one of those fruits that you may have never tried. You may not know what to do with it…how to prepare it or how to include it in meals with other foods. Hopefully, the article below will help you out. It’s a comprehensive article all about papaya, from what it is, to how to buy, store, and use it, to suggested recipe links. If you’re curious about papaya, you found the right place to find answers to your questions!

Enjoy,
Judi

Papaya 101 – The Basics

About Papayas
Papayas are oblong to pear-shaped fruits that are usually about 7 inches long. However, they can be as long as 20 inches. The flesh is orange in color, with yellow to pink hues. Inside are many black, round seeds with a gelatinous coating. The pea-sized seeds are edible with a peppery, bitter flavor. The flavor of papaya flesh is sweet with slight musk undertones. The consistency is soft and butter-like. Papaya trees produce fruit year-round, although they have a peak season in early summer and fall.

Papayas are native to Central America, where they were long revered by Latin American Indians. Explorers carried papayas to other parts of the world, including India, the Philippines, and Africa. They made their way around the world from there. Papayas have been cultivated in Hawaii since the 1920s where they are a major producer of the fruit, along with Mexico, Brazil, India, Indonesia, and Nigeria. The papaya tree only grows in warm climates.

Christopher Columbus referred to the papaya as “the fruit of the angels.” In Australia, papayas are referred to as papaws or pawpaws. In Brazil, they are called Mamaos. They can also be referred to as tree melons.

Papayas contain the enzyme papain, which helps to digest protein. The enzyme is especially concentrated in unripe papayas. This enzyme is often extracted from papayas and included in digestive enzyme supplements and some chewing gums. It is also added to commercial meat tenderizers.

Nutrition and Health Benefits of Papayas
Papaya is an excellent source of Vitamin C, with one medium papaya providing 224% of our daily needs. Papaya is also a good source of Vitamin A (from beta-carotene), folate, fiber, magnesium, potassium, copper, and Vitamin K. One medium papaya has about 119 calories, or 43 calories in a 100 gram (3.5 ounce) serving.

Possible health benefits of papaya include reducing the risk of heart disease, diabetes, asthma, and cancer. It aids in digestion, improves blood glucose control in diabetics, and lowers blood pressure. Beta-carotene, which is plentiful in papayas, has been found to be protective against prostate cancer in men, and also asthma in those who eat a lot of foods containing this antioxidant. Papayas have even been found to aid in wound healing.

Protection from Macular Degeneration. Papayas contain the antioxidant zeaxanthin which is known to filter blue rays from sunlight. By doing this it is believed to help protect our eyes from macular degeneration. Therefore, eating papayas may help to protect your eyes from sun-related damage.

Papaya and Latex-Fruit Syndrome. If you react to rubber, you may also react to papaya, especially unripe papayas. Papayas have proteins that are similar to those found in natural rubber. Some individuals who react to rubber will also react to the proteins in papayas. If you are in this group of people, papayas may not be right for you. Proceed with caution!

How to Select a Fresh Papaya
Papayas with a reddish-orange skin and are slightly soft to the touch are ready to eat right away. So, if you want a papaya for immediate use, that’s the one to opt for. Ones with yellow patches on the skin will take a few days to ripen when left at room temperature. Papayas that are totally green and hard are not ripe and should be avoided, unless you need an unripe one for a specific recipe. The unripe papayas will not develop their characteristic sweet flavor.

Avoid papayas that are bruised and overly soft. A few dark spots on the surface will not affect the flavor of the papaya.

How to Store Papayas
Ripe papayas should be stored in the refrigerator and used within a few days. If you want to speed up the ripening process, place a yellowish papaya in a paper bag with a ripe banana. Once the papaya ripens up it should be used right away or placed in the refrigerator and used within a few days.

Dried vs Fresh Papaya
Fresh Papaya. Thanks to modern transportation methods, fresh papaya is available in many grocery stores year-round. Both ripe and green (unripe) varieties are available and offer versatility so the fruit can be enjoyed raw in sweet dishes or cooked in savory foods.

Dried Papaya. Dried papaya is a convenient and delicious way to enjoy this tropical fruit and have it available whenever you need it. It’s important to read labels when purchasing dried papaya. A lot of manufacturers add sweeteners, preservatives, and coloring agents during the drying process. However, dried papaya without added sweeteners or chemicals is available from some resources. It may be marketed as organic or natural dried papaya. If you’re avoiding such additives, it’s critical to read labels when you’re shopping to be sure you are getting what you expect.

Dried papaya can be enjoyed on its own or added to quick breads, trail mix, granola, hot porridge (like oatmeal), cookie dough, and sprinkled on ice cream. Use it in any way you would use a dried fruit.

How to Prepare a Papaya
Papayas are easy to use and basically are prepared like a melon. Wash the fruit, then slice it in half. Scoop out the seeds, remove the peel and dice it up, or scoop out the flesh with a spoon or melon baller.

Quick Ideas and Tips for Using Papayas
Papayas can be eaten raw or used in a number of savory recipes. Experiment with papayas if you’re not familiar with them and surely you’ll find your favorite way to enjoy them. Here are some suggestions…

* Simply scoop out the pulp of a papaya and enjoy it as it is. For a little zing, you could drizzle a little lemon or lime juice on top.

* When adding papaya to a fruit salad, add the papaya just before serving. The enzymes in the papaya can cause other fruit to become soft.

* Although they can be a little bitter, the papaya seeds are edible with a peppery flavor. They can be dried, and chewed whole or blended into a dressing for a pepper flavor.

* Combine diced papaya, cilantro, jalapeno peppers, and ginger for a salsa that goes well with seafood.

* Slice a papaya lengthwise, remove the seeds, fill the cavity with a fruit salad, then top with a couple mint leaves for a beautiful presentation.

* Blend papaya, strawberries, banana and yogurt for a delicious smoothie.

* Unripe papayas are often used as a vegetable and added to curries, salads and stews, especially in Southeast Asian dishes.

* Make a tropical fruit salad with fresh papaya, mango and pineapple.

* Add dried papaya to a rice pilaf.

* Add papaya chunks to chicken, tuna, or shrimp salad.

* In many recipes, papaya may be used in place of mango.

* Bake a ripe papaya with a sprinkle of brown sugar and rum for an exceptional flavor treat.

* Add grated or thinly sliced unripe papaya to coleslaw.

* The flavor of ripe papaya is best when it’s cold, so refrigerate it first if you will be enjoying it raw.

* Make a simple breakfast addition or dessert by cutting a papaya in half (lengthwise), and scooping out the seeds. Fill the cavity with yogurt, then top with a few blueberries.

* Enjoy a tropical smoothie by blending some coconut milk with diced papaya and a few ice cubes.

* Make a papaya chia pudding by combining chopped papaya with 1 cup of almond milk (or milk of choice), 2 tablespoons of chia seeds, and ¼ teaspoon of vanilla. Pour the mixture into a small mason jar, cover and place it in the refrigerator to chill and thicken.

Herbs and Spices That Go Well with Papayas
Cayenne, cilantro, cinnamon, cumin, curry, garlic, ginger, lemongrass, mint, nutmeg, rosemary, salt, vanilla

Foods That Go Well with Papayas
Proteins, Legumes, Nuts, Seeds: Beans (esp. black), chicken, fish, legumes (in general), nuts (esp. almonds, cashews, macadamia, peanuts), pork, shrimp, tofu

Vegetables: Arugula, bell peppers, carrots, chili peppers, cucumbers, daikon radish, greens (salad), jalapeno peppers, jicama, lettuce, mung bean sprouts, onions (esp. red), scallions, shallots, spinach, tomatoes

Fruits: Avocados, bananas, berries (esp. raspberries, strawberries), citrus (esp. grapefruit, lemon, lime), coconut, kiwi, mango, melon (esp. cantaloupe, honeydew), passion fruit, peaches, pineapple, tamarind

Grains and Grain Products: Rice, tortillas (corn)

Dairy and Non-Dairy: Cheese, yogurt

Other: Agave nectar, honey, lavender, oil (olive), soy sauce, sugar (brown), tamari (with green papayas), vinegar (esp. rice wine, tarragon)

Papayas have been used in the following cuisines and dishes…
Caribbean cuisines, chutneys, curries, ice creams, jams, marinades, salad dressings, salads, salsas, smoothies, sorbets, Thai cuisine (green papayas)

Suggested Flavor Combos Using Ripe Papayas
Add ripe papayas to any of the following combinations…

Bananas + honey
Bananas + mangos + vanilla + yogurt
Bananas + oranges
Bell peppers + cilantro + lime + onions
Cayenne + cilantro + lime
Cayenne + greens + jicama + lemon + lime
Chiles + mango + mint + pineapple
Coconut + rice
Ginger + lime
Honey + mint + yogurt
Jicama + orange + red onions
Kiwi + mango + pineapple
Lime + mango + mint + orange
Strawberries + yogurt

Suggested Flavor Combos Using Green (Unripe) Papayas
Add green (unripe) papayas to any of the following combinations…

Chili pepper + garlic + lime + peanuts
Green beans + lime + peanuts + tomatoes
Lime + peanuts + Thai basil

Recipe Links

Papaya Bars https://www.acozykitchen.com/papaya-bars

Papaya Recipes https://www.foodnetwork.com/topics/papaya

Chicken and Papaya Stir-Fry https://www.foodandwine.com/recipes/chicken-and-papaya-stir-fry

Papaya and Feta Salad http://www.eatingwell.com/recipe/266922/papaya-and-feta-salad/

Jamaican Jerk Shrimp with Papaya and Pineapple http://www.eatingwell.com/recipe/265103/jamaican-jerk-shrimp-with-papaya-and-pineapple/

Tropical Melon Smoothie http://www.eatingwell.com/recipe/255708/tropical-melon-smoothie/

Green Papaya Salad http://www.eatingwell.com/recipe/252304/green-papaya-salad/

Green Papaya Salad (Som Tam) https://www.thespruceeats.com/green-papaya-salad-som-tam-recipe-3217693

Spiced Papaya Pie with Graham Cracker Crust https://www.thespruceeats.com/papaya-pie-with-graham-cracker-crust-1808408

Resources

http://www.whfoods.com/genpage.php?tname=foodspice&dbid=47

https://www.crfg.org/pubs/ff/papaya.html

http://justfunfacts.com/interesting-facts-about-papayas/

https://www.medicalnewstoday.com/articles/275517.php

https://fruitsandveggies.org/stories/top-10-ways-to-enjoy-papaya/

https://producemadesimple.ca/what-does-papaya-go-well-with/

https://www.healthline.com/nutrition/8-proven-papaya-benefits#section2

https://www.thespruceeats.com/papaya-storage-and-selection-1807787

https://healthyeating.sfgate.com/nutritional-dried-papaya-spears-1341.html

Page, Karen. (2014) The Vegetarian Flavor Bible. New York, NY: Little, Brown and Company.

About Judi
Julia W. Klee (Judi) began her journey enjoying “all things food” in elementary school when she started preparing meals for her family. That love of food blossomed into a quest to learn more and more about health and wellness as related to nutrition. She went on to earn a BS Degree in Food and Nutrition, then an MS Degree in Nutrition. She has taught nutrition and related courses at the college level to pre-nursing and exercise science students. Her hunger to learn didn’t stop upon graduation from college. She continues to research on a regular basis about nutrition as it relates to health. Her hope is to help as many people as possible to enjoy foods that promote health and wellness.