Category Archives: Uncategorized

Peaches

Peaches 101 – The Basics


Peaches 101 – The Basics

About Peaches
Peaches are stone fruits, native to northwest China. From there, the trees spread westward through Asia into the Mediterranean countries, then onward to other parts of Europe. Spanish explorers transported peaches to the Americas, where they were found in Mexico as early as 1600. Large-scale production of peaches started in the United States in the 19th century. Early crops were of poor quality. With improved techniques of grafting, large commercial peach orchards were eventually established.

The color of peach flesh can be white or yellow to orange. There are two main varieties of peaches: freestone, where the flesh easily separates from the one large pit or stone, and clingstone, where the flesh adheres securely to the stone. The freestone varieties are usually eaten fresh, “out of hand,” since the pit almost falls out once exposed. They can also be used in any application, like baking, cooking, canning and freezing. Clingstone peaches are a bit sweeter, smaller, and juicier than freestone varieties. They are excellent options for canning and preserving. Most commercially canned peaches are clingstone varieties.

Thousands of varieties of peaches have been developed over the years. Yellow-fleshed varieties are the most popular in North America.  Europeans enjoy both white and yellow fleshed peaches. Globally, China, Italy, Spain, and the United States are major producers of peaches.

Nutrition and Health Benefits
Peaches have noteworthy nutritional value and health benefits. One medium peach contains Vitamin C, Vitamin A, fiber, potassium, niacin, Vitamin E, Vitamin K, copper and manganese. They also have smaller amounts of magnesium, phosphorus, iron, and B-vitamins. One medium peach has about 58 calories, so they would make a healthy, low-calorie snack or addition to any meal or dessert.

Peaches also contain a number of antioxidants, compounds that are known to neutralize harmful molecules in the body, protecting us from aging and assorted diseases. It’s noteworthy that the fresher and riper a peach is, the more antioxidants it contains.

Digestive Help. The fiber in peaches is half soluble and half insoluble. This is especially helpful since each type of fiber serves its own purpose and they are not interchangeable. Soluble fiber feeds our gut bacteria, keeping colonies strong and active. Soluble fiber also binds with bile in the digestive tract, removing it in the feces. This forces the liver to make more bile from existing cholesterol, which in turn, helps to keep our blood cholesterol levels in check. Insoluble fiber is important for helping to propel the contents of the digestive tract forward, preventing constipation. This also helps to ward off disorders like Crohn’s disease, irritable bowel syndrome, and ulcerative colitis. It is important to note that much of the fiber in peaches is found in the skin, so to get the most benefit from your peaches, don’t peel them, if possible.

Heart Health. As mentioned under “Digestive Help,” the soluble fiber in peaches helps to keep cholesterol levels down. This in itself helps to ward off heart and cardiovascular diseases. Also, potassium, which is found in peaches, is an electrolyte known for helping to manage the balance of fluids in the body. It also promotes lower blood pressure, by helping blood vessels to relax and expand appropriately, allowing for better blood flow and transport of nutrients and oxygen throughout the body.

Skin Health. The high level of Vitamin A and antioxidants found in peaches helps to promote healthy skin. First, peaches are high in Vitamin C. This crucial vitamin is important in the development and maintenance of collagen in the body. Collagen is vital in providing a support system for the skin, promoting wound healing, and strengthening the skin. It can also improve the appearance of skin by reducing wrinkling, improving elasticity, smoothing roughness, and improving skin color.

Vitamin A, Vitamin E, and the other antioxidants (along with Vitamin C) found in peaches work together as anti-inflammatory agents, helping to protect the skin from sun damage, improving the skin tone, calming inflammation by squelching harmful free-radical molecules, and helping to protect against premature aging. Also, since peaches are largely water, they help to hydrate the skin, giving it a healthy glow and minimizing wrinkles.

Cancer Protection. The skin and flesh of peaches are rich in carotenoids, caffeic acid, and polyphenols. These types of antioxidants have been found to have anticancer properties, limiting the growth and spread of cancer cells and also helping to prevent non-cancerous tumors from becoming malignant. Animal and human studies confirm that peaches may be helpful in preventing breast cancer.

Allergy Symptoms. Peaches may help to reduce allergy symptoms. Studies have shown that peaches may help to reduce or prevent the release of histamines in the blood after exposure to allergens, thereby reducing allergy symptoms. More research is needed in this area, but the findings look promising.

Immunity. The antioxidants found in peaches may help to boost immunity by fighting certain types of bacteria.

Diabetes. Animal studies found that compounds in peaches may help to prevent high blood sugar levels and insulin resistance. More studies with humans are needed in this area, but it appears that peaches, along with other foods high in antioxidants, may be helpful in preventing and treating diabetes and insulin resistance.

Eye Health. The powerful antioxidants, lutein and zeaxanthin found in peaches, helps to protect the retina and lens of the eyes. Along with that, the compounds have been shown to reduce the risk of macular degeneration and cataracts, two common eye disorders that hinder the vision of many people. The Vitamin A found in peaches also is important for supporting eye health. A serious Vitamin A deficiency causes xerophthalmia, which can result in eye damage causing problems from night blindness to complete and irreversible total blindness. In fact, severe Vitamin A deficiency is the leading cause of blindness among children in underdeveloped nations around the world.

Cognitive Health. Antioxidants, like those found in peaches, are known to fight harmful molecules in the body. When affecting the brain, harmful free-radical molecules can cause neurodegenerative diseases like dementia and Alzheimer’s disease.

Ingesting ample antioxidants from foods in their natural form is the best way to obtain these helpful compounds. Including peaches and other fresh fruits and vegetables in your daily diet is a simple way to help ensure you lower your risk for serious conditions as detailed above.

How to Select Fresh Peaches
When choosing fresh peaches, bear in mind your personal preference or intended use. The white-fleshed peaches are sweeter and less acidic than the yellow-fleshed peaches, which are more of a sweet-tart flavor.

When buying fresh peaches, look for those that are hard or only slightly soft, with no bruises or wrinkles. Don’t be shy…smell the peach before you place it in your cart. Those that smell sweeter will be riper, sweeter in flavor, and ready to eat sooner than those with little to no aroma. Also, you can tell if a peach is ripe and ready to eat by gently pressing down on its flesh and feeling it slightly give…like you would test an avocado for ripeness.

Avoid peaches that are brownish, damaged, mushy or wrinkled, because they are old, overripe, and will not last long.

How to Store Fresh Peaches
If your fresh peaches are not fully ripe, they can be placed on the kitchen counter in a single layer, away from sunlight and heat. They should ripen within one to three days.

Ripe peaches will last up to one week when kept at room temperature. If you won’t be able to use them within that time, place them in the refrigerator to slow down the ripening process. They may be kept in an open area of the refrigerator, or in a crisper drawer to help protect them from damage. If they are placed in the crisper drawer, leave the air vent open, on the low humidity setting.

Quick Ideas and Tips for Using Peaches
* Try grilling or roasting peaches, then add them to a salad.

* Try grilled or roasted peaches with a scoop of vanilla ice cream or mascarpone cheese.

* Serve chicken with a peach sauce.

* Make a peach salsa to serve on tacos or pork tenderloin.

* On a hot day, try adding some sliced peaches to your favorite iced tea. For the most flavor, smash the peaches in the bottom of the glass before adding the ice cubes and tea.

* Blend some peaches with coconut milk for a “peaches and cream” smoothie or dessert. Add some dates or sweetener of choice, if desired. Add banana for more richness, if desired. Spice it up if you want with a little cinnamon and nutmeg.

* Blend peaches with yogurt or coconut cream and freeze it in popsicle molds. Sweeten it with dates or sweetener of choice, if desired. Add a touch of lemon juice for a little tartness and color retention, if desired.

* Add diced peaches to your morning oatmeal.

* Blend peaches with raspberries to make a sauce, then serve it over ice cream or coconut milk sorbet. Top with chopped almonds and enjoy!

* Try a salad with a bed of mixed greens mixed with cherry tomatoes and peach slices. Top with some fresh basil leaves and drizzle with a balsamic-honey dressing.

* The lighter, white flesh peaches taste sweeter and are less acidic than the traditional yellow flesh peaches. The yellow flesh peaches are sweet, but more acidic which makes them a little tangier.

* Peaches come in two basic varieties regarding their pits or stones. They can be freestone, where the flesh separates easily from the stone. Or they can be clingstone, where the flesh adheres to the stone and is not easily removed. The freestone peaches are easier to work with since the stone comes out easily. They also tend to be larger and less juicy than their counterparts, the clingstones. Clingstone peaches tend to be slightly softer, sweeter, and juicier than freestone peaches.

* Botanically speaking, nectarines are actually a variety of peach. They are so closely related that sometimes nectarines naturally appear on peach trees.

* 1 pound of fresh peaches = 4 medium peaches = about 2-1/2 cups chopped or sliced = about 1-1/2 cups pureed.

* If you need fresh peaches for a recipe and don’t have enough, even though the flavors may be a bit different, the following fruit may be used as a substitute: nectarines, apricots, plums, mangoes, papaya, cherries, and pluots or apriums (crosses between plums and apricots).

* If you need dried peaches for a recipe and don’t have enough, even though the flavors may be a bit different, the following may be used as a substitute: dried apricots, dried nectarines, and dried cherries.

* Top rice pudding (or any other pudding) with diced fresh peaches.

* Try a peach parfait by layering diced fresh peaches, yogurt, banana, pistachios, and granola.

* If you buy conventionally grown peaches and are concerned with pesticide or other chemical residues on your fruit, most of it can be easily removed by a simple (scienced-based!) 15-minute soak in a baking soda solution. Combine a ratio of 1 teaspoon of baking soda in 2 cups of water. Make up enough solution to be able to submerge your peaches. Weigh the peaches down with a plate to keep them under the water and allow them to soak for 15 minutes. Then simply rinse them with clean water and pat them dry. Store them and use them as usual. To see a demonstration on this technique, watch this video … https://youtu.be/AsUAD6EWyzw

Herbs and Spices That Go Well with Peaches
Allspice, basil, cardamom, cilantro, cinnamon, cloves, coriander, lemongrass, lemon verbena, mint, nutmeg, pepper, rosemary, saffron, salt, tarragon, vanilla

Foods That Go Well with Peaches
Proteins, Legumes, Nuts, Seeds: Almonds, bacon, beef, cashews, ham, hazelnuts, macadamia nuts, nuts (in general), pecans, pistachios, pork, poultry, prosciutto, pumpkin seeds, salmon (and other seafoods), walnuts

Vegetables: Arugula, chiles, endive, fennel, ginger, greens (salad), onions (red), radishes, scallions, tomatoes, watercress

Fruits: Apples (fresh, juice), apricots, avocado, bananas, berries (in general), blackberries, blueberries, cherries, coconut, currants, grapes, lemon, lime, mangoes, nectarines, orange (fresh, juice, liqueur, zest), papaya, passion fruit, pineapple, plums, pomegranates, raspberries, strawberries

Grains and Grain Products: Grains (in general), oatmeal, oats, quinoa, wheat berries

Dairy and Non-Dairy: Butter, buttermilk, cheese (esp. blue, burrata, cream, goat, mozzarella, ricotta), cream, crème fraiche, mascarpone, sour cream, yogurt

Other Foods: Caramel, chocolate, honey, lavender, maple syrup, molasses, oil (olive), rum, sherry, spirits (i.e., bourbon, brandy, cognac, Cointreau, Kirsch), sugar, vinegar (i.e., apple cider, balsamic, champagne, rice, wine), whiskey, wine (i.e., red or white, fruity, sparkling, and/or sweet)

Peaches have been used in the following cuisines and dishes…
Baked goods (i.e., pies, scones), chutneys, compotes, desserts (i.e., cobblers, crisps, crumbles, Melba, pies), ice cream, salads (i.e., fruit, grain, green), salsas, smoothies, sorbets, soups (i.e., cold and/or fruit), Southern (U.S.) cuisine

Suggested Food and Flavor Combos Using Peaches
Add peaches to any of the following combinations…

Almonds + Cinnamon + Yogurt
Almonds + Lemon + Olive Oil + Saffron
Balsamic Vinegar + Lettuce + Spinach + Maple syrup + Olive Oil
Balsamic Vinegar + Mint + Ricotta
Basil + Mozzarella Cheese
Berries + Lemon
Blueberries + Lemon + Maple Syrup
Blue Cheese + Hazelnuts
Cashew Cream + Balsamic Vinegar
Cherries + Balsamic Vinegar
Cilantro + Ginger + Lime
Cinnamon + Honey + Lemon + Yogurt
Fennel + Lemon
Ginger + Honey + Lemon + Lemongrass
Ginger + Lemon
Honey + Nuts + Oats/Oatmeal
Mangoes + Raspberries
Maple Syrup + Nuts + Orange Juice + Ricotta
Maple Syrup + Orange + Vanilla
Mascarpone + Strawberries + Vanilla
Pistachios + Vanilla

Recipe Links
34 Peach Recipes to Make This Summer https://www.foodandwine.com/fruits/peach/peaches

13 Most Delicious Ways to Eat Peaches https://www.self.com/gallery/peach-recipes

Baked Peaches https://www.wellplated.com/baked-peaches/#wprm-recipe-container-39548

Peaches and Berries with Lemon-Mint Syrup https://www.onceuponachef.com/recipes/peaches-berries-with-lemon-mint-syrup.html

39 Perfect Peach Desserts https://www.epicurious.com/recipes-menus/fresh-peach-desserts-gallery

Peach Pie Smoothie https://www.foodnetwork.com/recipes/ellie-krieger/peach-pie-smoothie-recipe-1940422

Savory Peach Chicken https://www.foodnetwork.com/recipes/ellie-krieger/savory-peach-chicken-recipe-1951238

Grilled Chicken Breasts with Spicy Peach Glaze https://www.foodnetwork.com/recipes/bobby-flay/grilled-chicken-breasts-with-spicy-peach-glaze-recipe-1922684

15 Savory Peach Recipes https://www.delish.com/cooking/g1292/savory-peach-recipes/?slide=16

Fresh Peaches with Blueberries and Yogurt http://www.whfoods.com/genpage.php?tname=recipe&dbid=146

43 Peach Recipes That Make the Most of Summer’s Juiciest Fruit https://www.epicurious.com/ingredients/peach-recipes-gallery

55 Juicy Peach Recipes for (an Endless) Summer https://www.countryliving.com/food-drinks/g1499/peach-recipes/

70+ Fresh Peach Recipes to Savor This Summer https://www.southernliving.com/food/holidays-occasions/summer-peach-recipes

60 Ways to Use a Farmers’ Market Haul of Fresh Peaches https://www.cookinglight.com/food/in-season/peach-recipes


Resources
https://producemadesimple.ca/what-goes-well-with-peaches/

https://www.hgofarms.com/peach-pairings-to-try/

https://www.thespruceeats.com/varieties-of-peaches-4057064

https://thebakersalmanac.com/fruit-flavor-pairing-chart/

https://www.healthline.com/nutrition/peach-fruit-benefits#TOC_TITLE_HDR_5

https://www.medicalnewstoday.com/articles/274620#benefits

https://www.verywellhealth.com/antioxidants-for-skin-health-4587778

https://www.health.com/nutrition/health-benefits-peaches

https://www.britannica.com/plant/peach

https://www.thekitchn.com/whats-the-difference-between-freestone-and-clingstone-peaches-246304

Joachim, David. (2010) The Food Substitutions Bible. 2nd Edition. Toronto, Ontario, Canada: Robert Rose, Inc.

Page, Karen. (2014) The Vegetarian Flavor Bible. New York, NY: Little, Brown and Company.


About Judi

Julia W. Klee (Judi) began her journey enjoying “all things food” in elementary school when she started preparing meals for her family. That love of food blossomed into a quest to learn more and more about health and wellness as related to nutrition. She went on to earn a BS Degree in Food and Nutrition, then an MS Degree in Nutrition. She has taught nutrition and related courses at the college level to pre-nursing and exercise science students. Her hunger to learn didn’t stop upon graduation from college. She continues to research on a regular basis about nutrition as it relates to health. Her hope is to help as many people as possible to enjoy foods that promote health and wellness.

Cauliflower

Cauliflower 101 – The Basics (UPDATE)

This is an updated and expanded edition of my original post for “Cauliflower 101 – The Basics.” If you have questions about cauliflower, are looking for nutrition information, or tips on how to use cauliflower, along with some recipe ideas, this should help!

Enjoy!
Judi

Cauliflower 101 – The Basics (UPDATE)

About Cauliflower
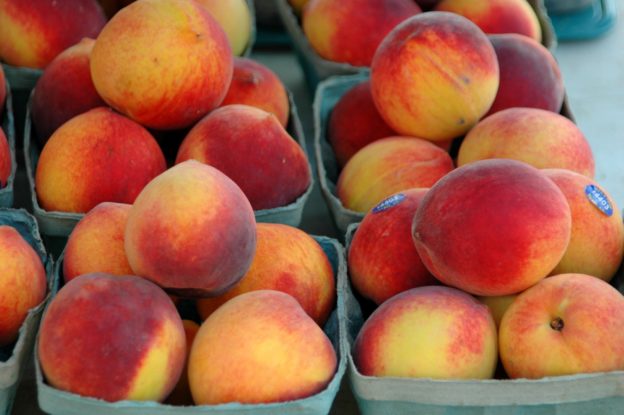
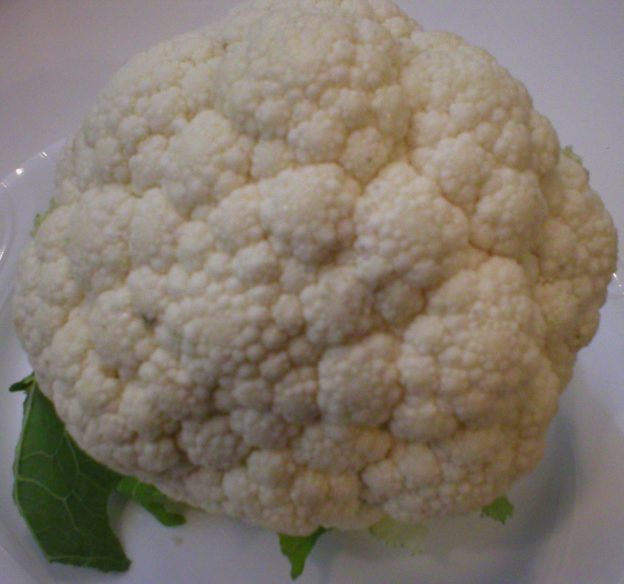
Cauliflower is a member of the cruciferous vegetable family, so it is related to cabbage, kale, Brussels sprouts, broccoli, and other such vegetables. There are many different types of cauliflower, including those with different colors in orange, green, and purple. In the United States, most cauliflower sold is white with a fairly large, compact head (or “curd”) with undeveloped flower buds that resemble broccoli florets.

The history of cauliflower dates back about 2,000 years. It appears to have originated in the area of modern-day Turkey. Many cultures prefer a loose curd variety of cauliflower (similar to broccoli rabe) over the tight compact head variety often seen in American grocery stores. Cauliflower is more popular in other parts of the world than in America, although popularity is increasing with the new ways of preparing it with the “low carb” trend. China and India produce about 74% of the world’s cauliflower.

Nutrition and Health Benefits
Cauliflower is an excellent source of Vitamin C, Vitamin K, folate, pantothenic acid, and Vitamin B6. It also supplies a lot of choline, fiber, Omega-3 fats, manganese, phosphorus, biotin, Vitamin B1, Vitamin B2, Vitamin B3, potassium, and magnesium. It is a very low-calorie food, with one cup of raw cauliflower having only 25 calories.

Like other members of the cruciferous family, cauliflower is high in antioxidants (specifically glucosinolates) that are known for fighting inflammation and reducing our risk for serious diseases. Also, cauliflower, like its cousin broccoli, contains choline, a compound that protects our nervous system and helps to ward off serious neurodegenerative conditions such as dementia and Alzheimer’s disease.

When eaten at least once a week, cauliflower has been associated with a lower risk of colorectal cancer. Cauliflower has also been shown to lower the risk of prostate cancer. Cauliflower has been included in assorted research projects studying the effects of cruciferous vegetables on the risk of cardiovascular diseases. These studies have repeatedly shown a decreased risk for such diseases. Because cauliflower has been shown to bind to bile acids in the digestive tract, eating cauliflower has been repeatedly associated with improvement in blood cholesterol levels. Furthermore, in a study focusing on the intake of broccoli, cabbage, cauliflower, and Brussels sprouts in middle-aged women, the rate of obesity was reduced when subjects increased their servings over time to about three servings per day.

Raw vs Cooked Cauliflower. Both raw and lightly cooked cauliflower have strong nutrient profiles, both in their vitamin and mineral content, as well as their phytonutrients, like sulfur-containing compounds and flavonoids. Despite the fact that cooking does cause some loss of water-soluble nutrients, it also increases the availability of other phytonutrients (specifically carotenoids like lutein and zeaxanthin) that are hard to utilize in the raw vegetable. However, when raw cauliflower is chewed very well, plant cell walls are broken, making these carotenoids more bioavailable. This same effect appears to hold true for cauliflower’s sulfur-containing compounds (such as the glucosinolate sinigrin).

The “take-away” information here is to enjoy your cauliflower lightly cooked or raw. But if you eat it raw, be sure to chew it very well to get the most nutritional benefit from the vegetable.

How to Select Fresh Cauliflower
Select fresh cauliflower with a clean, firm, compact head that is creamy white in color. It should feel heavy for its size. Avoid those that are soft, lightweight, have brown areas or dark spots on the curds. If leaves are attached, they should appear fresh and not wilted. Cauliflower heads with a lot of thick, green leaves still attached will be better protected from damage and will be fresher. The size of cauliflower heads does not indicate quality.

How to Store Fresh Cauliflower
Store uncooked cauliflower in the original plastic packaging or in a paper bag in the refrigerator. Place it stem side down to protect the florets from damage and excessive moisture that may accumulate in the bag. Use it within one week from purchase.

How to Prepare Cauliflower
The simplest way to wash cauliflower is to cut or break it into desired size pieces, then wash it. First, remove the leaves then remove the florets by cutting the central stem out where it meets the floret stalks. The florets can easily be removed and cut down or broken into smaller pieces, if desired.

If you are making cauliflower “steaks” then simply cut through the entire head into the desired width of slices needed for your recipe. The leaves and any undesired stem pieces can easily be removed after slicing.

Submerge the pieces into a bowl of water to rinse away any dirt or tiny insects that may be in there. It would be unusual to find insects in grocery store-purchased cauliflower. However, if the cauliflower was picked from your garden or bought at a farmer’s market, insects may be among the florets. In this case, soak your prepared pieces for 15 minutes in a bowl of salt water or a bowl of water with either lemon juice or vinegar mixed in. This will kill any insects that are lurking inside and also helps to remove any trapped dirt. After soaking, rinse the cauliflower well in fresh water, then proceed with your recipe.

Most people just eat the cauliflower florets. However, the stems and leaves are also edible, so include them if you want to enjoy the full benefit of the vegetable. Some people reserve the leaves and stems for soups or vegetable stock.

If you are opting to cook the cauliflower whole, then submerge the entire head for 15 minutes in a bowl of water, or one with salt or vinegar added, depending on where it was purchased. Rinse it well under running water afterward.

How to Preserve Cauliflower
Fresh cauliflower may be frozen, fermented, pickled, and even dehydrated.

Freezing Cauliflower. First, trim off any leaves and cut the head of cauliflower into pieces about 1 inch across. Wash the pieces well. If there is the possibility that insects are lurking inside, soak the pieces for 30 minutes in a solution of 4 teaspoons of salt per gallon of water. Rinse well and drain. Bring a large pot of water to boil, then place the prepared cauliflower pieces in the boiling water. Immediately set the timer for 3 minutes. When the timer finishes, transfer the cauliflower pieces to a bowl of ice water and allow them to cool in the water for 3 minutes. Drain well. Place the cauliflower pieces in freezer containers or bags, and label with the current date. Use them within 10 to 12 months for best quality and flavor.

Dehydrating Cauliflower. Cauliflower may be dehydrated, although there is mixed information among resources as to whether cauliflower should be dehydrated because of the quality of the outcome. The reason for this is that once dehydrated, it may turn orangey-brown in color. Despite this, it should lighten up once rehydrated, although it may never return to its original creamy white color.

To dehydrate cauliflower, wash and cut it as detailed above into 1-inch florets. The pieces must also be blanched for 3 minutes, using the same procedure as above. After the cauliflower pieces have been cooled in ice water and drained, spread them in a single layer on a mesh dehydrator tray. Follow your dehydrator manufacturer’s directions for approximate length of time and temperature for drying the cauliflower. When completely dried, the florets should feel dry and crisp, and have no sign of moisture inside when broken apart. Store the dried cauliflower pieces in an airtight container, preferably a glass mason jar with a traditional lid. It is helpful to place an oxygen absorber in the jar, and remove as much air from the jar as possible. Store it in a cool, dry place away from sunlight.

Fermenting Cauliflower. Cauliflower can easily be fermented and is something anyone can do. Remove the leaves from the head of cauliflower, wash them and reserve them to be used in the final steps of preparing the cauliflower for fermentation.

Wash and chop the cauliflower into small pieces. Place the chopped vegetables in a clean mason jar with a non-metallic lid. One-quart or ½-gallon jars work well. A standard jar lid and rim may be used, but they will be prone to rusting from exposure to the salt brine. Plastic mason jar lids will not erode. Fill the jar with cauliflower pieces to the shoulder of the jar, where it curves inward toward the mouth of the jar. If you do not have enough cauliflower pieces to fill the jar, either use a smaller jar or add another vegetable, such as diced carrots on top of the cauliflower to fill the jar. (It is important to fill the jar with vegetables or the fermentation process may not work well.)

Next, mix your brine solution. Different salt to water ratios are suggested by different sources. I prefer one measured teaspoon of canning/pickling salt to one cup of filtered or distilled water. Do not use iodized salt, nor regular tap water. (The chlorine in the water, and the iodine in the salt will hinder the fermentation process.) Dissolve the salt in the water in a measuring cup. I prefer to add a starter culture to the first cup of water added to the jar. This can be any commercially available starter culture you prefer. I have found that a mere ¼ teaspoon of starter culture is enough to ferment a one-quart size jar of vegetables. Instead of commercial starter culture, you may use about ¼ to ½ cup of established brine from prior fermented vegetables, if desired. Then fill the jar with the salt/culture water solution. Prepare additional salt water solution as needed to fill the jar. Culture only needs to be added once, not with each cup of water used.

Place reserved cauliflower leaves inside the jar on top of the vegetable pieces so that they will hold the vegetables below the water line. This step is important to prevent mold or yeast from forming on the exposed vegetables that may float. Be sure everything is below the water line, so add enough brine solution to cover all the vegetables, including the leaves on top.

Cover the jar and label it with the date you started. Place the jar in a cloth-lined bowl or tray to catch any spills that may happen as fermentation progresses. Put the fermentation jar in a cool place away from sunlight. Do not place it in the refrigerator at this point, or your fermentation will not take place properly. Monitor the brine level from time to time to be sure it remains above the vegetables. If it drops down at any point, add more brine solution (without additional culture). Taste the vegetables periodically and consider them finished when you like the flavor. Personally, I allow my vegetables to ferment for 10 days.

When the vegetables are fermented and taste like you prefer, place the jar in your refrigerator. They will wait there for months, until you are ready to enjoy them.

To see my video demonstration on how to ferment cauliflower, click here… https://youtu.be/RBVZpLoGGIg

Pickled Cauliflower. Fresh cauliflower may also be pickled and used in salads or to flavor or accompany many foods. See the Recipe Links section below for detailed instructions on pickling cauliflower. Two specific links on this topic are provided.

Quick Ideas and Tips for Using Cauliflower
* Top hot cooked cauliflower with a little melted butter, then season with your choice of chives, dill, nutmeg, minced parsley, or lemon juice.

* Add raw cauliflower to an appetizer tray with dip or hummus.

* Add cauliflower, raw or cooked, to your favorite green salad.

* Add chopped cooked cauliflower to a quiche or scrambled eggs.

* Roast cauliflower and broccoli together, flavored with olive oil and garam masala.

* When preparing fresh cauliflower, remember that the stems and leaves are edible. If you don’t want to include them in your dish, save them for soups, stews, or making stock.

* To cut a fresh cauliflower, first remove any leaves that are attached to the head. Then cut at the base of the floret stems to separate the large pieces. The florets may be cut smaller from there, if needed. The inner core may be cut into small pieces and cooked or eaten as desired.

* For best results when cooking cauliflower, cook it for the least amount of time and with the least amount of liquid possible. The longer it cooks, the more nutrients and flavor will be lost, and the more sulfur odor will be released.

* Cauliflower can be exchanged with broccoli in most recipes. So, if you have some favorite broccoli recipes and want to eat more cauliflower, try those same recipes with cauliflower instead of broccoli.

* When you’re blanching or cooking cauliflower in water, keep it creamy white by adding either 1 or 2 tablespoons of lemon juice, or 1 tablespoon of vinegar, or 1 cup of milk. The milk will also give the vegetable a sweeter flavor.

* One medium head of cauliflower will yield about 3 cups of chopped cauliflower, or 4 cups of florets.

* Do not cook cauliflower in an aluminum or cast-iron pot. The chemicals in cauliflower will react with the metals and cause the cauliflower to become discolored.

Herbs and Spices That Go Well with Cauliflower
Basil, bay leaf, capers, caraway seeds, cardamom, cayenne, chervil, chili pepper flakes, chili powder, cilantro, cinnamon, coriander, cumin, curry powder, curry spices, dill, fenugreek, garam masala, horseradish, marjoram, mint, mustard seeds/powder, nutmeg, oregano, paprika, parsley, pepper, rosemary, saffron, sage, salt, savory, tarragon, thyme, turmeric

Foods That Go Well with Cauliflower
Proteins, Legumes, Nuts, Seeds: Almonds, bacon, beans (esp., black, fermented black, green, white), beef, black-eyed peas, cashews, chicken, chickpeas, eggs, hazelnuts, lentils, nuts (in general), peas, pine nuts, pistachios, poppy seeds, pork, pumpkin seeds, seafood, sesame seeds, tahini, tofu

Vegetables:  Asparagus, bell pepper, bok choy, broccoli, Brussels sprouts, carrots, celery, chiles, chives, cress (land), garlic, ginger, greens (in general), kale, leeks, mushrooms, onions, potatoes, scallions, shallots, spinach, squash, sweet potatoes, tomatoes (fresh, sauce, sun-dried), watercress

Fruits: Apples, citrus fruits (in general), coconut, lemons, limes, mango, olives, orange, pumpkin, raisins, tamarind

Grains and Grain Products: Barley, bread crumbs, bulgur, corn, couscous, kasha, millet, noodles (i.e., Asian rice noodles), pasta, polenta, rice, spelt

Dairy and Non-Dairy: Butter and browned butter, buttermilk, cheese (in general, esp. blue, cheddar, feta, Gruyere, Parmesan), coconut milk, cream, ghee, milk (dairy and non-dairy), sour cream, yogurt

Other Foods: Chili pepper sauce, honey, mayonnaise, mustard (prepared, Dijon), nutritional yeast, oil (esp. mustard, olive, sesame, walnut), pesto, soy sauce, sriracha sauce, stock, vinegar (esp. balsamic, rice, white wine), wine (esp. dry white)

Cauliflower had been used in the following cuisines and dishes…
Aloo Gobi, chili, chowders, crudités, gratins, Italian cuisine, mashed cauliflower (like mashed potatoes), Mediterranean cuisines, Middle Eastern cuisines, pasta dishes (i.e., lasagna), pesto, polenta, purees, risottos, salads (i.e., cauliflower, green, pasta), soufflés, soups (i.e., cauliflower, curry, vegetable), cauliflower steaks, stir-fries, cauliflower tabbouleh, tacos

Suggested Food and Flavor Combos Using Cauliflower
Add cauliflower to any of the following combinations…

Almonds + Barley
Almonds + Browned Butter + Lemon
Balsamic Vinegar + Garlic + Olive Oil + Raisins
Bread Crumbs + Capers + Lemon + Parsley
Brussels Sprouts + Capers + Lemon
Brussels Sprouts + Garlic + Olive Oil + Rosemary
Capers + Green Olives + Lemon + Olive Oil
Cashews + Cilantro + Coconut + Nut Milk + Onions + Turmeric
Cheddar Cheese + Mustard
Cheddar Cheese + Parmesan Cheese + Parsley + Pasta
Chickpeas + Eggplant + Raisins
Chiles + Lime Juice
Chili Pepper Flakes + Parsley + Pasta
Coconut + Curry
Garlic + Tomatoes
Ginger + Orange
Lemon + Parsley
Lemon Zest + Mustard + Shallots
Mint + Parmesan Cheese + Pine Nuts
Sage + Walnuts
Scallions + Sesame Oil + Soy Sauce

Recipe Links
Pickled Cauliflower https://www.freshpreserving.com/blog?cid=pickled-cauliflower

Pickled Cauliflower with Carrots and Red Bell Peppers https://www.finecooking.com/recipe/pickled-cauliflower-with-carrots-red-bell-pepper

Judi’s Fermented Cauliflower [YouTube Video] https://youtu.be/RBVZpLoGGIg

Asian Sautéed Cauliflower http://www.whfoods.com/genpage.php?tname=recipe&dbid=182

Cauliflower, Fennel and White Bean Winter Salad https://www.thekitchn.com/recipe-cauliflower-fennel-and-74484

Five Ways to Eat Cauliflower https://www.thekitchn.com/five-ways-to-eat-cauliflower-99565

Recipe Roundup: Roasted Cauliflower (links to many recipes for roasted cauliflower) https://www.thekitchn.com/recipe-roundup-roasted-caulifl-74401

25 Ways to Cook with Cauliflower https://www.tasteofhome.com/collection/ways-to-cook-with-cauliflower/

Everything Bagel Style Cauliflower Rolls https://thefeedfeed.com/lexiscleankitchen/everything-bagel-style-cauliflower-rolls

Everything Bagel Cauliflower Steaks https://itdoesnttastelikechicken.com/everything-bagel-cauliflower-steaks/

Roasted Garlic Cauliflower https://www.allrecipes.com/recipe/54675/roasted-garlic-cauliflower/

Cauliflower Parmesan Crisps https://www.willcookforsmiles.com/cauliflower-parmesan-crisps/

Our 41 Best Cauliflower Recipes https://www.epicurious.com/ingredients/our-favorite-cauliflower-recipes-gallery

Crispy Sea Salt & Vinegar Cauliflower “Popcorn” https://www.blissfulbasil.com/crispy-sea-salt-vinegar-cauliflower-popcorn/#wprm-recipe-container-23883

30 Life-Changing Cauliflower Recipes for Every Comfort Food Craving https://blog.bulletproof.com/cauliflower-recipes-keto-paleo-2g3c/

13 Healthy Cauliflower Recipes https://health.facty.com/food/nutrition/13-healthy-cauliflower-recipes/?utm_source=adwords&utm_medium=c-search&utm_term=cauliflower%20recipes&utm_campaign=f-h-13-healthy-cauliflower-recipes&gclid=Cj0KCQiAk-7jBRD9ARIsAEy8mh50R8Si3aHqZtGX266QI_icxPG4IXNrHiUVaQkazB7dFEBZXomlkgIaAk2ZEALw_wcB

Cauliflower Aloo Gobi https://producemadesimple.ca/cauliflower-aloo-gobi/

How to Make Cauliflower Rice or Couscous https://www.thekitchn.com/how-to-make-cauliflower-rice-couscous-cooking-lessons-from-the-kitchn-203344

Asian Sautéed Cauliflower http://www.whfoods.com/genpage.php?tname=recipe&dbid=182


Resources
http://www.whfoods.com/genpage.php?tname=foodspice&dbid=13

http://www.berkeleywellness.com/healthy-eating/food/article/types-cauliflower

https://www.healthline.com/nutrition/benefits-of-cauliflower#section5

http://pickyourown.org/freezing_cauliflower.htm

https://www.freshpreserving.com/pickled-cauliflower-br2760.html

https://www.finecooking.com/recipe/pickled-cauliflower-with-carrots-red-bell-pepper

https://www.culturesforhealth.com/learn/recipe/lacto-fermentation-recipes/lacto-fermented-cauliflower-carrots-garlic/

http://www.sweetwater-organic.org/veggies/cauliflower/

https://articles.mercola.com/sites/articles/archive/2014/02/22/cauliflower-health-benefits.aspx

https://articles.mercola.com/sites/articles/archive/2014/02/22/cauliflower-health-benefits.aspx

https://producemadesimple.ca/goes-well-cauliflower/

https://www.recipetips.com/kitchen-tips/t–864/all-about-cauliflower.asp

Cooperative Extension Service, The University of Georgia. (1993) So Easy to Preserve. Bulletin 989. 3rd Edition. Athens, Georgia: Cooperative Extension Service, The University of Georgia.

Joachim, David. (2010) The Food Substitutions Bible. 2nd Edition. Toronto, Ontario, Canada: Robert Rose, Inc.

MacKenzie, Jennifer, Jay Nutt and Don Mercer. (2015) The Dehydrator Bible. Toronto, Ontario, Canada: Robert Rose, Inc.

Page, Karen. (2014) The Vegetarian Flavor Bible. New York, NY: Little, Brown and Company.


About Judi

Julia W. Klee (Judi) began her journey enjoying “all things food” in elementary school when she started preparing meals for her family. That love of food blossomed into a quest to learn more and more about health and wellness as related to nutrition. She went on to earn a BS Degree in Food and Nutrition, then an MS Degree in Nutrition. She has taught nutrition and related courses at the college level to pre-nursing and exercise science students. Her hunger to learn didn’t stop upon graduation from college. She continues to research on a regular basis about nutrition as it relates to health. Her hope is to help as many people as possible to enjoy foods that promote health and wellness.
Oregano

Oregano 101 – The Basics


Oregano 101 – The Basics

About Oregano
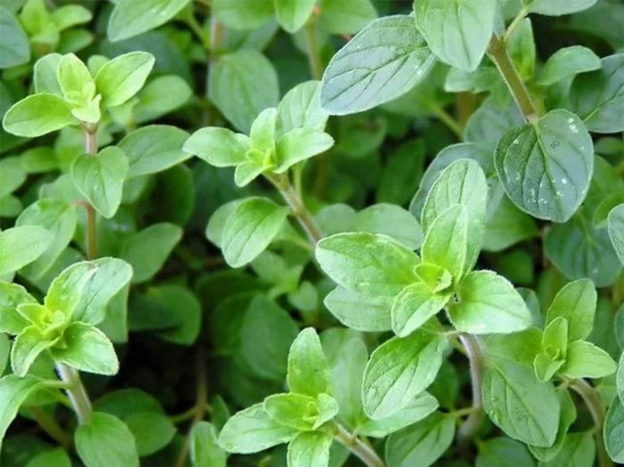
Oregano is a perennial herb that grows into a small shrub with multi-branched stems, with small, oval, grayish-green leaves. As the plant matures, it produces small white or pink flowers that are edible.

Oregano is an herb in the mint family. It is a close “cousin” to marjoram. Oregano is native to the Mediterranean region and western Asia. People have used it for thousands of years for both culinary and medicinal uses. Ancient Greeks and Romans associated oregano with joy and happiness, and used it at both weddings and funerals. The couple to be married was adorned with wreaths or garlands of oregano to ensure long years of love and happiness. Graves were planted with oregano to help the deceased find peace and tranquility in the next life.

Ancient Greeks discovered the plant had medicinal properties and used it to treat a variety of ailments. Oregano eventually was taken to China where it was prescribed to relieve fevers, vomiting, diarrhea, jaundice, and itchy skin. In the middle ages, people used oregano to treat rheumatism, toothache, indigestion, and cough. Later, oregano was consumed throughout Europe and Northern Africa where it was used to flavor meats, fish, and even wine. Oregano was hardly known in the United States before World War II. Soldiers discovered the herb during the Italian Campaign and brought the herb to the United States, with suggested ways to use it. Its popularity in America has grown ever since.

Oregano is very popular in Mediterranean cuisines, especially Greek and Italian foods. The leaves have a distinct aroma with a warm, slightly bitter flavor. The intensity of the flavor of oregano can vary among the different varieties. Also, growing conditions (season, climate, and soil) affect the flavor of oregano, so it can vary from a mild to intense, biting flavor.

Nutrition and Health Benefits
Even though we don’t eat a lot of oregano at any one time, the herb has an impressive list of compounds known to have disease prevention and health promoting properties.

Antibacterial and Antifungal Properties. Thymol, one of the noteworthy compounds in oregano is known to have antibacterial and antifungal properties. In a 2019 study, thymol and carvacrol, another important compound found in oregano essential oil, were found to prevent various strains of Staphylococcus aureus from developing in meat and dairy products, suggesting it could be used to deter bacterial growth in food. Researchers tested the antimicrobial effects of oregano oil against an array of microbes and found it to be effective against eleven different strains of bacteria.

Oregano is also an excellent source of Vitamin C, which is well-known for its antioxidant properties and help in warding off infections.

Antioxidants. Oregano is rich in antioxidant compounds, including Vitamin A, carotenes, lutein, zeaxanthin, and cryptoxanthin. It has been rated to be a plant among the highest with antioxidant benefits. These compounds protect us from dangerous free radical molecules that play a role in aging and various disease processes. Animal studies suggest that oregano extract may reduce inflammation associated with autoimmune arthritis, allergic asthma, and rheumatoid arthritis.

Promotes Healthy Digestion. Oregano stimulates the release of gastric juices, promoting healthy digestion and movement of intestinal contents.

Source of Important Minerals. Oregano is an excellent source of minerals like potassium, calcium, manganese, iron, and magnesium. Potassium, an important electrolyte in cellular and body fluids, is well-known for helping to control heart rate and blood pressure. Manganese functions as a co-factor in the antioxidant enzyme, superoxide dismutase. Iron is well-known for helping to prevent anemia, while magnesium and calcium are essential for healthy bones.

How to Select Oregano
Dried oregano is available in just about any grocery store you can name. Fresh oregano is found in the refrigerated produce section of many grocery stores. Many people prefer the flavor of fresh oregano over dried. Also, fresh oregano is richer in essential oils, and vitamins and minerals than its dried counterpart.

When shopping for fresh oregano, select those with a vibrant green color and a firm stem. There should be no mold, discoloration or yellowing.  They should not look wilted.

How to Store Oregano
Do not wash fresh oregano until you are ready to use it. The excess moisture could invite decay.

There are different ways fresh oregano can be stored…

(1) Store fresh oregano in the refrigerator in the original clamshell container it came in. Stored this way, it will keep for a few days.

(2) Store fresh oregano in the refrigerator, in a zip-lock bag. Like the plastic clamshell container, fresh herbs kept this way will have a tendency to dry out and should be used within three days.

(3) Store fresh oregano loosely wrapped, jelly roll style, in a slightly damp paper towel or cloth, placed loosely in a plastic bag, and kept in the refrigerator. When stored this way, it may keep for up to one week.

(4) Fresh oregano may also be kept like fresh cut flowers, standing up, cut side down, in a glass with a little water. Cover loosely with a plastic bag and store it in the refrigerator. Change the water every day or two. Try to use oregano kept this way within one week.

Store dried oregano in an airtight container in a cool, dry, place, away from a heat source and light. For best flavor, use it within six months.

How to Freeze Oregano
First, wash and dry your fresh oregano sprigs. Remove the leaves from the stems and place them loosely in a freezer bag. Remove as much air from the bag as you can. Try to place it somewhere in the freezer where the leaves won’t get crushed. Use within one year.

Fresh oregano may also be frozen in ice cubes. Wash and remove the leaves from stems. Place a measured amount of leaves in ice cube trays. Fill with water and freeze. Once frozen, transfer the cubes to a freezer bag or container. To use, simply add however many cubes you need to soups, sauces, stews, or marinades. Use your cubes within one year.

How to Dry Oregano
Like storing and freezing fresh oregano, there are different ways it can be dried.

(1) Wash and dry the fresh oregano on the stems. Tie the stems toward the cut side, and hang them upside down to dry in a cool, dry place, away from sunlight. The area should have plenty of ventilation. Once dried, the bundle can be placed in a bag or container and stored away from light and heat. Use within six months for best flavor. To save space, the leaves can easily be removed from the stems before being stored.

(2) Wash and dry the fresh oregano on the stems. Place the oregano, stems and all, in a clean paper bag that is large enough so the stems won’t be overly crowded. Close the paper bag by folding over the top. Lay the bag on its side in a cool, dry place. Two or three times a day, gently shake the bag to keep any branches from sticking together and turn the bag over. Check it periodically for dryness, starting after a week or so. When they are completely dry, remove the leaves from the stems and place them in an airtight container. Store it in a cool, dry place away from sunlight. Use within six months for best flavor.

(3) Fresh oregano may also be dried in a dehydrator. Wash and pat the stems and leaves dry. Place the stems on a mesh dehydrator sheet and follow the manufacturer’s directions for drying your herbs. The usual temperature for drying herbs is as low as possible, about 95°F. Allow them to dehydrate until they are crispy and completely dry. Remove the leaves from the stems and transfer them to an airtight container. As with the other methods, store it in a cool, dry place away from a heat source and light. Use within six months for best flavor.

Quick Ideas and Tips for Using Oregano
* Add dried oregano at the beginning of cooking to allow it to rehydrate and the flavor to be released. Add fresh oregano at the end of cooking so the flavor will remain in your food.

* Some varieties of oregano can be spicier than others. Italian oregano is sweeter and milder in flavor. Greek and Mexican oregano is hotter and spicier in flavor.

* If your pizza is lacking that “classic” pizza flavor, sprinkle it with a little dried oregano. Oregano is the herb that makes pizza taste like pizza.

* Try adding oregano to tomato-based pasta dishes, omelets, breads, roasted potatoes, kebabs, chicken, and lentils.

* Add a little sprinkle of dried oregano leaves to a green salad for a spicy flavor.

* If a recipe calls for fresh oregano and all you have is dried (or vice versa), here’s the conversion rate: 1 part of dried oregano = 3 parts of fresh. Example: 1 teaspoon of dried oregano = 1 tablespoon (3 teaspoons) of fresh oregano.

* If you’re making your own fresh dinner rolls, finely mince a few tablespoons of fresh oregano leaves, and knead it directly in the dough for fresh herb rolls.

* Try adding some fresh, chopped oregano leaves to a pot of beans during the last 15 minutes of cooking for an earthy oregano flavor.

* Make a robust, savory pesto using fresh oregano instead of basil leaves. Serve a little on a green salad, toss it with roasted vegetables, or brush it on your favorite bread.

* For a simple and satisfying salad, sprinkle oregano on sliced tomato and mozzarella cheese. Drizzle lightly with olive oil.

* If you elect to use oregano oil on your skin, be sure to dilute it with a carrier oil.

Herbs and Spices That Go Well with Oregano
Basil, capers, cayenne, cilantro, cumin, marjoram, pepper (black), salt

Foods That Go Well with Oregano
Proteins, Legumes, Nuts, Seeds: Beans (in general), beef, chicken, chickpeas, eggs, fish (and other seafood), lamb, pork, tahini, turkey, veal

Vegetables: Bell peppers, chiles, eggplant, endive, fennel, garlic, mushrooms, onions, potatoes, scallions, squash (summer and winter), tomatoes and tomato sauce, vegetables (roasted, stir-fried), zucchini

Fruits: Citrus (in general), lemons, olives, orange

Grains and Grain Products: Corn, grains (in general), pasta, rice

Dairy and Non-Dairy: Cheese (i.e., feta, soft, white)

Other Foods: Mustard (Dijon), oil (esp. olive)

Oregano has been used in the following cuisines and dishes…
Chili, Greek cuisine, Italian cuisine, kebabs, marinades, Mediterranean cuisines, Mexican cuisine, Middle Eastern cuisines, pasta dishes, pizza, salad dressings, salads (esp. Greek), sauces (esp. pasta, pizza, tomato), soups (esp. minestrone, spinach, tomato, yogurt), Southwest American cuisine, stews, stuffings

Suggested Food and Flavor Combos Using Oregano
Add oregano to any of the following combinations…

Cannellini beans + zucchini
Feta cheese + tomatoes [in salads]
Garlic + lemon [in salad dressings]
Lemon juice + olive oil [in marinades]

Recipe Links
Chimichurri Sauce https://www.allrecipes.com/recipe/68003/chimichurri-sauce/

Fast, Fresh Grape Tomato Salad https://www.allrecipes.com/recipe/223168/fast-fresh-grape-tomato-salad/

Cajun spice Mix https://www.allrecipes.com/recipe/149221/cajun-spice-mix/

Greek Lemon Chicken and Potatoes https://www.allrecipes.com/recipe/242352/greek-lemon-chicken-and-potatoes/

Daddy Eddie’s Roast Pork, Puerto Rican-Style https://www.allrecipes.com/recipe/254168/daddy-eddies-roast-pork-pernil-puerto-rican-style/

Homemade Pizza Sauce https://www.allrecipes.com/recipe/234536/how-to-make-homemade-pizza-sauce/

Herbs de Provence https://www.allrecipes.com/recipe/223272/herbs-de-provence/

Absolutely Fabulous Greek/House Salad https://www.allrecipes.com/recipe/36520/absolutely-fabulous-greekhouse-dressing/

Oregano Recipes https://www.foodandwine.com/seasonings/herbs/oregano/oregano-recipes?slide=91503ca7-1673-4fde-b3b1-1f75cdfa0db9#91503ca7-1673-4fde-b3b1-1f75cdfa0db9

Grilled Yellow Squash and Zucchini Pasta Salad https://www.sunset.com/recipe/grilled-yellow-squash-zucchini-pasta-salad

Orange, Radicchio, and Oregano Salad https://www.sunset.com/recipe/orange-radicchio-oregano-salad

Grilled Potato Salad https://www.sunset.com/recipe/grilled-potato-salad

Tagliatelle with Fresh Oregano Pesto https://www.tastymediterraneo.com/tagliatelle-with-fresh-oregano-pesto/


Resources
https://www.americanspice.com/blogs/fun-facts-on-oregano/

https://www.nutrition-and-you.com/oregano.html

https://www.thespruceeats.com/oregano-storage-1807785

https://www.gardeningknowhow.com/edible/herbs/hgen/freezing-herbs.htm

https://www.livingonadime.com/herb-guide/

https://www.spicesinc.com/p-510-what-spices-go-with-what-meat.aspx

https://www.spicesinc.com/p-510-what-spices-go-with-what-meat.aspx

https://www.thekitchn.com/5-ways-to-use-fresh-oregano-from-your-garden-ingredient-spotlight-191094

https://www.medicalnewstoday.com/articles/266259#benefits

https://davesgarden.com/guides/articles/herbal-history-oregano

http://www.indepthinfo.com/oregano/history.shtml

https://www.medicalnewstoday.com/articles/266259#risks

Page, Karen. (2014) The Vegetarian Flavor Bible. New York, NY: Little, Brown and Company.


About Judi

Julia W. Klee (Judi) began her journey enjoying “all things food” in elementary school when she started preparing meals for her family. That love of food blossomed into a quest to learn more and more about health and wellness as related to nutrition. She went on to earn a BS Degree in Food and Nutrition, then an MS Degree in Nutrition. She has taught nutrition and related courses at the college level to pre-nursing and exercise science students. Her hunger to learn didn’t stop upon graduation from college. She continues to research on a regular basis about nutrition as it relates to health. Her hope is to help as many people as possible to enjoy foods that promote health and wellness.
Baking Soda

The Many Uses of Baking Soda (What It Is and How To Use It)


What is baking soda?
Baking soda is sodium bicarbonate. It is an alkaline compound that will produce carbon dioxide gas when combined with an acid. It is found in nature in crystalline form, and is ground into a fine powder for culinary and household use.

How is it used in baking?
Baking soda is used as a leavening agent in baked goods that contain an acidic ingredient. When it comes in contact with an acid, such as vinegar, citrus juice, buttermilk, yogurt or cream of tartar, it forms carbon dioxide gas bubbles. The small bubbles get trapped in the food batter, causing it to inflate, or rise. The batter is then baked immediately.

Baking soda is often used in baked goods (such as quick breads, pancakes, muffins, cakes and fried foods) that contain acidic ingredients so it will create the leavening or rise in the finished product. Since the reaction with acid occurs quickly, the leavening time is much shorter than when yeast is used as a leavening agent. When baking soda is used as a leavening agent, the foods are cooked immediately. When the food is heated, the leavening is “fixed” in place so the expansion caused by the gas bubbles becomes set. If the food is not baked immediately, the gas bubbles may deflate and the product may not rise as expected.

Tip: When using baking soda in a baked product, be sure to add it to the dry ingredients before liquid ingredients are added. Stir or whisk the dry ingredients well to combine everything before liquid is added. Otherwise, if the baking soda is not disbursed well, the finished product may have large holes in it.

Is baking soda the same thing as baking powder?
Although baking powder does contain baking soda, the two are not the same thing. Baking powder is a mixture of baking soda, one or more acid salts (usually cream of tartar and sodium aluminum sulfate), and cornstarch (to absorb moisture so a reaction won’t take place until liquid is added to a batter). Baking powder usually causes two reactions at different times. This type of baking powder is often referred to as “double acting baking powder.” The first reaction takes place when liquid is added to the batter. The acid and baking soda in the baking powder react causing bubbles to form in the batter. The second reaction takes place when the batter is placed in the oven. The gas bubbles expand, causing the baked product to expand even further. The heat in the oven causes the expanded batter to “set” maintaining the lift or rise.

Since there are two reactions when baking powder is used, there can be a slight delay (15 to 20 minutes) before the product is baked, and leavening will still occur. Baking powder is typically used in recipes that do not contain acidic ingredients.

Shelf Life of Baking Soda vs Baking Powder
When stored in an airtight container in a cool, dry place, baking soda has an indefinite shelf life, although some producers recommend buying fresh baking soda every three years.

Baking powder should also be kept in an airtight container in a cool, dry place. It generally has a shelf life of six months to one year. Check the “Best by” date on the canister to determine its age. Discard baking powder when it is no longer active.

How to Test the Activity of Baking Powder
Place ½ teaspoon of baking powder in a bowl. Pour ¼ cup of boiling water over the baking powder. It should immediately bubble up violently. If it does, it’s still good. If it doesn’t bubble up, it is old and should be discarded. To see a demonstration of how this is done, view my video here…

How to Test the Activity of Baking Soda
Mix ¼ teaspoon of baking soda with 2 teaspoons of vinegar. The mixture should bubble up immediately. If it does not, the baking soda needs to be replaced. To see a demonstration of how this is done, view my video here…

Are baking soda and baking powder interchangeable in recipes?
No, the two are not interchangeable in recipes.

What happens if you use too much baking soda or baking powder in a recipe?
Too much baking soda added to a recipe may cause a soapy flavor and a coarse, open crumb (very large air bubbles/spaces in the finished product). Baking soda can cause cocoa powder to redden when baked. This is a normal reaction and the origin for the name “Devil’s Food Cake”.

Too much baking powder can cause the product to taste bitter. It can also cause the batter to rise too fast, then collapse, resulting in a flattened baked product. For instance, cakes made with too much baking powder will be sunken in the middle and have a coarse crumb (extra-large cells or air spaces).

What can I do with baking soda besides bake with it?
THIS is where the list gets long. Beside using baking soda as a leavening agent in baked goods, it has MANY other uses in the kitchen and around the house. The following is just a smattering of possibilities, since new uses for baking soda are being found all the time.

In the Kitchen
* Baking soda is well known for its ability to absorb odors. A small bowl or box of baking soda is often placed in refrigerators, freezers, or other enclosed areas to absorb odors. Replace it once a month for best results.

* Rubber gloves in the kitchen can get wet inside and smelly. To keep them fresh, sprinkle a little baking soda inside them. You’ll also find they are easier to slip on and off.

* Loosen baked on grease by sprinkling baking soda in the pan. Add some dish detergent and hot water. Allow the pan to soak for a while. The pan will be easier to clean. [NOTE: Do not use baking soda on aluminum cookware or bakeware. It will react with the aluminum and may discolor the pan.]

* Help to soften dry beans when you cook them and make them less gas-producing, add a little baking soda to the soaking water. This can be especially helpful if the beans are old…the older the are, the drier they get, and the longer it takes to cook them. Shorten the cooking time by adding baking soda to the soaking water. Add 1/4 teaspoon of baking soda per pound of beans in one gallon of water. Rinse them well after being soaked. A little baking soda may also be added to the cooking water. A mere ¼ teaspoon may be added to the cooking water to soften the beans and help them to cook faster. This is due to the alkalizing effect of the baking soda.

* Baking soda is mildly abrasive. This property makes it an effective agent for removing stains from coffee mugs, kitchen counters, microwaves, and kitchen tiles, along with grease stains. Make a paste with a little baking soda and a small amount of water. GENTLY rub it on the stained area with a sponge or cloth. When in doubt, do a test rub in an inconspicuous place. Rinse with plain water and buff the area dry. To see a video demonstration of how to remove stains from a coffee mug, watch this…

* Neutralize trash odors. If your kitchen trash can has an odor, sprinkle some baking soda in it to help neutralize the odors.

* Make fluffy omelets by adding ¼ teaspoon of baking soda to every three eggs used in the omelet. Don’t be tempted to add more baking soda, as it may make the eggs taste bland. Also, don’t oversalt your eggs since baking soda contains sodium.

* Baking soda has been found to remove chemical residues from the surface of conventionally-grown fruits and vegetables. Soak the food in a solution of 1 teaspoon of baking soda to 1 to 2 cups of water for 12 to 15 minutes. Rinse the food well, pat it dry, then store it and use it as usual. Note that this removes chemical residues from the surface. It will not remove chemicals that have soaked into the food. [This is a procedure I use on a regular basis and I can say from personal experience that it works. Here’s a video I have on this topic…

* Baking soda has been used to remove tarnish from silverware. Line a baking pan with aluminum foil. Add 1 tablespoon of baking soda to the foil-lined pan. SLOWLY pour in ½ cup of white vinegar. (Yes, there will be a reaction!) Pour in one cup of boiling water, then place your tarnished silver in the pan. The tarnish should begin to disappear almost immediately. Most of the silverware can be removed within 30 seconds. Heavily stained silverware may take up to one minute to be cleaned. Rinse your cleaned silverware in plain water and wash as usual. The tarnish will be left as a residue at the bottom of the baking pan. Discard it and the foil, then wash the pan.

* Another way to clean tarnished silverware is to gently rub a paste of three parts of baking soda to one part of water onto the silverware with a soft cloth or sponge. Rinse and dry.

* Make a paste of baking soda and water and rub it on plastic containers to remove stains.

* Try baking soda as a natural oven cleaner. [Note that this should be used only on conventional ovens, not self-cleaning ovens.]  Sprinkle baking soda on the bottom of the oven, while avoiding getting it on the heating element. Spray with a water bottle to dampen the baking soda. The sides can be cleaned by spreading on a paste made of 3 parts of baking soda with 1 part of water. Allow it to sit overnight. Scrub it off in the morning. Rinse thoroughly.

* Use baking soda and vinegar to remove burned on milk from a [NON-ALUMINUM] pot. This is a trick that I learned a long time ago and it has worked many times for me and my video viewers as well. Simply sprinkle a generous amount of baking soda on the burned milk in the pot. Add enough water to the pot to cover the burned area by about one inch. Add a generous portion of white vinegar to the pot. (Notice there are no specific measurements here…that’s deliberate!) The mixture will bubble vigorously. Turn the stove on high and bring the mixture to a boil. (Monitor it carefully because the baking soda and vinegar will quickly bubble up and raise within the pot. If it gets too high, lift the pot off the stove briefly and the bubbles will go back down.) Allow the mixture to boil for about 5 minutes. Turn off the heat and allow the pot to sit on the burner until the mixture cools completely. The pot is ready to be washed. The burned area should lift off easily with little scrubbing. Here’s a video where I demonstrated this technique …

* For an effective homemade cleaning solution for your refrigerator, simply mix 1 teaspoon of baking soda in a quart of warm water. Use the solution to wipe off the refrigerator, inside and out.

* To deodorize and clean your garbage disposal, pour 1 cup of baking soda down the drain while simultaneously running warm water. Then run your disposal for one minute, while running warm water, until all the baking soda is gone. This will help keep the grinding mechanism free of grease.

* To remove odors from plastic containers, first wash the container well. Then add 2 tablespoons of baking soda and fill the container with hot water. Place the lid on the container and shake well to dissolve the baking soda. Allow it to soak for 2 hours up to overnight (especially with strong odors). Wash the container well. This method can also work with juice pitchers, thermal bottles, lunch boxes, and any glass or plastic food container.

* To remove odors from your hands after preparing foods like garlic, onions or fish, wet your hands, sprinkle on some baking soda. Rub your hands together well, then rinse and dry.

* If the inside of your microwave is REALLY dirty with a lot of baked-on splattered food, baking soda can come to the rescue. Mix 2 tablespoons of baking soda with 1 cup of water in a microwave-safe bowl. Let this solution boil in the microwave on high for a few minutes, so that moisture collects on the inside walls of the microwave. Remove the bowl, then use paper towels to wipe down the inside of the microwave, including the door, and door seal. Then wipe it all down again with a damp sponge or cloth.

* To deodorize a wood cutting board, apply a paste of 3 parts of baking soda to 1 part of water. Leave the paste on for about 10 minutes. Rinse well, then dry.

* Remove black heel marks from kitchen linoleum or vinyl flooring with baking soda and a damp sponge or nylon scrubber. Rinse and dry the area.

* If you’re baking and a recipe calls for baking powder and you don’t have any, use ½ teaspoon of baking soda plus 1 teaspoon of cream of tartar in place of 2 teaspoons of baking powder. Since this is not a “double-acting” baking powder substitute, bake the item immediately after the liquid and dry ingredients are mixed together.

Personal Care
* Baking soda has been used to relieve heartburn or acid reflux. Dissolve a teaspoon of baking soda in a glass of water and drink the mixture slowly. Note that baking soda is high in sodium. If you need to restrict your sodium intake, this tactic may not be recommended for you. Check with your healthcare practitioner first. Also, do not drink this on a regular basis as it may cause metabolic alkalosis if ingested too often.

* Some people have used a baking soda solution as a mouthwash. Add ½ teaspoon of baking soda to a half glass of warm water. Swish around your mouth as usual. This will increase the pH of your mouth, which can inhibit the growth of bacteria. It also has been found to freshen the breath.

* Baking soda has been found to soothe canker sores inside the mouth. Rinse your mouth with baking soda mouthwash (as in the previous bullet point…1/2 teaspoon of baking soda in half a glass of warm water) once a day until the sore heals.

* Toothpaste with baking soda has been found to whiten teeth and remove dental plaque more effectively than toothpaste without baking soda. This is believed to be due to the mild abrasiveness and antimicrobial properties of baking soda.

* Some people use baking soda as an effective deodorant. Patting your armpits with a little baking soda can help to neutralize the acidic waste products of bacteria that cause the odor.

* A baking soda bath is often recommended to soothe itchy skin from insect bites and bee stings. Add 1 to 2 cups of baking soda to a tub of warm water. Soak in the tub for 10 to 40 minutes. Rinse with fresh water afterwards and drink plenty of water. If you don’t want to bother with a bath, just make a paste of baking soda and a little water. Apply the paste to the affected area and allow it to sit for a little while until the itching or stinging sensation stops. Rinse the paste off with cool water.

* For sunburn relief, add a few heaping tablespoons of baking soda to a bath tub along with a cup of oats. Fill the tub with cool water and soak for 15 to 20 minutes. Do not scrub the skin. Dab yourself dry with a towel afterwards.

* Sooth the irritation from vaginal yeast infections with a baking soda bath. A 2014 study found that baking soda killed Candida cells that led to yeast infections. Furthermore, baking soda has been found to have antifungal affects.

* Help sooth diaper rash by soaking the baby’s bottom in a baking soda bath for 10 minutes, three times a day. Use 2 tablespoons of baking soda in a tub of water. Pat the baby dry (do not rub the skin).

* Make a soothing foot bath by soaking feet for 10 minutes in a solution of 4 tablespoons (1/4 cup) of baking soda in 4 cups of warm water. This will relieve tired feet, soften calluses, and soothe athlete’s foot.

* To keep hair combs and brushes clean and free of oils, soak them overnight in a solution of 1 teaspoon of baking soda in one cup of water. In the morning, rinse them off and you’re ready to start your day!

* A baking soda bath can help relieve the itching and redness from eczema. Add ¼ cup baking soda to the bath water. Soak in the tub for 10 to 15 minutes. Pat the skin with a towel to remove excess water, and apply moisturizer to the skin afterwards, while the skin is still damp.

* Irritation from poison ivy and poison oak can be relieved with a baking soda bath. Dissolve ½ cup of baking soda in a tub of warm water. Soak up to 30 minutes.

* Urinary tract infections can be relieved with a baking soda bath. Add ¼ cup of baking soda to the bath water. Adults, soak up to 30 minutes. Young children should soak for 10 to 15 minutes. Do this twice a day.

* Baking soda can be used to remove odors from shoes. Put two tablespoons of baking soda in the center of a thin cloth. Gather the corners of the cloth and secure the edges with a rubber band or string. Place a sachet inside each smelly shoe. Remove the sachet when you’re ready to wear the shoe.

Safety of Baking Soda Baths. Generally, baking soda baths are considered to be safe and well-tolerated by most people. However, do not take a baking soda bath if you are pregnant or breastfeeding, have high blood pressure, have diabetes, have open wounds or serious infections, or are prone to fainting.

Around the House
* If you enjoy air fresheners in your home, try a homemade baking soda air freshener. Place 1/3 cup of baking soda in a small jar. Add 10 to 15 drops of your favorite essential oil. Cover the jar opening with a clean cloth and secure it with a string, ribbon or rubber band. When the scent starts to fade, gently shake the jar a few times. Add more essential oil as needed.

* Use baking soda to help whiten your laundry. Add ½ cup of baking soda to your washer along with your usual laundry detergent. The baking soda can help to remove stains from your clothes. Also, it will soften the water, so you may be able to use less laundry detergent.

* Baking soda can act as a multi-purpose cleaner in the bathroom. Make a paste with baking soda and a little water. The paste can be used to clean bathroom sinks, tiles, bathtubs, and showers. Use a sponge to apply the paste to scrub the area you want to clean. Allow it to sit for 15 to 20 minutes. Wipe the area down with a damp cloth afterwards.

* To clean your toilet bowl, routinely sprinkle some baking soda in the bowl and scrub with a toilet brush. For stained bowls, pour in ½ cup of baking soda and ½ cup of white vinegar. Scrub with a toilet brush, then flush. Be careful when doing this in case the bubbling action splashes upward!

* To remove perspiration stains from clothing, make a paste of baking soda and a little water. Rub the paste into the stained area and let it sit for one hour, then launder as usual.

* Did you accidentally spill a little gasoline on your clothes? Remove the odor by sprinkling the stained area with some baking soda. Place your clothes in a trash bag and seal it up. Let them sit there for a few days, then launder as usual.

* Is it winter and you’ve run out of ice melt? Sprinkle a little baking soda on the ice on your steps. It will provide some traction and melt the ice. Unlike rock salt, it won’t damage indoor or outdoor surfaces.

* For a safe way to clean your toothbrush, let it soak in a baking soda and water solution overnight.

* Do you have clogged bathroom drains? For a simple drain cleaner, start by pouring a cup of boiling water down the drain to help loosen things up. Mix one cup of baking soda with 1 cup of salt.  Place ½ cup to 1 cup of white vinegar in a separate measuring cup. Alternately spoon the baking soda and salt mixture into the drain, flushing it with a little white vinegar to help the dry mixture go down to the clog. Be careful, as it will bubble up! Once all the dry mixture and vinegar have been placed in the drain, cover with the drain plug and wait for 15 minutes. Then pour a large pot of boiling water down the drain. This will clear most clogs.

* Mop your tile floors clean with a solution of ½ cup of baking soda in a bucket of warm water.

* Make cloth diapers easier to clean by first soaking them in a solution of ½ cup of baking soda in 2 quarts of warm water. They should come out cleaner when laundered.

* Help keep cut flowers longer by adding a teaspoon of baking soda to the water in the vase.

* Help to keep your kitty’s litter box smelling fresh by sprinkling the bottom of the box with baking soda before adding litter. Use about one cup of baking soda to three pounds of litter. If you need to clean the box but are short on time, sprinkle some baking soda on top and give it a light stir. This will help keep odors in check for a short while until you can change the litter.

Resources
https://www.thespruceeats.com/what-is-baking-soda-p2-1328637

https://www.joyofbaking.com/bakingsoda.html

https://www.davidlebovitz.com/how-to-tell-if-baking-powder-is-still-good/

https://www.healthline.com/nutrition/baking-soda-benefits-uses#2.-Mouthwash

https://www.healthline.com/health/baking-soda-bath

https://pmaonline.com/posts/adult-primary-care/8-ways-to-treat-sunburn-at-home/

https://www.almanac.com/content/best-baking-soda-uses

https://www.liquidplumr.com/diy-plumbing-tip/how-baking-soda-and-vinegar-cleans-drains/

https://www.thankyourbody.com/uses-for-baking-soda/

https://www.networx.com/article/6-ways-not-to-use-baking-soda

https://www.readersdigest.ca/home-garden/tips/5-things-do-baking-soda/

https://www.cooksillustrated.com/articles/1745-can-baking-soda-make-beans-cook-faster

http://www.eatingwell.com/article/292167/the-weird-reason-you-should-be-adding-baking-soda-to-your-beans/

https://www.tasteofhome.com/article/degassing-beans/

https://nutritionfacts.org/questions/does-adding-baking-soda-to-soaking-beans-reduce-raffinose/

https://skillet.lifehacker.com/make-extra-tender-beans-with-a-little-baking-soda-1842156539

https://www.healthline.com/nutrition/10-baking-powder-substitutes#TOC_TITLE_HDR_5

https://www.armandhammer.com/

Baker, Jerry. (2006) Grandma Putt’s Old-Time Vinegar, Garlic, Baking Soda, and 101 More Problem Solvers. USA: American Master Products, Inc.

Ciullo, Peter A. (1995) Baking Soda Bonanza. New York, NY: Harper Collins Publishers, Inc.


About Judi

Julia W. Klee (Judi) began her journey enjoying “all things food” in elementary school when she started preparing meals for her family. That love of food blossomed into a quest to learn more and more about health and wellness as related to nutrition. She went on to earn a BS Degree in Food and Nutrition, then an MS Degree in Nutrition. She has taught nutrition and related courses at the college level to pre-nursing and exercise science students. Her hunger to learn didn’t stop upon graduation from college. She continues to research on a regular basis about nutrition as it relates to health. Her hope is to help as many people as possible to enjoy foods that promote health and wellness.
Bitter Melon

Bitter Melon 101 – The Basics


About Bitter Melon

Bitter melon (also known as bitter gourd) is a vine in the gourd family that grows best in tropical and sub-tropical climates. It is closely related to zucchini, squash, pumpkin, and cucumber. It is also in the same plant family as cantaloupe and watermelon. The vine produces fruit that is picked unripe and eaten as a vegetable. The flavor is described as bitter or sour. The color can be green or white, with the white variety being a little softer in texture, and less bitter as the fruit matures.

The bitterness in the fruit comes from its level of quinine. Because of this property, bitter melons have been highly prized by Asians, Panamanians, and Colombians who use it as a cure, and preventive medicine, for malaria.

Bitter melon is cultivated around the world and is considered to be a staple in many Asian cuisines. The common variety grown in China is typically long, green, and covered with wart-like bumps. The variety enjoyed in India is narrower, and green with pointed ends and rough, jagged spikes on the rind. Chinese bitter melons look more like cucumbers, despite their indentations, whereas Indian bitter melons are darker in color with ripples all around the fruit.

Nutrition and Health Benefits
Bitter melon is low in calories, with one cup of raw slices having a mere 20 calories. This fruit is high in nutrients, especially Vitamin C. One cup of raw bitter melon slices contains 93 percent of the Reference Daily Intake (RDI) for Vitamin C. That’s very impressive! It also contains a lot of Vitamin A, folate, potassium, zinc, iron, manganese, magnesium, and fiber.

The fruit also contains powerful antioxidants that help to protect our cells from damage, thereby warding off various disease. This helps to explain why bitter melon was used for medicinal purposes long before it was used as a food.

Blood Sugar Control. Components of bitter melon have been shown to improve several markers of long-term blood sugar control. It has been used by indigenous populations around the world to help treat diabetes-related conditions.

Cancer Fighting Properties. Laboratory studies have found that bitter melon extract was effective at killing cancer cells of the stomach, colon, lung, and nasopharynx. Another study found that bitter melon extract was able to block the growth and spread of breast cancer cells.

Improved Cholesterol Levels. Several animal studies found that bitter melon may lower cholesterol levels, supporting overall heart health. Total cholesterol, LDL cholesterol, and triglycerides were all reduced significantly in an animal study using extract of bitter melon. Further studies are needed to determine if these same effects would apply to humans, but the evidence is promising.

Weight Loss. Since bitter melon is low in calories and high in fiber, it may be helpful in weight loss plans. The high fiber helps to make you feel full longer, while the low calories can help to reduce overall calorie intake. Both animal and human studies found that bitter melon extract helped to decrease belly fat and body weight.

Hair and Skin Health. People living in areas where bitter melon is commonly grown have used it as a topical treatment for maintaining healthy hair, scalp, and skin. It has been used as a remedy for dandruff, hair loss, split ends, dry hair and scalp, and premature graying.

People have also eaten bitter melon as a preventative and treatment for acne, eczema, and psoriasis, and for stimulating blood flow to promote healing of wounds while preventing blood clots.

Precautions. Eating a lot of bitter melon, or taking a large amount of bitter melon supplements may cause some adverse effects such as diarrhea, vomiting, and stomach pain. Supplements are not recommended for pregnant women as its long-term effects have not been studied.

Use caution when taking bitter melon supplements if you are currently taking blood sugar lowering medications. Since bitter melon is known to help lower blood sugar levels, it may enhance the effect of your medications, causing your blood sugar to go too low. Eating the fruit in moderation may not be an issue, whereas it is advisable to consult your healthcare professional before taking bitter melon supplements.

How to Select
Bitter melon is not something you’ll find in the average American grocery store. However, since it is popular in Asian cultures, it can often be found at Asian food stores. It is harvested in the late summer to early fall, so that’s when it would be most available.

Choose melons that are free of bruises, dents, or any type of blemish. Avoid those that are soft or show signs of mold. Choose smaller sizes, up to about 10-inches in length. Larger melons may be available, but they are more bitter than the smaller fruit. The dark green melons are unripe, firm, and what is usually preferred. If it has some orange or yellow coloring, it is ripe. The riper the melon is, the more bitter it will be. If you’re buying Chinese bitter melons that look similar to cucumbers, choose ones with long ridges further apart, rather than closely placed. The very wrinkly ones will be more bitter than the others.

How to Store
Store bitter melons wrapped in a paper towel inside a perforated plastic bag in the crisper drawer of the refrigerator. It is best to keep them away from ethylene-producing fruit and vegetables, because the gas will cause the bitter melon to age faster. Use them within 4 to 5 days.

How to Prepare Bitter Melon
Wash the melon, then cut off the tip at each end. Slice the melon lengthwise. With a small spoon, remove the seeds and white pith from the center. This helps to reduce the bitterness. The melons do not need to be peeled. Slice the halves crosswise into thin, ¼-inch slices. The slices may be salted and allowed to rest for up to 30 minutes, or blanched for 2 to 3 minutes to remove some of the bitterness. If desired, 1 teaspoon of baking soda may be added to the blanching water to further reduce bitterness. Gently squeeze the treated slices, and rinse the pieces very well if they were salted. They may also be soaked in a bowl of water with 2 to 3 tablespoons of salt. Soak them for 15 to 20 minutes, then rinse well, drain them, and gently squeeze out extra liquid before cooking.

Bitter melon may be blanched, boiled, grilled, baked, pickled, steamed, stir-fried, and stuffed. It can be eaten raw, but is usually not served that way because of the bitterness.

Quick Ideas and Tips for Using Bitter Melon
* The peel of bitter melon is edible, so peeling is optional.

* When stir-frying with bitter melon that has been blanched, add it toward the last stages of cooking.

* Try juicing bitter melon along with other fruits and vegetables for a nutrient-rich beverage.

* Add bitter melon to your next stir-fry.

* Sauté bitter melon with tomatoes, garlic, and onions, then scramble the mixture with eggs.

* Try stuffing bitter melon with ground meat and vegetables, then serve with a black bean sauce.

* Add bitter melon to a savory salad, topped with your favorite salad dressing.

* Serve diced bitter melon in curries, stir-fries or pickles, or stuffed with meat, shrimp, spices and onions.

* Try parboiling bitter melon like you would zucchini, and serve it as a vegetable.

* Try seasoning bitter melon slices with salt, turmeric, and a little chili. Stir-fry with some onions and garlic, and top with a drizzle of balsamic vinegar or soy sauce. Add a pinch of sugar, if desired, to cut some of the bitterness.

* Try stuffing bitter melon halves (after the seeds and white pith have been removed) with seasoned minced pork, shrimp, and chopped onion. Season with fish paste.

* Balance the bitterness of bitter melon with strong flavors such as chili peppers, garlic, tamarind, ginger, sweet soy, miso, fermented black beans, fish sauce, dried shrimp, or curry paste.

* Pair bitter melon with something sweet like any winter squash, sweet potatoes, or corn.

* Try breaded and fried bitter melon slices.

Herbs and Spices That Go Well with Bitter Melon
Chili powder, cilantro, coriander, cumin, salt, turmeric

Foods That Go Well with Bitter Melon
Proteins, Legumes, Nuts, Seeds: Beans (i.e. black, fermented black), beef, chicken, duck, eggs, lamb, lentils, lima beans, poppy seeds, pork, poultry, seafood, sesame paste, sesame seeds, shrimp, string beans, tofu (i.e. firm)

Vegetables: Chiles (i.e. green, jalapeno, red), eggplant, garlic, ginger, okra, onions, potatoes, squash (i.e. kabocha), tomatoes, sweet potatoes

Fruits: Coconut, lemon, lime, pomegranate seeds

Grains and Grain Products: Corn, kamut, pita bread, rice

Dairy and Non-Dairy: Coconut milk, yogurt

Other Foods:  Miso, oil (i.e. canola, olive, peanut, sesame), soy sauce, sugar (i.e. brown), vinegar (i.e. cider)

Bitter melon has been used in the following cuisines and dishes…
Asian cuisines, Cambodian cuisine, Chinese cuisine (esp. Cantonese), curries, East Indian cuisine, ice creams, Indian cuisine, pickles, sorbets, stir-fries, stuffed bitter melon

Suggested Food and Flavor Combos Using Bitter Melon
Add bitter melon to any of the following combinations…

Garlic + Soy Sauce
Honey + Lemon
Miso + Tofu

Recipe Links
The Best Bitter Melon Recipes https://www.thespruceeats.com/the-best-bitter-melon-recipes-4071414

Stir-Fried Bitter Melon with Ground Pork, Fermented Black Beans, and Fish Sauce https://www.seriouseats.com/recipes/2010/07/seriously-asian-bitter-melon-stir-fry.html

Bitter Melon Tofu Stir-Fry (Vegan, Gluten-Free) https://sharonpalmer.com/bitter-melon-tofu-stir-fry-vegan-gluten-free/

Cold Summer Pasta with Bitter Melon, Sour Plum and Tuna https://cookpad.com/us/recipes/13647181-cold-summer-pasta-with-bitter-melon-sour-plum-tuna?via=search&search_term=bitter%20melon

Steamed Bitter Melon https://cookpad.com/us/recipes/13125357-steam-bitter-melon?via=search&search_term=bitter%20melon

Stir Fried Bitter Melon (Vegan) https://cookpad.com/us/recipes/11315973-stir-fried-bitter-melon-vegan?via=search&search_term=bitter%20melon

Simple Bitter Melon Soup https://cookpad.com/us/recipes/651242-simple-bitter-melon-soup?via=search&search_term=bitter%20melon

Bitter Melon with Egg and Tomatoes [Note: Scroll to the bottom of the page for the recipe] http://simplegoodandtasty.com/2011/05/03/bitter-melon

Chinese Bitter Melon Stir-Fry http://www.chubbypanda.com/2008/10/chinese-bitter-melon-stir-fry-how-to.html

Stir-Fried Bitter Melon with Eggs https://praneesthaikitchen.com/2011/08/04/stir-fried-bitter-melon-with-egg-recipe/


Resources
https://nutritiondata.self.com/facts/vegetables-and-vegetable-products/2319/2

https://www.healthline.com/nutrition/bitter-melon

https://nutritiondata.self.com/facts/vegetables-and-vegetable-products/2319/2

https://www.thespruceeats.com/the-best-bitter-melon-recipes-4071414

https://www.thespruceeats.com/how-to-prepare-bitter-melon-p2-695360

https://www.foodrepublic.com/2016/04/04/why-you-should-get-cooking-with-bitter-melon/

https://www.healthline.com/nutrition/bitter-melon#TOC_TITLE_HDR_4

https://www.theburningkitchen.com/superfoods-do-you-know-how-to-choose-and-prepare-bitter-gourd-that-is-less-bitter/

http://simplegoodandtasty.com/2011/05/03/bitter-melon

https://harvesttotable.com/bitter_melon_you_can/

https://specialtyproduce.com/produce/Indian_Bitter_Melon_9184.php

https://specialtyproduce.com/produce/White_Bitter_Melon_7609.php

https://highkitcheniq.com/store-bitter-melon/

https://www.medlife.com/blog/healthy-benefits-bitter-gourd-skin-hair/#1-prevents-skin-disorders

Page, Karen. (2014) The Vegetarian Flavor Bible. New York, NY: Little, Brown and Company.

About Judi

Julia W. Klee (Judi) began her journey enjoying “all things food” in elementary school when she started preparing meals for her family. That love of food blossomed into a quest to learn more and more about health and wellness as related to nutrition. She went on to earn a BS Degree in Food and Nutrition, then an MS Degree in Nutrition. She has taught nutrition and related courses at the college level to pre-nursing and exercise science students. Her hunger to learn didn’t stop upon graduation from college. She continues to research on a regular basis about nutrition as it relates to health. Her hope is to help as many people as possible to enjoy foods that promote health and wellness.
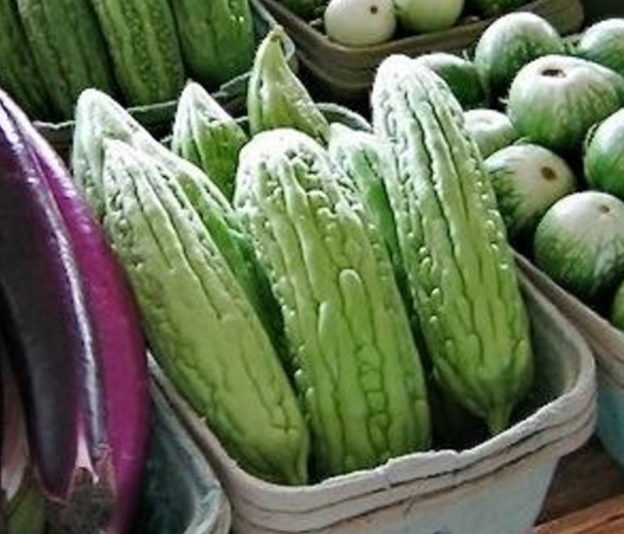
Butternut Squash

Butternut Squash 101 – The Basics


About Butternut Squash
Butternut squash is a winter squash with orange-flesh and a sweet flavor. It’s commonly treated as a vegetable, but technically, it’s a fruit since it contains seeds. Butternut squash is very versatile with many culinary uses from both sweet to savory dishes. It is a popular winter squash featuring a large bell-shaped bottom section and a slimmer, tapering neck. It’s often recognized by its tannish colored skin.

Butternut squash, like other squash varieties belongs to the Cucurbitaceae plant family. This family contains a lot of foods many people enjoy regularly, such as watermelons and other melons, and even cucumbers.

Winter squashes and related plants appear to be native to Central and South America. Not surprisingly, such foods have been an important part of the diet of the indigenous people for thousands of years. Since they are rich in nutrients and they store well in cooler temperatures, winter squashes were nutrient-rich foods that helped to nourish ancient people through the colder months when such foods were not in season.

Nutrition and Health Benefits of Butternut Squash
Butternut squash is an excellent source of Vitamin A from its carotenoid content. It also provides plenty of Vitamins C, B6, B2, B3, and K, along with fiber, manganese, copper, folate, pantothenic acid, potassium, and magnesium. Enjoy the seeds for a good supply of Vitamin E. One cup of cooked, mashed butternut squash has a mere 82 calories.

The bright orange color of butternut squash is a clear indication that it is packed with carotenoids, Vitamin A precursors. This makes them powerful antioxidant foods, protecting eye, skin and cardiovascular health, as well as warding off cancer.

Despite the fact that some people consider winter squash to be high-carbohydrate foods, winter squash is considered to be low on the glycemic index, with a rating of 55. Winter squash has been found to steady the release of sugars in the digestive tract, lowering the glycemic response to meals.

How to Select a Butternut Squash
Choose a butternut squash that is free of blemishes or decay, and feels firm and heavy for its size.

How to Store Butternut Squash
Butternut squash will keep well in a cool, dry, dark place. The ideal storage temperature is 50 to 68°F. Freshly picked squash have been stored in these conditions for up to 6 months. Most should store well for 1 to 3 months.

If mold appears on your squash, the molded area should be cut away and the remaining parts of the squash that are still good should be used immediately. Sometimes, commercial growers wax the squashes to prolong their shelf life and deter mold. If yours was not waxed and you want to extend the shelf life, you could oil the squash yourself. Wash the squash well to remove any dirt. Dry it well…make sure it is completely dry before proceeding or moisture left on it may invite decay. Place a small amount of food-grade oil of your choice on a paper towel or cloth, and wipe the entire surface of the squash, spreading a thin layer of oil all over. Be sure you get oil in all cracks and crevices of the squash. Buff off any excess oil. The surface should be shiny, but not oily to the touch. Store it in a cool, dry, dark place.

Once your squash has been cut, it should be tightly wrapped or stored in an airtight container in the refrigerator for no more than a week. Cooked butternut squash should be stored in an airtight container in the refrigerator, and used within 3 to 5 days.

Cooked butternut squash may be frozen in an airtight container. It will keep well for 10 to 12 months. Beyond that, the quality may decline, but it will still be safe to eat.

How to Prepare a Butternut Squash
First remove any label that was placed on your squash at the store. Then rinse the squash with water to clean it off. Butternut squash does not need to be peeled before being cooked, but you can peel it, if desired or if a recipe calls for peeling it first. The peel is tough, but they can be peeled with a vegetable peeler or a knife.

When cutting butternut squash, it’s easiest to cut it in half, separating the neck from the bulb end. Then the seeds need to be removed from the bulb end. They can be removed by scooping them out with a spoon, or by first cutting the bulb in half from top to bottom, then scraping the seeds out with a spoon. The stem end can then be cut off the top of the neck end. The neck end can then be stood upright to remove the peel, then the flesh can be cubed. Or the neck end can be cut in half lengthwise for roasting or cooking in another method.

Roasted Butternut Squash. Butternut squash can be roasted different ways. The squash may be cut into four large pieces (cutting the bulb end from the stem end, then cutting both the bulb and stem ends in half lengthwise) and removing the seeds as described above. Place all pieces, peel side up, on a parchment paper-lined baking sheet and roasting it at 375°F or 400°F until a sharp knife can easily be inserted through the pieces. Remove the tray from the oven and allow the squash to cool enough to be handled. Scrape the flesh from the peel with a spoon and use accordingly in your recipe.

This method can be simplified by placing your entire uncut, washed squash on a baking sheet and roasting it until a knife can easily pierce through its thickest part. Remove it from the oven, allow it to cool enough to be handled, then cut it, removing seeds, stem end, and scraping off the flesh to be used as needed.

Butternut cubes can also be roasted by first cutting the squash in half, separating the bulb end from the neck. Then trim off the stem end, stand the squash piece upright and remove the peel with a knife or vegetable peeler. Then slice the flesh into cubes. Most recipes for roasted butternut squash cubes call for placing the cubes on a parchment-lined baking sheet and coating the cubes with oil, then sprinkling them with salt and pepper to taste. Roast at 400°F or 425°F about 20 to 30 minutes, until fork-tender.

Steamed Butternut Squash. Place medium size chunks of peeled and seeded butternut squash in a steamer basket. Add water to the pot, but not so much that the squash pieces sit in water. Cover the pot with a tight-fitting lid and bring the water to boil. Steam for 10 to 12 minutes, or until the squash pieces are fork-tender. Remove the squash pieces to a bowl and proceed with desired recipe.

Sautéed Butternut Squash. Peeled, seeded butternut squash cubes may be sautéed in oil or butter in a skillet over medium heat. First, warm the fat in the skillet, add the squash cubes, then stir frequently and sauté until lightly browned and caramelized, about 10 to 15 minutes.

How to Freeze Butternut Squash
Cooked, pureed and frozen butternut squash is ready to be used in pies, soups, baked goods or in any recipe calling for pureed pumpkin or other winter squash. Simply wash the squash, cut it as desired, and cook it in whatever way you prefer…roasted with or without oil, steamed, or boiled. Scrape off the pulp from the peel, and puree the pulp in a food processor. Pureeing the pulp is not mandatory, but makes it much easier to work with when it’s time to use it. Place your pureed pulp in a freezer bag or container (leave about one inch of headspace). Label it with the date and store it in the freezer. Frozen pureed butternut squash will keep for 10 to 12 months. It is safe to use beyond that, but the quality may deteriorate.

Quick Ideas and Tips for Using Butternut Squash
* To make butternut squash easier to peel before cooking it, microwave it for 2 or 3 minutes first.

* The peel of butternut squash is edible, but tough. If you want to eat the peel, slow roast the squash and the peel will get softer as it roasts.

* For something different, try butternut squash fries instead of potato fries.

* Top salads with cubes of roasted butternut squash.

* Add chunks of butternut squash to stews.

* Stuff a roasted butternut squash half with a mixture of cooked grains and vegetables for a delicious and filling dish.

* Add roasted butternut squash to breakfast for something different.

* Add thin slices of raw butternut squash to salads for added flavor and texture.

* Enjoy roasted butternut squash in place of potatoes, pumpkin, or sweet potato.

* Mash cooked butternut squash with a little milk of choice and cinnamon and serve it instead of mashed potatoes.

* Use pureed butternut squash in place of pumpkin when making pies and tarts.

* Add cooked butternut squash to pasta dishes, or puree it and make an interesting pasta sauce.

* Combine pureed butternut squash with coconut milk for a creamy squash soup.

* Butternut squash seeds are edible! They can be saved and roasted as you would pumpkin seeds. Once scooped out, separate the seeds from the stringy pulp, and rinse them well. Coat the seeds with a little oil, and season them as desired. Spread the seeds in a single layer on a parchment or foil-lined baking sheet and roast them at 225°F for about 15 minutes until the seeds start to pop. Allow them to cool on the baking sheet before serving.

* Do you want to enjoy pureed squash, but are not sure how to flavor it? Try topping pureed butternut squash with cinnamon and maple syrup.

* For an interesting side dish, steam cubes of butternut squash. Then toss with a little olive oil, soy sauce, and ginger. Sprinkle with toasted squash seeds for a little added crunch.

Herbs/Spices That Go Well with Butternut Squash
Allspice, basil, bay leaf, cardamom, cayenne, chili pepper flakes, chives, cilantro, cinnamon, cloves, coriander, cumin, curry powder, garlic, ginger, marjoram, nutmeg, oregano, paprika (smoked)

Foods That Go Well with Butternut Squash
Proteins, Legumes, Nuts, Seeds: Beans (i.e. adzuki, lima, pinto, white), chicken, chickpeas, eggs, lamb, nuts (esp. almonds, pecans, walnuts), pork, pumpkin seeds, sesame seeds, sunflower seeds, tahini, tofu

Vegetables: Artichokes (Jerusalem), arugula, cabbage, carrots, cauliflower, celery, celery root, chiles, fennel, greens, kale, leeks, mushrooms, onions, shallots, spinach, tomatoes

Fruits: Apples, berries, coconut, cranberries, dates, lemon, lime, orange, pears, pomegranate seeds, raisins

Grains and Grain Products: Bulgur (wheat), corn, couscous, farro, millet, quinoa, rice

Dairy and Non-Dairy: Butter, browned butter, cheese (esp. cheddar, Parmesan, ricotta), coconut milk, cream, milk (dairy and non-dairy), yogurt

Other Foods: Miso, oil, sugar (esp. brown), stock (mushroom), tamari, vinegar (esp. balsamic), wine (esp. dry white)

Butternut squash has been used in the following cuisines and dishes…
Baked goods (i.e. muffins), casseroles, gratins, pasta (i.e. gnocchi, lasagna, ravioli), pizza, purees, risottos, soups and bisques, stews, succotash, tarts

Suggested Flavor and Food Combos Using Butternut Squash
Add butternut squash to any of the following combinations…

Allspice + cinnamon + cloves + maple syrup + vanilla
Apples + cinnamon + ginger + maple syrup + walnuts
Apples + cheese + honey
Apples + nuts
Balsamic vinegar + mushrooms + pasta
Browned butter + pine nuts + sage + pasta
Fruit (cranberries, dates) + nuts (pecans, pistachios)
Ginger + tamari + tofu
Orange + sage
Quinoa + walnuts
Rosemary + tomatoes + white beans
Sage + walnuts

Recipe Links
Roasted Butternut Squash (No Oil) (Judi in the Kitchen video) https://youtu.be/rVCS19OnNXY

Roasted Butternut Squash with Apples (Judi in the Kitchen video) https://youtu.be/XtuEkykDp08

Roasted Butternut Squash https://www.foodnetwork.com/recipes/ina-garten/roasted-butternut-squash-recipe-1921606

Sautéed Butternut Squash http://www.eatingwell.com/recipe/261206/sauteed-butternut-squash/

Side Dish Recipe for Roast Chicken—Pan-Seared Butternut Squash with Balsamic and Parmigiano Shards   https://www.thekitchn.com/a-side-dish-recipe-for-roast-chicken-balsamic-butternut-saut-with-parmigiano-shards-pick-a-side-from-tara-mataraza-desmond-195791

Sautéed Butternut Squash with Garlic, Ginger, and Spices https://www.justapinch.com/recipes/side/vegetable/sauteed-butternut-squash-with-garlic-ginger.html

Sautéed Butternut Squash https://tastykitchen.com/recipes/sidedishes/sauteed-butternut-squash/

Caramelized Browned Butter Butternut Squash https://www.onelovelylife.com/caramelized-browned-butter-butternut-squash/

26 Delicious Butternut Squash Recipes to Make This Fall https://www.delish.com/cooking/g3003/butternut-squash/

33 Butternut Squash Recipes We Love https://www.foodandwine.com/vegetables/squash-gourds/butternut-squash/butternut-squash

55 Best Butternut Squash Recipes Everyone in Your Family will Enjoy https://www.countryliving.com/food-drinks/g2701/butternut-squash-recipes/

10 Things to do With Butternut Squash https://www.thekitchn.com/10-things-to-do-with-butternut-squash-128579

Vegetarian Thanksgiving Dinner on a Sheet Pan https://www.liveeatlearn.com/vegetarian-thanksgiving-dinner-on-a-sheet-pan/

Crock Pot Steel Cut Oats with Butternut Squash https://www.liveeatlearn.com/crockpot-steel-cut-oatmeal-with-butternut-squash/

Roasted Butternut Chickpea Hummus Wraps https://www.liveeatlearn.com/roasted-butternut-chickpea-hummus-wraps/

Golden Squash Soup http://www.whfoods.com/genpage.php?tname=recipe&dbid=33

Steamed Butternut Squash with Almond Sauce http://www.whfoods.com/genpage.php?tname=recipe&dbid=112

Steamed Butternut Squash with Red Chili Sauce http://www.whfoods.com/genpage.php?tname=recipe&dbid=179

Resources
http://www.whfoods.com/genpage.php?tname=foodspice&dbid=63

https://www.bbcgoodfood.com/videos/techniques/how-prepare-butternut-squash

https://www.healthline.com/health/carotenoids#benefits

https://www.ncbi.nlm.nih.gov/pmc/articles/PMC3257702/

https://www.healthline.com/nutrition/butternut-squash

https://www.liveeatlearn.com/butternut-squash/

https://www.stilltasty.com/fooditems/index/18397

https://www.afamilyfeast.com/butternut-squash-puree/

https://www.thespruceeats.com/preserving-pumpkin-butternut-and-winter-squashes-1327938

https://www.allrecipes.com/recipe/54873/roasted-winter-squash-seeds/

Page, Karen. (2014) The Vegetarian Flavor Bible. New York, NY: Little, Brown and Company.


About Judi

Julia W. Klee (Judi) began her journey enjoying “all things food” in elementary school when she started preparing meals for her family. That love of food blossomed into a quest to learn more and more about health and wellness as related to nutrition. She went on to earn a BS Degree in Food and Nutrition, then an MS Degree in Nutrition. She has taught nutrition and related courses at the college level to pre-nursing and exercise science students. Her hunger to learn didn’t stop upon graduation from college. She continues to research on a regular basis about nutrition as it relates to health. Her hope is to help as many people as possible to enjoy foods that promote health and wellness.



Sweet Mustard Dressing

Sweet Mustard Dressing (Oil-Free, Vegan Option)

Here’s a yummy sweet mustard dressing, made without added oils. It can be vegan, if desired, by using maple syrup in place of honey. Either option will lend a different flavor, but either way is delicious and works well on any green salad or in any food calling for a honey mustard dressing. Below is a video demonstration of how to make the dressing. The written recipe follows the video.

Enjoy!
Judi

Sweet Mustard Dressing (Oil-Free, Vegan Option)
Makes About 3 Cups

1 cup of cooked or canned (and drained) white beans of choice
1 avocado, diced
½ cup water
¼ cup apple cider vinegar
½ cup Dijon mustard
¼ cup maple syrup or honey

One-Half of the Recipe (Makes 1-1/4 to 1-1/2 cups)
1/2 cup of cooked or canned (and drained) white beans of choice
1/2 avocado, diced
1/4 cup water
2 Tbsp apple cider vinegar
1/4 cup Dijon mustard
2 Tbsp maple syrup or honey

Place all ingredients in a blender or food processor. Process until smooth. Enjoy! Store extra in a covered container in the refrigerator and use within 4 days.

Fruits and Vegetables

Easy Ways to Add More Fruits and Veggies to Your Day

We all know we need to eat more plant foods…more fruits and vegetables, in particular. Most Americans don’t eat the recommended number of servings of these important foods yet they know they should. If you’re among that crowd and are looking for ways to include more plant foods into your day, I have some easy ideas for you to try.

Effective Way to Make Changes
First, remember that long-time habits cannot all be changed overnight (at least not permanently). The easiest way to make permanent change is to do it a little at a time. (Remember the saying, “Inch by inch, it’s a cinch; yard by yard, it’s hard.”) Pick something that’s do-able for you (such as always adding some type of fruit to your breakfast), make the change, and stick with it until it becomes second-nature to you…until you do it without thinking about it, and then you’re there! You’ve achieved that goal!

Next, keep that new habit and find something else to change in a positive way. Maybe find another way to add a vegetable to your lunch or to a snack food. Repeat the same process. Keep moving forward with this tactic, adding new changes when the others become a habit to you and they are “automatic.” Over time you’ll find that you’ve transformed your life (or at least your diet) for the good. Here are some ideas for adding more fruits and vegetables to your foods…

Breakfast
* Add fruit to cereal.

* Add fruit to yogurt and make it part of your breakfast.

* Add vegetables to an omelet. Mushrooms, bell peppers, onions, shredded carrots, greens (like kale), and tomatoes all blend well with eggs.

* Add fruit and greens (such as spinach) to a breakfast smoothie.

* Try a savory vegetable pancake. Sauté onions, carrots, spinach, and even mushrooms, then add them to a savory (not sweet) pancake batter. Cook as usual and enjoy (without the maple syrup). If you really want a topping, try unsweetened applesauce.

* Add diced apple to hot oatmeal or other porridge.

* Make a 100% fruit puree in advance to have available in the refrigerator. Top morning oatmeal with it.

* Is your morning time short? Try overnight oats with added berries. Add other fruits in the morning and you’ll have breakfast in no time.

* Try a loaded sweet potato for breakfast. Bake or boil it in advance, then warm it on the stove or in the microwave. Or, if time allows, pierce it and microwave it until it’s soft. Split it and fill the cavity with chopped nuts or your favorite nut butter and chopped fruit.

* Or fill a cooked sweet potato with scrambled eggs cooked with veggies such as sautéed onions, carrots, and chopped spinach.

* Sauté assorted vegetables such as kale, carrots, broccoli florets, mushrooms, and butternut squash. Add some beans, or top them with a soft-boiled egg. Have some toast, a side of cooked grain or even oatmeal.

* Add some sautéed vegetables to a breakfast burrito.

Lunch or Supper
* Enjoy a vegetable salad with your lunch (or supper), or as the whole meal. Add some fruit for sweetness, flavor and variety.

* Add as many vegetables as you can to a lunchtime sandwich. Lettuce, tomatoes, cucumbers, sprouts, avocado, and spinach would all work well.

* Have some veggie sticks with or without dip on the side. Jicama, carrots, cucumbers, celery, bell peppers, grape tomatoes, radishes, and even sugar snap peas and snow peas. Most offer great crunch and chewing experience while the dip can add variety in flavors. This is a healthful alternative to chips.

* Enjoy a piece of fresh fruit for dessert.

* Top meat, chicken or fish with a salsa of choice.

* Add shredded carrots, zucchini, or yellow squash to meatloaf, casseroles, and burgers (both meat and meatless).

* Add shredded vegetables to pasta sauce as it cooks. Carrots, bell peppers, mushrooms, zucchini, and yellow squash all blend well in tomato sauce.

* Add vegetables as toppings to your pizza.

* If you’re a meat eater, plan a meatless meal for one or two days a week. Plan a meal around a vegetable-based soup, stir-fry, or casserole. Add beans or legumes of choice for added protein.

* Use fresh vegetable or fruit slices as a garnish on your plate. Make a point of eating them rather than just enjoying their looks next to other foods.

* Stuff acorn (or other) squash, bell peppers, hollowed out zucchini, or spaghetti squash with a vegetable-bean mixture and enjoy that for supper. Be sure to eat the “bowl” along with the stuffing!

* Add vegetables to lasagna layers. Fresh spinach, finely shredded carrot, thinly sliced yellow squash or zucchini, and finely chopped steamed kale would all work well.

* When cooking rice or another grain for a side dish, add some frozen peas and even finely shredded carrots during the last few minutes of cooking time. Your grain will be embellished with vegetables for added color, nutrition and flavor. Not a fan of peas? Try finely shredded kale or spinach or something else that sounds good to you.

* Need a meal in a hurry? Make a quick quesadilla by stir-steaming or stir-frying some veggies (use a pack of assorted frozen (and thawed in a colander under running water) vegetables to make it even faster). Add in a handful of cooked beans, if desired. Place them on a tortilla and sprinkle with cheese of choice. Fold the tortilla, heat the tortilla on a frying pan to crisp it up some, and enjoy!

* Try cauliflower rice as a way to add more veggies to your meal. We’re not knocking rice here, just adding veggies. If you want the real thing (rice, that is), you could make a mixture of half rice and half cauliflower rice.

* Add finely chopped vegetables to polenta.

* If you’re not a huge fan of vegetables, yet want to add more to your meals, try dressing them up with your favorite salsa, glaze or sauce.

* Add pureed cauliflower, winter squash, sweet potato, or even bell peppers into sauces, mashed potatoes and even pot pies for added flavor, nutrition, and color.

* Try thickening soups and stews with vegetables instead of cornstarch. Okra will thicken, as will starchy vegetables like potatoes. Blended corn, mashed white or sweet potatoes, and pureed cooked root vegetables such as carrots may also do the trick. Although not “vegetables,” pureed beans in liquid can also be used to thicken soups. Blend equal parts of beans and soup broth. Add the slurry back to the pot and your soup should thicken.

* Try adding mashed, roasted cauliflower to mashed potatoes. This will make the potatoes healthier and creamier.

* Try a lettuce wrap. Make your usual taco, tortilla, or sandwich filling (but of course, with added veggies), then wrap it in a stack of lettuce leaves instead. Or take it one step further and try large collard green leaves, turnip green leaves, or flat-leaf kale leaves. Yet another way to add more veggies to your meal!

* Try a fish-less sushi. Use mushrooms, cucumbers, and avocado along with the sticky rice.

* Add some finely chopped spinach to your favorite risotto. Add it toward the end of cooking time since spinach cooks really fast.

* On a cold winter day, start your meal with a small warm bowl of vegetable soup as an appetizer. You’ll get veggies in and also curb your appetite so you don’t overeat.

* On a warm summer day, start your meal with a side salad or veggies and dip. Like with the soup, you’ll get more veggies in and curb your appetite a bit.

Salads
* Add vegetables to tuna, chicken, meat, or bean salads. Tomatoes, radishes, bell peppers, onions, would all work well. Serve on a bed of lettuce or spinach (and EAT the greens!).

* Include a green salad as a side dish with lunch and/or supper. Eat this, in addition to your “side” vegetable.

* Add variety to green salads by adding other vegetables such as red or green cabbage, spinach, carrots, green peas (frozen, thawed), mushrooms, celery, radishes, cucumbers, yellow squash or zucchini, broccoli and/or cauliflower, sprouts, sugar snap peas, snow peas, bell peppers, cooked green beans, scallions, tomatoes, radicchio, or any other vegetable you want.

* For a little sweetness, add some fruit to your green salads, such as pineapple, orange slices, grapes, berries of any sort, diced apples, diced pears, diced peaches, or mango cubes.

* Embrace “slaws.” Cole slaw doesn’t have to be limited to cabbage and mayonnaise. Red cabbage, green cabbage, shredded Brussels sprouts, grated kohlrabi, grated carrots, pineapple tidbits, grated apple, peanuts, hazelnuts, dried cranberries, raisins, celery root, beets, radishes, turnips, parsnips, rutabagas, and even citrus fruits can all be incorporated into assorted vegetable slaws. Experiment and get creative with this one!

* Don’t get stuck in a rut with your salads. Vary your greens. There are plenty to choose from: iceberg, romaine, green leafy lettuce, red leaf lettuce, specialty lettuces, spring mix, baby green mixes, spinach, kale, shredded cabbage, even shredded collard greens…explore what’s available in your local store or farm market!

* Don’t just vary your bed of greens, but vary your toppings too! There are lots of possibilities including tomatoes, shredded carrots, celery, bell peppers, broccoli pieces, cauliflower pieces, cucumbers, cooked green beans, frozen (and thawed) green peas, sliced olives, raw yellow squash or zucchini slices, beet slices (pickled, steamed, or raw), asparagus (raw, steamed or sautéed), parsnips (raw, steamed or sautéed), roasted Brussels sprouts (or even raw), corn (canned, raw, frozen and thawed, steamed or boiled), shaved kohlrabi, jicama, shaved celery root, natural sauerkraut or other fermented vegetables (homemade is mild tasting and less pungent than the canned variety), onions (all varieties), butternut squash (raw, cubed and roasted, steamed, or sautéed).

* Don’t toss the broccoli stems! They’re perfectly edible. If the outer layer is too tough for you, shave it off with a vegetable peeler and save it for vegetable broth. Slice the remaining stalk into your salad for an added vegetable. They are crunchy but not tough, and taste like broccoli. Why toss them???

* Try making a vegetable salad without the greens, just for something different. Load it with tomatoes, shredded carrots, onions, bell peppers, cucumbers, sugar snap peas for sweetness, and any other veggies you want. Top it with your favorite dressing and enjoy!

Snacks and Other Foods
* Have some fruits and/or vegetable pieces available to snack on whenever you have a hunger urge. Sliced bell peppers, carrot and celery sticks, sliced radishes, sliced jicama, broccoli or cauliflower florets, whole cherry or grape tomatoes, raw sugar snap peas, raw snow peas, and sliced yellow squash or zucchini would all work well. Include some whole baby cucumbers for an easy grab and go, crunchy snack. For fruit, peeled Clementine oranges, grapes, apples, pears, sliced kiwi, cubed mango, diced pineapple, strawberries, plums, peaches, cherries (when they’re in season), and bananas would all work well for a quick and handy snack. On the run? Pack them in a to-go bag and you’ll have them whenever your “snack-attack” hits you.

* Boil a whole sweet potato with the peel on. Allow it to cool then store it in the refrigerator. When hungry, cut off a slice or two and enjoy it just as it is…plain and simple. When you get used to eating foods without added sugars, a boiled sweet potato will actually taste sweet to you.

* Add shredded fruits and vegetables to baked goods like quick breads and muffins. Shredded apples, carrots, yellow squash, and zucchini would all work well.

* Use a fruit puree as a dip on a fruit and cheese tray. Pureed raspberries and/or pineapple would be good.

* Use a vegetable puree as a dip on a vegetable tray. (Example: Roasted red bell peppers blended with a little balsamic vinegar.)

* Spread your favorite nut butter on apple or pear slices for a delicious, satisfying snack.

* Add mixed berries to some vanilla yogurt for a filling snack.

* Stuff celery sticks with your favorite nut butter.

* Enjoy a slice of cantaloupe topped with cashew cream or yogurt.

* Try spreading a tortilla or flatbread with your favorite nut butter, top it with thinly sliced banana and a few raisins. Roll it up and enjoy it right away, or wrap it for a to-go snack.

* Add fresh vegetable/fruit juice to your day, not as a meal replacer, but as a supplement.

Desserts
* Instead of making overly sweetened desserts like pie, cake and cookies, enjoy a piece of fresh fruit for dessert. When your taste buds get used to not being overrun with excess sugars, a piece of fruit will actually be refreshing and taste sweet.

* Puree fresh fruit to use as a dressing over another dessert such as cake, pie, pudding, and ice cream.

* Include fruit pieces or fruit puree into desserts like parfaits and puddings.

* Stew or poach pears with a little sweetener (sugar, honey, or maple syrup) and spice (ginger, cinnamon, cloves, star anise) for an elegant dessert.

* Try banana “nice cream” by blending a frozen (peeled) banana. Period. It’s delicious as it is, but can be embellished any way you want. When blending, add in a little vanilla extract, cocoa powder, or another fruit. It can be sweetened with whatever you want, if desired. Top it with chopped nuts, dried coconut, chocolate chips or your favorite fruit puree and you have a delicious, healthy, fruity dessert ready in very little time.

* For a refreshing dessert on a hot day, swirl a freshly made fruit puree of your choice into your favorite yogurt. Pour into popsicle molds and freeze.

* Make a parfait layering pudding or yogurt with 100% fruit puree, chopped fresh fruit of choice, and granola.

* Top your favorite pudding with a fruit puree (unsweetened, of course!), or small chunks of fresh fruit of choice.

* Make a refreshing fruit salad with whatever fruit you have available. Add a topping of 100% fruit puree, or stir in some pineapple tidbits with juice, then sprinkle with unsweetened coconut.

Plan Ahead
* If you know your time will be short during the work week, take some time on the weekend or one evening to prepare some fruits and veggies in advance. For instance, salad greens can be washed, spun dry, chopped, and stored in the refrigerator, ready for fast salad assembly any time you need it. Other salad vegetables may also be chopped in advance and stored in a covered container in the refrigerator for faster salad making.

* On a day off, make a large pot of soup that’s loaded with assorted vegetables. In fact, double the veggies (or at least increase the amount) called for in the recipe (if possible). This will increase the “hearty factor” of the soup along with the nutritional punch. Divide it into containers for grab-and-go lunches for the week, or for quick suppers when time is short.

* “Ditto” the above suggestion for making a large casserole with extra veggies on a day off. You’ll have lunches (or easy suppers) ready to go for the week.

* If you’re cooking something in the oven and have space, add some sweet potatoes wherever there’s room so they can bake at the same time. Enjoy them with meals during the week, or save them for special, sweet and satisfying snacks when needed.

* Keep frozen vegetables in the freezer. They can be ready at a moment’s notice to be used in a number of ways. Add them to soups, casseroles, stir-fries, quiches, pasta dishes, and rice or grain dishes. Thaw frozen vegetables like peas and carrots and add them to a green salad for extra nutrients, flavor, and variety.

* When grocery shopping, look for something new that you haven’t tried before in the produce isle. Make a point of including that in at least one dish during the coming week.

* Keep frozen assorted fruit in the freezer. This is handy especially when they’re out of season or you don’t have time to get to the store. They can be included in smoothies, blended into desserts, or thawed and used in whatever way needed.

* If you’ll be going off somewhere for the day, pack ready-to-go snack bags of easy to munch on veggies, like baby carrots, grape tomatoes, cucumber slices or baby whole cucumbers, sugar snap peas, snow peas, celery sticks, bell pepper strips, and maybe some easy to eat fruit like grapes, a plum, or a banana.

With all the suggestions above, I hope this gives you some ideas as to what will work for you in adding more fruits and vegetables to your day. If you have suggestions not mentioned above, please feel free to share them below! I’d love to hear from you!

Judi

About Judi
Julia W. Klee (Judi) began her journey enjoying “all things food” in elementary school when she started preparing meals for her family. That love of food blossomed into a quest to learn more and more about health and wellness as related to nutrition. She went on to earn a BS Degree in Food and Nutrition, then an MS Degree in Nutrition. She has taught nutrition and related courses at the college level to pre-nursing and exercise science students. Her hunger to learn didn’t stop upon graduation from college. She continues to research on a regular basis about nutrition as it relates to health. Her hope is to help as many people as possible to enjoy foods that promote health and wellness.
Blended Creamy Orange Dessert

Blended Creamy Orange Dessert

Here’s a FAST and easy refreshing dessert or snack to make on a hot summer day. It’s simple to make, with few ingredients and can easily be tailored to your preferences. It reminds me of the Creamsicle popsicles I used to eat when I was young! The recipe makes 1 hefty serving or 2 modest servings, but can easily be increased to accommodate however many you need to feed. Below is a short video demonstration of how to make this dessert. The written recipe follows the video.

Enjoy!
Judi

Blended Creamy Orange Dessert
Makes 1 to 2 Servings

6 each (about ½ cup) frozen mango chunks
6 each (about ½ cup) frozen papaya chunks
1/3 cup orange juice
1/3 cup coconut milk (canned, unsweetened, full-fat variety)

Place all ingredients in a small blender or food processor. Process briefly until smooth. Enjoy immediately!

Note: Sweetener can be added to this, if desired. This recipe can EASILY be increased to make whatever amount you need!

Simple Pineapple Dressing

Simple Pineapple Dressing

Here’s a REALLY simple dressing that can be used on a green salad or changed slightly to dress up your favorite fruit salad. These three simple ingredients whip into a fast, delicious, and tasty dressing…Try it! The recipe can VERY easily be increased for you to make whatever amount you need. Below is a video clip showing how to make the dressing. The written recipe follows the video.

Enjoy!
Judi

Simple Pineapple Dressing
Makes About ½ Cup (1 to 2 Servings)

½ cup canned pineapple with juice*
1 Tbsp hulled hemp seeds
2 Tbsp red wine vinegar**

Put all ingredients in a blender and process until smooth. Enjoy this over a mixed green salad or a fruit salad where you want a little tang. Store extra dressing in a covered container in the refrigerator and use within 3 days.

* Any type of canned pineapple can be used, whether it’s crushed, tidbits, chunks, or rings. Fresh pineapple may also be used, but you may need to add a tablespoon or two of water to help it to blend smoothly.

** Red wine vinegar is delicious when using this dressing on a green salad. Try balsamic vinegar for a little sweetness when used on a fruit salad.

Note: If preferred, add a little sweetener of choice. For more of a savory dressing, add 1 clove of garlic or 1/8 tsp garlic powder, and a little salt and pepper to taste.

About Judi
Julia W. Klee (Judi) began her journey enjoying “all things food” in elementary school when she started preparing meals for her family. That love of food blossomed into a quest to learn more and more about health and wellness as related to nutrition. She went on to earn a BS Degree in Food and Nutrition, then an MS Degree in Nutrition. She has taught nutrition and related courses at the college level to pre-nursing and exercise science students. Her hunger to learn didn’t stop upon graduation from college. She continues to research on a regular basis about nutrition as it relates to health. Her hope is to help as many people as possible to enjoy foods that promote health and wellness.