Category Archives: Nutrition

Black Beans

Black Beans 101 – The Basics

Black beans are a popular and extremely health-promoting legume to include in your meals whenever you can. If you’re wondering about the health benefits of black beans or are looking for ideas on what to do with them, such as what foods, herbs, or spices go well with black beans, you’re in the right place! I’ve answered those questions and a lot more! Read onward for a comprehensive review of black beans.

Enjoy!
Judi

Black Beans 101 – The Basics

About Black Beans
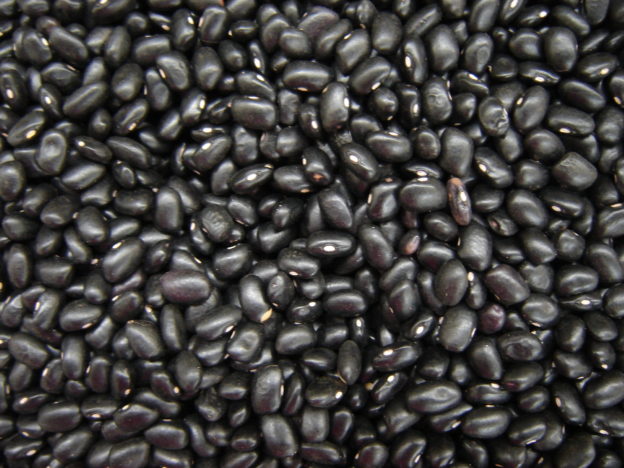
Black beans are native to North, South and Central America. They date as far back as 7,000 years ago when they were a staple food for Central and South Americans. Black beans are about one-half inch long with a shape similar to a pinto bean. They are members of the plant family Phaseolus vulgaris, along with navy, kidney, and pinto beans. Black beans are sometimes referred to as turtle beans or black turtle beans. Today, black beans are grown worldwide and are enjoyed in many cuisines. Cooked black beans are soft in texture with a mild, but slightly sweet flavor.

Nutrition and Health Benefits of Black Beans
Black beans are an excellent source of molybdenum. This trace mineral is critical in the formation of enzymes used in a variety of essential functions including carbohydrate metabolism. They also contain a lot of folate, fiber, copper, manganese, Vitamin B1, phosphorus, magnesium and iron. Furthermore, a one cup serving of black beans provides about 15 grams of protein (about one-third of the day’s needs), 15 grams of fiber, and about 180 mg of alpha-linolenic acid (an omega-3 fatty acid). That’s impressive!

Blood Sugar Control and Resistant Starch. The high fiber content of black beans coupled with the high protein content makes them an excellent food for helping to control blood sugar levels. Both fiber and protein help to regulate the passage of food through the gastrointestinal tract, reducing spikes in blood sugar from absorbed carbohydrates. This property gives black beans (and other legumes) a low rating on the glycemic index.

Also, recent studies have shown that black beans have specific peptides (types of proteins) that inhibit the formation of glucose transport molecules. This further inhibits glucose absorption from the digestive tract, also helping to keep blood sugars level. This can help in the management of blood sugar issues, especially Type 2 diabetes.

In addition to the high fiber content of black beans, much of their carbohydrate content consists of resistant starch. Resistant starch is not easily broken down in the upper digestive tract. Instead, it is carried to the large intestines where bacteria feed on the starch, breaking it down into short chain fatty acids. The fatty acids become fuel for our intestinal cells and may play a key role in the prevention of metabolic syndrome, bowel disorders, and some cancers. Short chain fatty acids have been found to aid in the treatment of ulcerative colitis, Crohn’s disease, and antibiotic-associated diarrhea. These properties help to decrease the risk of colorectal cancer in those who regularly eat black beans and other legumes.

Phytonutrient Content: Black beans are an outstanding source of anthocyanins and other flavonoids. Many of these compounds contribute to the rich, dark color of black beans. Anthocyanins acts as antioxidants, fighting harmful molecules in the body. They may provide anti-inflammatory, anti-viral, and anti-cancer benefits as well.

A 2010 report published in Nutrition Reviews found that anthocyanins may help to protect heart health by improving cholesterol levels and blood sugar levels, in addition to fighting oxidative stress. All of these factors contribute to heart disease. A 2011 study published in the American Journal of Clinical Nutrition found that anthocyanins may help to prevent high blood pressure, further protecting our heart health.

Dried vs Canned Black Beans
Dried Black Beans. Dried black beans should first be soaked, rinsed and drained, then cooked before being eaten. This takes some time and may not be feasible for all cooks. However, the nutrient content of dried, soaked and cooked beans is a little higher than that of the canned variety. Dried black beans are cheaper to buy when considering the amount of cooked beans you get from a one-pound bag vs the amount in one can of beans. If the cost factor is important to you, dried beans are the best option.

Storing Dried Black Beans. Store dried black beans in a cool, dry area in a sealed container. When properly stored, they should stay fresh for 2 to 3 years, although they are usually safe to eat beyond that. If you open a container of dried black beans and do not use them all, return the remaining unused beans to an airtight, sealed container stored in a cool, dry place. Dried beans are usually safe to eat beyond their ‘best by” date, although the quality may decline over time. If your dried beans develop an “off” odor or appearance, or show signs of mold or insect infestation, it’s time to discard them.

Canned Black Beans. Canned black beans are a convenient staple food to have in the pantry, and can be found in just about any grocery store. They should be rinsed and drained before eating. Since they are fully cooked, canned black beans can be eaten cold, cooked, pureed, or baked.

The nutrient content of canned black beans is slightly less than that of their dried counterparts, but not so much that they should be avoided. They are typically sorted before processing, as you would dry beans. The beans are then pre-hydrated before being cooked in their sealed cans. Some varieties of canned black beans have added salt and/or calcium chloride to maintain firmness. If you want to avoid those additives, organic and no salt added varieties of canned black beans are available at many grocery stores. The processing of canned black beans is relatively low when compared with other foods, and are considered to be a healthy alternative to dried black beans.

Storing Canned Black Beans. The quality of unopened cans of black beans can be good for 3 to 5 years if kept in a cool, dry place. They are usually safe to eat beyond that, but the quality may decline. Canned black beans usually have a “best by” date stamped on the can. If kept properly, the beans should be safe to eat beyond that day, but the quality may decline. If you notice a bad odor, off appearance or flavor, or mold, the beans should certainly be discarded. If any canned items are leaking, rusting, bulging, or severely dented, they should be discarded.

[On a personal note…When I was young, my parents had a pantry room off the kitchen where they stored canned foods. Apparently, they didn’t check them routinely. One day, a large can of fruit cocktail exploded in the room. It was everywhere! We did the best we could with clean-up, but that room smelled like old fruit cocktail for a VERY long time after that. So…lesson learned: Monitor your canned goods to be sure they are not bulging and use them within a reasonable amount of time!]

How to Prepare Dried Black Beans
Black beans should be soaked before being cooked. This makes them more tender, reduces cooking time, and also reduces their gas-producing tendencies when eaten. Preparing dried black beans is not hard, but does take some time.

First, place your dried beans in your cooking pot. Sort through them to remove any stones or other debris that may be in the bag, and any beans that don’t look good. Then rinse the beans and drain the water. Next, cover the beans with fresh water by at least two inches. There are two methods of soaking to choose from at this point…

Overnight method. Cover the pot and allow the beans to soak overnight or for at least 6 hours. Drain the water and cover the beans with fresh water by at least two inches. Cook your beans (see directions below).

Quick soak method. Cover your rinsed and drained beans in your cooking pot with fresh water. Place the lid on the pot and bring them to a boil. Boil them for two minutes. Remove the pot from the heat and allow them to rest in the covered pot for two hours. Drain the water, then fill the pot with fresh water. Cook your beans (see directions below).

Cooking your soaked beans. Place your pot filled with water and soaked beans on the stove. Cover the pot and bring them to a boil, then lower the heat. Tilt the lid on the pot and allow the beans to simmer until they are soft. This can take anywhere from 45 minutes to 2 hours depending upon how fast they are cooked and how long they soaked. Stir them occasionally. Be sure they remain submerged. If needed, add more hot water to the pot. Do NOT add salt or acidic ingredients like vinegar or lemon juice to the water at first. This will cause the beans to be tough and will make them hard to cook. If salted or flavored water is desired, add flavorings when they are close to being done. When they are soft, drain the water and use them as desired. Soaked dried beans may also be cooked in a pressure cooker or slow cooker.

Quick Ideas and Tips for Using Black Beans
* To have a supply of freshly cooked black beans readily available, cook a pound or two of dried beans. Cool them down in cold water, drain well, then transfer them to freezer bags or containers and store them in the freezer. You’ll have plenty of cooked black beans ready when you need them.

* Make a simple salad by combining black beans with celery, bell peppers, tomatoes and your favorite spicy dressing. Serve this on its own, on a bed of greens, or with a cooked grain of your choice.

* Make a quick taco by filling shells with cooked black beans, greens of choice, chopped tomatoes, avocado slices, onions and any other veggies you want. Top with chopped cilantro, a sprinkle of cheese, a drizzle of lime juice, and a dollop of sour cream or cashew cream.

* Make a black bean hummus by blending a can of black beans with tahini or avocado, lime, chili powder, and garlic to taste.

* Add cooked blacked beans to a stuffed baked potato.

* Use black beans in a burrito in place of refried beans.

* Make an easy dip by layering black beans with guacamole, diced tomatoes, onions, and chopped cilantro.

* Make a black bean salsa by combining black beans with diced tomatoes, red onion, jalapeno, and chopped cilantro. Add lime juice and salt to taste. Let rest for 20 minutes for flavors to blend, then serve with tortilla chips.

* Stuff baked sweet potatoes with a mixture of black beans, chopped onions, corn, diced tomatoes, all flavored with cumin, chili powder, cilantro and lime juice. Place the mixture in the baked sweet potato and top with cheddar cheese and a dollop of plain yogurt, sour cream or cashew cream.

* Try a black bean and walnut lettuce wrap. In a bowl, combine black beans, chopped walnuts, paprika, chili powder, cumin, chopped onion, diced tomatoes and any other vegetables you want, some lime juice, a little cheese, guacamole, sour cream, and/or salsa. Spoon the filling into large lettuce leaves, wrap and enjoy!

Herbs/Spices That Go Well with Black Beans
Basil, bay leaf, cayenne, chili pepper flakes, chili powder, cilantro, coriander, cumin, garlic, ginger, mint, mustard, oregano, paprika, parsley, pepper, rosemary, salt, savory, thyme

Foods That Go Well with Black Beans
Proteins, Legumes, Nuts, Seeds: Beef, chicken, chickpeas, eggs, pork, seafood, tempeh

Vegetables: Bell peppers, carrots, celery, chiles, chives, cucumbers, jicama, mushrooms, onions, potatoes, scallions, spinach, squash (winter), sweet potatoes, tomatoes

Fruits: Avocado, citrus fruits (esp. lemon, lime, orange), mangoes, olives, plantains

Grains and Grain Products: Corn, grains (in general), quinoa, rice, tortillas

Dairy and Non-Dairy: Cheese, sour cream

Other Foods: Chocolate, coffee, liquid smoke, miso, oil, sherry (dry), soy sauce, stock (vegetable), vinegar

Black beans have been used in the following cuisines and dishes…
Black bean cakes, Brazilian cuisine, burritos, Caribbean cuisine, casseroles, Central American cuisines, chili (vegetarian), Cuban cuisine, dips, empanadas, enchiladas, Jamaican cuisine, Latin American cuisines, Mexican cuisine, nachos, pates, Puerto Rican cuisine, purees, quesadillas, refried beans, salads, soups, South American cuisines, Southwestern (U.S.) cuisine, spreads, stews, tacos, Tex-Mex cuisine, tostadas, veggie burgers

Suggested Flavor Combos Using Black Beans
Add black beans to any of the following combinations…

Avocado + cilantro + corn + lime juice
Avocado + cilantro + onions + rice
Bell peppers + corn + lettuce + scallions
Bell peppers + garlic + onions
Brown rice + salsa + tomatoes
Cheddar cheese + chickpeas + corn + green onions
Chiles + cilantro + coriander + cumin + lime + scallions
Cilantro + lime + oregano + red onions
Cilantro + orange
Coriander + cumin + ginger
Garlic + thyme
Kale + sweet potatoes
Mango + quinoa
Salsa + sweet potatoes + tortillas

Recipe Links
Black Bean and Rice Salad https://www.thespruceeats.com/black-bean-and-rice-salad-3051221

Crock Pot Black Bean Chili https://www.thespruceeats.com/crockpot-black-bean-chili-recipe-481139

Easy Crock Pot Santa Fe Chicken https://www.thespruceeats.com/cindys-crock-pot-santa-fe-chicken-3054743

Southwest Black Bean and Corn Salad https://www.thespruceeats.com/southwest-black-bean-and-corn-salad-3377848

Quick and Easy Vegetarian Black Bean Soup https://www.thespruceeats.com/quick-vegetarian-black-bean-soup-3378007

Grilled Bean Burgers https://www.tasteofhome.com/recipes/grilled-bean-burgers/

Texas Black Bean Soup https://www.tasteofhome.com/recipes/texas-black-bean-soup/

Black Bean and Corn Quinoa https://www.tasteofhome.com/recipes/black-bean-corn-quinoa/

Black Bean Brownies https://www.tasteofhome.com/recipes/black-bean-brownies/

Black Bean and Rice Enchiladas https://www.tasteofhome.com/recipes/black-bean-and-rice-enchiladas/

Slow Cooked Stuffed Peppers https://www.tasteofhome.com/recipes/slow-cooked-stuffed-peppers/

Taco Lasagna https://www.tasteofhome.com/recipes/taco-lasagna/

Chili Tortilla Bake https://www.tasteofhome.com/recipes/chili-tortilla-bake/

15-Minute Black Bean Salad http://www.whfoods.com/genpage.php?tname=recipe&dbid=20

Mexican Black Bean Wrap with Avocado and Tri-Colored Slaw https://hellolittlehome.com/mexican-black-bean-wrap-avocado-tri-color-slaw/

Veggie Burrito Bowls https://www.easycheesyvegetarian.com/veggie-burrito-bowls/

Resources

http://www.whfoods.com/genpage.php?tname=foodspice&dbid=2

https://www.stilltasty.com/Fooditems/index/16542

https://www.stilltasty.com/Fooditems/index/16544

https://www.thespruceeats.com/cooking-black-beans-1808034

https://www.bonappetit.com/recipes/article/12-things-to-do-with-a-can-of-black-beans

https://domesticsuperhero.com/southwestern-stuffed-sweet-potatoes/

https://www.verywellhealth.com/the-scoop-on-anthocyanins-89522

https://www.ncbi.nlm.nih.gov/pmc/articles/PMC5613902/

https://www.phlabs.com/the-benefits-of-black-beans-will-blow-you-away

https://www.thespruceeats.com/black-bean-history-1807569

Page, Karen. (2014) The Vegetarian Flavor Bible. New York, NY: Little, Brown and Company.

About Judi
Julia W. Klee (Judi) began her journey enjoying “all things food” in elementary school when she started preparing meals for her family. That love of food blossomed into a quest to learn more and more about health and wellness as related to nutrition. She went on to earn a BS Degree in Food and Nutrition, then an MS Degree in Nutrition. She has taught nutrition and related courses at the college level to pre-nursing and exercise science students. Her hunger to learn didn’t stop upon graduation from college. She continues to research on a regular basis about nutrition as it relates to health. Her hope is to help as many people as possible to enjoy foods that promote health and wellness.

Salt

Ways to Reduce Your Salt Intake

The current 2015-2020 Dietary Guidelines for Americans recommend that Americans consume less than 2300 mg of sodium a day. That equates to less than one teaspoon of salt. Yet, many Americans still consume a lot more than that. Furthermore, recommendations are moving toward reducing that amount even more, to 1500 mg per day (about 2/3 of a teaspoon of salt, and this does not account for naturally-occurring sodium in our food). Where does all this sodium come from? In the average American diet, about 77% comes from processed foods or foods prepared outside the home (such as restaurant meals), 12% comes from natural sources (naturally occurring sodium in foods), 6% from salt added at the table while eating, and 5% added while cooking. When examining those percentages, it’s clear that most of the sodium in our diet comes from foods that we did not prepare ourselves.

We do need some sodium for our bodies to function normally, but the amount is far less than we consume. A mere 186 mg of sodium per day is all that’s truly needed, and that small amount can be found naturally occurring in whole, unadulterated foods. Furthermore, consuming whole, unadulterated plant foods such as fruits and vegetables, provides an abundance of potassium, helping to balance the potassium to sodium ratio in the body.

Many people need (or want) to slash their salt intake for numerous reasons and struggle to do so. The following are some suggestions on how to reduce your sodium intake, balance the sodium to potassium ratio, and yet still enjoy the flavor of our foods.

Prepare Your Own Foods at Home
This may hard to do all the time, especially if you travel a lot in your career, have odd working hours or a lot of responsibilities with little time to spend in the kitchen. You’re forgiven! However, it’s up to you to work out a way to squeeze a little valuable time for yourself to prepare some of your own foods to take along with you so you can reduce your need for restaurant foods.

Here are some ideas for easy food preparation at home…
* Try overnight oats for a ready-to-go breakfast in the morning. Recipes are all over the internet!

* Take time on a day off to prepare foods ahead for the coming week. Many people spend time on the weekend making a lot of food for the coming week’s lunches. Pack them in individual serving containers so you can just grab one and put it into a travel bag with an ice pack on your way out the door. It’ll be ready when you are. If need be, they could be stored in the freezer and placed in the refrigerator the night before you need it so it can thaw safely.

* Plan on having a large salad once a day, or at least as often as you can. Lettuce can be washed in advanced, drained, and then stored in the refrigerator in a covered container between layers of paper towels. It will stay crisp and will be ready when needed. Other vegetables can also be washed and cut in advance and stored in a similar way. Just be sure they’re not stored overly wet, or sitting in a puddle of water, which could cause them to spoil.

* Make a large pot of soup on a day off. Chill it down well, then store it in the refrigerator, either in a large container, or in individual containers. It can also be frozen in individual serving size containers for an easy lunch or supper when needed. If you remember, transfer a container (for the next day) in the refrigerator the night before so it can thaw (or at least start to thaw). Warm the soup on the stove or in the microwave for a fast meal.

* Make sandwich filling of some sort on a day off. Homemade hummus, nut butter and fruit spread, or (if you’re an omnivore) cooked meat or a meat combo if you prefer, are all possible sandwich fillings where you can control what’s in them. Store the filling in a covered container in the refrigerator and sandwiches will be easy to make when you need them.

* Make a large casserole on your day off. Like the soup, salads, and sandwich fillings, making a large casserole ahead of time gives you a nice option of your own foods made to your liking that you can enjoy during the week and have ready when you are. Individual portions can be stored in the refrigerator or frozen until needed. Warming it in a microwave or even toaster oven is an option, as long as your container is appropriate for those methods.

* Put supper in the crock pot/slow cooker in the morning before you leave for work. This may not work for everyone, since it involves extra time in the morning. But if you can get up a little earlier or work it out, a nice, hot, homemade supper will be ready for you when you get home. How convenient is that?

Season Foods with Herbs or Spices Instead of Salt
Sometimes a little added salt goes a long way in making food palatable, and that should be OK as long as we don’t overdo it (or have a medical issue requiring a salt-free diet). However, seasoning our own food with plenty of herbs and spices can reduce our need for added salt. Try some of the following options to flavor your foods instead of salt…

Proteins, Beans, Legumes, and Marinades: Basil, chiles/cayenne, chives, cilantro, coriander, dill (weed), ginger, nutmeg, oregano, paprika, pepper, rosemary, sage, tarragon, thyme, turmeric

Vegetables, Stir-Fries, Salads: Basil, chiles/cayenne, chives, cinnamon, cilantro, coriander, dill (weed), ginger, mint, nutmeg, oregano, paprika, pepper, rosemary, sage, tarragon, thyme, turmeric

Fruits: Cardamom, cinnamon, coriander, ginger, mint, nutmeg, pepper, rosemary, tarragon (esp. with lemon), thyme (esp. with citrus)

Grains, Grain Products, and Grain Dishes: Basil, cardamom, cinnamon, cloves, chiles/cayenne, coriander, ginger, mint, nutmeg, oregano, paprika, rosemary, sage, tarragon, thyme, turmeric

Dairy and Non-Dairy: Cardamom, chives, dill (weed), mint, nutmeg, rosemary, sage, thyme (esp. with cheese)

Casseroles, Sauces, Soups, Stews: Basil, cardamom, chiles/cayenne, chives, cinnamon, cilantro, coriander, dill (weed), ginger, nutmeg, oregano, paprika, pepper, rosemary, tarragon, thyme, turmeric

About some specific herbs/spices used to replace salt…
* Basil. Basil is sweet yet peppery. Fresh basil has more flavor than that of dried. Basil is excellent in pesto, marinades, dressings, sauces, sandwiches, soups, and salads. It is often used in Mediterranean dishes, especially tomato-based sauces and pizzas. There are different varieties of basil, giving different flavors to this herb.

* Cardamom. Cardamom is a warm, aromatic spice. Whole cardamom pods can be used, or the seeds (which are inside the pods) can be used whole or ground. Cardamom is commonly added to Asian spice mixes and curry pastes. It works well in baked goods and sweet breads along with cloves and cinnamon.

* Chiles/Cayenne. Chile peppers vary a lot in their heat, so always add a little at first if you’re not sure. Cayenne is a specific type of Chile pepper. Chile peppers are available fresh, dried, flaked, ground into powder, and made into hot sauce. Hot sauce may be high in sugar and/or salt, so do read labels if you’re on a salt-restricted plan. Opting for fresh hot peppers gives you more control over the sodium content of your food. Chiles work well in most foods, including vegetable and seafood dishes. A pinch of chili pepper with mustard can help you reduce the amount of cheese needed in a cheese sauce (thereby reducing sodium in the sauce, since cheese is high in sodium). Chiles combine well with cumin, coriander seeds, and turmeric. Cayenne pairs well with meats, grains, soups, and vegetables.

* Chives. Chives have an onion-like flavor but are milder than onions. Add chives to hot dishes at the end of cooking to preserve the flavor. Chives are excellent in mashed potatoes, baked potatoes, casseroles, salads, cream cheese, fish and poultry.

* Cinnamon. Cinnamon is most often used in sweet treats and baked goods like cakes, quick breads, and fruit crisps. But cinnamon also works in some savory dishes too. In Turkish and Middle Eastern cuisines, cinnamon is used to flavor chicken and lamb. It can also be used to add a special flavor to curries, tagines, casseroles, roast vegetables, Bolognese sauce, and stewed fruit.

* Coriander/Cilantro. In the United States, we refer to the seeds of this plant as coriander, whereas the leaves are called cilantro. The cilantro leaves have an earthy yet citrusy flavor. The coriander seeds have a warm, spicy, citrus flavor. Cilantro can be used raw or added to hot foods at the end of cooking time to preserve their flavor. The leaves are excellent in salads, soups (esp. carrot and coriander soup), salsas, curries, fish, and chicken dishes. It is often combined with lime and chiles in stir-fry dishes. Coriander seeds are commonly used in Indian cuisine.

* Cumin. The flavor of cumin is earthy and smoky. Cumin is the second most popular spice in the world (whereas black pepper is the first). Cumin pairs well with many foods, but especially chicken, beef, lamb, game, beans and rice. For a Mexican flare, combine cumin with oregano and chili. For a taste of India, combine cumin with cardamom, coriander, and turmeric.

* Dill. Dill seeds and dill weed (the leaves) are both used in a variety of dishes. Their flavor is very different. Dill seeds have a flavor of fennel, star anise, and celery combined. They are what gives dill pickles their characteristic flavor. The leaves (dill weed) have a fresh, bright flavor that add hints of lemon anise. Dill weed blends well with cottage cheese, cream cheese, omelets, seafood, steak, potato salad, and cucumber salads.

* Ginger. Ginger has a sharp aroma and flavor of pepper and lemon. It can be purchased fresh or dried and ground. Ginger enhances both sweet and savory dishes. Grated fresh ginger can be added to stir-fries, rice, curries, and meats. It can be added to salad dressings and even stewed fruit.

* Mint. This refreshing herb works well in both sweet and savory dishes. Try this with salads, pasta or couscous. Mint also goes well with carrots, cucumber, rice, melon, tomato, yogurt, and peas.

* Nutmeg. Nutmeg is sweet yet pungent at the same time. Most people prefer the flavor of freshly grated nutmeg rather than that of dried nutmeg, but use whatever you have on-hand. It works well in baked goods with cinnamon and cloves. Nutmeg plus black pepper complement each other in white sauces and cheese sauces. Nutmeg also adds a natural “warmth” when added to homemade potato, cauliflower, and cabbage soups.

* Oregano. Oregano has a warm, aromatic, and slightly bitter flavor with a strong aroma. It is commonly used in Greek and Mediterranean cuisines. It can be used in meat, poultry and seafood marinades. Use it also in egg dishes, breads, casseroles, and salads. It’s an essential ingredient in spaghetti sauce and gives pizza its classic flavor.

* Paprika. Paprika is made from dried and ground sweet peppers and hot peppers. It is milder and sweeter than cayenne pepper. Paprika can be paired with caraway, coriander, cinnamon and dill for a Hungarian flare. Combine paprika with garlic for a Spanish twist. Paprika also goes well with chicken, lamb and fish, on baked sweet potatoes, in beans, and with scrambled eggs.

* Parsley. Parsley has a mildly bitter, grassy flavor that blends well with other flavors, but does not overpower them. Flat-leaf parsley is preferred by chefs because its flavor holds up well when heated. Curly parsley is often used as a garnish. Parsley goes well with roast lamb, grilled steak, fish, chicken, vegetables, potatoes, omelets, stuffing, soft cheese, marinades, dressing, sauces and soups.

* Peppercorns. Peppercorns are not only the common black variety, but can also be red, green, yellow, and white. Each color has its own flavor. Some are sweet, some are bitter, while others are hot. Try a blend of different colored peppercorns for a warm flavor twist to your dishes.

* Rosemary. Rosemary is an aromatic herb with a pine-like fragrance. Use rosemary sparingly, as it can overpower other flavors. Use rosemary fresh or dried, but crush the dried rosemary first to release its essential oils and flavors. Rosemary can be added to meats, breads, pizza, tomato sauce, beans, potatoes and egg dishes. Roast whole springs of fresh rosemary with root vegetables such as carrots, parsnips, and sweet potatoes.

* Sage. Sage is similar in flavor to rosemary, but with more lemon and eucalyptus flavor. Sage retains its flavor with prolonged cooking, which is unlike many herbs. Sage is often used in Italian and French cuisines where it is added to meats, poultry, and stuffing. Chopped sage is often added to pasta and gnocchi.

* Spice/herb blends. There are a number of spice/herb blends on the market that have no salt added to them. These can make cooking easy for you if you’re in a hurry or don’t want to spend time researching what to season a food with. When shopping for a spice blend, look for “Salt-Free” on the label, or carefully read the ingredients list to be sure there is no added salt in the mix.

* Tarragon. Tarragon has a distinct licorice-like flavor with a star anise aroma. To preserve its flavor, add it near the end of cooking time. Tarragon is often used in French cuisine and goes well with fish, poultry, eggs, beef, and vegetable soups. It can also be added to salad dressings.

* Thyme. Thyme has a strong earthy, slightly minty flavor. Unlike many herbs, the flavor of thyme improves and is released with prolonged cooking. Whole thyme sprigs are often added to dishes early on to release their full flavor. Whole sprigs are often added to slow-cooked meals and casseroles, and removed at the end. Thyme pairs well with rosemary, parsley, sage, savory and oregano. It is used to flavor meats, chicken, game, and roasted vegetables. Thyme pairs well with paprika, oregano, and cayenne in Cajun cuisine. It also pairs well with cinnamon, nutmeg, and cayenne pepper in Caribbean cuisine. Lemon thyme goes well in soups and vegetable dishes.

* Turmeric. Turmeric is a common ingredient in curry and is often used in South Asian dishes. North Africans often use turmeric with ginger in flavoring meats, vegetables, and rice. A little turmeric goes a long way, as its flavor intensifies with cooking.

Foods That Can be Used to Season Dishes Without Added Salt
In addition to specific herbs and spices being used to replace added salt, some foods can be used as ingredients to replace added salt by adding another flavor dimension to a dish. Here are some examples…

Proteins, Beans, Legumes, and Marinades: Balsamic vinegar, beverages (beer, wine, coffee), celery, garlic, kelp granules, lemon, mushrooms, nutritional yeast, onions, salsa/chutney, vinegar (in general)

Vegetables, Stir-Fries, Salads: Balsamic vinegar, celery, garlic, kelp granules, lemon, mushrooms, nutritional yeast, onions, salsa/chutney, vinegar (in general)

Fruits: Balsamic vinegar, celery, lemon, vinegar (in general)

Grains, Grain Products, and Grain Dishes: Balsamic vinegar, celery, garlic, kelp granules, lemon, mushrooms, nutritional yeast, onions, salsa/chutney, vinegar (in general)

Dairy, Non-Dairy, Cheese: Balsamic vinegar, celery, lemon, mushrooms, nutritional yeast, onions, salsa/chutney

Casseroles, Sauces, Soups, Stews: Balsamic vinegar, beverages (beer, wine, coffee), celery, garlic, kelp granules, lemon, mushrooms, nutritional yeast, onions, vinegar (in general)

More about specific foods used to replace salt…
* Balsamic vinegar. Balsamic vinegar can be used far beyond salads. It comes in a variety of flavors that helps it to pair well with many foods. Some balsamic flavors include lemon, cherry, espresso, chocolate, garlic, apple, and more. The flavors enable balsamic vinegar to pair with many foods. It can add a sweet, fruity flavor to ice cream, yogurt, and beverages. It can be used to marinade red meats. Garlic and lemon balsamic vinegars can be used to flavor poultry, seafood and vegetables.

* Beverages (esp. beer, wine, coffee). Assorted beverages have been used to flavor foods in lieu of salt. Beer, wine, and even coffee have been used to flavor stews, soups, chili, pasta sauces, and braised dishes. These liquids can be used on their own or combined with broth. [Note! Beware of commercially prepared broth, as it may be high in sodium. Read the label to be sure it meets your needs regarding sodium intake.]

* Celery. For someone on a highly sodium-restricted diet, eating celery may be questionable. But for the rest of us, the unique flavor of celery can add a salty flare to otherwise bland foods. One stalk of celery naturally contains 32 mg of sodium, which is not a lot. But, since celery is mostly water, that sodium flavor seems to be accentuated in celery. So if you’re mixing up some food of whatever sort and you are missing a salty component, rather than reaching for the salt shaker, try adding a stalk or two of celery. Hopefully it will do the trick.

* Garlic. Garlic is an excellent alternative to salt. We’re all familiar with it and most likely have some in the kitchen, whether fresh or dried. Raw garlic adds a pungent zest to foods while roasted garlic adds a delicious sweet, nutty flavor. Add garlic to chicken, fish, meats, vegetables, salads, breads, and stir-fries…almost anything!

* Kelp granules. This option may be new to some people even though kelp has been available as a food for quite a white. Kelp granules are what they say…dried granules of kelp. It is salt-free, but NOT sodium-free. Along with other nutrients, kelp does contain iodine, a needed element that is added to table salt. Kelp granules do contain some naturally-occurring sodium from growing in the salty sea water. (One teaspoon generally contains about 100 mg of sodium.) However, it is far less than what you would find in table salt. (One teaspoon of table salt contains 2,325 mg of sodium.) This can serve as a good food source of iodine if you’re on a low-sodium or salt-restricted diet. However, it’s important to read the nutrition facts label first to be sure it meets your needs regarding sodium restriction. Also, don’t overdose on kelp because that could lead to an iodine overload!

* Lemon zest/lemon juice (or any citrus zest/juice). Lemon (or any citrus fruit) brightens flavors and pairs with most foods, from appetizers, to main dishes and vegetables, to salads, breads, and desserts. It can be added to marinades to bring flavor to foods without a lot of salt. The zest of the fruit brings out an even stronger flavor than the juice, so add it when you want a more pronounced citrus flavor to foods.

* Mushrooms. Mushrooms can add a subtle umami flavor to foods without adding extra salt to the dish. A mixture of caramelized onions, garlic, and mushrooms with a dash of balsamic vinegar may be all you need to flavor a specific food.

* Nutritional yeast. Nutritional yeast is deactivated (killed) yeast that comes in powder or flakes. It is an excellent source of an array of vitamins and minerals, with only 5 mg of sodium in two tablespoons of nutritional yeast flakes. It is described as having a nutty, cheesy, savory flavor. Nutritional yeast is often used as a vegan cheese substitute. If you’re not used to eating nutritional yeast, it’s best to slowly add it to your diet. Adding it too quickly may cause some unpleasant side effects. (1) Nutritional yeast has a lot of fiber, with about 5 grams in just 2 tablespoons. Adding too much too fast may cause gas, cramps, or even diarrhea. Drinking plenty of liquids with nutritional yeast may help to prevent this. (2) Some yeast products may trigger migraine headaches in some people. This is due to tyramine, a compound the body makes from the amino acid tyrosine contained in yeast products. (3) Nutritional yeast contains high amounts of the B-vitamin niacin, which can cause a flushing reaction in some people. This is like a facial to full-body hot flash, with reddening of the skin followed by burning and itching. It can last for ten to twenty minutes. The condition is uncomfortable, but not harmful. (4) Some individuals with irritable bowel disease are sensitive to yeast products. Nutritional yeast may trigger an immune response, worsening symptoms in some individuals with such conditions.

* Onions. Onions add a deep umami flavor to foods, especially when paired with garlic. Onions are used to flavor many foods including stews, soups, any braised or roasted dish, tomato based sauces, burgers, meatloaf, casseroles, pizza, salads, and more. When caramelized, onions add a sweetness to many foods including vegetarian and vegan dishes.

* Salsa and chutney. Salsas and chutneys add a fresh flavor to meats, fish, omelets, vegan/vegetarian dishes, appetizers, cheeses, chips and crudités. Homemade versions would be ideal for those on a reduced salt plan since you can control the ingredients. When purchasing store-bought varieties, read the nutrition facts panel and ingredients list to be sure it meets your needs.

* Vinegar (in general). When the flavor of a dish seems “flat” and bland, add a touch of acid to brighten it up. Vinegar (or even citrus juice) will enhance the flavors in sauces, salads, green vegetables, marinades, salsas, and chutney. There are many flavors of vinegars which vary from extremely to mildly acidic and very sour to sweet, so experiment with enhancing the flavors of foods with different vinegars rather than added salt.

Foods to Avoid When on a Low-Sodium Diet
* Canned soups. Canned soups are usually very high in salt content, so avoid them if you are on a reduced sodium diet. If you see a low-sodium option, also read the label before purchasing it to be sure it meets your needs, because they may also have too much sodium for some people.

* Bouillon cubes and commercially made broths. Traditional bouillon cubes and prepared broths can be extremely high in added salt. Be sure to read the nutrition facts panel and ingredients list, even if it is labeled as low-sodium. It still may have too much sodium for some people who are on a sodium-restricted diet.

* Chips and salted snacks. This one almost goes without saying. Commercially prepared chips and salted snacks like nuts, pretzels, popcorn, and pork rinds are laden with added salt. If you’re on a salt-restricted plan, such items will be off your list unless you opt for an unsalted or low-sodium version. (They ARE out there!) Always check the label first.

* Milk and cheese products. Cow’s milk has some naturally-occurring sodium (about 105 mg per cup). When milk is made into cheese, the sodium content is concentrated, resulting in products that are often higher in sodium. Furthermore, most cheeses are high in sodium since salt is added during the cheese-making process. Therefore, cheese may be off your list if you’re on a low-sodium diet. Be sure to read the Nutrition Facts panel on all milk products to be sure they meet your needs.

* Salted butter and margarines. These foods can be a source of sodium that we often don’t think about, but when combined with the sodium in other foods, it can add up. Opt for unsalted or low-salt versions when possible.

* Flavorings and condiments with added salt. The list can be long here, but this includes all herb/spice blends with added salt, such as garlic salt, celery salt, onion salt, and seasoning salt. Meat tenderizers, barbeque sauce, soy sauce, ketchup, mustard, teriyaki sauce, oyster sauce, salad dressings, tamari, Worcestershire sauce, pickles and pickle relish, sauerkraut, bacon bits, and even croutons will likely contain added salt. When in doubt, read the label!

* Food mixes. Prepared food mixes are often high in added salt. Such items include gravy mixes, boxed pasta/vegetable/rice mixes with seasonings, instant pudding mixes, Ramen noodles and other instant soups, and all other instant or convenience foods. Even dried bean mixes with seasoning packets are something to beware of when on a sodium-restricted plan. Always check the label to be sure it meets your needs.

* Frozen dinners and prepared frozen foods. These foods are usually laden with added salt used as a flavoring and even preservative. This also includes frozen pizzas. When in doubt, read the label for the sodium content on the Nutrition Facts panel to see if it meets your needs.

* Processed meats. Processed meats such as bacon, lunchmeats, ham, corned beef, hot dogs, salt pork, and sausages, are often very high in salt content. Avoid these unless they are a low-sodium option that actually meets your nutritional needs (check the label).

* Poultry. Many poultry items (such as Thanksgiving turkeys) are injected with broth for moisture and flavoring. This can greatly increase the sodium content of these foods, possibly raising it above your limits. Check the label or ask the meat department manager in your store about the sodium content of what you’re considering.

* Some bread products. Salt is normally added to yeast bread dough because it helps to control the growth of the yeast during the bread baking process. Read the label to be sure any bread you purchase meets your needs.

* Some canned foods. When on a reduced-sodium diet, another way to lower sodium intake is to choose salt-free canned foods rather than “regular” canned options. This includes canned vegetables, beans, sauces, gravies, salsa, and soups. More and more foods are being packed with salt-free options, so the choices are increasing. When on a sodium-restricted plan, reading canned food labels is a must-do.

* Bottled vegetable juice. Many tomato-based vegetable juices are high in sodium. However, some varieties are labeled as being “reduced-sodium.” Read the Nutrition Facts panel to be sure it meets your needs.

* Restaurant foods. Many of these same principles apply when dining at a restaurant. When in doubt, ask the server which menu options are low-sodium.

* Beware of softened water. Softened water is “softened” with added sodium. This should be avoided when on a sodium-restricted plan. Softened water should not be used for food preparation nor drinking when sodium intake needs to be low.

Resources
https://www.cdc.gov/salt/index.htm

https://health.gov/dietaryguidelines/2015/guidelines/

https://www.google.com/url?sa=t&rct=j&q=&esrc=s&source=web&cd=10&ved=2ahUKEwiBn9zxz4_mAhUSEawKHY–AMIQFjAJegQIAxAC&url=https%3A%2F%2Fwww.heart.org%2F-%2Fmedia%2Ffiles%2Fabout-us%2Fpolicy-research%2Ffact-sheets%2Faccess-to-healthy-food%2Freducing-sodium-in-the-us-diet-fact-sheet-2019.pdf%3Fla%3Den%26hash%3DD86A882315B2BA51D74F104EF00B74DCCF41C980&usg=AOvVaw1WLawWhm8kk_JELArmKMMo

https://www.healthline.com/nutrition/sodium-per-day#recommendations

https://www.bhf.org.uk/informationsupport/heart-matters-magazine/nutrition/herbs-and-spices

https://www.savoryspiceshop.com/dill-weed

https://foodinsight.org/cutting-down-on-sodium-6-alternatives-to-salt/

https://shescookin.com/10-naturally-delicious-sodium-substitutes/

https://nutritionovereasy.com/2011/02/is-kelp-high-in-sodium/

https://nutritiondata.self.com/facts/custom/1323565/2

https://www.healthline.com/nutrition/nutritional-yeast-dangers#1

https://my.clevelandclinic.org/health/articles/15426-sodium-controlled-diet

https://www.ucsfhealth.org/education/guidelines-for-a-low-sodium-diet

https://healthfinder.gov/healthtopics/category/health-conditions-and-diseases/heart-health/low-sodium-foods-shopping-list

Page, Karen. (2014) The Vegetarian Flavor Bible. New York, NY: Little, Brown and Company.

About Judi
Julia W. Klee (Judi) began her journey enjoying “all things food” in elementary school when she started preparing meals for her family. That love of food blossomed into a quest to learn more and more about health and wellness as related to nutrition. She went on to earn a BS Degree in Food and Nutrition, then an MS Degree in Nutrition. She has taught nutrition and related courses at the college level to pre-nursing and exercise science students. Her hunger to learn didn’t stop upon graduation from college. She continues to research on a regular basis about nutrition as it relates to health. Her hope is to help as many people as possible to enjoy foods that promote health and wellness.

Lentils

Lentils 101 – The Basics

The whole-foods, plant-based diet is increasing in popularity. So, lentils, beans, and seeds are being enjoyed by many. Even if you’re a meat eater, having a meatless meal at least once a week is encouraged. Lentils have been around for thousands of years and many people enjoy them. Yet, many others are new to lentils and just aren’t sure what to do with them. Here’s some help for you. Below is a lot of basic information about lentils, covering what they are, the various types of lentils, the nutritional and health benefits of lentils, how to flavor them and what other foods pair well with them, recipe suggestions, and more! Let me know if you need further information about lentils and I’ll do my best to help!

Enjoy!
Judi

Lentils 101 – The Basics

About Lentils
Lentils are in the legume family. They are actually pulses, which are the edible seeds that grow in pods containing only one or two seeds per pod. They are believed to have originated in central Asia, and have been eaten since prehistoric times. They are one of the first foods be cultivated. Lentil seeds dating back 8000 years have been found at archeological sites in the Middle East. Today, most lentils are grown in India, Turkey, Canada, China and Syria. There are many varieties with the most common types in American grocery stores being brown, green and red (but actually more orange in color). There are also yellow, black, and puy lentils.

The brown lentils are the variety most commonly found in American grocery stores. They have a mild, earthy flavor, and hold their shape well when cooked. Brown lentils are “universal” in the lentil family as they can be used in whatever recipe that calls for lentils. They can be mashed and used in meatless burgers, blended into soups, used in salads, and used in casseroles and literally any recipe calling for lentils. They pair well with grains.

Green lentils have a bit of a peppery flavor. This makes them particularly suitable to add to salads or any dish where a pepper flavor is welcome. They take a little longer to cook then the brown variety, but still hold their shape well while maintaining a little firmness. This type of lentil is not as commonly found in American stores as the brown lentils, and can be a little more costly.

Red lentils have a sweet, nutty flavor. They cook up faster than other varieties because they are actually split and the seed coat has been removed. This makes them soft and mushy when cooked, making them a natural thickening agent for soups, purees, and stews.

Yellow lentils are split like red lentils. They have a sweet-nutty flavor, like their red counterpart. Since they are split, they also cook up quicker than brown or green lentils, in 15 or 20 minutes. Yellow lentils are commonly used in Indian cuisine.

Black lentils are also called beluga lentils. These are the most flavorful lentils. They have a somewhat thicker skin than brown lentils, so if you want them tender, they may need to cook a little longer like the green lentils, perhaps up to 40 minutes. If you want to maintain some of their crispness, cook them for less time, about 30 minutes.

Puy (pronounced pwee) lentils come from the French region of Le Puy. They look like green lentils, but are smaller and have a peppery flavor.

Nutrition Tidbits
Lentils are an excellent source of molybdenum and folate, and a very good source of dietary fiber, copper, phosphorus and manganese. Also, they are a good source of iron, protein, Vitamin B1, pantothenic acid, zinc, potassium and Vitamin B6. Lentils contain no fat. One cup of cooked lentils provides about 1/3 of our daily protein needs (18 grams) and 230 calories.

Lentils are a good source of both soluble and insoluble fiber. The soluble fiber helps to keep our cholesterol in check (by binding with bile in the digestive tract, removing it from the body and forcing the body to use cholesterol in the system to make more bile). The insoluble fiber in lentils helps to prevent constipation while reducing the risk of irritable bowel syndrome and diverticulosis.

The fiber in lentils not only helps to regulate cholesterol levels, but also regulates blood sugar. This helps in controlling diabetes, insulin resistance and hypoglycemia. Research has confirmed that eating lentils as part of a high fiber diet helps to release energy slowly and steadily, showing dramatic effects in diabetics by controlling blood sugar and lowering cholesterol levels.

The fiber content, combined with its folate and magnesium content, works wonders in helping to lower the risk of heart disease by lowering homocysteine levels and improving blood flow around the body. Homocysteine is an important amino acid needed in certain metabolic reactions. When our folate level is low, homocysteine levels increase, causing damage to arterial walls and raising our risk for heart disease.

Lentils are also a good source of iron, with one cup of cooked lentils providing over a third of our daily needs. Iron is critical for carrying oxygen throughout the body in the bloodstream. Eating lentils on a regular basis can help keep our energy levels up and prevent iron deficiency.

How to Select Lentils
Most lentils available today are either found in bulk bins or are prepackaged. When buying lentils, make sure there is no sign of moisture or insect damage. Look for ones that are whole and not cracked.

How to Store Lentils
Store lentils in an airtight container in a dry, cool, dark place. They should keep for about a year.

How to Preserve Lentils
Once cooked, lentils will keep in the refrigerator for about one week. Cooked lentils can be frozen and should be used within three months.

How to Prepare Lentils
Compared to other beans or legumes, lentils are very easy to prepare since they need no presoaking. Before cooking them, check them for stones or debris and remove anything as needed. Place the dry lentils in a strainer and rinse them under cold water, then cook as desired.

How to Sprout Lentils
Here is my video on how to sprout lentils, from start to harvest…


How to Cook Lentils
When boiling lentils, use one part lentils to three parts water. It is not mandatory, but bringing the water to a boil first before placing the lentils in the water helps to make them more digestible. When the water returns to a boil, turn down the heat and simmer, covered, for about 30 minutes until tender. Brown lentils usually take about 30 minutes to cook. Red lentils take about 20 minutes, and black lentils may take up to 45 minutes to cook. Some recipes call for slightly more firm lentils, requiring a little less cooking time, while other recipes call for very soft lentils, requiring a little more cooking time.

Some suggested ways to use lentils:
* Try mixing lentils with rice or another grain. The combination will make a complete and very digestible protein. Vegetables can be added to make a simple meal. Suggested vegetables include dark leafy greens like kale or spinach, or crunch vegetables like carrots or bell peppers.

* Add cooked lentils to stir-fries or casseroles.

* Use pureed cooked lentils in hummus.

* Cook lentils in your favorite broth to add more flavor to them. Add some herbs to flavor them to your liking.

* Add lentils to soups and stews for a protein boost.

* Use lentils in a curry served over rice.

* Serve chili-spiced lentils with cheese and nacho chips or use them as a taco filling.

* Stuff sweet potatoes with your favorite cooked lentils. Top with cheese.

* Try a creamy red lentil soup.

* Try a lentil salad. Many can be served warm, room temperature or cold…a perfect addition to a summer gathering (or any time for that matter!).

Herbs/Spices That Go Well with Lentils
Bay leaf, cardamom, chili powder, cilantro, cinnamon, cloves, coriander, cumin, curry, garam masala, garlic, ginger, mint, oregano, paprika, parsley, rosemary, tarragon, thyme, turmeric

Other Foods That Go Well with Lentils
Meats and other proteins: Beef, eggs, fish, lamb, sausage

Grains: Rice, pasta and any just about any grains or grain product

Vegetables: Carrots, celery, leafy green vegetables, mushrooms, onion, tomatoes

Dairy: Cheese

Recipe Links
Lentils with Mushrooms and Carrots https://www.judiklee.com/2019/06/04/lentils-with-mushrooms-and-carrots/

Sweet and Savory Lentils https://www.judiklee.com/2019/05/28/sweet-and-savory-lentils/

Lentils with Vegetables over Spaghetti Squash https://youtu.be/_wrLM_1s-ZI and https://www.judiklee.com/2019/08/27/lentils-with-vegetables-over-spaghetti-squash/

Mexican Lentils and Rice https://www.lentils.org/recipe/mexican-lentils-rice/

Roasted Spring Vegetable Medley with Crispy Lentils https://www.lentils.org/recipe/roasted-spring-vegetable-medley-with-crispy-lentils/

Teriyaki Stir-fry with Lentils and Quinoa https://www.lentils.org/recipe/teriyaki-stirfry-with-lentils-quinoa/

Instant Pot Lentils Braised with Beets and Red Wine https://www.lentils.org/recipe/instant-pot-lentils-braised-with-beets-red-wine/

Shrimp with White Wine, Lentils and Tomatoes https://www.lentils.org/recipe/shrimp-with-white-wine-lentils-tomatoes/

Quick Pasta with Lentils https://www.lentils.org/recipe/quick-pasta-with-lentils/

25 Ways to Turn Lentils into Dinner https://www.thekitchn.com/25-ways-to-turn-lentils-into-dinner-248332

10 Delicious Ways to Eat Lentils https://www.onegreenplanet.org/vegan-food/delicious-ways-to-eat-lentils/

Warm Winter Greens with Balsamic Lentils and Roasted Pears https://producemadesimple.ca/warm-winter-greens-with-balsamic-lentils-and-roasted-pears/

8 Surprisingly Fast and Delicious Lentil Recipes https://www.foodandwine.com/blogs/8-surprisingly-fast-and-delicious-lentil-recipes

25 Creative Lentil Recipes That Go Way Beyond Soup https://www.bonappetit.com/recipes/slideshow/lentil-recipes

Sweet Potato and Red Lentil Curry https://www.cookinglight.com/recipes/sweet-potato-and-red-lentil-curry

15 Best Lentil Recipes https://www.acouplecooks.com/best-lentil-recipes/

Mediterranean Lentil Salad https://www.allrecipes.com/recipe/14260/mediterranean-lentil-salad/

Lentil Salad https://www.skinnytaste.com/lentil-salad/

Greek Lentil Salad https://cookieandkate.com/greek-lentil-salad-recipe/

Sexy Lentil Salad https://www.recipetineats.com/sexy-lentil-salad/

Lentil Salad https://simpleveganblog.com/lentil-salad/

Lentil and Rice Salad https://www.bonappetit.com/recipe/lentil-and-rice-salad

Quinoa Lentil Salad with Lemon Vinaigrette https://www.asweetpeachef.com/quinoa-lentil-salad-lemon-vinaigrette/

About Judi
Julia W. Klee (Judi) began her journey enjoying “all things food” in elementary school when she started preparing meals for her family. That love of food blossomed into a quest to learn more and more about health and wellness as related to nutrition. She went on to earn a BS Degree in Food and Nutrition, then an MS Degree in Nutrition. She has taught nutrition and related courses at the college level to pre-nursing and exercise science students. Her hunger to learn didn’t stop upon graduation from college. She continues to research on a regular basis about nutrition as it relates to health. Her hope is to help as many people as possible to enjoy foods that promote health and wellness.

Resources
http://www.whfoods.com/genpage.php?tname=foodspice&dbid=52#descr

https://www.lentils.org/about-lentils/

https://www.weightwatchers.com/util/art/index_art.aspx?tabnum=1&art_id=82311&sc=3022

https://www.livestrong.com/article/528308-how-to-spice-up-lentils/

https://www.simplyhealthyfamily.org/lentils-taste/

https://kitchenbyte.com/what-do-lentils-taste-like/

https://www.cookinglight.com/cooking-101/different-types-lentils

https://www.wideopeneats.com/5-different-types-of-lentils/

https://www.bonappetit.com/story/types-of-lentils

https://www.healthline.com/nutrition/lentils#types

https://www.mindbodygreen.com/0-5488/7-Health-Benefits-of-Lentils.html

https://www.thekitchn.com/flavor-combinations-beans-herb-75364

Garlic

Garlic Powder vs Fresh Garlic

Fresh Garlic vs Garlic Powder

Most people have a jar of garlic powder somewhere in their kitchen arsenal of flavorings. It is simply ground up dehydrated garlic. Garlic powder has a somewhat different, milder flavor than its fresh counterpart. It is often called for marinades and dips since it disburses well in liquids and imparts a mild garlic flavor. Even though fresh garlic is called for in many recipes, we’ll sometimes opt for the powdered version depending on the time we have available, the desired outcome, or even our mood at the moment. So, the question came up…what’s the difference between the two? Does garlic powder have the same health properties as fresh garlic?

Garlic powder contains many of the same nutrients found in fresh garlic, but in lesser amounts. This is to be expected since processing food usually decreases nutrients to some degree.

While garlic powder does contain alliin and allinase, the components found in fresh garlic that produce the valuable compound allicin, allicin itself if not found in garlic powder. Allicin is produced when fresh garlic is crushed or finely chopped and allowed to sit for about 10 to 15 minutes before being used. It has antimicrobial benefits, reduces inflammation and is an antioxidant that can help fight heart disease.

In an experiment conducted at https://www.cooksillustrated.com, researchers learned that allicin can be produced in garlic powder (and thereby giving the powder a better garlic flavor and the health properties of allicin) by first hydrating the garlic powder in an equal amount of water before being used (ie place ½ teaspoon of garlic powder in ½ teaspoon of water and allow the powder to hydrate or soak up water before using it). This allowed time for allicin to be produced and the flavor of the powder to be more like that of fresh garlic.

Despite the processing needed to produce garlic powder, the powdered version seems to still help to regulate blood pressure, lower cholesterol levels including reducing plaque buildup in arteries, benefit the immune system, lower some cancer risks and help with digestion. To get the most health benefits from your garlic powder, hydrate it first in an equal amount of water and allow it to rest for 10 to 15 minutes to allow allicin to develop. So, although fresh seems to be best, garlic powder appears to be a very close second in terms of health benefits.

To see my video on this subject, click the video below…

About Judi
Julia W. Klee (Judi) began her journey enjoying “all things food” in elementary school when she started preparing meals for her family. That love of food blossomed into a quest to learn more and more about health and wellness as related to nutrition. She went on to earn a BS Degree in Food and Nutrition, then an MS Degree in Nutrition. She has taught nutrition and related courses at the college level to pre-nursing and exercise science students. Her hunger to learn didn’t stop upon graduation from college. She continues to research on a regular basis about nutrition as it relates to health. Her hope is to help as many people as possible to enjoy foods that promote health and wellness.

Resources
https://www.organicfacts.net/garlic-powder.html

https://www.dovemed.com/healthy-living/wellness-center/what-are-differences-between-using-fresh-versus-garlic-powder/

https://www.livestrong.com/article/268286-benefits-of-garlic-powder/

https://www.livestrong.com/article/329968-what-are-the-health-benefits-of-allicin/

https://www.cooksillustrated.com/how_tos/8896-experiment-bringing-out-the-best-in-garlic-powder

https://www.verywellhealth.com/the-benefits-of-allicin-88606

Making Kombucha with Less Sugar

I have made fermented food products for many years, especially yogurt. I raised my children on homemade yogurt and the whole family ate it on a regular basis. So, I’m familiar with culturing foods.

I recently got introduced to kombucha and have realized the value in it for its probiotic qualities. I purchased a scoby and my kombucha has been thriving for a good while now and I’ve been drinking it everyday! Yum!

I’ve seen many posts online with the question about making kombucha with less sugar. Those questions are usually answered with scaled down recipes, but still calling for the same ratio of water to sugar to tea bags. To me, that’s not answering the question. Well…here’s your answer!

Since I drink it daily (maybe about a cup to 1-1/2 cups a day), I thought I’d try less sugar. It always seemed to me that 1 cup of sugar per gallon of water (the standard recipe) was more sugar than would be truly needed. NOTE that the standard recipe may be right IF your gallon batch of kombucha lasts a month or more, without fresh tea being added, as in a continual brew. 

So…to my continual brew of kombucha (this is plain kombucha, not the soda pop type with fruit juice added) I started using HALF the amount of sugar that the original recipe calls for. I’ve been doing this now for a couple weeks and my scobies (note that’s plural) are multiplying and thriving in my jar. Even the original scoby is still alive and thriving. They seem to be extremely happy, even though the sugar content of the brew has been reduced. My kombucha tastes perfectly fine to me and I feel good that it has less sugar in it.

I am adding freshly made tea/sugar mixture to the jar as needed, maybe 4 cups every few days with the reduced sugar and I have noticed nothing negative happening in the jar. The taste is the same, the scobies are multiplying and thriving, and all is well.

SO…For those of you who want to subject yourself to less sugar in your kombucha, it appears that HALF the recommended amount of sugar is fine as long as you continue to add to the batch as you drink it. Note that this recommendation is for plain kombucha. It is not the brewed drink made with fruit juice and double fermented, yielding a soda pop-like beverage. I suspect it may work well with that recipe too since fruit juice has naturally occurring sugar in it, but I have not tried it, so I cannot guarantee it will work.

Here is the ratio of ingredients that I now use:

1 gallon (16 cups ) filtered water : 8 black tea bags : 1/2 cup sugar
8 cups filtered water : 4 black tea bags : 1/4 cup sugar
4 cups filtered water : 2 black tea bags : 2 tablespoons sugar
2 cups filtered water : 1 black tea bag : 1 tablespoon sugar

I am not including the complete directions here on how to make kombucha. I’m assuming the reader already knows how to brew it. If not, please just do an internet search for how to make kombucha and you’ll find countless sites with complete directions online. Simply cut the recommended amount of sugar in half and your brew should be just fine and you’ll consume less sugar along the way. YES, the sugar is needed for the culture, but the ratio of 1 cup per gallon is more than is needed for the culture to thrive.

Happy kombucha making!
Judi

Build a Better Salad

Build A Better Salad

We love salads…BIG salads. Whole meal salads are what I’m referring to here. These are complete meals in a bowl and not just with a little lettuce, tomato and cheese. These salads are filled with assorted vegetables, protein sources, and fruit. What’s even better is the fact that they are totally flexible in what is put in them, so they can be tailored to individual likes and dislikes as well as what’s available at the moment. These salads are better (to us) than any salad we can get in a restaurant because they’re made the way WE like them, with ingredients WE prefer! You too can build a better salad, YOUR way. The following are the basics of how I build a better salad…

Start with a lettuce bed of mixed greens. Use a mixture of assorted greens as the foundation of your salad. Use whatever you can get and mix them up…iceberg, Romaine, green and/or red leaf lettuces, arugula, baby kale, spring mix, spinach, red or green cabbage, etc. Get creative!

Add a big assortment of fresh veggies. Again, get creative. Use what you have available to you and don’t be afraid to try something new. Suggestions include: cucumber, tomatoes, yellow squash, zucchini squash, celery, red, green, and/or yellow bell pepper, fresh broccoli and/or cauliflower, lightly steamed (and cooled) asparagus, jicama, red or yellow onion, scallions, chives, minced garlic, lightly steamed (and cooled) green beans, roasted (and cooled) Brussels sprouts… Explore the produce isle of your favorite grocery store and let your imagine run wild!

Add a protein source (or two…or three). I always add thawed frozen green peas to our salads. They make a nice addition to any green salad and are packed full of protein. They’re for starters. From there, I add garbanzo beans (to my salad), diced cheese, assorted nuts of choice, and sometimes sliced hard boiled egg. If you’re a fan of meats in your salads, thinly sliced grilled steak or chicken breast would be a flavorful addition. Grilled salmon would be a prized addition, too. Whether you add meat or not, there are plenty of options to choose from so that your salad will provide enough protein to meet anyone’s needs.

Build a Better Salad

Build a Better Salad

Add fruit for color, sweetness and eye candy. We started adding fruit to our meal salads after my husband returned from a trip to Hawaii with his college jazz band. He found that restaurants there added fruit to their salads and he really enjoyed it. Thanks Hawaii! Good fruits to include are fresh or canned pineapple, chopped fresh apple, blueberries, strawberries, tangerine (Clementine) sections, grapes (seedless would be preferred). Even diced pear would make a good addition! Try fresh raspberries for added sweet/tang!

Dress your salad…but don’t overdo it. Dressings are added to salads for flavor, moisture and binding properties. The problem with dressings is that many people simply add too much. This can make salads unhealthful to eat. The veggies and fruit are not the culprits. It’s the dressing. The above salad suggestions would go well with just about any dressing you choose. Just strive to go light on the dressing and still enjoy the wonderful flavors of the vegetables, fruits, and protein foods you used to construct your meal. If you can’t taste the other components, then you have too much dressing. Make it your goal to avoid using too much dressing. This will keep your salads healthful and calorie-controlled.

We usually use oil and vinegar as our salad dressing. The ratio will vary according to individual tastes, but a general rule of thumb is 2 parts oil to 1 part vinegar. A lot of flavor variation can be obtained by using different vinegars at different times: red wine, apple cider, tarragon, raspberry, and rice vinegars all lend different flavors to a salad, so experiment. Added herbs can also bring a new flavor to your salad. Suggestions include: oregano, dill, parsley, and tarragon (used individually, not all in the same salad). Get creative!

Here’s a video showing the construction of the salads in the featured photo. Enjoy! Judi


Gluten free? AVOID “herb rice” in restaurants!

Many people have gone gluten free by choice. Others MUST choose gluten free options for health reasons. I fit into the later category, although I haven’t been that way my entire life. In recent years I learned I developed a serious health issue that is triggered by eating anything with gluten in it. Hence, I’ve become gluten free. This is NOT a choice for me.

Eating a gluten free meal becomes very challenging when faced with eating out in restaurants. This is particularly so when faced with menu items that appear to be gluten free. One case in point is “herb rice.” I would expect “herb rice” to be rice mixed with specific herbs and flavorings to make a delicious gluten free dish. However, many restaurants serve an “herb rice blend” that is actually a mix of rice, flavorings and orzo, a tiny pasta made from wheat. THAT’S the problem.

Unfortunately, many restaurant workers, “servers” in particular, are uninformed as to what their “herb rice” actually contains. They’re under the impression that it’s just flavored rice. I have been faced with this TWICE now since I’ve been gluten free. Note that I have nothing against the rice blends they use…they’re actually delicious. HOWEVER, they’re not just rice…they’re NOT gluten free. And with the innocent ignorance of waiters/waitresses, wary customers may be served foods they shouldn’t eat. My personal experiences are cases in point.

First, years back when I newly discovered that I should avoid wheat, I was at a restaurant/bar-grill. I choose something with “herb rice” in it, innocently thinking it was just rice. I asked the waitress if it was just rice and gluten free. She insisted that it was just rice, so I ordered it. After eating about half of it, I realized it had orzo in it…wheat pasta. When I spoke with the waitress about it and said I couldn’t eat the dish, she still insisted that it didn’t contain wheat and was only rice. We had a bit of an argument and she finally brought me the box it came in. Of course, when reading the ingredients list, wheat pasta was listed as one of the components (I’m not ignorant when it comes to food and it didn’t take much to find a wheat product in the ingredients list). When I brought this to her attention and asked for something else to replace the rice, we settled on refried beans. She was obviously not happy with me. I was brought a blob of refried beans, straight out of the can and unheated. I told the manager about the episode when we paid for the meal and I got little response in return. Needless to say, we’ve never been back there again.

Secondly, just last night we were at a different restaurant and they presented us with their new spring/summer menu. A wonderful dish was listed and I opted for it. Again, it was served with “herb rice.” I asked the waitress about it and she was very polite in saying she thought it was just rice, but wasn’t certain. I opted for hash browns instead of the rice. (They were out of the rice blend anyway and I was already planning on ordering hash browns since I suspected the “rice” was not just rice.) Nevertheless, the waitress DID offer information for me…the brand name of the blend. I looked it up and here’s the ingredients list…

Parboiled long grain rice, orzo (macaroni product made from wheat flour), salt, autolyzed yeast extract*, onions*, garlic*, turmeric spice which imparts color.

*dried
CONTAINS WHEAT INGREDIENTS

I’m thankful that the waitress was kind enough to at least offer the information to me so I could check for myself. I also appreciated her humbleness in admitting she was not certain of the ingredients. Unfortunately, apparently restaurant owners and chefs don’t inform their workers about these critical aspects of their food. For most patrons, it’s not an issue at all. But for those who MUST avoid certain ingredients, it’s important for the wait staff to be knowledgeable of what’s being served. Sadly, that’s usually not the case, so it’s up to the patron to be informed and wary of what they order.

Unless you really know the restaurant and how they prepare foods, wait for the herb rice until you get home and make it yourself!! Don’t order it in a restaurant.

I hope this information helps someone out there to avoid ordering some food that can cause health issues. Again, if you can eat gluten, the herb rice blend is a delicious option. But if gluten presents a problem, don’t be fooled by the name. It’s not just flavored rice.

Best wishes to all and happy eating,
Judi

How to Choose the Best Olive Oil

We’ve all seen our favorite chefs at work on TV. Most of them use extra virgin olive oil. Why? Because it’s one of the healthiest oils to consume. However, they rarely say what brand they’re using (unless they’re being paid to advertise for that company).

Good quality olive oil can be one of the healthiest oils to use. It helps correct blood cholesterol problems and is high in vitamin E and antioxidants, fighting harmful compounds in the body. Olive oil plays a vital role in the Mediterranean diet, which we know is very healthful.

So…when we get to the grocery store, choosing which olive oil to buy seems about like choosing a breakfast cereal! There are MANY to choose from…too many. It’s just too confusing. So, I’ve done some research to help us all pick the best olive oil from the array we have to choose from at the moment.

It’s important to know that not all olive oils were created equal. In fact, MANY that are typically on our grocery store shelves are not healthful oils at all. Many have been “refined” (a process that involves heat and/or chemical solvents), have been on the shelf for extended periods of time and hence are not fresh, or are older oils that have been blended with fresher oils to mask their rancid flavor. Yuk!

Because eating old or rancid oils is actually damaging to health, I decided to put together a list of things to look for to help you choose which oil is best among those that are available to you at the moment when shopping. There may be higher quality oils out there in wherever-land, but they’re not the ones you’re looking at for the moment when you’re starring at the huge array on the grocery store shelf. You NEED to know which one to choose NOW! Copy this list and carry it with you the next time you shop for olive oil.

First, it’s important to know that ANY extracted oil is highly perishable. Light, heat and oxygen can interact with the oil and cause it to age or even spoil, creating compounds that are harmful to our health. So, keep this fact in mind as you make your way through the steps below.

When at the grocery store…

Put your “blinders” on! First thing, DON’T look at the price right away. IF you shop for price only, you’ll probably choose the cheapest oil on the shelf. Mistake #1. That oil is very likely refined and not the most healthful. That’s not what you want!

Choose oil in a small dark glass bottle (or packaging that shields the oil from light).  Unless you’re going to use a LOT of oil FAST, go for the small size…one that you know you can use up in a relatively short amount of time. Be sure the bottle (glass, not plastic) is dark, helping to protect the oil from damaging light. Otherwise, if you know you need a lot of oil and will be using it up quickly, opt for oil in a large can.

Be sure the cap is sealed and air tight. Well, duh. This should be a “given.” However…it’s worth checking because you never know what you might come across in a grocery store.

Choose “extra virgin olive oil.” Extra virgin is the highest quality olive oil. Now…DON’T take the front label on the bottle for it’s word. Turn the bottle over and look at the ingredients list. It should only say “extra virgin olive oil.” It MIGHT list refined oil and extra virgin olive oil. If it does, put it back on the shelf. It’s a blend of less-than-healthy refined oil, most likely mixed with fresher oil to improve the flavor. Not your best option.

Look for “first cold pressed” or “mechanically pressed.” This is the natural way to extract oil from olives. Otherwise it was probably extracted using heat and/or chemicals, which is not desirable and not the healthiest oil around. Choose a naturally extracted oil.

Some bottles say “organic.” Organic options in most any foods are good. However, “organic” alone with regard to olive oil is NOT the only thing to look for. Check out the other components before deciding that it’s your best option.

Look for quality seals on the label. Not all oils will have them, but they are helpful in ensuring the oil was produced according to set quality standards. Some seals you might see include:

COOC (California Olive Oil Council)
North American Olive Oil Association
International Olive Oil Council
PDO (Protected Designation of Origin…DOP in Italian)
PGI (Protected Geographical Indication…IGP in Italian)

Look for an expiration date or “best by” date. Try to select one with at least a year left before it expires. The further out the date, the fresher the oil. Freshly produced olive oil will last up to 2 years from the time of harvest, IF kept under ideal conditions (which is often not the case). AND we don’t know the time lapse from harvest to production and many dates are based on production dates, so there is some mystery here. So…the more time left in the dating, the fresher the oil.

Look for the producer and place of origin of the olives. Ideally, it’s best to find an oil from olives that were grown, processed and packaged in the same location. However, that would RARELY be found on our grocery store shelves. Just note that oil will be freshest and of higher quality under those circumstances. That translates into less transport time, less chance of spoilage due to less-than-ideal conditions along the way, etc. However, MOST if not all of what we’ll typically find on our grocery store shelves will not meet this criteria. It’s good to look for it anyway. IF you manage to find one…latch onto it!

NOW…After having looked for oils that meet the above criteria…it’s time to compare prices. Now you’ll know you’re getting the best deal on your olive oil AND the most healthful option you have to choose from at the moment.

When you get home…

TASTE the oil when you get it home. Ignore the color because the color will vary depending upon the variety of olive used and when it was picked. The color does NOT reflect the quality of the oil. When tasting, the oil should smell and taste like olives, and should have a slight bitterness and possibly pepperiness. This indicates the presence of the polyphenol compounds…the healthful compounds that we WANT in the oil! Hopefully the oil you selected will meet this criteria. If not, it’s back to the drawing board the next time you shop for oil.

Store your oil wisely. Store it away from light, heat and oxygen (close the bottle quickly after using it). Use it up quickly…don’t try to store it for a long time.

Get the most health benefits from your oil. Use the oil unheated as much as possible to get the most health benefits from your carefully chosen product. When using it to cook with, heat it the least amount possible to keep from destroying the polyphenol compounds and breaking down the oil (which is not healthful).

Here’s a video that I produced on this subject. Hope this helps!! Happy eating, Judi

Introducing…”NutriBit” Videos

As many people know, I have a lot of formal training in food and nutrition. In addition to that I’ve owned and operated my own bakery/bistro, taught nutrition to college students, AND I continue to delve into personal research on a regular basis.

It was recently suggested to me that I share some of this information with others. That seemed like a reasonable thing to do, especially since it ties in with my blog AND YouTube videos. Hence…the birth of “NutriBits”…as in “bits” of nutritional and health/wellness information relayed through videos. These are short, to the point videos I’ll be creating as I share valuable nutritional, health and wellness information that could help you in the kitchen, at the grocery store, and in your quest to live a healthier life.

A link to my introductory video is below. Please check it out and DO post questions that I might be able to help you with either here or in the comments section of any video I post. I’ll be happy to help with whatever questions I can! Judi

Gluten Free Bread Muffins

Gluten Free Bread Muffins

Many people have gone gluten-free these days for assorted reasons. No matter what the reason, one thing that is often missed is bread. No matter what is said about bread in the news, even though its form may have changed, bread has been a staple in the diet of people for eons. If you enjoy bread and suddenly find yourself trying to do without it, life is just not the same! Nothing quite takes the place of bread.

I’ve explored gluten-free bread recipes and have found this one to be a winner. It’s a recipe I developed after a NUMBER of trial runs. It works baked in a loaf, but even better when made in a regular size muffin tin. This bread is not sweet, so it goes well with meals. The recipe is as follows.

Watch the video below for my special tips on making this bread successfully along with details of how to make it in a loaf. Enjoy! Judi

Gluten Free Bread Muffins
Makes 12 Regular Size Bread Muffins (or 1 loaf)

14 oz gluten-free flour blend (that contains NO xanthan gum, guar gum, nor yeast)
4 oz gluten-free oat flour OR almond meal/flour
3 Tbsp plain psyllium husk powder
2 Tbsp granulated sugar
1-1/2 tsp salt
2 Tbsp baking powder
1 cup almond milk (or any milk you prefer)
1 cup water
2 large eggs, lightly beaten
2 Tbsp extra virgin olive oil (or any vegetable oil you prefer)
1 tsp apple cider vinegar

Combine dry ingredients in a large bowl; set aside.

In a medium bowl, combine the liquid ingredients. Add liquid mixture to the dry mix and stir until well combined.

Lightly coat a regular size 12-cup muffin tin with nonstick spray. Scoop 1/3 to 1/2 cup batter into each muffin cup, dividing the batter evenly among all cups. Allow batter to “rest” as the oven preheats.

Place top rack of oven on the middle shelf. Preheat oven to 350ºF. When oven is heated, place muffin pan into oven and bake for 20 minutes. Remove pan from oven and allow muffins to cool in the pan on a wire rack. Enjoy.

Bread may be stored, tightly wrapped in the refrigerator for one or two days. For prolonged storage, wrap each one tightly and store in the freezer until needed. Allow bread to thaw at room temperature or very briefly on a defrost setting in a microwave oven.

To see tips on how to successfully make this recipe or how to bake it in a loaf form, see the video below! Judi