Category Archives: Misc

Cutting Board

Cutting Boards 101 – The Basics

Cutting boards come in different sizes, shapes, thicknesses, and materials including wood, plastic, bamboo, stone, glass, and more. Most of us have them in our kitchen equipment, and we use them on a regular basis. But cleaning them can be a bit confusing because the different materials can require different treatments. To complicate matters, the type of food we use on them (from raw meats to fresh vegetables and fruits, to baked breads) also makes a difference on how they should be treated.

First, one important rule-of-thumb when using cutting boards is to have several of them, with one being reserved only for use with raw meats, seafood, and poultry. Raw animal foods carry their own risks for specific food-borne illnesses that can create serious concerns if not handled properly during food preparation. Reserving a board only for such uses can help to avoid potential cross-contamination of pathogens that can lead to serious disease.

The following information will hopefully help you out with how to choose the right cutting boards for your needs, and regularly clean and maintain the boards for safe use in food preparation.

Wood Cutting Boards
Wooden cutting boards are a favored piece of kitchen equipment for most chefs, both professional and casual alike. Yet, they do require some specific care to maintain them over the years.

Pros: It has been proven by research that wood boards retain less bacteria than plastic boards, especially those with a lot of knife marks. Wood boards can be sanded and resurfaced if necessary. Also, they are usually heavy and don’t slide around easily, which can be extremely hazardous. It has been proven that wooden boards are THE BEST surface for maintaining a sharp knife edge. Also, they come in a variety of sizes, shapes and thicknesses.

Cons: They require more routine maintenance than other types of boards (i.e. waxing and oiling). They cannot be soaked for long periods of time. They cannot be put in the dishwasher.

Routine cleaning: Wooden cutting boards should NOT be placed in the dishwasher. The exposure to prolonged heat and water can cause the board to warp and possibly crack. Cracks in wooden cutting boards will tend to harbor microbes that can feed on trapped food particles. This is NOT what you want to happen to your cherished wooden cutting board!

Routine cleaning of your wooden cutting board, after using it to cut breads, fruits and vegetables can be done simply by hand washing it in hot, soapy water with as much manual scrubbing action as is needed to get it clean. Using a scrub brush will help to make this job faster and easier. Rinse it well, pat it dry, then stand it up to air dry completely before putting it away.

When using your wood board for high-risk foods such as raw meat, fish, and poultry, it should be immediately hand-washed in hot soapy water, then sanitized. Dry the board, then allow it to air dry before putting it away.

Sanitizing your wooden cutting board: Research has shown that wooden cutting boards harbor fewer microbes than do plastic cutting boards. Nevertheless, if you have used your wood board for cutting raw animal foods (meats, poultry, fish), sanitizing it after it is hand-washed is important to kill any remaining pathogens after it was washed. This should be done EACH time the board is used for raw animal foods, especially if that same board will be used for cutting fruits and/or vegetables that are to be eaten raw (this practice is not recommended). There are some options (listed below) on how to sanitize your board.

If your wooden cutting board is not being used for raw animal products, you can get by with sanitizing it less often than when using it for raw animal foods. According to the results of a study published in the Journal of Applied Microbiology (August 2015), traditional detergent-based household methods of cleaning will usually sufficiently clean cutting boards used in the preparation of foods that are not high risk (such as raw animal foods) or when not being used for immune-compromised individuals. Ideally for ultimate food safety, cutting boards should be sanitized after each use. However, when no one being fed is immune compromised or when only low-risk foods are being prepared, sanitizing it less often should suffice.

To reduce the risk of cross-contamination if using a cutting board for high-risk foods such as raw meat, fish, and poultry, it is suggested that we have different cutting boards for high-risk foods than for low-risk foods (fresh vegetables, fruits and breads). Having different colors, shapes or sizes for different types of food can help to keep the cook from using the wrong cutting board during food preparation.

Bleach: The USDA recommends that we sanitize a board used for cutting raw animal foods in a solution of 1 tablespoon of unscented bleach to 1 gallon of water. First, hand-wash the board in hot, soapy water, and scrub it well. Then apply the bleach solution and allow it to sit for 3 to 5 minutes, rinse well, then dry it with a clean cloth or paper towel. Stand it up for a little while to help ensure it is completely dry before storing it.

A slightly stronger solution, but simpler to mix up was suggested by Global News of Canada. Mix one teaspoon of bleach to three cups of water. Pour that over the washed cutting board and allow it to sit for a few minutes. Rinse it well, then dry the board.

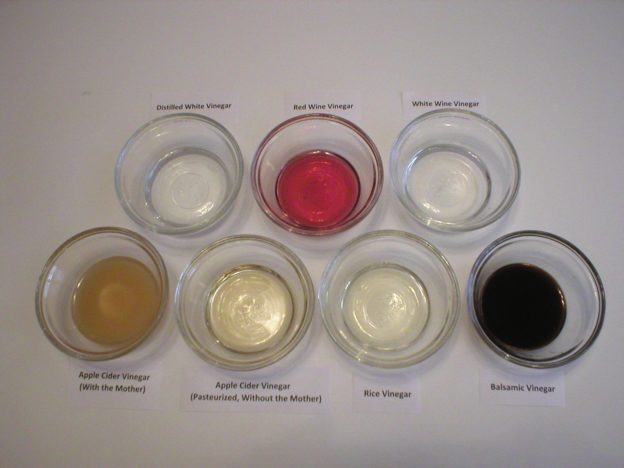
Vinegar: Vinegar is a non-toxic item that most of us keep in our kitchen. After being hand-washed in hot, soapy water, a wood board can be sanitized with a solution of 1 part of white vinegar to 4 parts of water. Allow the solution to remain on the board for a few minutes, then rinse it well, and pat it dry. Allow the board to air dry before storing it.

If you REALLY want to “go for the gusto,” you could also use undiluted white vinegar to sanitize your board. Spray your cutting board with straight white vinegar, allow it to sit for 3 to 5 minutes, rinse it well, pat it dry, then stand it up, and allow it to air dry before putting it away.

Hydrogen Peroxide: As always, wash your board first with hot, soapy water. According to The Food Network, wood cutting boards can be sanitized by pouring 3% hydrogen peroxide (this is the type of hydrogen peroxide commonly found in your local pharmacy) all over the board. Distribute the liquid around the board with a cleaning sponge, and leave it alone for a few minutes as it bubbles, killing any microbes that are left on the board. When finished, rinse well, and wipe it off with a clean cloth or paper towel. Allow it to air dry before storing the board.

To Deodorize a Wooden Cutting Board: There are several suggested ways to deodorize a wood cutting board…
If your board has any lingering odor from some food used on it, sprinkle baking soda on the board, then pour white vinegar onto it. Important! This will create a lot of bubbling, so be sure to do this in a sink! When the bubbling stops, rinse the board well, dry it with a clean cloth or paper towel, and then stand it up to air dry.

Another way to remove odors from a wood board would be to rub the board well with a cut lemon, squeezing the juice as you rub. Allow the juice to sit on the board for a few minutes, then rinse it well and dry the board.

Some people remove stains and odors from a wood cutting board by sprinkling it with coarse salt, then rubbing it with a cut lemon, squeezing to remove the juice as they rub. When finished, rinse the board well and dry the board. Allow it to air dry before putting it away.

Spritzing the board with white vinegar after use can help to avoid the development of odors in your board.

Protect the Wood: Oiling wooden boards helps to maintain their surface and keeps them from drying out, which could cause them to crack. This also helps to prevent liquids from food and microbes from penetrating the board, helping to keep it clean and germ-free. The goal is to penetrate the wood and saturate the wood fibers with board oil.

All wooden cutting boards should be oiled periodically by rubbing them with food-safe (this is critical!) mineral oil (or an alternative oil of choice). This oil can be found in most local pharmacies. Note, that mineral oil is the oil of choice by most professional chefs for this application, since it will not go rancid over time. Do not use vegetable oils for this purpose. They will spoil, causing the board to smell bad and possibly transmit rancid oils into your food.

If you prefer to use a food-derived oil, you could use traditional coconut oil (which is solid at room temperature) or fractionated coconut oil (which is liquid at room temperature). Just note that some say traditional coconut oil may go rancid over an extended period of time, whereas fractionated coconut oil should not.

First, be sure your board is as clean (and dry) as possible. Then, simply rub a generous amount of your preferred oil very well into the DRY board with a clean, dry cloth, or new paint brush dedicated to this purpose (do not use your hands as you might get a splinter!). Doing this will help to prevent cracks in the board, keeping it from harboring microbes in hard-to-reach areas. After being oiled, stand your cutting board up on its side on a clean, dry towel, or place it on a wire rack. Allow the oil to soak in as long as possible before wiping any excess off. Try to allow the oil to soak in for at least a few hours (up to 24 hours) before wiping away the excess. A simple way to do this would be to wipe the board with oil in the evening. Allow it to sit overnight. Wipe any excess oil off in the morning, and allow it to air dry until it is not tacky or sticky feeling. Then use the board as needed.

How often you should oil your board depends upon how often you use it. Wooden boards used daily may benefit from being oiled once a month. Those not used very often could be oiled once or twice a year. If your board feels “dry to the touch” it’s time to oil it. If nothing else, let that tip be your guide.

Spoon (Wood) Butter (Cutting Board Creams or Waxes): You can also condition your board with “spoon butter” or “wood butter” which is a mixture of beeswax, food-grade mineral oil, and sometimes other waxes. These same creams may also be referred to as cutting board creams or waxes. They can be purchased in stores (local and online) that carry cutting boards and kitchen supplies.

While board oil penetrates the wood, board creams or waxes coat the surface of the board, protecting it from liquids and stains. Board creams or waxes also help to protect sanitation, as they fill in knife marks, where bacteria can live, even after the board is cleaned. When used in conjunction, both board oil and cream or wax can protect your wooden cutting board from inside to out, helping it to serve you well for years.

To use board creams or waxes, rub a generous amount of the mixture into your board and allow it to sit for at least several hours, up to 24 hours (overnight is really convenient). Then buff excess off your board with a clean, dry cloth. Allow it to air dry until it no longer feels tacky or sticky, then use your board as normal. Use it freely on any wood or bamboo bowl, board, or kitchen utensil.

Plastic Cutting Boards
Plastic cutting boards are enjoyed by many. They are usually made from polyethylene and can be washed at the sink, soaked for indefinite periods of time, and placed in the dishwasher. They are relatively good on knife blades, but not as good as wood boards in that respect.

Pros: One benefit of plastic boards is that they come in different colors. The assorted colors can help you isolate their use for specific types of foods, such as one specifically for raw meats, while another is specifically for raw vegetables, and yet another is dedicated only to cutting breads. Such a system is excellent to help prevent cross-contamination of bacteria which can be deadly.

Plastic boards can be safely soaked for long periods of time and can also be placed in the dishwasher.

Plastic boards are relatively good for maintaining the sharp edge of your knife, since they give slightly in the cutting process.

Cons: Over time, plastic boards can get a lot of knife gouges in them which are permanent. Such furrows allow places for bacteria to harbor, even after the board has been washed. When a plastic board becomes “fuzzy” or has a lot of knife furrows in it, it’s time to replace it.

Sanitizing Your Board: Always start by first washing your board in hot soapy water, or running it through a dishwashing cycle. If your board has been used for low-risk foods such as breads or fresh fruits and vegetables, occasionally letting your plastic board soak in a diluted bleach solution (1 tablespoon of unscented bleach to 1 gallon of water) for 5 minutes can adequately sanitize the board. If the board has been used for cutting raw meat, seafood, or poultry, it’s important to sanitize it after EACH such use.

Placing it in the dishwasher after each use is also a good way to help keep your plastic board clean and fresh.

No matter how your board has been washed or sanitized, be sure your board is completely dry before storing it. Any moisture left on the board can allow bacteria to remain viable.

Bamboo Cutting Boards
Bamboo cutting boards have increased in popularity in recent years. They require less maintenance than traditional wood cutting boards and are harder and less porous than hardwoods.

Pros: Bamboo cutting boards require less maintenance than traditional wood boards. Since they do not retain water as traditional wood boards can, they are less likely to warp, crack, or harbor bacteria. Bamboo absorbs very little moisture and resists scarring from knives, so they are more resistant to bacteria than traditional wood boards. They make lovely serving trays for cheese, crackers, and other appetizers or finger foods.

Because bamboo is harder than traditional wood, it resists scarring from knife use, as does traditional wood. This makes it easier to clean and less likely to retain bacteria after use.

The hardness and density of bamboo makes it less likely to stain when preparing some foods like meats or tomatoes.

Bamboo is a sustainable crop, so less damage is done to the environment when bamboo is harvested than trees. Bamboo is a grass and one of the fastest growing plants on the planet! It is one of the simpler and more economically grown plants available. Also, they are relatively inexpensive.

Cons: Do not put bamboo cutting boards in the dishwasher, which might cause the board to warp and/or crack. Also, do not soak your bamboo board.

Read the label carefully when buying a bamboo cutting board. Some bamboo products are processed with formaldehyde and glues that can leach into foods over time. Choose only boards made with non-toxic treatments or organic practices.

Since bamboo is harder than traditional wood boards, they are not as forgiving to knife blades as wood boards. Hence, your knife may not last as long when using a bamboo cutting board, especially if it is a cheaper knife made with a softer metal than a higher-priced knife.

Bamboo boards should not be used as hot plates or trivets for hot items, since this might burn the board.

Pre-conditioning your bamboo board: If your bamboo board was not pre-conditioned by the manufacturer, you’ll need to do that before you use it. First, wash it well in hot soapy water, then dry it and allow it to completely air dry. Then prime it with food grade mineral oil. Apply a generous amount of oil and let it sit for a few hours to overnight. Wipe off any remaining oil in the morning with a clean, dry cloth or paper towel until it does not feel damp or sticky, and it will be ready to use. Do this about once a month to maintain your board and extend its life, or repeat this process any time your board looks dry.

Spoon (Wood) Butter: See this topic under the Wood board section. The same information applies to bamboo boards.

Washing, Sanitizing, and Maintaining Your Bamboo Cutting Board: Clean bamboo cutting boards with hot soapy water; and sanitize if it each time it is used for cutting raw meats, seafood, or poultry. Dry it thoroughly before putting it away. Do not put it in the dishwasher.

To sanitize your bamboo board, scrub it well with a mixture of 1 tablespoon bleach to 1 gallon of water (or 1 teaspoon of bleach to 1 quart of water…which is slightly stronger than the 1 gallon mixture). Allow it to sit for a few minutes, then rinse the board well afterwards, and wipe it dry. Allow it to air dry completely before putting it away.

Glass Boards
Glass cutting boards can be beautiful decorative elements in any kitchen. They make a nice platform or tray for items that you want to protect from other surfaces. Although they can be easy to clean and maintain, most professionals do not use glass boards for reasons stated below.

Pros: Glass boards are easy to clean since they are nonporous. Germs can’t penetrate them. They may be placed in the dishwasher.

Cons: Since glass boards are hard and have no “give” whatsoever, they can damage knife blades over time. For this reason, most authorities do not recommend glass cutting boards for cutting purposes.

Sanitizing Your Board: Simply wash your glass board at the sink or in the dishwasher. An occasional sanitizing with a bleach or vinegar solution is always advisable (see how, under “Wood” section).

Stone/Marble/Granite Boards
Stone boards are excellent when used for rolling pastry. They are naturally cool to the touch which helps to keep the butter or other fat in the pastry from melting during the rolling process. Doughs also tend to stick less to stone, marble, or granite when being rolled out. They can also be used to place pots on to keep them from scratching a counter top. But since they are extremely hard, they can dull knife blades over time when used to cut foods, so they are generally not recommended for use as a traditional cutting board.

Pros: There is no chance these boards will warp. They can be used as a hot pad or trivet. They can be very attractive and add a nice element to your kitchen décor. They are simple to clean and sanitize and do not need special treatment to maintain.

Cons: They can dull your knife blade when used as a true cutting board. If not careful, they can chip or crack if mishandled or bumped.

When to Replace Your Cutting Board
Replace your cutting board when it shows a lot of wear, such as extensive knife marks. Deep groves in any board can allow bacteria to live on the board, even after being washed.

Also replace your board if it has warped. Using a warped board will not be stable on the counter or table, which can be very hazardous when using a sharp knife. The cost of a new board is well worth it when compared to having a serious knife injury.

If you are using a wood or bamboo board and the seams are starting to separate, it’s time to replace the board. It may be unstable to use, making working with a sharp knife potentially dangerous. Also, deep groves may catch your knife making cutting action erratic and possibly invite an injury. Furthermore, deep groves or cracks can also harbor bacteria. So, needless to say, a board that is separating is not worth keeping! When dealing with food and food-related equipment…”When in doubt, throw it out!”

About Judi
Julia W. Klee (Judi) began her journey enjoying “all things food” in elementary school when she started preparing meals for her family. That love of food blossomed into a quest to learn more and more about health and wellness as related to nutrition. She went on to earn a BS Degree in Food and Nutrition, then an MS Degree in Nutrition. She has taught nutrition and related courses at the college level to pre-nursing and exercise science students. Her hunger to learn didn’t stop upon graduation from college. She continues to research on a regular basis about nutrition as it relates to health. Her hope is to help as many people as possible to enjoy foods that promote health and wellness.

Resources
https://www.thekitchn.com/the-best-way-to-clean-and-care-for-wood-cutting-boards-good-questions-164690

https://www.foodnetwork.com/how-to/packages/help-around-the-kitchen/photos/how-to-clean-a-wooden-cutting-board

https://www.quora.com/What-kitchen-wood-cutting-boards-are-dishwasher-safe

https://www.cuttingboard.com/blog/how-to-properly-clean-your-wood-cutting-board/

https://www.thekitchn.com/how-to-oil-and-maintain-a-wooden-cutting-board-lessons-from-the-kitchn-195642

https://www.cuttingboard.com/how-to-oil-and-maintain-a-cutting-board/

https://www.fsis.usda.gov/wps/portal/fsis/topics/food-safety-education/get-answers/food-safety-fact-sheets/safe-food-handling/cutting-boards-and-food-safety

https://www.eatright.org/homefoodsafety/four-steps/separate/cutting-board-safety

https://www.canr.msu.edu/news/cutting_boards_and_food_safety_1

https://montgomery.osu.edu/program-areas/family-and-consumer-sciences/healthy-people/sanitize-counter-tops-and-cutting-boards

https://www.cookinglight.com/cooking-101/techniques/how-to-clean-wooden-cutting-board

https://globalnews.ca/news/4043583/clean-disinfect-chopping-board/

https://www.ncbi.nlm.nih.gov/pubmed/26060060

https://housewifehowtos.com/clean/how-to-clean-your-cutting-board/

https://www.huffpost.com/entry/cutting-boards-to-avoid_n_1335613

https://www.consumerreports.org/food-safety/are-plastic-cutting-boards-better-than-wood/

https://www.cuttingboard.com/blog/top-five-benefits-of-a-bamboo-cutting-board/

https://cooking.stackexchange.com/questions/34324/what-are-the-dos-and-donts-regarding-cleaning-a-bamboo-cutting-board

https://www.thekitchn.com/whats-the-best-kind-of-cutting-board-plastic-wood-or-bamboo-51821

https://foodal.com/kitchen/knives-cutting-boards-kitchen-shears/cutting-boards/knife-friendly-hygienic/

https://www.thekitchn.com/how-to-oil-and-maintain-a-wooden-cutting-board-lessons-from-the-kitchn-195642

https://www.cooksillustrated.com/how_tos/8625-caring-for-wood-cutting-boards-and-utensils-with-spoon-butter

https://news.ncsu.edu/2014/09/cutting-boards-food-safety/

Desiccant Packets

Uses for Desiccant Packets

You know what I’m referring to here…those little packets of drying agent found in bottles of vitamins, etc. We usually toss them with the bottle when it’s empty. Well, there ARE useful things we can do with them, so consider keeping one of those bottles and save the packets in there for future use. Here are some ways to use them…

Store some with silver tableware or silver jewelry. The drying agents won’t stop silver from tarnishing, but it will slow it down.

Add some with clothes and blankets during off-season storage. The drying effect will help to prevent mustiness and mildew.

Add them to whatever you store in a damp basement. They will help to keep items dry and prevent mustiness and mold from forming.

Put them in a camera bag. If you use your camera outdoors, the humidity in the camera bag can cause some film and condensation to form on the camera. Placing some drying packets in the camera bag can help to prevent that from happening.

Add them to any container where you store photos. Moisture can cause old photos to stick together and ruin them. Adding some drying packets to the photo box can help to save those precious old photos.

Protect important documents. Add some drying packs to any container where old, important documents are being stored. Birth certificates, marriage licenses, death certificates, property titles, important receipts, and treasured old letters and cards are all prime examples. This will help to preserve the documents.

Use them when storing dry flowers. Many people use dried flowers for potpourri, room decor, and assorted craft projects. Drying packets can help to dry flower petals and also keep them dry in their storage containers.

Add them to your toolbox. Some tools and accessories are prone to rusting. Adding some drying packets to your toolbox can help to prevent that from happening.

Help keep electronics dry. Put some drying packets in your electronics bags and storage containers to help keep them dry and prolong their life.

Add them to powdery mixtures to prevent clumping. Some powdery mixtures can tend to clump up when humidity enters the box. Laundry detergent, dishwasher detergent, and other powdered cleaning agents are good examples. Toss in a few drying packets to help prevent the clumping. Be sure to remove them when using the detergent!

Preserve stored collectables. If you have a collection of old baseball cards, comic magazines, or any other such paper items, add some drying packets to the storage container. This will help to soak up moisture in the box, preserving your precious items that much more.

Help to preserve holiday decorations. Adding some drying packets to your boxes of stored holiday decorations can help to keep them fresh and dry for your next use.

Revive old musty books. Place some drying packets in a plastic bag with a musty book. Leave it there for a few days and that will help take the moisture and musty smell out of the book.

Add them to garden seed packets. If you save seeds from year to year, add some drying packets to the bag your seeds are stored in. The reduction in moisture may help to preserve your seeds a bit longer.

Place some in bathroom medicine cabinets. Adding some drying packets to bathroom medicine cabinets can help prevent shelves from rusting, and also to help protect the contents of the cabinet from the excessive moisture in the bathroom.

Add them to your sorted vitamins and other pills. If you divvy out pills in advance, adding some drying agents to your storage container can help to keep your pills dry and fresh.

Keep fishing tackle items from rusting. Placing some drying packets in your fishing tackle box can help to keep those items from rusting.

Store some in shoes. If your shoes have gotten wet, or if your feet tend to sweat a lot, place some packets inside your shoes when storing them to help dry them out and reduce odors.

Prevent carpentry nails from rusting. If you store carpentry nails and such, they might rust over time. Placing some drying packets in with those items can help keep them from rusting.

Prevent holiday tins from rusting. We all enjoy the beauty and joy decorative tins can bring to our homes and tables during the holidays. But they do have a tendency to rust over time. Place some drying packets in your favored tins when they are being stored to help keep them dry and prevent rusting.

Place some in closets. Closets can tend to smell stale, especially if not used regularly. Place some drying packets in closets to help make them (and their contents) fresh and dry.

Place some in gym bags. This will help to keep the contents dry and smelling fresh.

Rescue your cell phone. Many people have accidentally dropped their cell phones in water. After retrieving your phone, wipe it dry and remove the battery and memory card, if you can. Place your phone, battery, and memory card in an air-tight container (such as a plastic bag) with some drying packets. Leave it there at least overnight, even up to 24 hours, and your phone should (hopefully!) be fine.

Keep windows dry. Sometimes condensation can form between window panes. Placing a few drying packets between the window panes can help to stop the condensation from forming.

Keep pet food dry. If you invest in a large, bulk bag of dry pet food, place a few drying packets in the bag to help keep the pet food dry and fresh. Of course, be careful not to feed them to your pet…they are NOT edible!

Keep windshield from fogging up. The car windshield can get foggy on humid days, especially during early morning drives. Placing some drying packets on the dashboard can help to soak up some of that humidity, preventing the window from getting foggy.

Extend razor blade life. Razors tend to have a short life, especially when not dried after use. They’re too expensive to waste them like that! After use, dry them off, then go one step further by placing them in an air-tight container with some drying packets.

Preserve dry makeup. Preserve the life of dry makeup powders by storing them in an air-tight container with a few drying packets. This is especially helpful if you live in a humid area.

Keep dry foods dry. Add one or more drying packets (depending on size) to opened, dry foods. Bread crumbs, flour, herbs and spices, pastas, rice and other grains, and crackers are good examples of foods that can age quickly if moisture gets in them. The drying packets will help to keep these foods fresh and dry until needed. This is especially helpful if you live in a humid climate.

Freshen stale dresser drawers. Have you ever noticed a musty odor when you open a dresser drawer that isn’t used very often? Place some drying packets in the drawer to keep the things inside fresh and dry.

Freshen luggage. When returning home from a long trip, dirty laundry in luggage can cause smelly, and even moldy luggage. Carry some desiccant packs with you and turn them loose in your luggage to do their job on the way home. You’ll still need to wash your laundry, but at least it (hopefully) shouldn’t be moldy!

Revive your used packets…Don’t Throw them Out!
When your packets have been used and reused, don’t toss them! They can be revived by placing them outside in the sun on a dry, hot day. Afterwards, store them in a tightly closed container until you need them again.

If that won’t work for you, place the used packets on a clean, dry baking sheet and place them in your oven set at its lowest temperature. Allow them to “bake” for an hour or more to dry them out. (Be careful not to burn the packets during the process. If you see the packets turning dark, remove them from the oven!) Store them in an airtight container.

Better yet, if you have a dehydrator, place the used packets in the dehydrator with the temperature set at about 120°F for 2 or more hours. Return them to your storage container to be used again.

Resources
https://www.practicallyfunctional.com/17-uses-for-desiccants-how-to-make-your-own/

https://www.makelifelovely.com/6-uses-for-silica-gel-packets-dont/

https://www.edcosupply.com/3-unbelievable-uses-for-desiccant-packs/

https://www.mythirtyspot.com/17-clever-ways-to-use-silica-gel-that-you-never-knew/

https://www.littlethings.com/silica-gel-household-uses/1

https://www.bobvila.com/slideshow/10-reasons-you-shouldn-t-toss-silica-gel-packets-51628

https://www.ifixit.com/Answers/View/403/What+is+the+best+way+to+dry+used+desiccant+Silica-Gel

Assorted Vinegars

Vinegar 101 – The Basics

This post covers a lot of details about vinegar, from general information to specifics about assorted types of vinegar. Hopefully you’ll find what you’re looking for. Please let me know if you need further information!

I hope this helps!
Judi

Vinegar 101 – The Basics

About Vinegar
The word “vinegar” stems from the French word “vin aigre” which means “sour wine.” This is appropriate since vinegars are made by adding bacteria to liquids to cause fermentation. The liquid to be fermented is usually wine, beer or cider. The fermentation process creates alcohol, which is then exposed to oxygen. The bacteria then create the acetic acid, turning the liquid very acidic, giving it the tart flavor characteristic if vinegar. Depending upon the process used and the type of vinegar being made, the fermentation process can take anywhere from a couple days to years. Some vinegars, such as balsamic, may be left to ferment for up to 25 years. Vinegars are often diluted to contain from 5 to 20 percent acetic acid, by volume.

Vinegar has been used for thousands of years as a cooking ingredient, condiment, medicine, and preservative. Today it is even being used as a cleaning agent. The use of vinegar has been traced back to ancient Babylon, around 5,000 B.C.E, where it was used in cooking and as a medicine, preservative, and a drink for strength and wellness.

Vinegars are excellent additions to marinades because the acid helps to break down proteins, making them more tender. Vinegar can also be used to balance out flavors and reduce bitterness in some foods. It is commonly used in salad dressings, marinades, sauces, mayonnaise, and ketchup.

Nutrition Tidbits
Most vinegars have few nutrients yet they do have some beneficial health properties. It is very low in calories with one tablespoon having only 3 to 14 calories, depending upon the variety. The few calories it has comes from the little bit of sugars remaining from the fermentation process. If you have food sensitivities, it is important to read labels, as some vinegars are a blend of vinegar, juice, added sugars, and possibly other ingredients that may cause reactions in some people. A few vinegars contain gluten while others contain added sulfites.

Early records in China, the Middle East, and Greece, show vinegar being used as a digestive aid, an antibacterial agent on wounds, and a treatment for cough. Today, a few small studies have shown some health benefits from vinegar, which has sparked a lot of attention for using vinegar in natural health treatments.

Studies published in 2010 showed that including vinegar with a meal helps to reduce post-meal blood glucose levels. Balsamic vinegar has been shown to lower triglyceride and total cholesterol levels.

General Tips for Using Vinegar
* Use vinegar to brighten the flavor of foods and balance the richness of a fatty dish.

* Use vinegar to tenderize protein foods (such as meats and poultry) by adding it to marinades.

* Use vinegar when pickling foods, as it not only adds flavor, but acts as a preservative by killing bacteria.

* Adding a little vinegar to cooking water can help to brighten the color of vegetables, especially those in the cruciferous family (cabbage, broccoli, cauliflower, kale, etc.).

* Some resources suggest adding a little vinegar to the water when boiling eggs. They say it makes eggs easier to peel.

* Some suggest adding a little vinegar to water when poaching eggs to help keep them together.

* For a quick buttermilk substitution, add 1 tablespoon of vinegar to 1 cup of milk. Allow it to rest a few minutes for the milk to thicken.

* To perk up the flavor of cooked beans or bean soups, add a little vinegar during the last 5 minutes of cooking time. Adding it earlier will make the beans tough and harder to cook properly.

How to Store Vinegar
Vinegar does not need to be stored in the refrigerator. However for best quality, store it tightly capped in a cool, dry, dark place, away from sunlight and heat. Some vinegars will have a “Best by” date stamped on the bottle. Even though it may be safe to consume the vinegar beyond that date, the quality may not be its best.

Unpasteurized, raw apple cider vinegar may become more cloudy with age. That’s simply the culture (bacteria) multiplying in the bottle. It is still safe to use.

Generally speaking, unopened vinegar will keep for about two years in a cool, dry, dark place. Once opened, it should be used within about six months for best quality. To keep opened vinegar longer, it may be stored in the refrigerator.

What is the “Mother” in Vinegar?
The “Mother” of vinegar is a mixture of cellulose and bacteria (or culture) that fermented the original liquid into vinegar. It is found in fermented alcohols and unpasteurized vinegars, most commonly in raw apple cider vinegar. It creates a cloudy appearance in the vinegar and is harmless to consume. It will not affect the flavor of the vinegar. In fact, the “M other” contains friendly probiotic bacteria, prebiotic fibers, and nutrients that can boost health.

Food Sensitivities
Gluten: Most vinegars do not contain gluten. However, some that are made with grains may contain gluten. This information is listed below each type of vinegar for clarification. When in doubt, check the label and ask your physician or dietitian, if necessary.

According to Shelly Case, RD (at https://shelleycase.com/is-vinegar-gluten-free/), the distillation process destroys gluten. So, if a vinegar (such as white vinegar) was made from wheat (a gluten-containing grain), and it was “distilled” the gluten has been removed or destroyed in the process and would therefore be safe to eat, even by those with gluten sensitivities. If the vinegar was made with a gluten-containing grain, such as wheat, and was not distilled, then the vinegar does still contain gluten, and would not be safe to eat by those with gluten sensitivities. Beware and read labels! This information is also confirmed by the FDA as stated here… https://www.glutenfreewatchdog.org/news/why-distillation-is-compatible-with-a-gluten-free-diet/

Sulfites: Most fermented foods contain naturally-occurring sulfites. However, naturally-occurring sulfites differ from those added as food preservatives, and usually present no problems to those with sulfite sensitivities. Some vinegars have added sulfites, whereas others do not. If you are sensitive to sulfites, always check the label before purchasing vinegar, and consult your physician if necessary.

Common Varieties of Vinegar

Apple Cider Vinegar: Also known as cider vinegar, this variety is pale brown with a mild apple flavor. It is made from fermented apple cider, unpasteurized apple juice, or apple pulp. It is inexpensive.

Best Uses: Apple cider vinegar is excellent in chutneys, stews, marinades, sweet pickles, and in coleslaw or salad dressings.

Food Sensitivities: Apple cider vinegar is naturally gluten-free.

Balsamic Vinegar: This is a dark, sweet vinegar that has been produced in Italy for over 800 years. It is usually made from whole processed red or white wine grapes (called “grape must,” or the crushed grapes including the seeds, peel and stems). The grape must is boiled to a concentrate, fermented, acidified, and then aged in wooden barrels for up to 50 years. The longer it is aged, the thicker, sweeter and pricier it gets.

Best Uses: Balsamic vinegar is excellent on strawberries, tomatoes, grilled meats and poached fruit. It can also be used in salad dressings, marinades, sauces, and soups. It is sometimes reduced into a thick sauce and served over fruit or ice cream.

Food Sensitivities: Balsamic vinegar is gluten-free and, like other vinegars, contains naturally occurring sulfites. Most balsamic vinegars will not have added sulfites, but if you are sensitive, it is advisable to always check the label before purchasing any balsamic vinegar.

Malt Vinegar: Malt vinegar is a dark, flavorful vinegar that is very popular with fish and chips in England. It comes from barley that was made into beer, then fermented into vinegar. It has a milder, sweeter and more complex flavor than plain white vinegar.

Best Uses: Malt vinegar is often used on French fries (and on fish and chips in the UK), and in making pickles.

Food Sensitivities: Malt vinegar is made from barley, which contains gluten. Therefore, if you have a sensitivity to gluten, you should avoid malt vinegar UNLESS it was distilled (which would have removed the gluten). Malt vinegar naturally contains a small amount of sulfites, less than 10 ppm. This is a very low level, which usually poses no issue, even for people who have a sulfite allergy. When in doubt, ask your physician!

Red Wine Vinegar: This vinegar is made from red wine and is usually aged in wooden barrels. It has a strong flavor that blends well in hearty dishes. Red wine vinegar is often used in French and Mediterranean cuisines and is less acidic than distilled or cider vinegars.

Best Uses: Red wine vinegar is excellent in salad dressings, stews, sauces, marinades, and with cooked meat and fish.

Food Sensitivities: Red wine vinegar is gluten-free since it is made with grapes. Like other vinegars, red wine vinegar will have naturally occurring sulfites. However, some brands of red wine vinegar have ADDED sulfites, whereas others do not. If you are sensitive to added sulfites, it is important to read the label before purchasing this type of vinegar.

Rice Vinegar: This type of vinegar is made from fermented rice. It is commonly referred to as rice wine vinegar. It has a mild, sweet flavor and is less acidic than other vinegars.

Best Uses: Rice vinegar is excellent in salad dressings, seafood marinades, and Asian cuisine in dishes like sushi, pickled ginger and seafood, and stir-fries.

Food Sensitivities: True rice vinegar (made only with rice and no other grains) is naturally gluten-free. However, some rice vinegars imported from Asia may contain a mixture of grains. If your rice vinegar was made only with rice OR was distilled, it is considered to be gluten-free. Otherwise, be sure to read the label carefully to be sure it does not contain something you might react to.

White Vinegar: This is also known as distilled vinegar or distilled white vinegar, and is made from fermented grains. It is clear, highly acidic, and has a very sour flavor. It is one of the least expensive vinegars and is now being used as a cleaning agent, especially for washing windows and cleaning coffee pots. It is not as strong as “cleaning vinegar,” yet it is still an effective cleaning agent.

Best Uses: White vinegar is excellent for preserving foods such as in pickling fruits and vegetables. It is also an effective antibacterial, grease, and mineral-removing cleaning agent.

Food Sensitivities: White vinegar is made from fermented grains, particularly wheat. If white vinegar was not distilled, it will still contain gluten. If the vinegar was distilled, it should contain no gluten. So, if you are sensitive to gluten, be sure to purchase white vinegar that has been distilled.

Cleaning White Vinegar: It’s important to note here that “cleaning white vinegar” is not the same as the age-old distilled white vinegar. Although they may look the same, cleaning vinegar is stronger and is not something to ingest. Cleaning vinegar is diluted to 6% acidity, whereas distilled white vinegar is diluted to 5% acidity. That one percentage point difference may seem small, but in vinegar terms, it equates to cleaning vinegar being 20% stronger than distilled white vinegar. It is TOO strong to ingest and can cause harm if consumed.

Some brands may also be scented with chemicals not intended for consumption. Hence, that’s one more reason not to add this type of vinegar to your salads! If you do use “cleaning vinegar,” I suggest you do not store it near your usual vinegars that you use in foods. You really don’t want to mix these up! Its added strength makes it a very effective cleaning agent. However, be careful what you apply cleaning vinegar to. Its strong acidity will damage hardwood floors, granite, marble, and metals. It is safe to use on bathroom ceramic surfaces, on glass, and in the laundry. Cleaning vinegar is more costly than distilled white vinegar.

White Wine Vinegar: The flavor of white wine vinegar will range from mild to very tangy, depending upon the type of wine used in its production. It is usually pale in color with a mild flavor. It is often used in French and Mediterranean cuisines.

Best Uses: White wine vinegar is excellent in vinaigrette dressings, vegetable dishes, soups, stews, pickled vegetables, and in cooking meat and fish.

Food Sensitivities: Since white wine vinegar is made from grapes, it is naturally gluten-free. The vinegar will contain naturally-occurring sulfites from the wine, and may or may not contain added sulfites. If you are sensitive to sulfites, please read the label before purchasing white wine vinegar.

Less Common Varieties of Vinegar

Black Vinegar: Black vinegar is also known as Chinkiang vinegar, and is usually made from glutinous rice or sorghum. It has a woody, smoky flavor. It is a common sour ingredient in foods found in southern China. In the United States, black vinegar is used as a dipping sauce for dumplings and in meat marinades.

Best Uses: Use black vinegar as a dipping sauce, and to flavor meats and stir-fries. It may be used as a less expensive alternative to balsamic vinegar.

Food Sensitivities: Traditional black vinegar, made from rice or sorghum would be naturally gluten-free. However, some varieties may have been made with added wheat, millet, peas, barley, bran and/or chaff (the outer husk of a grain). Wheat and barley contain gluten. So, if the vinegar was made with other grains in addition to rice and was not distilled, it may contain gluten. If you are gluten sensitive, be sure to read the label before purchasing any black vinegar.

Black vinegar may or may not have added sulfites. If you are sensitive to sulfites, reading labels is warranted.

Cane Vinegar: Cane vinegar is made from the syrup of sugar cane. It has a mellow flavor, similar to rice vinegar. It is not sweet since it contains no residual sugar. It is yellow to golden brown in color, and is less acidic than distilled vinegars. It is made in the Philippines, France, and Louisiana. It is called “sukang iloko” in the Philippines. Champagne, white wine, cider, and rice wine vinegars may be substituted for cane vinegar.

Best Uses: Cane vinegar is often used in sweet and sour dishes, and to flavor meats.

Food Sensitivities: Since cane vinegar is made from sugar cane, it is naturally gluten-free. However, it is important to check the label before purchasing cane vinegar, as it may contain other ingredients that may or may not contain gluten.

Cane vinegar usually does not contain added sulfites, but check the label before purchasing, as brand ingredients may vary.

Champagne Vinegar: This vinegar is made from a slightly dry white wine, made from the same grapes as champagne. It is made only in the Champagne region of France. It has a mild flavor.

Best Uses: Champagne vinegar may be used like any white wine vinegar. It is especially good on citrus salads, and in marinades and sauces.

Food Sensitivities: Champagne vinegar is naturally gluten-free since it is made from grapes. It will contain naturally-occurring sulfites from the wine. If you are sensitive to sulfites, check the label before purchasing to be sure it contains no added sulfites.

Coconut Palm Vinegar: This type of vinegar is made in Asian countries from the sap of the coconut palm tree, and/or the water of the coconut. It is a white, cloudy vinegar with a flavor ranging from mild to sharply acidic. All varieties have a faint flavor of yeast or must. A substitution would be 1 part rice or white vinegar, 1 part water, and a squeeze or two of fresh lime juice.

Best Uses: Coconut vinegar is usually used as a dipping condiment, and can be added to sauces, cooked foods and salads.

Food Sensitivities: Coconut vinegar should be naturally gluten-free. However, if you are gluten-sensitive, read the label before purchasing to be sure no gluten-containing ingredients have been added.

Flavored Vinegars: Some flavored vinegars, such as tarragon vinegar, are available in many grocery stores. However, many people make their own flavored vinegars by adding desired herbs, spices or flavorings to wine, rice, or cider vinegar. Colorado State University Extension has prepared an excellent website detailing how to make your own flavored vinegars, with specific recipes included. https://extension.colostate.edu/topic-areas/nutrition-food-safety-health/flavored-vinegars-and-oils-9-340/

Specialty flavored vinegars may also be purchased from select stores. The following are just a few (of many) online shops carrying flavored vinegars. Please note that I have no connection with any of them.

https://www.igourmet.com/shoppe/shoppe.aspx?cat=Vinegars&subcat=Flavored+Vinegar

https://theolivepress.com/shop/catalog/flavored/filters/page=allhttps://www.theolivetap.com/vinegars/

https://www.williams-sonoma.com/shop/food/vinegars/

Specialty vinegars may also be purchased at https://www.amazon.com/

Fruit Vinegars: In this case, we’re referring to vinegars made with fruit other than apples (as in apple cider vinegar). Fruit vinegars can be made with just about any fruit you want including, apples, apricots, grapes, pineapples, pomegranates, passion fruit, raisins, peaches, blackberries, raspberries, blueberries, figs, pears, cranberries, lemons, mangoes, oranges, plums, raisins, tomatoes, and more. Fruit vinegars may be purchased online and in some grocery stores. They can also be made at home.

Best Uses: Fruit vinegars add a sweet-tart flavor to whatever foods they’re served with. They pair well with extra virgin olive oil and have been used to flavor pork, turkey, chicken and fish. They add fruitiness to green salads, vegetables, and dips for fruit/cheese trays. They can also be used in marinades for a sweet-tart flavor.

Instructions for making your own fruit vinegars can be found on this and other websites: https://www.organicauthority.com/eco-chic-table/homemade-fruit-vinegar-recipe

DIY Fruit Vinegar Instructions, using strawberries, blueberries, figs, persimmons, or pears: https://www.foodrepublic.com/recipes/make-fruit-vinegar/

Red Rice Vinegar: This vinegar is made from fermented red yeast rice. It is milder in flavor than red wine vinegar. It is sweet, tart, and salty.

Best Uses: Red rice vinegar is often used in Chinese seafood dishes and dipping sauces.

Food Sensitivities: Sometimes barley and sorghum are added to red rice vinegar. Since barley contains gluten, this type of vinegar may contain gluten if it is not distilled. If you have a gluten sensitivity, it is important to check the label to see if it contains barley. If so, and if it was not distilled, it should be avoided.

Seasoned Rice Vinegar: This is rice vinegar with added sugar, salt, and sometimes sake or MSG (monosodium glutamate). Using this vinegar is an easy way to boost the sweet, salty, and tangy flavor of foods. It is found in the Asian section of some grocery stores.

Best Uses: Seasoned rice vinegar is often used in sushi and salad dressings.

Food Sensitivities: This rice should be naturally gluten-free, but check the label to be sure a gluten-containing ingredient was not added. Also, some people react to MSG. Read the label carefully if you have food sensitivities when choosing seasoned rice vinegar to be sure there are no added ingredients that you need to avoid.

Sherry Vinegar: True sherry vinegar is made in Spain from sherry wine, and is used in Spanish and French cuisine. The wine is aged for at least 6 months, with the resulting vinegar being aged from 2 to over 10 years. The older the vinegar, the darker the color, the more complex the flavor will be, and the more expensive it will be to buy. It has a bright, deep flavor. Some grocery stores may carry sherry vinegar. Wine vinegar may be used as a substitute for sherry vinegar.

Best Uses: Sherry vinegar can be used to flavor beans, marinara, soups, snap peas, tomatoes, and green salads.

Food Sensitivities: Since sherry vinegar is made ultimately from grapes, it is naturally gluten-free. It will contain naturally-occurring sulfites since it is made from wine. It is important to read labels since less-expensive brands may have additives.

Spirit Vinegar: Spirit vinegar (sometimes referred to as grain vinegar) is a colorless, strong vinegar made by a double fermentation process of a grain, usually barley. The first fermentation converts sugars to alcohol. The alcohol is distilled then subjected to the second fermentation, which converts the alcohol to acetic acid. It has a higher acidity than other vinegars. This vinegar is sometimes referred to interchangeably with distilled white vinegar. However, spirit vinegar contains a higher acid content than white vinegar, and it still contains a little alcohol, where white vinegar does not.

Best Uses: This type of vinegar is used mostly in pickling.

Food Sensitivities: Since spirit vinegar is made with distilled liquids, it is considered to be gluten-free.

About Judi
Julia W. Klee (Judi) began her journey enjoying “all things food” in elementary school when she started preparing meals for her family. That love of food blossomed into a quest to learn more and more about health and wellness as related to nutrition. She went on to earn a BS Degree in Food and Nutrition, then an MS Degree in Nutrition. She has taught nutrition and related courses at the college level to pre-nursing and exercise science students. Her hunger to learn didn’t stop upon graduation from college. She continues to research on a regular basis about nutrition as it relates to health. Her hope is to help as many people as possible to enjoy foods that promote health and wellness.

Resources
https://www.foodnetwork.com/healthyeats/healthy-tips/2011/08/vinegar-101

https://en.m.wikipedia.org/wiki/Vinegar

https://www.livestrong.com/article/21611-nutritional-value-vinegar/

https://www.hsph.harvard.edu/nutritionsource/food-features/vinegar/

https://www.livestrong.com/article/555379-how-to-store-opened-bottles-of-apple-cider-vinegar/

https://www.doesitgobad.com/does-apple-cider-vinegar-go-bad/

https://www.finecooking.com/ingredient/malt-vinegar

https://www.foodrepublic.com/2012/04/06/what-is-malt-vinegar/

https://www.foodandwine.com/condiments/what-you-need-know-spring-about-many-types-vinegar

https://lifehealthhq.com/whole30-vinegar/

https://www.beyondceliac.org/gluten-free-diet/is-it-gluten-free/vinegar/

https://www.verywellhealth.com/sulfite-allergy-82911

https://www.verywellfit.com/is-vinegar-gluten-free-562363

http://www.heinzvinegar.com/products-red-wine-vinegar.aspx

https://shelleycase.com/is-vinegar-gluten-free/

https://www.glutenfreewatchdog.org/news/why-distillation-is-compatible-with-a-gluten-free-diet/

https://en.wikipedia.org/wiki/Black_vinegar

http://thebaldgourmet.com/focus-ingredient-what-is-chinese-black-vinegar/

https://www.cooksinfo.com/champagne-vinegar

https://www.cooksinfo.com/cane-vinegar

https://aussietaste.com.au/glossary/oils-and-vinegars-a-to-z/cane-vinegar/

https://extension.colostate.edu/topic-areas/nutrition-food-safety-health/flavored-vinegars-and-oils-9-340/

https://www.cooksinfo.com/palm-vinegar

https://www.cooksinfo.com/vinegar

https://www.bonappetit.com/story/what-is-sherry-vinegar

https://en.wikipedia.org/wiki/Sherry_vinegar

https://www.livestrong.com/article/262961-what-are-the-benefits-of-coconut-vinegar/

https://www.webstaurantstore.com/article/373/types-of-vinegar.html

https://www.thekitchn.com/rice-vinegar-ingredient-spotlight-184260

https://www.finecooking.com/article/whats-seasoned-rice-vinegar

https://www.theolivetap.com/product/vinegars/balsamic-vinegars/white-balsamic-vinegars/peach-white-balsamic-vinegar/

https://www.glutenfreedietitian.com/vinegar/

https://www.simplyrecipes.com/a_guide_to_balsamic_vinegar/

https://fantasticservicesgroup.com.au/blog/cleaning-vinegar-vs-normal-vinegar-whats-the-difference/

How to Fix a Food That is Too Salty

It’s happened to the best of us. We taste a food and it’s way too salty! What can we do? Your first instinct might be to throw it out and start over. But that’s costly, time consuming, and probably not necessary. Below are some ways to remedy the situation. Some options may work better than others, depending upon the type of food you’re working with and how much salt is in there. Nevertheless, anything is worth a try over throwing out good food!

Here’s a video where I cover these tips…

1. Add more liquid. If you’re making soup, a sauce, or another liquid dish and it’s too salty, add more liquid to balance it out. Of course, this may mean you need to add more of the other flavorings already in the dish, but that is do-able.

2. Increase the recipe. Try increasing the recipe. If you’re cooking a stew and it’s too salty, you could add more vegetables and a little more of the liquid that was used in the stew. Adding a little more browned meat may also do the trick, but adding more vegetables may be simpler, since extra meat may be frozen in a larger amount than needed. Allow the altered stew to cook a little while, then taste it before adding any other seasonings to adjust the flavor.

3. Rinse salty raw meat. If you’re just getting started with a meat and you’ve accidentally over-salted it, give it a quick rinse under cold running water, then pat it dry with a paper towel. Of course, any other seasonings that were added to the meat will then need to be replaced. But that’s far better than tossing the meat!

4. Add a bit of acid. A small splash of vinegar, lemon juice, or another acidic liquid can mask the saltiness of soups, sauces, and other liquid dishes. If you’re not thrilled about adding more water to the pot, this may be an alternative.

5. Add a little sweetener. A pinch of sugar or other sweetener may also counter excessive saltiness in a liquid food, like soups, stews and sauces.

6. Change it to a milk or cream based dish. Transform the food into a cream-based dish, such as adding cream to a tomato-based sauce, making it a tomato-cream sauce. It would add a new flavor dimension while cutting the saltiness.

7. Try a potato. Some sources claim that adding a potato to a liquid-based dish will cut some of the saltiness, while others claim this will not work. When in trouble, it’s worth a try. If your dish does not already have cut potatoes in it, place a washed, whole potato (with the peel) in your salty soup or stew and let it cook for a while. The whole potato can be removed at the end, if desired. If this trick works for you, please let me know! If nothing else, the potato will absorb some of the salty liquid, thereby removing some of the salt that way. Removing the potato, then adding back some unsalted liquid may help a little.

8. Soak it in water. If you purchased a food that is too salty, such as bacon, a ham, or salt pork, simply soak it in some water for a couple hours (in the refrigerator). The extra salt will leach out into the water.

9. Cover it with an unsalted sauce or topping. If you’ve over-salted a main dish, such as a meat or a casserole, and it’s too late to fix the problem, try balancing it out with an under-salted sauce or topping for the food. When eaten together, the two may balance each other out to have just the right amount of salt.

Simple tips to avoid over salting foods in the first place…

1. Don’t measure over the pot. Don’t measure salt over a vessel (pot, pan, bowl, skillet, etc.) that you’re preparing food in. If you accidentally spill some, it will be hard to remove all the excess.

2. Check the lid! Check the lid of the salt container before pouring. If it’s loose, you’re in trouble!

3. Consider the other ingredients. Beware of other ingredients that may be salty when using them in a dish with added salt. For example, if you’re using canned vegetables that contain salt, or a store-bought container of broth, soy sauce, fish sauce, salted butter, anchovies, capers, or pickles, it may contain more salt than you think. It’s better to season lightly, taste as you go, then add more when you’re sure it needs the extra flavoring.

4. Start with less seasoning, then taste and adjust. Deliberately use less seasoning while cooking. Taste and adjust seasoning as you go being careful not to overdo it.

About Judi
Julia W. Klee (Judi) began her journey enjoying “all things food” in elementary school when she started preparing meals for her family. That love of food blossomed into a quest to learn more and more about health and wellness as related to nutrition. She went on to earn a BS Degree in Food and Nutrition, then an MS Degree in Nutrition. She has taught nutrition and related courses at the college level to pre-nursing and exercise science students. Her hunger to learn didn’t stop upon graduation from college. She continues to research on a regular basis about nutrition as it relates to health. Her hope is to help as many people as possible to enjoy foods that promote health and wellness.

Resources
https://www.thespruceeats.com/how-to-fix-a-recipe-that-s-too-salty-1388006

https://www.epicurious.com/expert-advice/how-to-save-food-thats-too-salty-article

https://www.sheknows.com/food-and-recipes/articles/966391/in-a-pickle-how-to-fix-overly-salty-food/

https://www.tasteofhome.com/collection/common-cooking-mistakes-and-how-to-fix-them/

Stove Drip Pans

Test Comparison – Two Ways to Clean Stove Drip Pans

I conducted a comparison test of two different ways to clean electric range burner drip pans. One method used no-heat-needed oven cleaner. The other method was washing with baking soda and a blue scrub sponge. Below is a video demonstration of the test. The test notes, including pros and cons of each method, are below the video link. I hope this helps you decide which method is right for you.

Enjoy!
Judi

Comparison Test: Two Ways to Clean Stove Drip Pans

The following covers details of a comparison test I conducted of two ways to clean electric stove drip pans.

Method 1: Scrub with baking soda and blue scrub sponge

Two electric stove drip pans were washed with dish detergent in warm water to remove any loose debris. They were then sprinkled liberally with baking soda and scrubbed with the rough side of a damp blue scrub sponge. The pans were rewashed in soapy water and dried with a towel.

Results: Most, but not all, of the food debris was removed with some effort of using the scrub sponge and a toothbrush in the tight crevices of the pans. It was difficult, if not impossible, to remove all of the debris that was in the tight folds of the drip pans.

To test if the oven cleaner would further remove residue that the baking soda would not, the one pan that still had some residue on it was sprayed with oven cleaner and returned to the garage. It was allowed to treat for 5-1/2 hours. (Note: The instructions on the can say to allow the spray to treat the oven cavity for 2 hours or overnight, so this timeframe was in between the recommended treatment times.)

Result: The oven cleaner did remove the small amount of remaining food stains from the tight crevices of the drip pan. The pan was cleaned in the same manner as in Method #2 below. No effort was needed to remove the remaining stains from the drip pan when the oven cleaner was used.

Pros:
* No harsh chemicals were involved.
* The baking soda and scrub sponge removed all of the residue from the drip pans, except where scrubbing was extremely difficult, in the tight crevices of the pan.
* Baking soda is safe and effective.
* This method is very inexpensive.
* This method involves something already available (baking soda and a scrub sponge) in most kitchens.

Cons:
* It took some scrubbing action to remove the debris, so there is some work involved.
* It takes a little time to clean the pans this way, depending upon how dirty the drip pans are.
* This method may not remove everything from the pans, especially in tight crevices.
* It is very hard to scrub in crevices of the drip pans. The toothbrush worked a little better than the sponge since the bristles reached into the folds of the pan, but still did not remove everything. Perhaps another type of brush or tool would have done a better job.

Method 2: Spraying drip pans with no-heat-needed oven cleaner

Two electric stove drip pans were sprayed with no-heat-needed oven cleaner. They were placed on newspaper and left overnight in a garage. The next day, they were rinsed with warm water and lightly scrubbed with the rough side of a damp blue scrub sponge. The pans were then washed in warm soapy water and dried with a towel.

Results: All of the food debris rinsed off the drip pans with little to no scrubbing effort needed. Other than chips and mars in the finish of the drip pans, they looked as clean as if they were new.

Pros:
* This method is extremely easy. Just spray and let the pans sit overnight, followed by a light scrubbing the next day.
* This removed all residue from the pans.
* Very little effort was needed to clean the pans.
* This method required very little time.
* No hard scrubbing was needed to remove the food debris.

Cons:
* This method involves a harsh, potentially harmful chemical.
* To be safe, it’s helpful to spray and leave the drip pans in a garage or on a porch (outside of the house).
* Gloves may be needed with this method if you have sensitive skin.
* You may need to take precautions not to breathe in the fumes.
* The oven cleaner may not be something you have readily available.
* The oven cleaner releases harmful chemicals into the environment.
* This method is a bit more costly than Method #1.

Conclusion
Both methods produced very satisfactory results. The use of the oven cleaner provided the easiest and most effective way to remove food debris from the drip pans with little effort. However, the downside of using harsh chemicals may not make it the best choice for all people.

The baking soda method offers a very effective alternative, with a cost-savings advantage plus a less harmful chemical being used in the process. If using the baking soda method, to prevent buildup in the tight crevices of the drip pans, it would be advantageous to clean the drip pans on a regular basis, helping to prevent permanent staining and hard crusting of debris on the pans. With that, the cleaning results would be excellent and even more comparable to that of using the oven cleaner.

Overall winner on effectiveness and ease of use: Method #2, No-heat-needed oven cleaner

A VERY close runner-up: Method #1, Scrubbing with baking soda and the scratchy side of a blue scrub sponge.

Ginger Root

Ginger 101 – The Basics

Ginger root has been used for thousands of years for its culinary and medicinal properties. Fresh ginger knobs can be intimidating if you don’t know what to do with them. In the video below, I cover a wide array of information about ginger from what it is, to its medicinal properties, to how to cook with it, and more. My video notes are below for your personal use. Enjoy!

I hope this helps!
Judi

Ginger 101 – The Basics

About Ginger
Ginger is a rhizome (Zingiber officinale) that is related to turmeric. It has a thick underground stem that produces roots and shoots. The plant can grow up to three feet high and produce from two to five sections that can be harvested year-round. After the sections are washed and dried in the sun, they can be used for culinary or medicinal purposes. Ginger grows well in a warm, damp climate, with most of the world’s ginger being grown in China, India, Australia, and Jamaica. The flesh of ginger can be yellow, white or red, depending on the variety, and has a pungent and spicy aroma and flavor.

Medicinal Properties
Ginger originated in Southeast Asia, where it has been used by Chinese and Indian healers for thousands of years. It is still used today for both its culinary and medicinal benefits. Consuming ginger may help to reduce muscle soreness, inflammation, and relieve arthritis pain in a similar, yet more comprehensive way than NSAIDS (non-steroidal anti-inflammatory drugs, such as ibuprofen and acetaminophen). And, when taken in normal amounts, ginger does not appear to harm the stomach nor kidneys, like NSAIDS can.

Ginger may also help to reduce nausea, improve digestion and sooth upset stomachs, control high blood pressure, improve blood cholesterol levels, fight cancer, destroy harmful pathogens in the digestive tract, relieve migraine headaches, and clear skin blemishes.

Precautionary advice: Large amounts of ginger taken at one time (such as eating a whole knob at one time) may interfere with calcium channel blockers and drugs that lower blood sugar. Eating such a large amount at once may also cause heartburn, diarrhea, and mouth irritation.

Nutrition Tidbits
Ginger has an array of vitamins and minerals in trace amounts. So, with regard to essential nutrients, it doesn’t have much to offer. However, its value as a spice and its extensive medicinal properties far outweigh its nutritional value.

How to Select Fresh Ginger
Choose pieces that look fresh with smooth skin with no blemishes, and feel heavy for their size. Avoid pieces that are soft, wrinkled, or moldy.

How to Store Ginger
Store unpeeled ginger tightly wrapped in plastic (or in a zip-lock bag with the air removed) and in the refrigerator. Be sure it is completely dry before wrapping it, or that will invite mold. It should last about a month in the refrigerator when stored properly. Throw it out if it develops mold.

How to Preserve Ginger
Ginger is found fresh, dried, crystallized, and even pickled.

Peeled fresh ginger can be stored for weeks in a glass jar covered with vodka or some other alcoholic beverage.

Fresh ginger can be stored in the freezer. Simply peel then grate the ginger. Put it on a parchment-lined baking tray in increments you plan to use it (ie in one teaspoon mounds). Freeze until solid, then transfer the mounds to an air-tight container and return them to the freezer. They should keep for about 6 months. It can be used frozen or will quickly thaw when needed.

Ginger can also be frozen by simply cutting the unpeeled root into one-inch chunks. Place chunks on a plate or baking sheet and freeze. Transfer to freezer bags and return them to the freezer.

To dry fresh ginger, peel and cut it into small pieces, then follow manufacturer’s directions for drying.

How to Prepare Ginger
Fresh ginger needs to be peeled before eaten. It can be peeled with a knife or scraped with the tip of a teaspoon.

Cooking/Serving Methods
Use ginger anywhere you want its sharp spicy flavor. This includes dipping sauces, dressings, rubs, pesto, teas, and even smoothies. To convert a recipe from dried ginger, use 6 parts fresh grated ginger for 1 part of dried ground ginger.

Serving ideas
Drink it! Try ginger tea with lemon for a comforting drink, especially if you have a sore throat. It’s also a great addition to cocktails and mixed drinks!

Add ginger to juices and smoothies.

Add ginger to a raw beet salad.

Ginger, carrots, and sweet potato are a flavorful combo for soup.

Winter holidays just aren’t right without ginger: Ginger biscotti or cookies, and gingerbread.

Herbs/Spices That Go With Ginger
Basil, chili, cilantro, cumin, curry, garam masala, lemongrass, mint, miso, turmeric, wasabi

Foods That Go Well With Ginger
Produce: apples, apricots, asparagus, bell peppers, blueberries, bok choy, carrot, cauliflower, celery, cherries, collard greens, cranberries, edamame, eggplant, fennel, figs, garlic, kiwi, lemon, lime, melon, mushrooms, onion, orange, peaches, pear, plums, potatoes, pumpkin, scallions, spinach, squash, sweet potatoes, tamarind, watercress, zucchini

Savory: poultry, fish, beef, seafood, oats, rice, tofu, almonds, tahini, seitan, chickpeas, grains, and lentils

Other: sesame oil, soy sauce, tamari, sake, rum, seaweed, honey, cream, and yogurt

Suggested Flavor Combinations
Ginger + Cream + Honey
Ginger + Cilantro + Scallions + Garlic
Ginger + Beef + Broccoli + Soy Sauce
Ginger + Celery + Carrot + Garlic
Ginger + Carrot
Ginger + Soy Sauce

Recipe Links
29 Ginger Recipes That Will Spice Up Your Life https://www.buzzfeed.com/rachelysanders/ginger-recipes

Ginger Tea With Honey and Lemon https://producemadesimple.ca/ginger-tea-lemon-honey/

Ginger Sweet Potato Soup with Toasted Curry Croutons https://www.climbinggriermountain.com/2015/11/ginger-sweet-potato-soup-with-toasted-curry-croutons.html

Gingerbread Cookies https://www.canadianliving.com/food/recipe/gingerbread-cookies-4

Gingerbread Chess Pie https://www.canadianliving.com/food/recipe/gingerbread-cookies-4

101 Ways to Cook With Ginger https://www.cookinglight.com/food/recipe-finder/ginger-recipes?

20 Sweet Ginger Desserts https://www.foodnetwork.ca/baking/photos/sweet-ginger-dessert-recipes/#!ina-garten-pumpkin-roulade-with-ginger-buttercream

53 Ginger Recipes That Are Just The Right Amount of Spicy https://www.bonappetit.com/recipes/slideshow/13-recipes-make-want-linger-ginger

About Judi
Julia W. Klee (Judi) began her journey enjoying “all things food” in elementary school when she started preparing meals for her family. That love of food blossomed into a quest to learn more and more about health and wellness as related to nutrition. She went on to earn a BS Degree in Food and Nutrition, then an MS Degree in Nutrition. She has taught nutrition and related courses at the college level to pre-nursing and exercise science students. Her hunger to learn didn’t stop upon graduation from college. She continues to research on a regular basis about nutrition as it relates to health. Her hope is to help as many people as possible to enjoy foods that promote health and wellness.

Resources
https://www.precisionnutrition.com/all-about-ginger

http://www.whfoods.com/genpage.php?tname=foodspice&dbid=72

https://www.everydayhealth.com/diet-nutrition/diet/ginger-nutrition-facts-health-benefits-alternative-uses-more/

https://nutritiondata.self.com/facts/spices-and-herbs/191/2

https://www.thekitchn.com/heres-the-best-way-to-store-fresh-ginger-tips-from-the-kitchn-214681

https://www.finecooking.com/article/whats-the-best-way-to-store-ginger

https://www.thekitchn.com/store-grated-ginger-in-the-freezer-to-make-it-last-longer-tips-from-the-kitchn-186709

https://producemadesimple.ca/goes-well-ginger/

Easy Way to Liquefy Crystallized Honey

Raw honey will crystallize at some point in time. This is a very natural process and should be expected. There are a number of ways to liquefy it again, but some of the ways will destroy the raw properties and eventually degrade the quality of the honey. Here’s an easy and effective way of removing the sugar crystals without destroying the raw properties of the honey. Note, that honey will crystallize again over time because of the unstable nature of the sugar to water ratio within the honey.

To learn about why the sugar crystals form in honey and what to do about it, see the following videos. Instructions for a simple and effective way of removing the crystals is below the video links.

I hope this helps!
Judi

To decrystallize honey using an electric range or a gas range without a constantly lit pilot light:
Place the jar of honey on the rack in the middle of the oven away from the light bulb. Turn on the light, but do NOT turn on the oven. Leave it there and eventually it will liquefy. The heat from the light bulb will gently warm the honey, while keeping the temperature within a safe range so the raw properties of the honey (ie. enzymes) are not destroyed. This will take hours, with the actual length of time unknown. It depends on how much honey is in the jar and the type, size, and amount of sugar crystals that were formed. This process could easily be accomplished overnight, or while you’re away at work during the day.

If you have a range with a constantly lit pilot light:
In this case, your oven may already be warm. It’s advisable to take the temperature inside the oven, measuring the heat generated only from the pilot light. If it’s between 80F and 110F, it may be enough to bring the honey back into its liquid form without the added heat of the light bulb. Simply place the jar of honey on the rack in the middle of the oven and leave it there for an extended period of time, usually overnight or while you’re away at work during the day. The length of time it takes will depend upon the actual temperature of the oven and the type and amount of sugar crystals in the honey.

Stop Leaks in Plastic Mason Jar Lids

Here’s a really simple solution to stopping the plastic mason jar lids from leaking liquids. Just take the lid that came with the jar and place it inside the plastic top, rubber ring side outward, facing the jar rim. Place the cap on the jar and tighten. You do not need to overly tighten the lid to make this work. See the video below where I demonstrate just how easy and effective this is!

I hope this helps!
Judi

About Judi
Julia W. Klee (Judi) began her journey enjoying “all things food” in elementary school when she started preparing meals for her family. That love of food blossomed into a quest to learn more and more about health and wellness as related to nutrition. She went on to earn a BS Degree in Food and Nutrition, then an MS Degree in Nutrition. She has taught nutrition and related courses at the college level to pre-nursing and exercise science students. Her hunger to learn didn’t stop upon graduation from college. She continues to research on a regular basis about nutrition as it relates to health. Her hope is to help as many people as possible to enjoy foods that promote health and wellness.

Bell Peppers

How to Pick a Sweeter Green Bell Pepper

Most of us know that red, orange and yellow bell peppers are truly ripe and much sweeter than green bell peppers. However, they are about twice the cost of the green peppers. Hence, money talks and most of us opt for the green variety. But, have you noticed that sometimes they taste pretty good, where other times they’re bitter and not sweet at all? I’ve discovered a really easy way to select sweeter green bell peppers. Learn this simple trick in the video below!

I hope this helps!!
Judi

About Judi
Julia W. Klee (Judi) began her journey enjoying “all things food” in elementary school when she started preparing meals for her family. That love of food blossomed into a quest to learn more and more about health and wellness as related to nutrition. She went on to earn a BS Degree in Food and Nutrition, then an MS Degree in Nutrition. She has taught nutrition and related courses at the college level to pre-nursing and exercise science students. Her hunger to learn didn’t stop upon graduation from college. She continues to research on a regular basis about nutrition as it relates to health. Her hope is to help as many people as possible to enjoy foods that promote health and wellness.

Garlic

Garlic Powder vs Fresh Garlic

Fresh Garlic vs Garlic Powder

Most people have a jar of garlic powder somewhere in their kitchen arsenal of flavorings. It is simply ground up dehydrated garlic. Garlic powder has a somewhat different, milder flavor than its fresh counterpart. It is often called for marinades and dips since it disburses well in liquids and imparts a mild garlic flavor. Even though fresh garlic is called for in many recipes, we’ll sometimes opt for the powdered version depending on the time we have available, the desired outcome, or even our mood at the moment. So, the question came up…what’s the difference between the two? Does garlic powder have the same health properties as fresh garlic?

Garlic powder contains many of the same nutrients found in fresh garlic, but in lesser amounts. This is to be expected since processing food usually decreases nutrients to some degree.

While garlic powder does contain alliin and allinase, the components found in fresh garlic that produce the valuable compound allicin, allicin itself if not found in garlic powder. Allicin is produced when fresh garlic is crushed or finely chopped and allowed to sit for about 10 to 15 minutes before being used. It has antimicrobial benefits, reduces inflammation and is an antioxidant that can help fight heart disease.

In an experiment conducted at https://www.cooksillustrated.com, researchers learned that allicin can be produced in garlic powder (and thereby giving the powder a better garlic flavor and the health properties of allicin) by first hydrating the garlic powder in an equal amount of water before being used (ie place ½ teaspoon of garlic powder in ½ teaspoon of water and allow the powder to hydrate or soak up water before using it). This allowed time for allicin to be produced and the flavor of the powder to be more like that of fresh garlic.

Despite the processing needed to produce garlic powder, the powdered version seems to still help to regulate blood pressure, lower cholesterol levels including reducing plaque buildup in arteries, benefit the immune system, lower some cancer risks and help with digestion. To get the most health benefits from your garlic powder, hydrate it first in an equal amount of water and allow it to rest for 10 to 15 minutes to allow allicin to develop. So, although fresh seems to be best, garlic powder appears to be a very close second in terms of health benefits.

To see my video on this subject, click the video below…

About Judi
Julia W. Klee (Judi) began her journey enjoying “all things food” in elementary school when she started preparing meals for her family. That love of food blossomed into a quest to learn more and more about health and wellness as related to nutrition. She went on to earn a BS Degree in Food and Nutrition, then an MS Degree in Nutrition. She has taught nutrition and related courses at the college level to pre-nursing and exercise science students. Her hunger to learn didn’t stop upon graduation from college. She continues to research on a regular basis about nutrition as it relates to health. Her hope is to help as many people as possible to enjoy foods that promote health and wellness.

Resources
https://www.organicfacts.net/garlic-powder.html

https://www.dovemed.com/healthy-living/wellness-center/what-are-differences-between-using-fresh-versus-garlic-powder/

https://www.livestrong.com/article/268286-benefits-of-garlic-powder/

https://www.livestrong.com/article/329968-what-are-the-health-benefits-of-allicin/

https://www.cooksillustrated.com/how_tos/8896-experiment-bringing-out-the-best-in-garlic-powder

https://www.verywellhealth.com/the-benefits-of-allicin-88606