Category Archives: Misc

Baking Soda

The Many Uses of Baking Soda (What It Is and How To Use It)


What is baking soda?
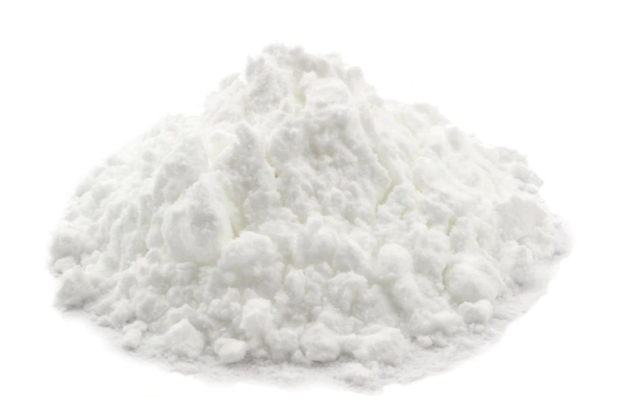
Baking soda is sodium bicarbonate. It is an alkaline compound that will produce carbon dioxide gas when combined with an acid. It is found in nature in crystalline form, and is ground into a fine powder for culinary and household use.

How is it used in baking?
Baking soda is used as a leavening agent in baked goods that contain an acidic ingredient. When it comes in contact with an acid, such as vinegar, citrus juice, buttermilk, yogurt or cream of tartar, it forms carbon dioxide gas bubbles. The small bubbles get trapped in the food batter, causing it to inflate, or rise. The batter is then baked immediately.

Baking soda is often used in baked goods (such as quick breads, pancakes, muffins, cakes and fried foods) that contain acidic ingredients so it will create the leavening or rise in the finished product. Since the reaction with acid occurs quickly, the leavening time is much shorter than when yeast is used as a leavening agent. When baking soda is used as a leavening agent, the foods are cooked immediately. When the food is heated, the leavening is “fixed” in place so the expansion caused by the gas bubbles becomes set. If the food is not baked immediately, the gas bubbles may deflate and the product may not rise as expected.

Tip: When using baking soda in a baked product, be sure to add it to the dry ingredients before liquid ingredients are added. Stir or whisk the dry ingredients well to combine everything before liquid is added. Otherwise, if the baking soda is not disbursed well, the finished product may have large holes in it.

Is baking soda the same thing as baking powder?
Although baking powder does contain baking soda, the two are not the same thing. Baking powder is a mixture of baking soda, one or more acid salts (usually cream of tartar and sodium aluminum sulfate), and cornstarch (to absorb moisture so a reaction won’t take place until liquid is added to a batter). Baking powder usually causes two reactions at different times. This type of baking powder is often referred to as “double acting baking powder.” The first reaction takes place when liquid is added to the batter. The acid and baking soda in the baking powder react causing bubbles to form in the batter. The second reaction takes place when the batter is placed in the oven. The gas bubbles expand, causing the baked product to expand even further. The heat in the oven causes the expanded batter to “set” maintaining the lift or rise.

Since there are two reactions when baking powder is used, there can be a slight delay (15 to 20 minutes) before the product is baked, and leavening will still occur. Baking powder is typically used in recipes that do not contain acidic ingredients.

Shelf Life of Baking Soda vs Baking Powder
When stored in an airtight container in a cool, dry place, baking soda has an indefinite shelf life, although some producers recommend buying fresh baking soda every three years.

Baking powder should also be kept in an airtight container in a cool, dry place. It generally has a shelf life of six months to one year. Check the “Best by” date on the canister to determine its age. Discard baking powder when it is no longer active.

How to Test the Activity of Baking Powder
Place ½ teaspoon of baking powder in a bowl. Pour ¼ cup of boiling water over the baking powder. It should immediately bubble up violently. If it does, it’s still good. If it doesn’t bubble up, it is old and should be discarded. To see a demonstration of how this is done, view my video here…

How to Test the Activity of Baking Soda
Mix ¼ teaspoon of baking soda with 2 teaspoons of vinegar. The mixture should bubble up immediately. If it does not, the baking soda needs to be replaced. To see a demonstration of how this is done, view my video here…

Are baking soda and baking powder interchangeable in recipes?
No, the two are not interchangeable in recipes.

What happens if you use too much baking soda or baking powder in a recipe?
Too much baking soda added to a recipe may cause a soapy flavor and a coarse, open crumb (very large air bubbles/spaces in the finished product). Baking soda can cause cocoa powder to redden when baked. This is a normal reaction and the origin for the name “Devil’s Food Cake”.

Too much baking powder can cause the product to taste bitter. It can also cause the batter to rise too fast, then collapse, resulting in a flattened baked product. For instance, cakes made with too much baking powder will be sunken in the middle and have a coarse crumb (extra-large cells or air spaces).

What can I do with baking soda besides bake with it?
THIS is where the list gets long. Beside using baking soda as a leavening agent in baked goods, it has MANY other uses in the kitchen and around the house. The following is just a smattering of possibilities, since new uses for baking soda are being found all the time.

In the Kitchen
* Baking soda is well known for its ability to absorb odors. A small bowl or box of baking soda is often placed in refrigerators, freezers, or other enclosed areas to absorb odors. Replace it once a month for best results.

* Rubber gloves in the kitchen can get wet inside and smelly. To keep them fresh, sprinkle a little baking soda inside them. You’ll also find they are easier to slip on and off.

* Loosen baked on grease by sprinkling baking soda in the pan. Add some dish detergent and hot water. Allow the pan to soak for a while. The pan will be easier to clean. [NOTE: Do not use baking soda on aluminum cookware or bakeware. It will react with the aluminum and may discolor the pan.]

* Help to soften dry beans when you cook them and make them less gas-producing, add a little baking soda to the soaking water. This can be especially helpful if the beans are old…the older the are, the drier they get, and the longer it takes to cook them. Shorten the cooking time by adding baking soda to the soaking water. Add 1/4 teaspoon of baking soda per pound of beans in one gallon of water. Rinse them well after being soaked. A little baking soda may also be added to the cooking water. A mere ¼ teaspoon may be added to the cooking water to soften the beans and help them to cook faster. This is due to the alkalizing effect of the baking soda.

* Baking soda is mildly abrasive. This property makes it an effective agent for removing stains from coffee mugs, kitchen counters, microwaves, and kitchen tiles, along with grease stains. Make a paste with a little baking soda and a small amount of water. GENTLY rub it on the stained area with a sponge or cloth. When in doubt, do a test rub in an inconspicuous place. Rinse with plain water and buff the area dry. To see a video demonstration of how to remove stains from a coffee mug, watch this…

* Neutralize trash odors. If your kitchen trash can has an odor, sprinkle some baking soda in it to help neutralize the odors.

* Make fluffy omelets by adding ¼ teaspoon of baking soda to every three eggs used in the omelet. Don’t be tempted to add more baking soda, as it may make the eggs taste bland. Also, don’t oversalt your eggs since baking soda contains sodium.

* Baking soda has been found to remove chemical residues from the surface of conventionally-grown fruits and vegetables. Soak the food in a solution of 1 teaspoon of baking soda to 1 to 2 cups of water for 12 to 15 minutes. Rinse the food well, pat it dry, then store it and use it as usual. Note that this removes chemical residues from the surface. It will not remove chemicals that have soaked into the food. [This is a procedure I use on a regular basis and I can say from personal experience that it works. Here’s a video I have on this topic…

* Baking soda has been used to remove tarnish from silverware. Line a baking pan with aluminum foil. Add 1 tablespoon of baking soda to the foil-lined pan. SLOWLY pour in ½ cup of white vinegar. (Yes, there will be a reaction!) Pour in one cup of boiling water, then place your tarnished silver in the pan. The tarnish should begin to disappear almost immediately. Most of the silverware can be removed within 30 seconds. Heavily stained silverware may take up to one minute to be cleaned. Rinse your cleaned silverware in plain water and wash as usual. The tarnish will be left as a residue at the bottom of the baking pan. Discard it and the foil, then wash the pan.

* Another way to clean tarnished silverware is to gently rub a paste of three parts of baking soda to one part of water onto the silverware with a soft cloth or sponge. Rinse and dry.

* Make a paste of baking soda and water and rub it on plastic containers to remove stains.

* Try baking soda as a natural oven cleaner. [Note that this should be used only on conventional ovens, not self-cleaning ovens.]  Sprinkle baking soda on the bottom of the oven, while avoiding getting it on the heating element. Spray with a water bottle to dampen the baking soda. The sides can be cleaned by spreading on a paste made of 3 parts of baking soda with 1 part of water. Allow it to sit overnight. Scrub it off in the morning. Rinse thoroughly.

* Use baking soda and vinegar to remove burned on milk from a [NON-ALUMINUM] pot. This is a trick that I learned a long time ago and it has worked many times for me and my video viewers as well. Simply sprinkle a generous amount of baking soda on the burned milk in the pot. Add enough water to the pot to cover the burned area by about one inch. Add a generous portion of white vinegar to the pot. (Notice there are no specific measurements here…that’s deliberate!) The mixture will bubble vigorously. Turn the stove on high and bring the mixture to a boil. (Monitor it carefully because the baking soda and vinegar will quickly bubble up and raise within the pot. If it gets too high, lift the pot off the stove briefly and the bubbles will go back down.) Allow the mixture to boil for about 5 minutes. Turn off the heat and allow the pot to sit on the burner until the mixture cools completely. The pot is ready to be washed. The burned area should lift off easily with little scrubbing. Here’s a video where I demonstrated this technique …

* For an effective homemade cleaning solution for your refrigerator, simply mix 1 teaspoon of baking soda in a quart of warm water. Use the solution to wipe off the refrigerator, inside and out.

* To deodorize and clean your garbage disposal, pour 1 cup of baking soda down the drain while simultaneously running warm water. Then run your disposal for one minute, while running warm water, until all the baking soda is gone. This will help keep the grinding mechanism free of grease.

* To remove odors from plastic containers, first wash the container well. Then add 2 tablespoons of baking soda and fill the container with hot water. Place the lid on the container and shake well to dissolve the baking soda. Allow it to soak for 2 hours up to overnight (especially with strong odors). Wash the container well. This method can also work with juice pitchers, thermal bottles, lunch boxes, and any glass or plastic food container.

* To remove odors from your hands after preparing foods like garlic, onions or fish, wet your hands, sprinkle on some baking soda. Rub your hands together well, then rinse and dry.

* If the inside of your microwave is REALLY dirty with a lot of baked-on splattered food, baking soda can come to the rescue. Mix 2 tablespoons of baking soda with 1 cup of water in a microwave-safe bowl. Let this solution boil in the microwave on high for a few minutes, so that moisture collects on the inside walls of the microwave. Remove the bowl, then use paper towels to wipe down the inside of the microwave, including the door, and door seal. Then wipe it all down again with a damp sponge or cloth.

* To deodorize a wood cutting board, apply a paste of 3 parts of baking soda to 1 part of water. Leave the paste on for about 10 minutes. Rinse well, then dry.

* Remove black heel marks from kitchen linoleum or vinyl flooring with baking soda and a damp sponge or nylon scrubber. Rinse and dry the area.

* If you’re baking and a recipe calls for baking powder and you don’t have any, use ½ teaspoon of baking soda plus 1 teaspoon of cream of tartar in place of 2 teaspoons of baking powder. Since this is not a “double-acting” baking powder substitute, bake the item immediately after the liquid and dry ingredients are mixed together.

Personal Care
* Baking soda has been used to relieve heartburn or acid reflux. Dissolve a teaspoon of baking soda in a glass of water and drink the mixture slowly. Note that baking soda is high in sodium. If you need to restrict your sodium intake, this tactic may not be recommended for you. Check with your healthcare practitioner first. Also, do not drink this on a regular basis as it may cause metabolic alkalosis if ingested too often.

* Some people have used a baking soda solution as a mouthwash. Add ½ teaspoon of baking soda to a half glass of warm water. Swish around your mouth as usual. This will increase the pH of your mouth, which can inhibit the growth of bacteria. It also has been found to freshen the breath.

* Baking soda has been found to soothe canker sores inside the mouth. Rinse your mouth with baking soda mouthwash (as in the previous bullet point…1/2 teaspoon of baking soda in half a glass of warm water) once a day until the sore heals.

* Toothpaste with baking soda has been found to whiten teeth and remove dental plaque more effectively than toothpaste without baking soda. This is believed to be due to the mild abrasiveness and antimicrobial properties of baking soda.

* Some people use baking soda as an effective deodorant. Patting your armpits with a little baking soda can help to neutralize the acidic waste products of bacteria that cause the odor.

* A baking soda bath is often recommended to soothe itchy skin from insect bites and bee stings. Add 1 to 2 cups of baking soda to a tub of warm water. Soak in the tub for 10 to 40 minutes. Rinse with fresh water afterwards and drink plenty of water. If you don’t want to bother with a bath, just make a paste of baking soda and a little water. Apply the paste to the affected area and allow it to sit for a little while until the itching or stinging sensation stops. Rinse the paste off with cool water.

* For sunburn relief, add a few heaping tablespoons of baking soda to a bath tub along with a cup of oats. Fill the tub with cool water and soak for 15 to 20 minutes. Do not scrub the skin. Dab yourself dry with a towel afterwards.

* Sooth the irritation from vaginal yeast infections with a baking soda bath. A 2014 study found that baking soda killed Candida cells that led to yeast infections. Furthermore, baking soda has been found to have antifungal affects.

* Help sooth diaper rash by soaking the baby’s bottom in a baking soda bath for 10 minutes, three times a day. Use 2 tablespoons of baking soda in a tub of water. Pat the baby dry (do not rub the skin).

* Make a soothing foot bath by soaking feet for 10 minutes in a solution of 4 tablespoons (1/4 cup) of baking soda in 4 cups of warm water. This will relieve tired feet, soften calluses, and soothe athlete’s foot.

* To keep hair combs and brushes clean and free of oils, soak them overnight in a solution of 1 teaspoon of baking soda in one cup of water. In the morning, rinse them off and you’re ready to start your day!

* A baking soda bath can help relieve the itching and redness from eczema. Add ¼ cup baking soda to the bath water. Soak in the tub for 10 to 15 minutes. Pat the skin with a towel to remove excess water, and apply moisturizer to the skin afterwards, while the skin is still damp.

* Irritation from poison ivy and poison oak can be relieved with a baking soda bath. Dissolve ½ cup of baking soda in a tub of warm water. Soak up to 30 minutes.

* Urinary tract infections can be relieved with a baking soda bath. Add ¼ cup of baking soda to the bath water. Adults, soak up to 30 minutes. Young children should soak for 10 to 15 minutes. Do this twice a day.

* Baking soda can be used to remove odors from shoes. Put two tablespoons of baking soda in the center of a thin cloth. Gather the corners of the cloth and secure the edges with a rubber band or string. Place a sachet inside each smelly shoe. Remove the sachet when you’re ready to wear the shoe.

Safety of Baking Soda Baths. Generally, baking soda baths are considered to be safe and well-tolerated by most people. However, do not take a baking soda bath if you are pregnant or breastfeeding, have high blood pressure, have diabetes, have open wounds or serious infections, or are prone to fainting.

Around the House
* If you enjoy air fresheners in your home, try a homemade baking soda air freshener. Place 1/3 cup of baking soda in a small jar. Add 10 to 15 drops of your favorite essential oil. Cover the jar opening with a clean cloth and secure it with a string, ribbon or rubber band. When the scent starts to fade, gently shake the jar a few times. Add more essential oil as needed.

* Use baking soda to help whiten your laundry. Add ½ cup of baking soda to your washer along with your usual laundry detergent. The baking soda can help to remove stains from your clothes. Also, it will soften the water, so you may be able to use less laundry detergent.

* Baking soda can act as a multi-purpose cleaner in the bathroom. Make a paste with baking soda and a little water. The paste can be used to clean bathroom sinks, tiles, bathtubs, and showers. Use a sponge to apply the paste to scrub the area you want to clean. Allow it to sit for 15 to 20 minutes. Wipe the area down with a damp cloth afterwards.

* To clean your toilet bowl, routinely sprinkle some baking soda in the bowl and scrub with a toilet brush. For stained bowls, pour in ½ cup of baking soda and ½ cup of white vinegar. Scrub with a toilet brush, then flush. Be careful when doing this in case the bubbling action splashes upward!

* To remove perspiration stains from clothing, make a paste of baking soda and a little water. Rub the paste into the stained area and let it sit for one hour, then launder as usual.

* Did you accidentally spill a little gasoline on your clothes? Remove the odor by sprinkling the stained area with some baking soda. Place your clothes in a trash bag and seal it up. Let them sit there for a few days, then launder as usual.

* Is it winter and you’ve run out of ice melt? Sprinkle a little baking soda on the ice on your steps. It will provide some traction and melt the ice. Unlike rock salt, it won’t damage indoor or outdoor surfaces.

* For a safe way to clean your toothbrush, let it soak in a baking soda and water solution overnight.

* Do you have clogged bathroom drains? For a simple drain cleaner, start by pouring a cup of boiling water down the drain to help loosen things up. Mix one cup of baking soda with 1 cup of salt.  Place ½ cup to 1 cup of white vinegar in a separate measuring cup. Alternately spoon the baking soda and salt mixture into the drain, flushing it with a little white vinegar to help the dry mixture go down to the clog. Be careful, as it will bubble up! Once all the dry mixture and vinegar have been placed in the drain, cover with the drain plug and wait for 15 minutes. Then pour a large pot of boiling water down the drain. This will clear most clogs.

* Mop your tile floors clean with a solution of ½ cup of baking soda in a bucket of warm water.

* Make cloth diapers easier to clean by first soaking them in a solution of ½ cup of baking soda in 2 quarts of warm water. They should come out cleaner when laundered.

* Help keep cut flowers longer by adding a teaspoon of baking soda to the water in the vase.

* Help to keep your kitty’s litter box smelling fresh by sprinkling the bottom of the box with baking soda before adding litter. Use about one cup of baking soda to three pounds of litter. If you need to clean the box but are short on time, sprinkle some baking soda on top and give it a light stir. This will help keep odors in check for a short while until you can change the litter.

Resources
https://www.thespruceeats.com/what-is-baking-soda-p2-1328637

https://www.joyofbaking.com/bakingsoda.html

https://www.davidlebovitz.com/how-to-tell-if-baking-powder-is-still-good/

https://www.healthline.com/nutrition/baking-soda-benefits-uses#2.-Mouthwash

https://www.healthline.com/health/baking-soda-bath

https://pmaonline.com/posts/adult-primary-care/8-ways-to-treat-sunburn-at-home/

https://www.almanac.com/content/best-baking-soda-uses

https://www.liquidplumr.com/diy-plumbing-tip/how-baking-soda-and-vinegar-cleans-drains/

https://www.thankyourbody.com/uses-for-baking-soda/

https://www.networx.com/article/6-ways-not-to-use-baking-soda

https://www.readersdigest.ca/home-garden/tips/5-things-do-baking-soda/

https://www.cooksillustrated.com/articles/1745-can-baking-soda-make-beans-cook-faster

http://www.eatingwell.com/article/292167/the-weird-reason-you-should-be-adding-baking-soda-to-your-beans/

https://www.tasteofhome.com/article/degassing-beans/

https://nutritionfacts.org/questions/does-adding-baking-soda-to-soaking-beans-reduce-raffinose/

https://skillet.lifehacker.com/make-extra-tender-beans-with-a-little-baking-soda-1842156539

https://www.healthline.com/nutrition/10-baking-powder-substitutes#TOC_TITLE_HDR_5

https://www.armandhammer.com/

Baker, Jerry. (2006) Grandma Putt’s Old-Time Vinegar, Garlic, Baking Soda, and 101 More Problem Solvers. USA: American Master Products, Inc.

Ciullo, Peter A. (1995) Baking Soda Bonanza. New York, NY: Harper Collins Publishers, Inc.


About Judi

Julia W. Klee (Judi) began her journey enjoying “all things food” in elementary school when she started preparing meals for her family. That love of food blossomed into a quest to learn more and more about health and wellness as related to nutrition. She went on to earn a BS Degree in Food and Nutrition, then an MS Degree in Nutrition. She has taught nutrition and related courses at the college level to pre-nursing and exercise science students. Her hunger to learn didn’t stop upon graduation from college. She continues to research on a regular basis about nutrition as it relates to health. Her hope is to help as many people as possible to enjoy foods that promote health and wellness.

Peppercorns

Peppercorns 101 – The Basics


Peppercorns 101 – The Basics

About Peppercorns
Pepper is native to India and has been a prized spice since ancient times. Ancient Greeks not only used pepper as a spice, but also as currency and a sacred offering used to honor the gods. It was also used to pay taxes and ransoms. In the Middle Ages, a man’s stockpile of peppercorns was indicative of his wealth.

In ancient times, pepper was also valued because it had some important culinary uses. Not only did it season otherwise bland food, but its spiciness could also mask the flavor of stale or spoiled food. Since there was little way to preserve food, its spoilage was a problem they continually dealt with.

The value of pepper sparked the development of the spice trade, which led to the exploration of undeveloped lands, and also the development of major merchant cities in Europe and the Middle East. Today, the major commercial producers of pepper are India and Indonesia.

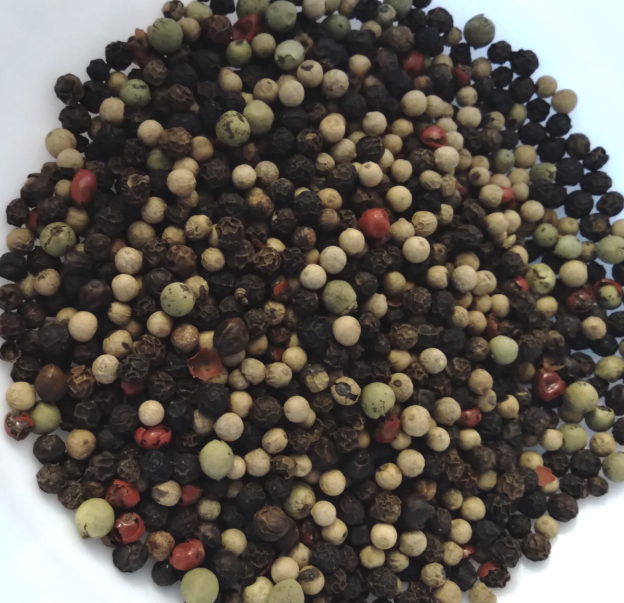
Black, green, and white peppercorns are all berries from the same plant, Piper nigrum. The plant is a perennial climbing vine. The different colors reflect different stages of berry development and processing methods. Black peppercorns are picked when they are only half ripe and are about to turn red (as they ripen). They are dried, which causes them to shrivel and turn dark. Green peppercorns are picked when they are still green, before they begin to ripen. After being picked, they are either dried or steeped in brine. White peppercorns are picked when they are very ripe, and are then soaked in a brine to remove their outer shell, leaving just the inner seed. Black peppercorns are the most flavorful and pungent of all the peppercorns. They are available whole or ground.

Pink peppercorns are from a completely different plant, Schinus mole, which is related to ragweed. They are sometimes referred to as false peppercorns since they come from a different plant species. Other “false” peppercorns include the Szechuan, Negro, and Long peppercorns.

Nutrition and Health Benefits
Peppercorns are rich in a variety of nutrients, including Vitamins A (in the form of beta-carotene) and K, calcium, magnesium, potassium, manganese, and phosphorus. It also has antioxidant and antibacterial properties.

Pepper has been used to help alleviate the following ailments: abdominal pain from digestive problems (such as heartburn, indigestion, constipation, and inadequate stomach acids), cold, diabetes, diarrhea, dysentery, flu, fluid retention, mental exhaustion, nicotine cravings, obesity (by stimulating the breakdown of fat cells), pain, poor memory, depression, respiratory mucus, runny nose, sprains, tumors, ulcers, flatulence, nausea, and weakness from coma or vertigo.

Caution: Dosages and applications would vary by ailment and individual characteristics like current medications, age, and weight, so it is advisable to follow the advice of a medical practitioner when using pepper for any medicinal purposes.

When pepper is ingested above usual culinary amounts, it is known to interact with the following drugs: Coumadin, Inderal, Advil, Naprosyn, Tylenol, Neodur, and smoking cessation aids.

Types of Peppercorns
Black Peppercorns.  Black peppercorns come from the same plant as white peppercorns, Piper nigrum. They are harvested before they start to ripen. They are then dried, which causes them to shrivel and turn black. Their flavor is strong and biting, but not necessarily “hot.” The flavor of pepper is primarily due to its content of the compound piperine.

Suggested uses for black peppercorns: Use whole black peppercorns when pickling and making stock. Use cracked black peppercorns on meats and salads. Use ground black peppercorns for everything else.

White Peppercorns. White peppercorns come from the same plant as black peppercorns, Piper nigrum. They are harvested in the middle of the season and first soaked to remove the outer layer, then dried. Removing the outer husk prevents them from turning dark and preserves their light color. The flavor of white pepper is sharper and brighter than that of black pepper. When shopping for white peppercorns, choose ones that are creamy white (but not bleached white). They should be relatively uniform in size and have no specks of gray or black. White pepper will add a little “heat” to whatever food you flavor it with. White pepper goes especially well in soups, stews, marinades, and stir-fries. White peppercorns are sold both whole and ground.

Suggested uses for white peppercorns: Use white peppercorns when cooking white sauces, cream soups, fish, poultry, and grilled meats.

Green Peppercorns. Green peppercorns are the green berries, picked long before they are ripe. They are usually freeze-dried to preserve their smooth skin and green color. They may also be pickled. Green peppercorns have a very tart flavor that does not last long in the mouth.

Suggested uses for green peppercorns: Use green peppercorns when cooking meat sauces, poultry, vegetables, and seafood.

Red Peppercorns. Red peppercorns are also the fruit of the Piper nigrum plant. However, red peppercorns are fully ripened on the vine. They have a sweet, mellow flavor when compared with their black counterparts. True red peppercorns are rarely found in the United States. Most recipes calling for red peppers are referring to ground cayenne or red chiles.

Pink (Preserved Red) Peppercorns. Preserved red peppercorns are rarely found in the United States. They are red peppercorns of the Piper nigrum plant that were preserved in a brine. They are soft, so they are typically put in recipes whole. They are sometimes used in egg dishes and salads.

Blends and Combinations of Peppercorns. When black and green peppercorns are combined, they will add more of a “bite” to a dish. When black and white peppercorns are combined, the flavor of pepper will linger longer.

Lemon Pepper. Sometimes pepper is combined with other ingredients to lend specific flavors to foods. Lemon pepper is one example that is often added to chicken or fish.

The following are considered to be “false peppers” since they aren’t harvested from the Piper nigrum vine, and their flavors are a little different than traditional pepper.

Sichuan or Szechuan Pepper. This pepper is made from the berries of a prickly Ash tree native to China. They are commonly used in many Chinese and Japanese dishes. They are spicier than pepper from the Piper nigum vine.

Negro Pepper. This type of pepper is grown in Ghana and Malawi (Africa). Like black pepper, the fruit is dried in the sun. It has a strong flavor but leaves a bitter aftertaste, so it is not usually substituted for black pepper.

Long Pepper. Long pepper, Piper longum, has fruit about one inch long with a lot of tiny black and gray seeds. The flavor is that of a mild pepper and ginger combination. It is used in sweet hot dishes where the flavor of ginger is accented. This pepper is sometimes used on fresh fruit, coleslaw, and other fresh foods since cooking dilutes the flavor. It is not considered to be a good substitute for black pepper.

Pink Peppercorns (Shinus molle). These peppercorns are harvested from a different plant than traditional pepper, so they are not considered to be a true pepper. When eaten, these peppercorns have a peppery flavor that turns sweet. It is not a good substitute for traditional pepper. However, in Madagascar, Mexico, and Australia, where it is grown, it is commonly used to flavor vegetables and seafood. Importantly, this type of pepper can cause allergic reactions, especially in children. So, use it with caution if you’re not sure about potential reactions.

How to Select Pepper
Pepper is available whole, cracked, ground, and brined. For the best flavor when using dried pepper, opt for whole peppercorns and grind it yourself as needed with a pepper mill or spice grinder.  

How to Store
Store pepper in a tightly sealed container, preferably glass. Keep it in a cool, dry, dark place. Whole peppercorns will stay fresh for about 4 years, but will keep almost indefinitely even though their flavor may diminish over time. Ground pepper will stay fresh for about three months. Although not necessary, peppercorns may be stored in the freezer, but bear in mind that its flavor will be more pronounced after being frozen.

Quick Ideas and Tips for Using Pepper
* The flavor of ground pepper will diminish after being cooked for a long time. So, for best flavor, add pepper toward the end of cooking time.

* For fresh pepper flavor, keep a pepper mill on the table so it can be added directly to your plate.

* For a simple salad dressing, combine olive oil, lemon juice, salt, and freshly ground pepper.

* Pepper has been used as an insecticide. Sprinkle pepper around non-garden areas to keep insects out. You could also mix a teaspoon of freshly ground black pepper with one quart of warm water. Spray it on plants to kill ants, potato bugs, and silverfish.

* To tell if peppercorns are fresh, simply smell them. If they have lost their aroma, they are stale and won’t have a strong flavor. You could also crush a couple peppercorns and taste them. If they have lost their zest, they can still be used, but won’t provide a lot of flavor.

* About 1/8 teaspoon of ground pepper is equivalent to five turns on a typical pepper grinder.

* Add a few peppercorns to your ground pepper shaker to help keep it from clogging up.

* Freezing peppercorns enhances its flavor.

* Ground pepper will hold its flavor for about 3 months. It will dwindle thereafter. The flavor of whole peppercorns will last almost indefinitely.

* For the best pepper flavor, buy whole peppercorns and grind it as needed.

* Whole peppercorns can add flavor to marinades, poached fish, and boiled meats. Suggested amounts are: 10 to 12 whole peppercorns in marinades, 4 to 6 whole peppercorns in poaching liquid, 1 to 2 whole peppercorns when poaching fish, and 8 to 10 whole peppercorns when boiling meat.

Herbs and Spices That Go Well with Pepper
Allspice, basil, bay leaf, caraway, cardamom, cinnamon, cloves, coriander, cumin, ginger, lemongrass, mustard, nutmeg, oregano, paprika, parsley, rosemary, sage, salt, tarragon, thyme, turmeric

Foods That Go Well with Pepper
Proteins, Legumes, Nuts, Seeds: Bacon, beans, beef, chicken, duck, eggs, fish and other seafood, ham, lamb, lentils, nuts (in general), peanuts, peas, pine nuts, pork, sausage, sesame, venison, tofu, turkey, veal

Vegetables: Artichokes, asparagus, broccoli, cabbage, carrots, cucumbers, eggplant, fennel, garlic, leeks, mushrooms, onions, pickles, potatoes, shallots, spinach, squash, sweet potatoes, tomatoes, vegetables (in general)

Fruits: Apples, apricots, berries, cherries, fruit (in general), grapefruit, grapes, lemon, lime, olives, orange, pineapple, pumpkin, strawberries

Grains and Grain Products: Bread, pasta, rice, tortillas

Dairy and Non-Dairy: Butter, cheese, coconut milk, cream, yogurt

Other Foods: Beer, brandy, oil (esp. olive), sugar, vinegar, wine

Pepper has been used in the following cuisines and dishes…
North American cuisine, baked goods (i.e. spice cakes), Cajun cuisine, Creole cuisine, European cuisines, gravies, Indian cuisine, marinades, pickles, salad dressings, salads, sauces, soups, Southeast Asian cuisine, Southern U.S. cuisine, stocks

Recipe Links
Peppercorn Steak https://www.simplyrecipes.com/recipes/peppercorn_steak/

Steak with Creamy Peppercorn Sauce https://www.recipetineats.com/peppercorn-sauce/

Black Pepper, Tofu and Asparagus https://www.bonappetit.com/recipe/black-pepper-tofu-and-asparagus

Classic Carbonara https://www.bonappetit.com/recipe/traditional-carbonara

Farro-Vegetable Hash with Chermoula https://www.bonappetit.com/recipe/farro-vegetable-hash-with-chermoula

Crispy Turmeric and Pepper Spiced Chicken Wings https://www.bonappetit.com/recipe/crispy-turmeric-and-pepper-spiced-chicken-wings

Boiled Chicken https://www.allrecipes.com/recipe/20455/boiled-chicken/?internalSource=hub%20recipe&referringId=1157&referringContentType=Recipe%20Hub&clickId=cardslot%2013

Fried Steak with Peppercorn Gravy https://www.allrecipes.com/recipe/68596/fried-steak-with-peppercorn-gravy-sauce/?internalSource=recipe%20hub&referringId=1157&referringContentType=Recipe%20Hub&clickId=cardslot%2054

Cauliflower Steak with Green Peppercorn Sauce https://mypureplants.com/cauliflower-steak-peppercorn-sauce

10 Black Pepper-Based Vegan Recipes to Spice Up Your Night https://www.onegreenplanet.org/vegan-food/10-black-pepper-based-vegan-recipes-to-spice-up-your-night/

Resources
https://whatscookingamerica.net/Information/Pepper.htm

http://www.whfoods.com/genpage.php?tname=foodspice&dbid=74#descr

https://www.bonappetit.com/story/white-pepper

https://www.britannica.com/plant/black-pepper-plant

https://www.encyclopedia.com/plants-and-animals/plants/plants/pepper

https://thekitchenprofessor.com/blog/how-long-does-peppercorn-last

https://www.ilikeitalianfood.com/blogs/news/the-king-of-spices-pepper-varieties-and-colours

https://thespiceacademy.com/flavor-combinations-peppercorn-blend/

Page, Karen. (2014) The Vegetarian Flavor Bible. New York, NY: Little, Brown and Company.


About Judi

Julia W. Klee (Judi) began her journey enjoying “all things food” in elementary school when she started preparing meals for her family. That love of food blossomed into a quest to learn more and more about health and wellness as related to nutrition. She went on to earn a BS Degree in Food and Nutrition, then an MS Degree in Nutrition. She has taught nutrition and related courses at the college level to pre-nursing and exercise science students. Her hunger to learn didn’t stop upon graduation from college. She continues to research on a regular basis about nutrition as it relates to health. Her hope is to help as many people as possible to enjoy foods that promote health and wellness.
Nutmeg

Nutmeg 101 – The Basics


Nutmeg 101 – The Basics

About Nutmeg
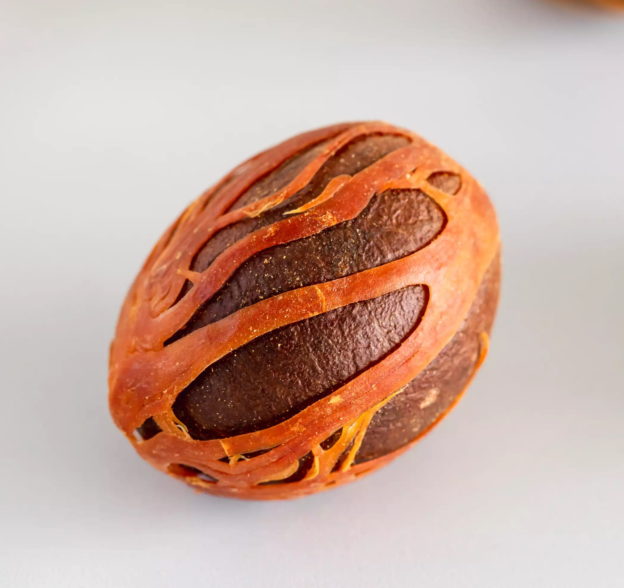
Nutmeg is a spice that is made from the seed of the tree, Myristica fragrans. The tree is native to Indonesia and is an evergreen tree. The tree actually is the source of two spices, nutmeg and mace. Nutmeg is the inner seed, whereas mace is the red, lacy-type substance that surrounds the seed.

There is historical evidence dating nutmeg back to the first century, A.D. It was a treasured spice and commanded a high price. Nutmeg was even the cause of war, when the Dutch took over the Banda islands to monopolize the nutmeg trade. This ultimately gave birth to the Dutch East India Company, a conglomeration of several Dutch trading companies.

To make nutmeg, the seeds are slowly dried in the sun over six to eight weeks. As they dry, the seed shrinks away from its coating. The seeds are ready to be harvested when they rattle in their shells when shaken. Nutmeg seeds are then separated from their outer coating, which is then sold as mace. The inner seed is sold whole or ground up as powdered nutmeg.

Nutmeg has a nutty, slightly sweet flavor with a distinct aroma. It is an intense spice with a distinct flavor, so a little goes a long way. Nutmeg is synonymous with fall since it is often used in fall and holiday desserts and beverages. It is also used in savory dishes such as butternut squash soup. Nutmeg is also known to pair well with cream- or cheese-based dishes. Eggnog is typically flavored with nutmeg.

Nutrition and Health Benefits
Although we don’t consume a lot of nutmeg at any one time, there is an impressive list of nutrients supplied by this spice. Nutmeg contains a lot of manganese, copper, magnesium and fiber. It also supplies potassium, phosphorus, iron, calcium, zinc, folate, thiamin and even omega-6 fatty acids.

The leaves and other parts of the nutmeg tree are used for extracting nutmeg essential oil. The oil contains a variety of compounds that have medicinal properties and has been used in traditional medicine to relieve a variety of ailments.

Pain Relief. Nutmeg essential oil has anti-inflammatory properties and has been used for pain relief. Just a few drops of the essential oil applied to the affected area has been used to treat inflammation, swelling, joint pain, muscle pain and sores.

Helps Treat Insomnia. Nutmeg seems to have a calming effect and has been used since antiquity for calming and inducing sleep. Enjoy a warm glass of milk with a pinch of ground nutmeg before bedtime and it will help you to relax and fall asleep easier.

Helps Digestion. Nutmeg has been shown to help relieve intestinal gas, diarrhea, and constipation. Add a pinch to soups and stews. That small amount will help to promote the secretion of enzymes, thereby helping with digestion. The fiber in nutmeg will help keep things moving in the digestive tract, relieving gas and preventing constipation.

Brain Health. Nutmeg has been shown to stimulate nerves in the brain. It was commonly used as a brain tonic by ancient Greeks and Romans. It has been shown to be an effective treatment for depression and anxiety, calming emotional stress. The essential oils in nutmeg have been found to work as “adaptogens” by acting both as a stimulant and sedative, depending upon the needs of the body at the time. When we’re stressed, it can help to lower blood pressure. If we’re down, it can help to lift the mood, acting as a stimulant.

Promotes Detoxification. The compounds in nutmeg have been found to help clear toxins from the body via the liver and kidneys. The essential oils in nutmeg have anti-bacterial properties. Some toothpastes have nutmeg essential oils in them to help control harmful bacteria in the mouth that can lead to bad breath. Also, the essential oil in nutmeg contains eugenol, which is known to help relieve toothache.

Promotes Healthy Skin. Not only does nutmeg have antimicrobial and anti-inflammatory properties, but it also has been found to remove blackheads, and treat acne and clogged pores. An easy home remedy is to mix equal parts of ground nutmeg and honey into a paste. Apply it to pimples, leave it on for 20 minutes, then wash it off with cool water.

A paste can also be made with ground nutmeg and a few drops of milk. Mix into a paste and massage it into the skin, then rinse with cool water.

Nutmeg may also be added to facial scrubs with oatmeal, orange peel, etc.

Blood Pressure and Circulation. The minerals in nutmeg make it a wonderful ingredient for helping to regulate blood pressure and circulation. The stress-reducing properties help blood vessels to relax, lowering blood pressure and aiding in cardiovascular function.

Caution! Nutmeg should be used sparingly and limited to any amount you would normally use in a food. When used in high doses (well beyond what you would normally use in any food), nutmeg has hallucinogenic properties. It can also cause nausea and palpitations. Such high dosages can be very toxic, and in rare cases, even deadly. In the case of accidental overdose, especially with children, seek medical attention immediately.

How to Select Nutmeg
Nutmeg may be purchased as a whole seed or ground up. Either version will be available in the spice isle of the grocery store. Some stores do not carry whole nutmeg, but most will carry the ground spice.

Many chefs prefer the whole spice and grind it as needed. The flavor of the freshly ground nutmeg will be more intense than the pre-ground powder.

How to Store Nutmeg
Store whichever type of nutmeg you have (whole or ground) in an airtight container in a cool, dry, dark place such as your pantry. It should be kept away from heat sources and sunlight.

The whole spice will keep fresh and maintain its flavor longer than the pre-ground powdered nutmeg.  Whole nutmeg seeds will maintain their freshness for about 4 years. Ground nutmeg will stay fresh and flavorful for at least six months, and up to two years. As long as nutmeg is stored properly, it will be edible beyond that, but the flavor may dwindle over time.

Quick Ideas and Tips for Using Nutmeg
* When grating whole nutmeg, avoid doing it over a hot pot or one with steaming liquid. This will make the seed moist which can cause it to spoil. The heat can cause it to age fast. So, it’s better to grate it onto a plate or small bowl on the counter rather than directly over hot food.

* When you use nutmeg, if you notice it has little aroma, it may be getting old. Feel free to taste it if there’s no sign of mold or decay. If it has little flavor, it’s past time to replace it. It’s still safe to consume, but won’t give the flavor you’re expecting.

* Nutmeg has a strong, distinct flavor. Use it sparingly. You can always add more, but it would be hard to counteract the flavor if too much is added.

* Try a sprinkle of nutmeg as a garnish on eggnog or cappuccino.

* If you don’t have nutmeg on hand and a recipe calls for it, the best substitute is mace. Since it’s part of the seed itself, the flavor is close. Otherwise, the flavor outcome will be different, but you could use a touch of pumpkin pie spice, allspice, ginger, cinnamon, or ground cloves.

* Nutmeg goes well with baked or stewed fruit, so try it as a garnish when you cook fruit.

* Sprinkle nutmeg on custard for added flavor and a nice garnish.

* Add a sprinkle of nutmeg to milk-based sauces.

* Try a sprinkle of nutmeg on steamed, stir-steamed, or sautéed spinach or a spinach soufflé.

* One whole nutmeg seed yields 2 to 3 teaspoons of ground nutmeg.

* Add nutmeg to fillings for cannelloni, ravioli or tortellini.

* Add a pinch of nutmeg to mashed potatoes or sweet potatoes.

Herbs and Spices That Go Well with Nutmeg
Cardamom, cinnamon, cloves, ginger, lemongrass, mace

Foods That Go Well with Nutmeg
Proteins, Legumes, Nuts, Seeds: Beef, chicken, eggs, ham, meat (in general), pecans, pork, sausage

Vegetables: Carrots, greens (dark leafy), mushrooms, potatoes, spinach, squash (winter), sweet potatoes, yams

Fruits: Apples, bananas, fruit (in general; fresh and dried), lemon, pumpkin

Grains and Grain Products: Rice

Dairy and Non-Dairy: Cheese (cheddar, Gruyere, pecorino, ricotta), coconut milk, cream, milk

Other Foods: Chocolate, vanilla

Nutmeg has been used in the following cuisines and dishes…
Baked goods (biscuits, cakes, cookies, pastries, pies), cereals (hot, breakfast), cheese dishes (fondues, soufflés), desserts (cheesecake, custards, puddings, drinks (esp. cream or milk-based, i.e. eggnog), egg dishes (quiches), French cuisine, ice cream, Indian cuisine, Italian cuisine, noodle dishes (i.e. macaroni and cheese), pastas, puddings (i.e. rice), sauces (barbecue, béchamel, cheese, cream, pasta, tomato), soups (i.e. cream based), stews (vegetable)

Recipe Links
Classic Custard Pie with Nutmeg https://www.thespruceeats.com/classic-custard-pie-with-nutmeg-3052755

Quick and Easy Drop Cookies with Nutmeg https://www.thespruceeats.com/quick-and-easy-drop-cookies-3059058

Spiced Apple Juice with Cinnamon and Nutmeg https://www.thespruceeats.com/fall-spiced-apple-juice-3051541

Easy Spiced Peach Cobbler https://www.thespruceeats.com/easy-spiced-peach-cobbler-3058942

Garam Masala Spice Mix https://www.thespruceeats.com/garam-masala-spice-mix-recipe-1809291

Pumpkin Banana Bread https://www.thespruceeats.com/pumpkin-banana-bread-recipe-1806113

Carrot Cake with Pineapple https://www.thespruceeats.com/carrot-cake-with-pineapple-3052454

Deep-Dish Shepherd’s Pie with Sweet Potato and Chicken Curry https://www.thekitchn.com/recipe-deep-dish-shepherds-pie-with-sweet-potato-and-chicken-curry-228115

Make-Ahead Ham and Cheese Breakfast Casserole https://www.thekitchn.com/recipe-make-ahead-ham-and-cheese-breakfast-casserole-43364

Super-Soft Snickerdoodle Cookies https://www.thekitchn.com/recipe-super-soft-snickerdoodl-115237

My Favorite Spice Rub (Amazing on Meat and Seafood) https://www.thegarlicdiaries.com/my-favorite-spice-rub-amazing-on-meat-and-seafood/#tasty-recipes-6003

20 Ways to Cook with Nutmeg https://www.epicurious.com/ingredients/our-best-nutmeg-recipes-cake-bread-desserts-spice-gallery


Resources
https://www.thespruceeats.com/what-is-nutmeg-1328522

https://www.doesitgobad.com/nutmeg-go-bad/

https://www.thespruceeats.com/nutmeg-recipes-and-cooking-tips-1809314

https://food.ndtv.com/food-drinks/7-incredible-nutmeg-benefits-from-inducing-sleep-to-relieving-pain-1464121

https://nutritiondata.self.com/facts/spices-and-herbs/195/2

https://www.thekitchn.com/inside-the-spice-cabinet-nutmeg-69844

https://www.saveur.com/article/Techniques/Seven-Things-to-Do-with-Nutmeg/

Page, Karen. (2014) The Vegetarian Flavor Bible. New York, NY: Little, Brown and Company.


About Judi

Julia W. Klee (Judi) began her journey enjoying “all things food” in elementary school when she started preparing meals for her family. That love of food blossomed into a quest to learn more and more about health and wellness as related to nutrition. She went on to earn a BS Degree in Food and Nutrition, then an MS Degree in Nutrition. She has taught nutrition and related courses at the college level to pre-nursing and exercise science students. Her hunger to learn didn’t stop upon graduation from college. She continues to research on a regular basis about nutrition as it relates to health. Her hope is to help as many people as possible to enjoy foods that promote health and wellness.
Whole Dried Peas vs. Split Peas

Dried Green Peas – Whole vs. Split: A Comparison

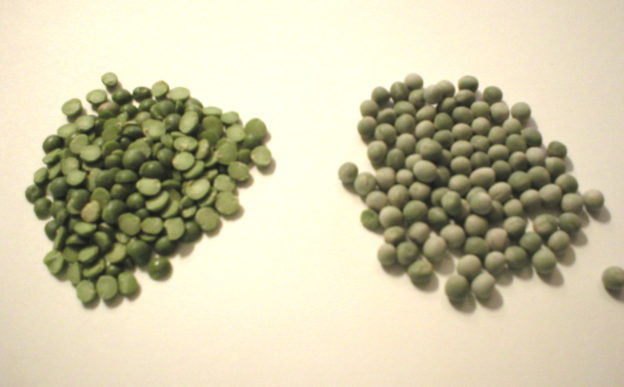
If you’re wondering what the difference is between split peas and whole dried peas, the following article should help! It covers what they are and their differences in soaking needs, preparation methods, cooking times, texture when cooked, and whether they will sprout. Below is a video covering this topic. The written article is below the video.

Enjoy!
Judi

Split Green Peas vs Whole Dried Peas: A Comparison

About Dried Peas
Dried green peas are in the same plant family as beans and lentils, but are usually grouped separately since their preparation is different. Whole dried peas and green split peas are from the same plant. Although we usually associate dried peas with being green, there is also a yellow colored variety. The yellow variety has a milder flavor than the green peas.

Researchers have discovered that dried peas have been eaten since prehistoric times. Peas were even mentioned in the Bible. They were prized in ancient civilizations of Egypt, Greece, and Rome. It appears that the Chinese were the first to eat both the seeds and pods as vegetables. Peas were brought to the United States soon after the colonists arrived. Today, the largest producers of peas are Russia, France, China and Denmark.

Nutrition and Health Benefits of Peas
Dried peas are small, but mighty when considering their nutritional value. They are rich in fiber, including soluble fiber, which is known to lower cardiovascular disease risks by removing bile (and thereby cholesterol) from the body. They also contain a lot of molybdenum, B-vitamins (folate, Vitamin B1, and pantothenic acid), copper, manganese, protein, phosphorus, and potassium.

In addition to helping to remove cholesterol from the body, the fiber in dried peas helps to prevent constipation, and bowel disorders like irritable bowel syndrome and diverticulosis.

The soluble fiber in peas also helps to stabilize blood sugar. This is especially helpful to people with insulin resistance, hypoglycemia, or diabetes. Legumes like dried peas can help to balance blood sugar levels while providing a steady flow of energy. Studies have shown that diabetics who consumed high fiber diets (of about 50 grams of fiber a day) had lower blood glucose and insulin levels, along with lower levels of blood cholesterol, triglycerides, and very low-density lipoproteins (VLDL). These factors help to improve overall health along with reducing the risk of cardiovascular disease.

What is a split pea?
Split green peas are a field pea variety that is grown specifically for being dried and split. These are different from “garden peas” that are grown to be eaten fresh. Dried peas are used mostly in soups, stews, and casseroles.

Some people wonder if split peas are the same thing as lentils. Even though split peas and lentils are very similar in size and shape, they are not the same thing. They are different varieties of legumes. Split peas are a field pea, grown specifically for drying. Lentils are the dried seed of a different plant. They are not interchangeable legumes.

Split green peas are the same plant as whole dried green peas. The whole peas were not peeled and split before being sold, like the split peas.

Should peas be soaked?
Split Peas. Split peas can be soaked before being cooked, but it’s not mandatory. Most resources don’t suggest soaking split peas.

Whole Dried Peas. Whole dried peas need to be soaked for at least 8 hours or overnight before being cooked.

How to Prepare Peas
Split Peas. To prepare dried split peas, simply sort through the peas to remove any debris. Then rinse them in a colander and transfer them to the cooking pot. Follow your recipe from there. To cook them alone, place your rinsed peas in a pot and cover them with cold water. The usual ratio is 1 cup of peas to 2 or 3 cups of water. Bring them to a boil, then reduce the heat to simmer, cover the pot, and allow them to cook for about 30 to 45 minutes, until they are tender. Note that many recipes for split pea soup will require a longer cooking time, making the peas mushy so the soup can have a creamy texture.

Whole Dried Peas. To prepare whole dried peas, first sort through them and remove any debris. Then rinse and drain them. Please them in a large bowl or pot and cover them with enough water to allow them to expand and still remain submerged. After soaking, drain the water and cover them with fresh water for cooking in a pot with a lid. Bring them to a boil, then reduce the heat, cock the lid on the pot, and simmer the peas until they are tender. This usually takes about one hour, but can take longer depending upon how old the peas are and how soft you want them to be.

About the Foam. White foam can form on the top of your water when cooking dried peas and beans. It can simply be skimmed off and discarded. Of, if preferred, it can be left alone and it will eventually dissolve and be incorporated back into the cooking water. There is no harm either way you go…discarding it or leaving it in the water. The choice is yours!

Texture When Cooked
Split Peas. Split peas will usually become mushy and disintegrate when cooked completely. With this, they will provide the rich creamy texture characteristic of pea soup. If you prefer, split peas can be cooked until they are just tender so they will somewhat maintain their shape.

Whole Peas. When completely cooked, whole dried peas will remain intact. However, if you want to use them for pea soup, simply take an immersion blender, regular blender, or food processor, and blend them up to make a creamy foundation for any soup.

Will They Sprout?
Split green peas will not sprout since the whole seed is not intact. Whole, dried peas will sprout. They can be jar sprouted in only 2 or 3 days. They can also be tray sprouted and grown into microgreens. There are many resources on the internet that give details on how to jar sprout or tray sprout whole dried green peas.

Resources
https://www.aaaai.org/ask-the-expert/relationship-split-pea-green-pea

http://www.whfoods.com/genpage.php?tname=foodspice&dbid=56

https://www.camelliabrand.com/about-the-bean/about-green-split-peas/

https://www.cooksinfo.com/split-green-peas

https://www.drweil.com/diet-nutrition/cooking-cookware/cooking-with-legumes-dried-peas/

https://www.thekitchn.com/whats-the-difference-between-split-peas-and-lentils-word-of-mouth-214986

http://sprouting.com/product/549/Peas%2C-Green.html

https://www.bobsredmill.com/recipes/how-to-make/basic-preparation-instructions-for-green-split-peas/

https://startcooking.com/how-to-beans-split-peas-and-lentils


About Judi

Julia W. Klee (Judi) began her journey enjoying “all things food” in elementary school when she started preparing meals for her family. That love of food blossomed into a quest to learn more and more about health and wellness as related to nutrition. She went on to earn a BS Degree in Food and Nutrition, then an MS Degree in Nutrition. She has taught nutrition and related courses at the college level to pre-nursing and exercise science students. Her hunger to learn didn’t stop upon graduation from college. She continues to research on a regular basis about nutrition as it relates to health. Her hope is to help as many people as possible to enjoy foods that promote health and wellness.
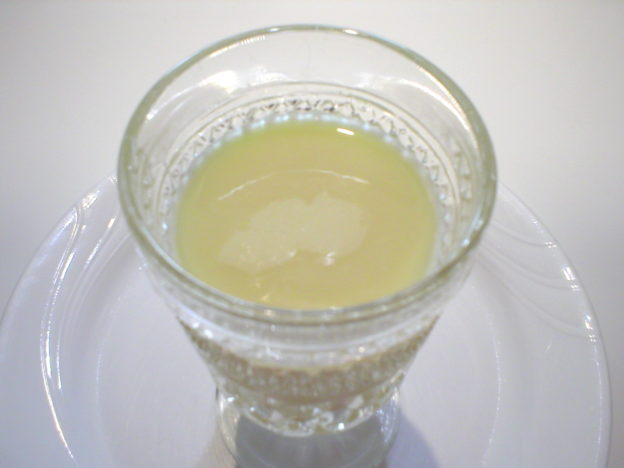
Orange Cream Beverage

Orange Cream Beverage (Non-Alcoholic!)

If you strive to eat the healthiest options you can find, yet you sometimes miss the flavors of “yester-year,” this fast and REALLY simple beverage recipe may help you out. The first sip instantly reminds me of a Creamsicle popsicle I used to enjoy in my youth. Although I haven’t had one for countless years, it’s a flavor I haven’t forgotten. When I think of those popsicles, many fun memories come to mind. Well I recently recreated the easiest and healthiest version of that flavor that I could possibly concoct. TWO ingredients! That’s it.

Below is a video demonstration of how to make this delicious beverage. The written recipe is below the video.

Enjoy!
Judi


Orange Cream Beverage
(Non-Alcoholic!)

2 parts orange juice
1 part extra creamy oat milk

Add ingredients to a glass, stir, and enjoy!

Tip: To make this even more creamy, a scoop of vanilla ice cream or yogurt may also be added. Coconut milk or any milk desired may be used in place of the oat milk, but the flavor will change.


Apples

Apples 101 – About Autumn Glory Apples


Apples 101 – About Autumn Glory Apples

Origin
Autumn Glory apples are a cross between Fuji and Golden Delicious apples. They were developed and have been grown exclusively by Superfresh Growers in Washington state. The apples were first sent to market in 2011.

Nutrition Facts
The nutritional aspects of Autumn Glory apples would be roughly equivalent to that of other sweet apples. One average Autumn Glory apple has about 100 calories. They are high in Vitamin C and fiber. They also supply potassium, Vitamin B6, Vitamin K, manganese, riboflavin, copper, phosphorus, magnesium, thiamin, Vitamin A and Vitamin E.

It is worth noting that a lot of the nutrients found in apples are in the skin. So, it’s worth eating the peel of apples, if possible.

Characteristics of Autumn Glory Apples
Appearance. Autumn Glory apples are somewhat asymmetrical. They have yellow skin with red coloring over the yellow.

Flavor and Texture. The flesh of Autumn Glory apples is yellow, crispy, and juicy. It has a cider-like aroma with a sweet flavor. It is described as tasting like apple pie with caramel and cinnamon notes. Some describe the flavor as being like applesauce. Autumn Glory apples have low acidity.

Storage/Shelf-Life. Autumn Glory apples can be stored in the refrigerator or another cool, dry place for several weeks.

Best Uses for Autumn Glory Apples
Fresh. The flavor and texture of Autumn Glory apples makes them an excellent choice for snacking and eating out of hand. They would also be a good addition to fruit and green salads of all types. They pair well with strong flavored cheeses. When juiced, the flavor of Autumn Glory apples makes an excellent cocktail base and blends well with rum, whiskey, and white wine (for sangria).

Baking. Autumn Glory apples are sweet with a hint of cinnamon and spice. This makes them an excellent flavor for baked apples, or an addition to assorted baked goods like pies, crisps, muffins, and crumbles.

Cooking. Autumn Glory apples make a sweet applesauce, especially with the hint of spice already in their flavor. The flavor of Autumn Glory apples pairs well with savory foods like fresh herbs (such as thyme, rosemary, sage, and basil), pork, and nuts (especially almonds and peanuts).

Recipe Links
Autumn Glory Apple Bread https://www.delishknowledge.com/autumn-glory-apple-bread/

Easy, Healthy Apple Recipes with Autumn Glory Apple https://www.healthygrocerygirl.com/blog/easy-healthy-apple-recipes-with-autumn-glory-apple/

Crustless Apple Pie https://www.thefoodhussy.com/recipe-crustless-apple-pie/

Autumn Glory Apple Crumble Tart https://www.theproducemoms.com/2015/02/25/autumn-glory-apple-tart-recipe-crumble/

Autumn Glory Apple Slab Pie https://superfreshgrowers.com/recipes/autumn-glory-apple-slab-pie

Rustic Autumn Glory Apple Galette https://cafejohnsonia.com/2016/11/rustic-autumn-glory-apple-galette.html

Apple Recipes Featuring Autumn Glory Apples https://www.healthygrocerygirl.com/blog/apple-recipes-featuring-autumn-glory-apples/


Resources

https://specialtyproduce.com/produce/Autumn_Glory_Apples_10166.php

https://www.producebluebook.com/2020/01/13/autumn-glory-apple-outpacing-other-apples/

https://theproducenews.com/headlines/autumn-glory-apple-season-begins

https://superfreshgrowers.com/our-fruit/apples/autumn-glory

https://superfreshgrowers.com/the-bite/autumn-glory-apples-quickly-become-the-craze-on-social-media

https://www.healthline.com/nutrition/peeling-fruits-veggies#TOC_TITLE_HDR_2


About Judi

Julia W. Klee (Judi) began her journey enjoying “all things food” in elementary school when she started preparing meals for her family. That love of food blossomed into a quest to learn more and more about health and wellness as related to nutrition. She went on to earn a BS Degree in Food and Nutrition, then an MS Degree in Nutrition. She has taught nutrition and related courses at the college level to pre-nursing and exercise science students. Her hunger to learn didn’t stop upon graduation from college. She continues to research on a regular basis about nutrition as it relates to health. Her hope is to help as many people as possible to enjoy foods that promote health and wellness.
Turmeric

Turmeric 101 – The Basics


Turmeric 101 – The Basics

About Turmeric
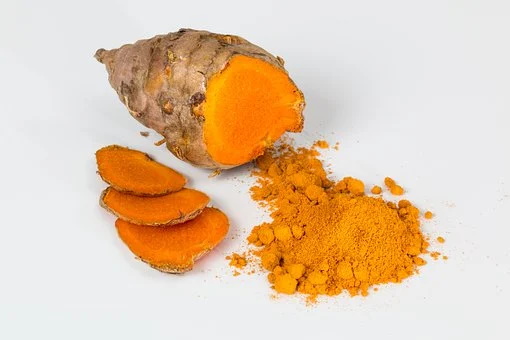
Dried turmeric comes from the root (rhizome) of the plant Curcuma longa. Before being processed, the root looks a lot like ginger root. That’s no coincidence, since they are in the same plant family, Zingiberaceae (also known as the “ginger family”). Turmeric is sometimes referred to as Indian saffron since it has as very deep yellow-orange color like the prized spice, saffron. Sometimes turmeric is referred to as “curcuma” in reference to its highly praised component, curcumin. Because of these unique and special qualities, turmeric has been used throughout history as a culinary spice, herbal medicine, and dye for fabrics.

The flavor of turmeric is unique and all its own. The flavor is peppery, warm, and bitter. Its fragrance is mild and somewhat like a blend of orange and ginger.

People in the United States are mostly familiar with the dried, powdered form of turmeric, but the fresh variety is growing in popularity. When purchased fresh, it looks very similar to ginger root. But when cut, the flesh is bright orange and very different than that of ginger root.

Turmeric is native to India and Southeast Asia, where it has been used as a culinary spice for thousands of years. Additionally, turmeric has remained a mainstay in traditional medicine, going back thousands of years in the Ayurvedic tradition. In recent years in the United States, turmeric has become more popular for its natural medicinal properties. The vast majority of the world’s turmeric is grown in and exported from India.

Nutrition and Health Benefits of Turmeric
Turmeric is an excellent source of iron and manganese. It is also a good source of Vitamin B6, fiber, copper, and potassium.

Turmeric is well known for its many health benefits. The health-promoting phytonutrients in turmeric include curcumin, demethoxycurcumin, tumerones, and tumenorols. However, many of the health benefits of turmeric appear to be due to its special compound, curcumin. In fact, most research on the benefits of turmeric actually are centered around curcumin and not the spice itself. The amount of curcumin in turmeric is actually small, only 2 to 5% of the weight of the root. The amount can vary depending on the species, growing conditions, and timing of growth and harvest. However, when possible, use the whole spice to flavor food, rather than its single component, curcumin. Even though the other healthful components in turmeric have not been studied as much as curcumin, there is almost always greater value in consuming the whole food rather than its isolated parts.

Decreased Cancer Risk. Many research studies have demonstrated an overall reduced cancer risk from curcumin. These effects seem to be due to curcumin’s antioxidant, anti-inflammatory, immune-regulatory, enzyme-related, cell signaling, and cell regulatory mechanisms. These benefits apply to a wide range of types of cancers including cancer of the prostate, pancreas, lung, colon, cervix, breast, mouth, tongue, and stomach. Clearly, you can reduce your overall risk of cancer with regular consumption of turmeric.

Detoxification. Research has well-documented the detoxification effects of curcumin. It stimulates Phase II detox activity by allowing cells to bind toxins together with other molecules so they can be excreted from the body. As more toxins are bound and excreted, our risk for cancer decreases.

Cardiovascular Benefits. Adding turmeric to food helps to control blood fat levels after a meal. This effect was seen when individuals remained relaxed after their meal. When engaged in stressful activities post-meal, their blood fats were more elevated.

Animal studies have also shown that the antioxidant and anti-inflammatory effects of curcumin from turmeric improve blood pressure and lower the overall risk of cardiovascular disease.

Improved Production of DHA (Docosahexaenoic Acid). Curcumin appears to stimulate the production of DHA from ALA, the essential fatty acid alpha-linolenic acid. ALA and DHA are omega-3 fatty acids with proven health benefits, improving cognitive function and protecting the nervous system. Many foods contain small amounts of ALA, but preformed DHA is found in only a few foods (mostly fatty fish like salmon and sardines). Largely, the body is responsible for converting some ALA to DHA. However, the conversion rate is small and many people aren’t good converters. Curcumin has been found to stimulate the enzymes needed to make that conversion, helping to increase our level of DHA. This, in turn, helps to promote proper brain function and wards off neurodegenerative problems like Alzheimer’s disease.

Helps to Preserve Beta-Carotene in Cooked Foods. Including turmeric as a spice in cooked foods helps to preserve the beta-carotene in some foods, such as carrots and pumpkin.

Protection of the Digestive Tract. When curcumin is broken down in the digestive tract, it releases vanillin and ferulic acid. These are well-studied antioxidant and anti-inflammatory compounds that may help to protect the digestive tract from cancer and other conditions known to afflict the bowels. Animal studies have shown that Crohn’s disease, ulcerative colitis, and inflammatory bowel disease may all improve with the use of turmeric.

A little goes a long way! Researchers have found that the benefits of turmeric and its compound curcumin can be realized without ingesting huge amounts of the spice. While many studies have looked at the amount of turmeric that may be ingested in India, where turmeric is used a lot, studies have shown that in some situations, as little as 50 mg of turmeric (as little as 1/50th of a teaspoon) when ingested regularly can have beneficial effects over several months.

Helps Prevent the Formation of Heterocyclic Amines in Grilled Meats. Heterocyclic amines are harmful compounds that can form when meats are cooked at high temperatures, such as in grilling and pan frying. Such compounds have been shown to cause assorted cancers in animal studies. Researchers have found that meat that was marinated in a spice mixture containing 1-2 teaspoons of turmeric per 3.5 ounces of meat were less likely to form heterocyclic amines when grilled, than meat that was not treated with the turmeric-laden spice mix.

How to Select Turmeric
Most grocery stores carry dried, powdered turmeric in the spice isle. The color of turmeric is not the best indicator of freshness because it can vary from yellow to orange. Aroma is the best indicator of freshness, but it’s not possible to smell the powder when purchasing the powder prepackaged. Look for a “Best by” date stamped somewhere on the container and use that as your guide for freshness.

Some stores are carrying fresh turmeric, which can be found in the refrigerated produce section, often near ginger root. Many people prefer the flavor of fresh turmeric over that of dried, powdered and will opt for fresh roots if they are available. When buying fresh turmeric, choose firm roots and avoid those that are soft, wrinkled, or shriveled.

How to Store Turmeric
Store dried, powdered turmeric in an airtight container in a cool, dry, dark place such as a cupboard or your pantry. Use it within a year.

Fresh turmeric root should be stored in the refrigerator, wrapped in a plastic bag or in an airtight container. It should be used within a week or two. If you cannot use it all within that time, the remainder may be frozen for several months.

Dried vs Fresh Turmeric
Dried Turmeric. Dried turmeric is relatively easy to find in the spice isle of most Western grocery stores. Dried turmeric comes from the same rhizome (root) as does fresh. It was simply dried first and ground into a powder.

Fresh Turmeric. Turmeric is not used in Western foods as heavily as it is used in Asian and other cultures around the world. Because of that, many grocery stores do not carry fresh turmeric root. If they do stock it, the rhizome would be found in the refrigerated section of the produce department, often near ginger root. If your store does not carry it, try finding it in a specialty store that specializes in ethnic foods, such as Asian or Indian cuisine supplies.

Shelf Life. Fresh turmeric can last a few weeks in the refrigerator. Powdered turmeric can last for years when stored in an airtight container in a cool, dry place, away from light. However, for best flavor, use dried turmeric within six months to a year.

Flavor. When compared in cooked dishes, both dried and fresh turmeric are indistinguishable, lending a mild flavor to the food. In an uncooked dish, fresh turmeric may impart a gingery heat to food if a lot of it is used.

Nutrient Availability. Turmeric has a lot of antioxidants that prove to be extremely health-promoting. Those found in fresh turmeric are more easily absorbed and used by the body than those found in the powdered form. For the best nutrient absorption, use turmeric with black pepper and a little added fat in a food. The compounds in turmeric are fat-soluble and the piperine in black pepper makes compounds in turmeric more bioavailable.

Interchangeability.  The flavor of fresh turmeric may be a bit brighter when used in a raw food application. However, when used in a cooked food, the flavors of fresh and dried turmeric are considered to be indistinguishable. When substituting one for the other, use three times more of fresh, grated turmeric than you would the powdered version (1 tablespoon of freshly grated turmeric = 1 teaspoon of dried, powdered turmeric).

Which Application for Which Food? Use fresh turmeric when making a fresh or raw food, such as a smoothie or pickles. You will get the full benefit of the flavor and nutritional components that way. When using turmeric in cooked foods or when making a dry rub, use powdered turmeric.

How to Prepare Fresh Turmeric
Just like when using fresh ginger, fresh turmeric should be peeled first. Some people use the edge of a teaspoon to peel the rhizome since it won’t cut into the flesh as much as a paring knife. Then cut off whole pieces or grate it with a microplane grater. Wrap any unused portion with plastic wrap and store it in the refrigerator for up to 7 to 10 days.

Quick Ideas and Tips for Using Turmeric
* When substituting fresh for dried turmeric (or vice versa), the equivalents are as follows:  1 inch of fresh turmeric = 1 tablespoon freshly grated turmeric = 1 teaspoon dried, ground turmeric powder

* Try adding a pinch of turmeric to scrambled eggs. The color will blend in and the flavor will be subtle.

* Toss a little powdered turmeric onto vegetables before roasting them. This works well with cauliflower, potatoes, and root vegetables.

* Try adding a pinch of powdered turmeric to rice. It will give it some color and a little flavor.

* Sprinkle powdered turmeric on sautéed or braised greens like kale, collards, and cabbage.

* Add a pinch of powdered turmeric to chicken or vegetable soup.

* Try a slice of fresh turmeric (or a pinch of powdered) in fresh juice or smoothies.

* Fresh turmeric stains very easily and quickly. To avoid stains on your hands, wear kitchen gloves when working with it. To remove stains from cutting boards and counter tops, try soap and water as quickly as you can after the stain appears. You may also use diluted bleach, Soft Scrub, or a paste made with baking soda and water. However, to be sure the chemicals won’t harm your counter top, try them in a very small, inconspicuous area first just to be sure!

* Add a little turmeric powder to egg salad to give it a deeper color.

* Try mixing cooked brown rice with raisins, cashews and a little turmeric, cumin and coriander.

* To give salad dressings a yellow hue, add a pinch of turmeric powder.

* Add a little powdered turmeric to macaroni and cheese.

* If you’re not used to adding turmeric to foods, use a small amount at first. The flavor is distinct, and the color is very concentrated and may impart a yellow color to your food. Too much may make a food look somewhat muddy or give it a flavor you don’t want. When not sure, start with 1/8 teaspoon at a time.

* To make the nutrients and healthful compounds in turmeric more bioavailable, include some black pepper and a little fat in the same food as the turmeric. The piperine in black pepper makes the antioxidants in turmeric more useable by the body, and the fat increases absorption.

* Make golden pancakes! Add ½ teaspoon of powdered turmeric to dry pancake mix. This will give your pancakes a deep golden color.

* Add freshly grated turmeric to marinades for meat, fish, or poultry.

* Add grated fresh turmeric to your favorite stir-fry.

Herbs and Spices That Go Well with Turmeric
Cilantro, cinnamon, cloves, coriander, cumin, curry powder, ginger, lemongrass, mustard and mustard seeds, pepper (black)

Foods That Go Well with Turmeric
Proteins, Legumes, Nuts, Seeds: Beef, chicken, chickpeas, eggs, lamb, lentils, nuts and seeds (in general), peanuts, peas, tofu

Vegetables: Carrots, cauliflower, chiles, garlic, ginger, greens, kohlrabi, okra, onions, potatoes, scallions, shallots, spinach, squash (winter), sweet potatoes, vegetables (root)

Fruits: Avocados, coconut, cranberries, currants, lemon, lime, raisins, tamarind

Grains and Grain Products: Grains (in general), noodles, quinoa, rice

Dairy and Non-Dairy: Coconut milk, yogurt

Other Foods: Oil (esp. olive), sugar (esp. brown)

Turmeric has been used in the following cuisines and dishes…
Curries, dals, stewed greens, Indian cuisine, Middle Eastern cuisines, Moroccan cuisine, mustard (prepared), pickles, salad dressings, salads, sauces, soups, Southeast Asian cuisines, stews, stir-fries, tagines, Thai cuisine, tofu scrambles

Suggested Flavor Combos Using Turmeric
Add turmeric to any of the following combinations…

Basmati Rice + Dried Fruit + Garlic + Lemon + Pistachios + Scallions
Black Pepper + Lemon Juice + Olive Oil
Carrots + Chickpeas + Cinnamon + Couscous + Saffron + Zucchini
Cilantro + Cumin + Garlic + Onion + Paprika + Parsley + Pepper
Coriander + Cumin

Recipe Links
DIY Curry Powder https://minimalistbaker.com/diy-curry-powder/

20 Tasty Turmeric Recipes to Spice Up Your Life https://www.thekitchn.com/recipes-with-turmeric-223795

The Best Ways to Cook with Turmeric https://www.mashed.com/51847/best-ways-cook-turmeric/

Sunshine Smoothie with Coconut, Clementine, and Turmeric https://www.thekitchn.com/recipe-sunshine-smoothie-with-coconut-clementine-and-turmeric-recipes-from-the-kitchn-199347

Cauliflower Steaks with Ginger, Turmeric, and Cumin https://www.thekitchn.com/recipe-cauliflower-steaks-recipes-from-the-kitchn-195541

The Superfood Baked Potato https://www.thekitchn.com/recipe-the-superfood-baked-potato-recipes-from-the-kitchn-201261

Turmeric-Ginger Tea https://www.thekitchn.com/recipe-turmericginger-tea-104084

Southwestern Tofu Scramble https://www.thekitchn.com/recipe-southwestern-tofu-scramble-recipes-from-the-kitchn-183466

Mixed Bean Masala with Fragrant Yellow Rice https://www.thekitchn.com/recipe-mixed-bean-masala-with-fragrant-yellow-rice-177562

5-Minute Vegan Golden Milk https://minimalistbaker.com/5-minute-vegan-golden-milk/

Golden Milk (Turmeric Milk) https://downshiftology.com/recipes/turmeric-milk-dairy-free/#wprm-recipe-container-32718


Resources
https://www.thekitchn.com/recipes-with-turmeric-223795

https://www.mashed.com/51847/best-ways-cook-turmeric/

http://whfoods.org/genpage.php?tname=foodspice&dbid=78#descr

https://www.thekitchn.com/whats-the-difference-between-fresh-and-dried-turmeric-ingredient-intelligence-203090

https://www.spiceography.com/fresh-turmeric-vs-powder/

https://www.today.com/food/how-cook-turmeric-super-healthy-trendy-root-t43536

https://www.healthline.com/nutrition/turmeric-and-black-pepper#health-benefits

Page, Karen. (2014) The Vegetarian Flavor Bible. New York, NY: Little, Brown and Company.


About Judi

Julia W. Klee (Judi) began her journey enjoying “all things food” in elementary school when she started preparing meals for her family. That love of food blossomed into a quest to learn more and more about health and wellness as related to nutrition. She went on to earn a BS Degree in Food and Nutrition, then an MS Degree in Nutrition. She has taught nutrition and related courses at the college level to pre-nursing and exercise science students. Her hunger to learn didn’t stop upon graduation from college. She continues to research on a regular basis about nutrition as it relates to health. Her hope is to help as many people as possible to enjoy foods that promote health and wellness.
Sweet Mustard Dressing

Sweet Mustard Dressing (Oil-Free, Vegan Option)

Here’s a yummy sweet mustard dressing, made without added oils. It can be vegan, if desired, by using maple syrup in place of honey. Either option will lend a different flavor, but either way is delicious and works well on any green salad or in any food calling for a honey mustard dressing. Below is a video demonstration of how to make the dressing. The written recipe follows the video.

Enjoy!
Judi

Sweet Mustard Dressing (Oil-Free, Vegan Option)
Makes About 3 Cups

1 cup of cooked or canned (and drained) white beans of choice
1 avocado, diced
½ cup water
¼ cup apple cider vinegar
½ cup Dijon mustard
¼ cup maple syrup or honey

One-Half of the Recipe (Makes 1-1/4 to 1-1/2 cups)
1/2 cup of cooked or canned (and drained) white beans of choice
1/2 avocado, diced
1/4 cup water
2 Tbsp apple cider vinegar
1/4 cup Dijon mustard
2 Tbsp maple syrup or honey

Place all ingredients in a blender or food processor. Process until smooth. Enjoy! Store extra in a covered container in the refrigerator and use within 4 days.

Fruits and Vegetables

Easy Ways to Add More Fruits and Veggies to Your Day

We all know we need to eat more plant foods…more fruits and vegetables, in particular. Most Americans don’t eat the recommended number of servings of these important foods yet they know they should. If you’re among that crowd and are looking for ways to include more plant foods into your day, I have some easy ideas for you to try.

Effective Way to Make Changes
First, remember that long-time habits cannot all be changed overnight (at least not permanently). The easiest way to make permanent change is to do it a little at a time. (Remember the saying, “Inch by inch, it’s a cinch; yard by yard, it’s hard.”) Pick something that’s do-able for you (such as always adding some type of fruit to your breakfast), make the change, and stick with it until it becomes second-nature to you…until you do it without thinking about it, and then you’re there! You’ve achieved that goal!

Next, keep that new habit and find something else to change in a positive way. Maybe find another way to add a vegetable to your lunch or to a snack food. Repeat the same process. Keep moving forward with this tactic, adding new changes when the others become a habit to you and they are “automatic.” Over time you’ll find that you’ve transformed your life (or at least your diet) for the good. Here are some ideas for adding more fruits and vegetables to your foods…

Breakfast
* Add fruit to cereal.

* Add fruit to yogurt and make it part of your breakfast.

* Add vegetables to an omelet. Mushrooms, bell peppers, onions, shredded carrots, greens (like kale), and tomatoes all blend well with eggs.

* Add fruit and greens (such as spinach) to a breakfast smoothie.

* Try a savory vegetable pancake. Sauté onions, carrots, spinach, and even mushrooms, then add them to a savory (not sweet) pancake batter. Cook as usual and enjoy (without the maple syrup). If you really want a topping, try unsweetened applesauce.

* Add diced apple to hot oatmeal or other porridge.

* Make a 100% fruit puree in advance to have available in the refrigerator. Top morning oatmeal with it.

* Is your morning time short? Try overnight oats with added berries. Add other fruits in the morning and you’ll have breakfast in no time.

* Try a loaded sweet potato for breakfast. Bake or boil it in advance, then warm it on the stove or in the microwave. Or, if time allows, pierce it and microwave it until it’s soft. Split it and fill the cavity with chopped nuts or your favorite nut butter and chopped fruit.

* Or fill a cooked sweet potato with scrambled eggs cooked with veggies such as sautéed onions, carrots, and chopped spinach.

* Sauté assorted vegetables such as kale, carrots, broccoli florets, mushrooms, and butternut squash. Add some beans, or top them with a soft-boiled egg. Have some toast, a side of cooked grain or even oatmeal.

* Add some sautéed vegetables to a breakfast burrito.

Lunch or Supper
* Enjoy a vegetable salad with your lunch (or supper), or as the whole meal. Add some fruit for sweetness, flavor and variety.

* Add as many vegetables as you can to a lunchtime sandwich. Lettuce, tomatoes, cucumbers, sprouts, avocado, and spinach would all work well.

* Have some veggie sticks with or without dip on the side. Jicama, carrots, cucumbers, celery, bell peppers, grape tomatoes, radishes, and even sugar snap peas and snow peas. Most offer great crunch and chewing experience while the dip can add variety in flavors. This is a healthful alternative to chips.

* Enjoy a piece of fresh fruit for dessert.

* Top meat, chicken or fish with a salsa of choice.

* Add shredded carrots, zucchini, or yellow squash to meatloaf, casseroles, and burgers (both meat and meatless).

* Add shredded vegetables to pasta sauce as it cooks. Carrots, bell peppers, mushrooms, zucchini, and yellow squash all blend well in tomato sauce.

* Add vegetables as toppings to your pizza.

* If you’re a meat eater, plan a meatless meal for one or two days a week. Plan a meal around a vegetable-based soup, stir-fry, or casserole. Add beans or legumes of choice for added protein.

* Use fresh vegetable or fruit slices as a garnish on your plate. Make a point of eating them rather than just enjoying their looks next to other foods.

* Stuff acorn (or other) squash, bell peppers, hollowed out zucchini, or spaghetti squash with a vegetable-bean mixture and enjoy that for supper. Be sure to eat the “bowl” along with the stuffing!

* Add vegetables to lasagna layers. Fresh spinach, finely shredded carrot, thinly sliced yellow squash or zucchini, and finely chopped steamed kale would all work well.

* When cooking rice or another grain for a side dish, add some frozen peas and even finely shredded carrots during the last few minutes of cooking time. Your grain will be embellished with vegetables for added color, nutrition and flavor. Not a fan of peas? Try finely shredded kale or spinach or something else that sounds good to you.

* Need a meal in a hurry? Make a quick quesadilla by stir-steaming or stir-frying some veggies (use a pack of assorted frozen (and thawed in a colander under running water) vegetables to make it even faster). Add in a handful of cooked beans, if desired. Place them on a tortilla and sprinkle with cheese of choice. Fold the tortilla, heat the tortilla on a frying pan to crisp it up some, and enjoy!

* Try cauliflower rice as a way to add more veggies to your meal. We’re not knocking rice here, just adding veggies. If you want the real thing (rice, that is), you could make a mixture of half rice and half cauliflower rice.

* Add finely chopped vegetables to polenta.

* If you’re not a huge fan of vegetables, yet want to add more to your meals, try dressing them up with your favorite salsa, glaze or sauce.

* Add pureed cauliflower, winter squash, sweet potato, or even bell peppers into sauces, mashed potatoes and even pot pies for added flavor, nutrition, and color.

* Try thickening soups and stews with vegetables instead of cornstarch. Okra will thicken, as will starchy vegetables like potatoes. Blended corn, mashed white or sweet potatoes, and pureed cooked root vegetables such as carrots may also do the trick. Although not “vegetables,” pureed beans in liquid can also be used to thicken soups. Blend equal parts of beans and soup broth. Add the slurry back to the pot and your soup should thicken.

* Try adding mashed, roasted cauliflower to mashed potatoes. This will make the potatoes healthier and creamier.

* Try a lettuce wrap. Make your usual taco, tortilla, or sandwich filling (but of course, with added veggies), then wrap it in a stack of lettuce leaves instead. Or take it one step further and try large collard green leaves, turnip green leaves, or flat-leaf kale leaves. Yet another way to add more veggies to your meal!

* Try a fish-less sushi. Use mushrooms, cucumbers, and avocado along with the sticky rice.

* Add some finely chopped spinach to your favorite risotto. Add it toward the end of cooking time since spinach cooks really fast.

* On a cold winter day, start your meal with a small warm bowl of vegetable soup as an appetizer. You’ll get veggies in and also curb your appetite so you don’t overeat.

* On a warm summer day, start your meal with a side salad or veggies and dip. Like with the soup, you’ll get more veggies in and curb your appetite a bit.

Salads
* Add vegetables to tuna, chicken, meat, or bean salads. Tomatoes, radishes, bell peppers, onions, would all work well. Serve on a bed of lettuce or spinach (and EAT the greens!).

* Include a green salad as a side dish with lunch and/or supper. Eat this, in addition to your “side” vegetable.

* Add variety to green salads by adding other vegetables such as red or green cabbage, spinach, carrots, green peas (frozen, thawed), mushrooms, celery, radishes, cucumbers, yellow squash or zucchini, broccoli and/or cauliflower, sprouts, sugar snap peas, snow peas, bell peppers, cooked green beans, scallions, tomatoes, radicchio, or any other vegetable you want.

* For a little sweetness, add some fruit to your green salads, such as pineapple, orange slices, grapes, berries of any sort, diced apples, diced pears, diced peaches, or mango cubes.

* Embrace “slaws.” Cole slaw doesn’t have to be limited to cabbage and mayonnaise. Red cabbage, green cabbage, shredded Brussels sprouts, grated kohlrabi, grated carrots, pineapple tidbits, grated apple, peanuts, hazelnuts, dried cranberries, raisins, celery root, beets, radishes, turnips, parsnips, rutabagas, and even citrus fruits can all be incorporated into assorted vegetable slaws. Experiment and get creative with this one!

* Don’t get stuck in a rut with your salads. Vary your greens. There are plenty to choose from: iceberg, romaine, green leafy lettuce, red leaf lettuce, specialty lettuces, spring mix, baby green mixes, spinach, kale, shredded cabbage, even shredded collard greens…explore what’s available in your local store or farm market!

* Don’t just vary your bed of greens, but vary your toppings too! There are lots of possibilities including tomatoes, shredded carrots, celery, bell peppers, broccoli pieces, cauliflower pieces, cucumbers, cooked green beans, frozen (and thawed) green peas, sliced olives, raw yellow squash or zucchini slices, beet slices (pickled, steamed, or raw), asparagus (raw, steamed or sautéed), parsnips (raw, steamed or sautéed), roasted Brussels sprouts (or even raw), corn (canned, raw, frozen and thawed, steamed or boiled), shaved kohlrabi, jicama, shaved celery root, natural sauerkraut or other fermented vegetables (homemade is mild tasting and less pungent than the canned variety), onions (all varieties), butternut squash (raw, cubed and roasted, steamed, or sautéed).

* Don’t toss the broccoli stems! They’re perfectly edible. If the outer layer is too tough for you, shave it off with a vegetable peeler and save it for vegetable broth. Slice the remaining stalk into your salad for an added vegetable. They are crunchy but not tough, and taste like broccoli. Why toss them???

* Try making a vegetable salad without the greens, just for something different. Load it with tomatoes, shredded carrots, onions, bell peppers, cucumbers, sugar snap peas for sweetness, and any other veggies you want. Top it with your favorite dressing and enjoy!

Snacks and Other Foods
* Have some fruits and/or vegetable pieces available to snack on whenever you have a hunger urge. Sliced bell peppers, carrot and celery sticks, sliced radishes, sliced jicama, broccoli or cauliflower florets, whole cherry or grape tomatoes, raw sugar snap peas, raw snow peas, and sliced yellow squash or zucchini would all work well. Include some whole baby cucumbers for an easy grab and go, crunchy snack. For fruit, peeled Clementine oranges, grapes, apples, pears, sliced kiwi, cubed mango, diced pineapple, strawberries, plums, peaches, cherries (when they’re in season), and bananas would all work well for a quick and handy snack. On the run? Pack them in a to-go bag and you’ll have them whenever your “snack-attack” hits you.

* Boil a whole sweet potato with the peel on. Allow it to cool then store it in the refrigerator. When hungry, cut off a slice or two and enjoy it just as it is…plain and simple. When you get used to eating foods without added sugars, a boiled sweet potato will actually taste sweet to you.

* Add shredded fruits and vegetables to baked goods like quick breads and muffins. Shredded apples, carrots, yellow squash, and zucchini would all work well.

* Use a fruit puree as a dip on a fruit and cheese tray. Pureed raspberries and/or pineapple would be good.

* Use a vegetable puree as a dip on a vegetable tray. (Example: Roasted red bell peppers blended with a little balsamic vinegar.)

* Spread your favorite nut butter on apple or pear slices for a delicious, satisfying snack.

* Add mixed berries to some vanilla yogurt for a filling snack.

* Stuff celery sticks with your favorite nut butter.

* Enjoy a slice of cantaloupe topped with cashew cream or yogurt.

* Try spreading a tortilla or flatbread with your favorite nut butter, top it with thinly sliced banana and a few raisins. Roll it up and enjoy it right away, or wrap it for a to-go snack.

* Add fresh vegetable/fruit juice to your day, not as a meal replacer, but as a supplement.

Desserts
* Instead of making overly sweetened desserts like pie, cake and cookies, enjoy a piece of fresh fruit for dessert. When your taste buds get used to not being overrun with excess sugars, a piece of fruit will actually be refreshing and taste sweet.

* Puree fresh fruit to use as a dressing over another dessert such as cake, pie, pudding, and ice cream.

* Include fruit pieces or fruit puree into desserts like parfaits and puddings.

* Stew or poach pears with a little sweetener (sugar, honey, or maple syrup) and spice (ginger, cinnamon, cloves, star anise) for an elegant dessert.

* Try banana “nice cream” by blending a frozen (peeled) banana. Period. It’s delicious as it is, but can be embellished any way you want. When blending, add in a little vanilla extract, cocoa powder, or another fruit. It can be sweetened with whatever you want, if desired. Top it with chopped nuts, dried coconut, chocolate chips or your favorite fruit puree and you have a delicious, healthy, fruity dessert ready in very little time.

* For a refreshing dessert on a hot day, swirl a freshly made fruit puree of your choice into your favorite yogurt. Pour into popsicle molds and freeze.

* Make a parfait layering pudding or yogurt with 100% fruit puree, chopped fresh fruit of choice, and granola.

* Top your favorite pudding with a fruit puree (unsweetened, of course!), or small chunks of fresh fruit of choice.

* Make a refreshing fruit salad with whatever fruit you have available. Add a topping of 100% fruit puree, or stir in some pineapple tidbits with juice, then sprinkle with unsweetened coconut.

Plan Ahead
* If you know your time will be short during the work week, take some time on the weekend or one evening to prepare some fruits and veggies in advance. For instance, salad greens can be washed, spun dry, chopped, and stored in the refrigerator, ready for fast salad assembly any time you need it. Other salad vegetables may also be chopped in advance and stored in a covered container in the refrigerator for faster salad making.

* On a day off, make a large pot of soup that’s loaded with assorted vegetables. In fact, double the veggies (or at least increase the amount) called for in the recipe (if possible). This will increase the “hearty factor” of the soup along with the nutritional punch. Divide it into containers for grab-and-go lunches for the week, or for quick suppers when time is short.

* “Ditto” the above suggestion for making a large casserole with extra veggies on a day off. You’ll have lunches (or easy suppers) ready to go for the week.

* If you’re cooking something in the oven and have space, add some sweet potatoes wherever there’s room so they can bake at the same time. Enjoy them with meals during the week, or save them for special, sweet and satisfying snacks when needed.

* Keep frozen vegetables in the freezer. They can be ready at a moment’s notice to be used in a number of ways. Add them to soups, casseroles, stir-fries, quiches, pasta dishes, and rice or grain dishes. Thaw frozen vegetables like peas and carrots and add them to a green salad for extra nutrients, flavor, and variety.

* When grocery shopping, look for something new that you haven’t tried before in the produce isle. Make a point of including that in at least one dish during the coming week.

* Keep frozen assorted fruit in the freezer. This is handy especially when they’re out of season or you don’t have time to get to the store. They can be included in smoothies, blended into desserts, or thawed and used in whatever way needed.

* If you’ll be going off somewhere for the day, pack ready-to-go snack bags of easy to munch on veggies, like baby carrots, grape tomatoes, cucumber slices or baby whole cucumbers, sugar snap peas, snow peas, celery sticks, bell pepper strips, and maybe some easy to eat fruit like grapes, a plum, or a banana.

With all the suggestions above, I hope this gives you some ideas as to what will work for you in adding more fruits and vegetables to your day. If you have suggestions not mentioned above, please feel free to share them below! I’d love to hear from you!

Judi

About Judi
Julia W. Klee (Judi) began her journey enjoying “all things food” in elementary school when she started preparing meals for her family. That love of food blossomed into a quest to learn more and more about health and wellness as related to nutrition. She went on to earn a BS Degree in Food and Nutrition, then an MS Degree in Nutrition. She has taught nutrition and related courses at the college level to pre-nursing and exercise science students. Her hunger to learn didn’t stop upon graduation from college. She continues to research on a regular basis about nutrition as it relates to health. Her hope is to help as many people as possible to enjoy foods that promote health and wellness.
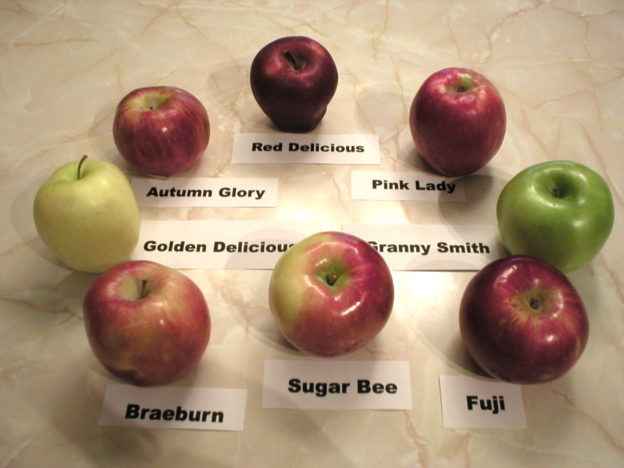
Vegan Mayonnaise

Vegan Mayonnaise (Oil Free)

Here’s a great substitute for traditional mayonnaise, if you’re looking for something that’s vegan and free of added oils. It’s easy to make and blends up quickly. Below is a video demonstration of how to make the mayo. The written recipe is below.

Enjoy!
Judi

Vegan Mayonnaise
(White Bean and Avocado Mayo)
Makes About 2 Cups

1 (15 oz) can of white beans of choice OR 1-3/4 cups cooked white beans of choice
1 Tbsp Dijon mustard
1 Avocado, diced
1 Tbsp lemon juice
1 Tbsp white wine vinegar
2 Tbsp water or aquafaba (reserved bean juice from the can)

One-Half of the Recipe (Makes about 1 cup)
1/2 (15 oz) can of white beans of choice OR ½ cup + 3/8 cup cooked white beans of choice
1/2 Tbsp Dijon mustard
1/2 Avocado, diced
1/2 Tbsp lemon juice
1/2 Tbsp white wine vinegar
1 Tbsp water or aquafaba (reserved bean juice from the can)

One-Fourth of the Recipe (Makes about ½ cup)
1/4 (15 oz) can of white beans of choice OR Scant ½ cup cooked white beans of choice
¾ tsp Dijon mustard
¼ Avocado, diced
¾ tsp lemon juice
¾ tsp white wine vinegar
½ Tbsp water or aquafaba (reserved bean juice from the can)

Rinse and drain the canned beans, reserving the liquid from the can, if opting to use it. Place all ingredients in a blender and process until smooth. Use as you would any mayonnaise. Store in a covered container in the refrigerator and use within 5 days.

Cook’s Note: Since this is made with avocado, it will have a pale green tint, which is unlike traditional mayonnaise. However, the flavor is very similar to that of traditional mayonnaise.