This post covers a lot of details about vinegar, from general information to specifics about assorted types of vinegar. Hopefully you’ll find what you’re looking for. Please let me know if you need further information!
I hope this helps!
Judi
Vinegar 101 – The Basics
About Vinegar
The word “vinegar” stems from the French word “vin aigre” which means “sour wine.” This is appropriate since vinegars are made by adding bacteria to liquids to cause fermentation. The liquid to be fermented is usually wine, beer or cider. The fermentation process creates alcohol, which is then exposed to oxygen. The bacteria then create the acetic acid, turning the liquid very acidic, giving it the tart flavor characteristic if vinegar. Depending upon the process used and the type of vinegar being made, the fermentation process can take anywhere from a couple days to years. Some vinegars, such as balsamic, may be left to ferment for up to 25 years. Vinegars are often diluted to contain from 5 to 20 percent acetic acid, by volume.
Vinegar has been used for thousands of years as a cooking ingredient, condiment, medicine, and preservative. Today it is even being used as a cleaning agent. The use of vinegar has been traced back to ancient Babylon, around 5,000 B.C.E, where it was used in cooking and as a medicine, preservative, and a drink for strength and wellness.
Vinegars are excellent additions to marinades because the acid helps to break down proteins, making them more tender. Vinegar can also be used to balance out flavors and reduce bitterness in some foods. It is commonly used in salad dressings, marinades, sauces, mayonnaise, and ketchup.
Nutrition Tidbits
Most vinegars have few nutrients yet they do have some beneficial health properties. It is very low in calories with one tablespoon having only 3 to 14 calories, depending upon the variety. The few calories it has comes from the little bit of sugars remaining from the fermentation process. If you have food sensitivities, it is important to read labels, as some vinegars are a blend of vinegar, juice, added sugars, and possibly other ingredients that may cause reactions in some people. A few vinegars contain gluten while others contain added sulfites.
Early records in China, the Middle East, and Greece, show vinegar being used as a digestive aid, an antibacterial agent on wounds, and a treatment for cough. Today, a few small studies have shown some health benefits from vinegar, which has sparked a lot of attention for using vinegar in natural health treatments.
Studies published in 2010 showed that including vinegar with a meal helps to reduce post-meal blood glucose levels. Balsamic vinegar has been shown to lower triglyceride and total cholesterol levels.
General Tips for Using Vinegar
* Use vinegar to brighten the flavor of foods and balance the richness of a fatty dish.
* Use vinegar to tenderize protein foods (such as meats and poultry) by adding it to marinades.
* Use vinegar when pickling foods, as it not only adds flavor, but acts as a preservative by killing bacteria.
* Adding a little vinegar to cooking water can help to brighten the color of vegetables, especially those in the cruciferous family (cabbage, broccoli, cauliflower, kale, etc.).
* Some resources suggest adding a little vinegar to the water when boiling eggs. They say it makes eggs easier to peel.
* Some suggest adding a little vinegar to water when poaching eggs to help keep them together.
* For a quick buttermilk substitution, add 1 tablespoon of vinegar to 1 cup of milk. Allow it to rest a few minutes for the milk to thicken.
* To perk up the flavor of cooked beans or bean soups, add a little vinegar during the last 5 minutes of cooking time. Adding it earlier will make the beans tough and harder to cook properly.
How to Store Vinegar
Vinegar does not need to be stored in the refrigerator. However for best quality, store it tightly capped in a cool, dry, dark place, away from sunlight and heat. Some vinegars will have a “Best by” date stamped on the bottle. Even though it may be safe to consume the vinegar beyond that date, the quality may not be its best.
Unpasteurized, raw apple cider vinegar may become more cloudy with age. That’s simply the culture (bacteria) multiplying in the bottle. It is still safe to use.
Generally speaking, unopened vinegar will keep for about two years in a cool, dry, dark place. Once opened, it should be used within about six months for best quality. To keep opened vinegar longer, it may be stored in the refrigerator.
What is the “Mother” in Vinegar?
The “Mother” of vinegar is a mixture of cellulose and bacteria (or culture) that fermented the original liquid into vinegar. It is found in fermented alcohols and unpasteurized vinegars, most commonly in raw apple cider vinegar. It creates a cloudy appearance in the vinegar and is harmless to consume. It will not affect the flavor of the vinegar. In fact, the “M other” contains friendly probiotic bacteria, prebiotic fibers, and nutrients that can boost health.
Food Sensitivities
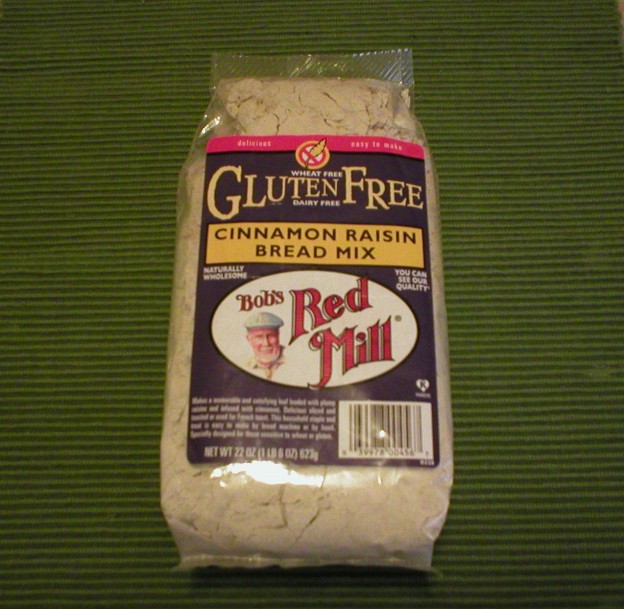
Gluten: Most vinegars do not contain gluten. However, some that are made with grains may contain gluten. This information is listed below each type of vinegar for clarification. When in doubt, check the label and ask your physician or dietitian, if necessary.
According to Shelly Case, RD (at https://shelleycase.com/is-vinegar-gluten-free/), the distillation process destroys gluten. So, if a vinegar (such as white vinegar) was made from wheat (a gluten-containing grain), and it was “distilled” the gluten has been removed or destroyed in the process and would therefore be safe to eat, even by those with gluten sensitivities. If the vinegar was made with a gluten-containing grain, such as wheat, and was not distilled, then the vinegar does still contain gluten, and would not be safe to eat by those with gluten sensitivities. Beware and read labels! This information is also confirmed by the FDA as stated here… https://www.glutenfreewatchdog.org/news/why-distillation-is-compatible-with-a-gluten-free-diet/
Sulfites: Most fermented foods contain naturally-occurring sulfites. However, naturally-occurring sulfites differ from those added as food preservatives, and usually present no problems to those with sulfite sensitivities. Some vinegars have added sulfites, whereas others do not. If you are sensitive to sulfites, always check the label before purchasing vinegar, and consult your physician if necessary.
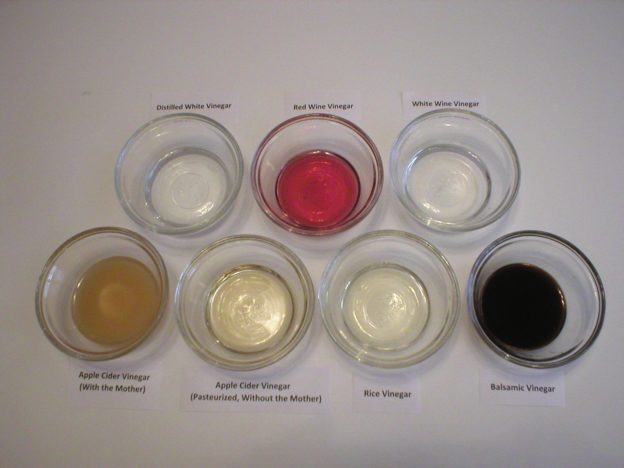
Common Varieties of Vinegar
Apple Cider Vinegar: Also known as cider vinegar, this variety is pale brown with a mild apple flavor. It is made from fermented apple cider, unpasteurized apple juice, or apple pulp. It is inexpensive.
Best Uses: Apple cider vinegar is excellent in chutneys, stews, marinades, sweet pickles, and in coleslaw or salad dressings.
Food Sensitivities: Apple cider vinegar is naturally gluten-free.
Balsamic Vinegar: This is a dark, sweet vinegar that has been produced in Italy for over 800 years. It is usually made from whole processed red or white wine grapes (called “grape must,” or the crushed grapes including the seeds, peel and stems). The grape must is boiled to a concentrate, fermented, acidified, and then aged in wooden barrels for up to 50 years. The longer it is aged, the thicker, sweeter and pricier it gets.
Best Uses: Balsamic vinegar is excellent on strawberries, tomatoes, grilled meats and poached fruit. It can also be used in salad dressings, marinades, sauces, and soups. It is sometimes reduced into a thick sauce and served over fruit or ice cream.
Food Sensitivities: Balsamic vinegar is gluten-free and, like other vinegars, contains naturally occurring sulfites. Most balsamic vinegars will not have added sulfites, but if you are sensitive, it is advisable to always check the label before purchasing any balsamic vinegar.
Malt Vinegar: Malt vinegar is a dark, flavorful vinegar that is very popular with fish and chips in England. It comes from barley that was made into beer, then fermented into vinegar. It has a milder, sweeter and more complex flavor than plain white vinegar.
Best Uses: Malt vinegar is often used on French fries (and on fish and chips in the UK), and in making pickles.
Food Sensitivities: Malt vinegar is made from barley, which contains gluten. Therefore, if you have a sensitivity to gluten, you should avoid malt vinegar UNLESS it was distilled (which would have removed the gluten). Malt vinegar naturally contains a small amount of sulfites, less than 10 ppm. This is a very low level, which usually poses no issue, even for people who have a sulfite allergy. When in doubt, ask your physician!
Red Wine Vinegar: This vinegar is made from red wine and is usually aged in wooden barrels. It has a strong flavor that blends well in hearty dishes. Red wine vinegar is often used in French and Mediterranean cuisines and is less acidic than distilled or cider vinegars.
Best Uses: Red wine vinegar is excellent in salad dressings, stews, sauces, marinades, and with cooked meat and fish.
Food Sensitivities: Red wine vinegar is gluten-free since it is made with grapes. Like other vinegars, red wine vinegar will have naturally occurring sulfites. However, some brands of red wine vinegar have ADDED sulfites, whereas others do not. If you are sensitive to added sulfites, it is important to read the label before purchasing this type of vinegar.
Rice Vinegar: This type of vinegar is made from fermented rice. It is commonly referred to as rice wine vinegar. It has a mild, sweet flavor and is less acidic than other vinegars.
Best Uses: Rice vinegar is excellent in salad dressings, seafood marinades, and Asian cuisine in dishes like sushi, pickled ginger and seafood, and stir-fries.
Food Sensitivities: True rice vinegar (made only with rice and no other grains) is naturally gluten-free. However, some rice vinegars imported from Asia may contain a mixture of grains. If your rice vinegar was made only with rice OR was distilled, it is considered to be gluten-free. Otherwise, be sure to read the label carefully to be sure it does not contain something you might react to.
White Vinegar: This is also known as distilled vinegar or distilled white vinegar, and is made from fermented grains. It is clear, highly acidic, and has a very sour flavor. It is one of the least expensive vinegars and is now being used as a cleaning agent, especially for washing windows and cleaning coffee pots. It is not as strong as “cleaning vinegar,” yet it is still an effective cleaning agent.
Best Uses: White vinegar is excellent for preserving foods such as in pickling fruits and vegetables. It is also an effective antibacterial, grease, and mineral-removing cleaning agent.
Food Sensitivities: White vinegar is made from fermented grains, particularly wheat. If white vinegar was not distilled, it will still contain gluten. If the vinegar was distilled, it should contain no gluten. So, if you are sensitive to gluten, be sure to purchase white vinegar that has been distilled.
Cleaning White Vinegar: It’s important to note here that “cleaning white vinegar” is not the same as the age-old distilled white vinegar. Although they may look the same, cleaning vinegar is stronger and is not something to ingest. Cleaning vinegar is diluted to 6% acidity, whereas distilled white vinegar is diluted to 5% acidity. That one percentage point difference may seem small, but in vinegar terms, it equates to cleaning vinegar being 20% stronger than distilled white vinegar. It is TOO strong to ingest and can cause harm if consumed.
Some brands may also be scented with chemicals not intended for consumption. Hence, that’s one more reason not to add this type of vinegar to your salads! If you do use “cleaning vinegar,” I suggest you do not store it near your usual vinegars that you use in foods. You really don’t want to mix these up! Its added strength makes it a very effective cleaning agent. However, be careful what you apply cleaning vinegar to. Its strong acidity will damage hardwood floors, granite, marble, and metals. It is safe to use on bathroom ceramic surfaces, on glass, and in the laundry. Cleaning vinegar is more costly than distilled white vinegar.
White Wine Vinegar: The flavor of white wine vinegar will range from mild to very tangy, depending upon the type of wine used in its production. It is usually pale in color with a mild flavor. It is often used in French and Mediterranean cuisines.
Best Uses: White wine vinegar is excellent in vinaigrette dressings, vegetable dishes, soups, stews, pickled vegetables, and in cooking meat and fish.
Food Sensitivities: Since white wine vinegar is made from grapes, it is naturally gluten-free. The vinegar will contain naturally-occurring sulfites from the wine, and may or may not contain added sulfites. If you are sensitive to sulfites, please read the label before purchasing white wine vinegar.
Less Common Varieties of Vinegar
Black Vinegar: Black vinegar is also known as Chinkiang vinegar, and is usually made from glutinous rice or sorghum. It has a woody, smoky flavor. It is a common sour ingredient in foods found in southern China. In the United States, black vinegar is used as a dipping sauce for dumplings and in meat marinades.
Best Uses: Use black vinegar as a dipping sauce, and to flavor meats and stir-fries. It may be used as a less expensive alternative to balsamic vinegar.
Food Sensitivities: Traditional black vinegar, made from rice or sorghum would be naturally gluten-free. However, some varieties may have been made with added wheat, millet, peas, barley, bran and/or chaff (the outer husk of a grain). Wheat and barley contain gluten. So, if the vinegar was made with other grains in addition to rice and was not distilled, it may contain gluten. If you are gluten sensitive, be sure to read the label before purchasing any black vinegar.
Black vinegar may or may not have added sulfites. If you are sensitive to sulfites, reading labels is warranted.
Cane Vinegar: Cane vinegar is made from the syrup of sugar cane. It has a mellow flavor, similar to rice vinegar. It is not sweet since it contains no residual sugar. It is yellow to golden brown in color, and is less acidic than distilled vinegars. It is made in the Philippines, France, and Louisiana. It is called “sukang iloko” in the Philippines. Champagne, white wine, cider, and rice wine vinegars may be substituted for cane vinegar.
Best Uses: Cane vinegar is often used in sweet and sour dishes, and to flavor meats.
Food Sensitivities: Since cane vinegar is made from sugar cane, it is naturally gluten-free. However, it is important to check the label before purchasing cane vinegar, as it may contain other ingredients that may or may not contain gluten.
Cane vinegar usually does not contain added sulfites, but check the label before purchasing, as brand ingredients may vary.
Champagne Vinegar: This vinegar is made from a slightly dry white wine, made from the same grapes as champagne. It is made only in the Champagne region of France. It has a mild flavor.
Best Uses: Champagne vinegar may be used like any white wine vinegar. It is especially good on citrus salads, and in marinades and sauces.
Food Sensitivities: Champagne vinegar is naturally gluten-free since it is made from grapes. It will contain naturally-occurring sulfites from the wine. If you are sensitive to sulfites, check the label before purchasing to be sure it contains no added sulfites.
Coconut Palm Vinegar: This type of vinegar is made in Asian countries from the sap of the coconut palm tree, and/or the water of the coconut. It is a white, cloudy vinegar with a flavor ranging from mild to sharply acidic. All varieties have a faint flavor of yeast or must. A substitution would be 1 part rice or white vinegar, 1 part water, and a squeeze or two of fresh lime juice.
Best Uses: Coconut vinegar is usually used as a dipping condiment, and can be added to sauces, cooked foods and salads.
Food Sensitivities: Coconut vinegar should be naturally gluten-free. However, if you are gluten-sensitive, read the label before purchasing to be sure no gluten-containing ingredients have been added.
Flavored Vinegars: Some flavored vinegars, such as tarragon vinegar, are available in many grocery stores. However, many people make their own flavored vinegars by adding desired herbs, spices or flavorings to wine, rice, or cider vinegar. Colorado State University Extension has prepared an excellent website detailing how to make your own flavored vinegars, with specific recipes included. https://extension.colostate.edu/topic-areas/nutrition-food-safety-health/flavored-vinegars-and-oils-9-340/
Specialty flavored vinegars may also be purchased from select stores. The following are just a few (of many) online shops carrying flavored vinegars. Please note that I have no connection with any of them.
https://www.igourmet.com/shoppe/shoppe.aspx?cat=Vinegars&subcat=Flavored+Vinegar
https://www.williams-sonoma.com/shop/food/vinegars/
Specialty vinegars may also be purchased at https://www.amazon.com/
Fruit Vinegars: In this case, we’re referring to vinegars made with fruit other than apples (as in apple cider vinegar). Fruit vinegars can be made with just about any fruit you want including, apples, apricots, grapes, pineapples, pomegranates, passion fruit, raisins, peaches, blackberries, raspberries, blueberries, figs, pears, cranberries, lemons, mangoes, oranges, plums, raisins, tomatoes, and more. Fruit vinegars may be purchased online and in some grocery stores. They can also be made at home.
Best Uses: Fruit vinegars add a sweet-tart flavor to whatever foods they’re served with. They pair well with extra virgin olive oil and have been used to flavor pork, turkey, chicken and fish. They add fruitiness to green salads, vegetables, and dips for fruit/cheese trays. They can also be used in marinades for a sweet-tart flavor.
Instructions for making your own fruit vinegars can be found on this and other websites: https://www.organicauthority.com/eco-chic-table/homemade-fruit-vinegar-recipe
DIY Fruit Vinegar Instructions, using strawberries, blueberries, figs, persimmons, or pears: https://www.foodrepublic.com/recipes/make-fruit-vinegar/
Red Rice Vinegar: This vinegar is made from fermented red yeast rice. It is milder in flavor than red wine vinegar. It is sweet, tart, and salty.
Best Uses: Red rice vinegar is often used in Chinese seafood dishes and dipping sauces.
Food Sensitivities: Sometimes barley and sorghum are added to red rice vinegar. Since barley contains gluten, this type of vinegar may contain gluten if it is not distilled. If you have a gluten sensitivity, it is important to check the label to see if it contains barley. If so, and if it was not distilled, it should be avoided.
Seasoned Rice Vinegar: This is rice vinegar with added sugar, salt, and sometimes sake or MSG (monosodium glutamate). Using this vinegar is an easy way to boost the sweet, salty, and tangy flavor of foods. It is found in the Asian section of some grocery stores.
Best Uses: Seasoned rice vinegar is often used in sushi and salad dressings.
Food Sensitivities: This rice should be naturally gluten-free, but check the label to be sure a gluten-containing ingredient was not added. Also, some people react to MSG. Read the label carefully if you have food sensitivities when choosing seasoned rice vinegar to be sure there are no added ingredients that you need to avoid.
Sherry Vinegar: True sherry vinegar is made in Spain from sherry wine, and is used in Spanish and French cuisine. The wine is aged for at least 6 months, with the resulting vinegar being aged from 2 to over 10 years. The older the vinegar, the darker the color, the more complex the flavor will be, and the more expensive it will be to buy. It has a bright, deep flavor. Some grocery stores may carry sherry vinegar. Wine vinegar may be used as a substitute for sherry vinegar.
Best Uses: Sherry vinegar can be used to flavor beans, marinara, soups, snap peas, tomatoes, and green salads.
Food Sensitivities: Since sherry vinegar is made ultimately from grapes, it is naturally gluten-free. It will contain naturally-occurring sulfites since it is made from wine. It is important to read labels since less-expensive brands may have additives.
Spirit Vinegar: Spirit vinegar (sometimes referred to as grain vinegar) is a colorless, strong vinegar made by a double fermentation process of a grain, usually barley. The first fermentation converts sugars to alcohol. The alcohol is distilled then subjected to the second fermentation, which converts the alcohol to acetic acid. It has a higher acidity than other vinegars. This vinegar is sometimes referred to interchangeably with distilled white vinegar. However, spirit vinegar contains a higher acid content than white vinegar, and it still contains a little alcohol, where white vinegar does not.
Best Uses: This type of vinegar is used mostly in pickling.
Food Sensitivities: Since spirit vinegar is made with distilled liquids, it is considered to be gluten-free.
About Judi
Julia W. Klee (Judi) began her journey enjoying “all things food” in elementary school when she started preparing meals for her family. That love of food blossomed into a quest to learn more and more about health and wellness as related to nutrition. She went on to earn a BS Degree in Food and Nutrition, then an MS Degree in Nutrition. She has taught nutrition and related courses at the college level to pre-nursing and exercise science students. Her hunger to learn didn’t stop upon graduation from college. She continues to research on a regular basis about nutrition as it relates to health. Her hope is to help as many people as possible to enjoy foods that promote health and wellness.
Resources
https://www.foodnetwork.com/healthyeats/healthy-tips/2011/08/vinegar-101
https://en.m.wikipedia.org/wiki/Vinegar
https://www.livestrong.com/article/21611-nutritional-value-vinegar/
https://www.hsph.harvard.edu/nutritionsource/food-features/vinegar/
https://www.livestrong.com/article/555379-how-to-store-opened-bottles-of-apple-cider-vinegar/
https://www.doesitgobad.com/does-apple-cider-vinegar-go-bad/
https://www.finecooking.com/ingredient/malt-vinegar
https://www.foodrepublic.com/2012/04/06/what-is-malt-vinegar/
https://www.foodandwine.com/condiments/what-you-need-know-spring-about-many-types-vinegar
https://lifehealthhq.com/whole30-vinegar/
https://www.beyondceliac.org/gluten-free-diet/is-it-gluten-free/vinegar/
https://www.verywellhealth.com/sulfite-allergy-82911
https://www.verywellfit.com/is-vinegar-gluten-free-562363
http://www.heinzvinegar.com/products-red-wine-vinegar.aspx
https://shelleycase.com/is-vinegar-gluten-free/
https://www.glutenfreewatchdog.org/news/why-distillation-is-compatible-with-a-gluten-free-diet/
https://en.wikipedia.org/wiki/Black_vinegar
http://thebaldgourmet.com/focus-ingredient-what-is-chinese-black-vinegar/
https://www.cooksinfo.com/champagne-vinegar
https://www.cooksinfo.com/cane-vinegar
https://aussietaste.com.au/glossary/oils-and-vinegars-a-to-z/cane-vinegar/
https://www.cooksinfo.com/palm-vinegar
https://www.cooksinfo.com/vinegar
https://www.bonappetit.com/story/what-is-sherry-vinegar
https://en.wikipedia.org/wiki/Sherry_vinegar
https://www.livestrong.com/article/262961-what-are-the-benefits-of-coconut-vinegar/
https://www.webstaurantstore.com/article/373/types-of-vinegar.html
https://www.thekitchn.com/rice-vinegar-ingredient-spotlight-184260
https://www.finecooking.com/article/whats-seasoned-rice-vinegar
https://www.glutenfreedietitian.com/vinegar/
https://www.simplyrecipes.com/a_guide_to_balsamic_vinegar/
https://fantasticservicesgroup.com.au/blog/cleaning-vinegar-vs-normal-vinegar-whats-the-difference/