Category Archives: Gluten Free

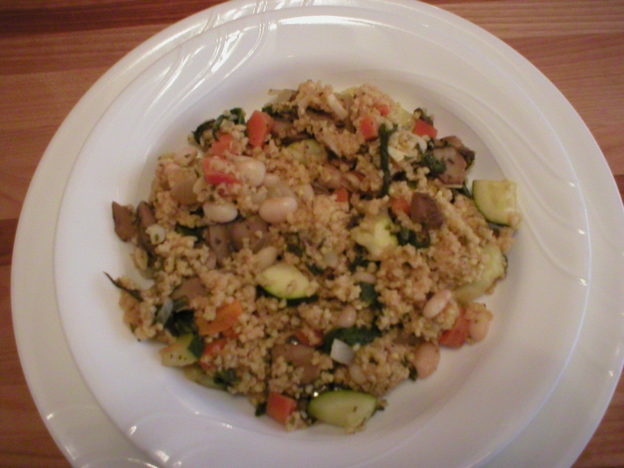
Millet Vegetable Pilaf

Millet Vegetable Pilaf

If you’re looking for something different to fix for a social gathering, or simply to make ahead for a weeknight meal, this should do the trick. It’s not hard to make and is ready in about the time it takes to cook a small pot of millet.

Below is a video demonstration of how to make this dish. The written recipe follows the video.

Enjoy!
Judi

Millet Vegetable Pilaf
Makes 4 to 5 Meal-Size Servings (or About 8 Side Servings)

1 cup millet
2 cups vegetable broth

1/2 cup vegetable broth, or more as needed
1/2 cup chopped onion
3 cloves garlic, minced
1/3 cup diced bell pepper
1 cup diced carrot
1 tsp dried basil leaves
1 tsp dried thyme leaves
1 Tbsp dried parsley flakes
Salt and pepper to taste
1 small (4 oz) can or jar of mushroom pieces OR 1 cup sliced fresh mushrooms
1-1/2 cups diced zucchini or yellow squash
1-1/2 cups cooked great northern beans OR 1 (15 oz) can great northern beans, optional
2 cups coarsely chopped fresh spinach
Zest of 1 lemon
Juice of one lemon

Place the millet in a fine strainer and rinse it under running water. Allow it to drain over a bowl. In a medium pot with a lid, bring the 2 cups of vegetable broth to a boil. Add the millet. Cover the pot and reduce heat to medium-low so the millet will simmer. Cook for 20 minutes, until most of the liquid has been absorbed. Remove from heat and allow the millet to rest for 5 minutes, with the lid still on the pot.

Meanwhile, cook the vegetables. In a skillet with a lid, heat about 1/3 cup of the vegetable broth. Add the onion, garlic, bell pepper, carrots, basil, thyme, parsley flakes, and salt and pepper to taste. Stir-steam the vegetables over medium heat until they are almost crisp-tender, keeping the skillet covered when not stirring. Add more broth as needed to keep the mixture from getting dry. When the carrots are almost fork-tender, stir in the mushrooms, zucchini, the cooked beans (if using them), chopped spinach, any remaining broth, and the lemon zest. Continue cooking about another 1 to 2 minute, to allow the spinach to wilt and the zucchini to cook to a crisp-tender. Turn off the heat and stir in the lemon juice. Total cooking time is roughly 13 minutes. Remove from heat. Gently stir in the cooked millet and serve.

Rice Chickpea Crackers

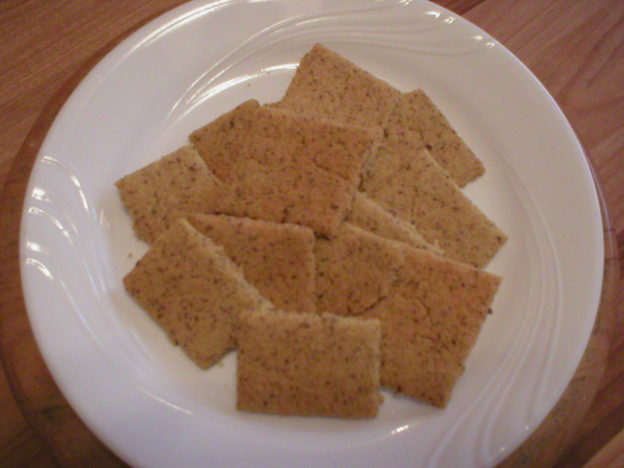
Rice-Chickpea Crackers

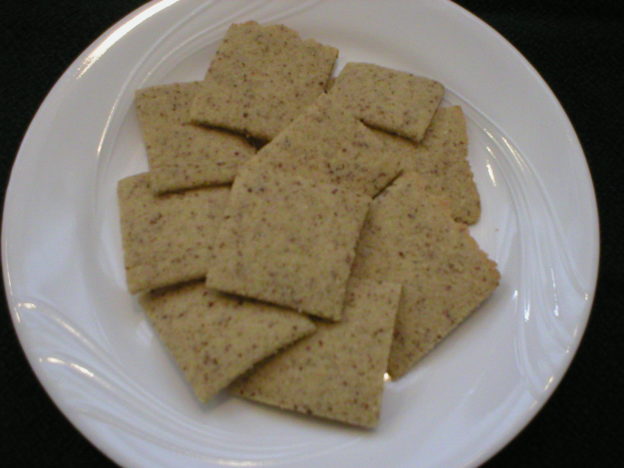
Here’s an easy gluten-free cracker to make! Below is a video demo of how to make the crackers. The written recipe follows the video.

Enjoy!
Judi

Rice-Chickpea Crackers
Makes about 4 Dozen 1-1/2” Crackers

3/4 cup brown rice flour
1/4 cup garbanzo bean (chickpea) flour
1 tsp baking powder
1 Tbsp flax meal (ground flax seed)
1/2 tsp salt (optional, see note below)*
1 Tbsp extra virgin olive oil**
1/4 cup water or milk of choice, or more as needed

Combine the flours, flax meal, baking powder, and salt (if adding it to the mixture) in a small bowl. Add the oil and milk; stir well to combine.
Transfer the dough to a silicone baking mat or sheet of parchment paper the size of a large baking sheet. With your hands, form the dough into a rectangle. Cover the dough with a sheet of waxed paper about the size of the baking mat or parchment paper. With a rolling pin, roll the dough into a large rectangle until it is 1/8” to 1/4” thick. Remove the waxed paper. Score the dough into individual crackers about 1-1/2” square (this will not be perfect and don’t stress over measurements), with a pizza cutter or a dull butter knife. Don’t press hard, as you don’t want to cut the baking mat or parchment paper!

Place the sheet on the rack in the middle of a preheated 350°F oven, and allow them to bake for 18 to 25 minutes, until lightly browned. The baking time will vary depending upon the thickness of the dough and whether they were baked on parchment paper or silicone.

Important! Set your timer for 10 minutes at the start, rather than the full baking time. Crackers along the edges will bake faster than the crackers in the center. As they brown, they will need to be removed and allowed to cool on a plate or cooling rack. Return the remaining crackers to the oven, setting the timer for short intervals at a time, removing browned crackers along the way, until all the crackers have lightly browned. When all are lightly browned and dry, remove the pan and allow the crackers to cool, either directly on the pan or on a cooling rack. Enjoy!

Store cooled crackers in an airtight container at room temperature.

* Note: Feel free to add any herbs you want to flavor these your way. Dried herbs can be added when combining the dry ingredients. The added salt will enhance the flavor of the cracker, but it can be omitted, if desired; OR leave the salt out of the batter and sprinkle a small amount of salt on top of the formed crackers before they are baked. Be careful not to add too much, as a little goes a long way!

**The olive oil can be omitted, if desired, but the crackers will have a very dry mouth feel.

Chickpea Tomato Herb Crackers

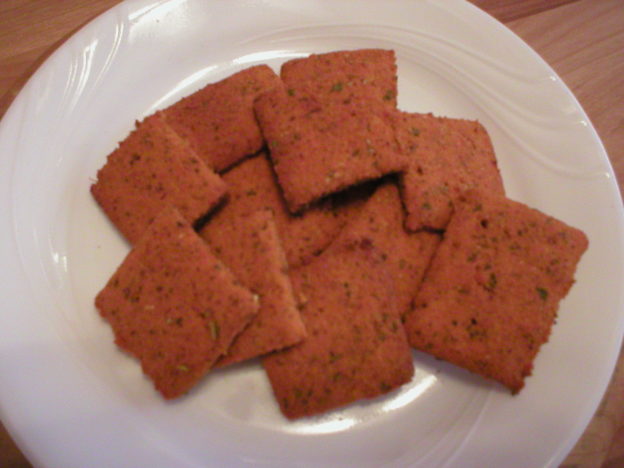
Chickpea Tomato Herb Crackers

If you’re looking for a flavorful tomato herb cracker using gluten-free flours, this is a great one to try. They are delicious, gluten-free and easy to make. Give them a try sometime!

Below is a video demonstration of how to make the crackers. The written recipe is below the video. Happy baking!

Enjoy!
Judi

Chickpea Tomato Herb Crackers
Makes about 4 Dozen (1-1/2 to 2” Crackers)

½ cup brown rice flour
½ cup garbanzo (chickpea) flour
1 tsp baking powder
1 Tbsp flaxmeal
½ tsp salt
¼ tsp garlic powder
½ tsp onion powder
½ tsp dried basil*
½ tsp dried rosemary*
¼ tsp dried oregano*
1 tsp dried parsley
3 Tbsp tomato paste
1 Tbsp extra virgin olive oil
1/3 cup water

In a small bowl, combine all ingredients and stir well to make a smooth paste-like consistency. If the dough is too wet, add more flour. If it is too dry, add a little more water in small amounts until the dough can easily be rolled, but is not too wet.

Preheat oven to 350°F. Place the dough on a silicone mat or a sheet of parchment paper cut to fit a large baking tray. With a spatula or your hands (moistened with water to keep the dough from sticking), gently form the dough into a rectangle. Cover the dough with waxed paper and roll it into a large rectangle, about 1/8 to 1/4 inch thick. Remove the waxed paper. With a pizza cutter or a butter knife, gently score the dough into 1-1/2 to 2-inch squares to form your crackers. (Don’t stress over perfection!)

Place the pan on the rack in the middle of the oven and bake for 25 to 35 minutes, until the crackers are crisp and lightly browned. The baking time will vary depending upon how thick the dough has been rolled and whether they are baked on parchment paper or silicone, so they must be watched closely.

Important! Monitor the crackers as they bake, starting at about 10 minutes into the baking time. Remove any browned crackers along the edges as they bake to prevent them from burning. When all are baked (lightly browned, dry to the touch, and move freely on the baking sheet), remove the pan from the oven and allow the crackers to cool. Store in a covered container at room temperature.

* If preferred, you can use 1-1/4 tsp (or more) of Italian seasoning in place of the basil, rosemary and oregano.

Judi's Powerhouse Oats with Green Juice

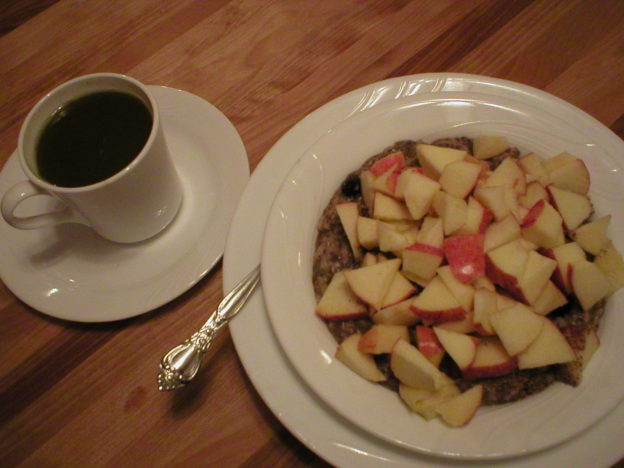
Powerhouse Oats

Here’s the recipe for my Powerhouse Oats. I eat this for breakfast on most days, along with about 6 ounces of freshly made green juice, mostly of kale and carrots. Between the two, this breakfast holds me well and has done a lot for my health! Try it sometime!!

Below is a video showing how I make the oats. The written recipe is below the video.

Enjoy!
Judi

Judi’s Powerhouse Oats
Makes 1 Serving

½ cup rolled oats, uncooked
1-1/3 cups water
¼ cup cooked great northern beans
1 Tbsp chia seeds
2 Tbsp blueberries, or more if desired
½ tsp ground cinnamon
1 Tbsp ground flaxseed
1 medium apple, chopped
Milk of choice, optional

In a small saucepan, add the oats, water, beans, chia seeds, blueberries and cinnamon. Bring mixture to a boil. Stir constantly for 1 or 2 minutes until the mixture thickens. Remove from heat and transfer into a bowl. Sprinkle with ground flaxseed and top with chopped apple. This breakfast oatmeal can be eaten as it is or enjoyed with some milk of choice.


Red Lentil Vegetable Patties

Red Lentil Vegetable Patties

Looking for a veggie burger recipe that’s easy to make YOUR way? Well…you’ve found it! This recipe is extremely flexible and an easy way to use up some leftover cooked potatoes or vegetables you’re just not sure what to do with. It’s SO flexible, you can use cooked potatoes or rice, and vegetables that are cooked, frozen, or raw! How convenient is that? If that’s not enough, the burgers can be pan-fried or baked in the oven without any added oil. Something for everyone 🙂

Below is a demonstration of how to make the patties. The written recipe is below the video. I hope this helps!

Enjoy,
Judi

Red Lentil Vegetable Patties
Makes 10 Patties (1/2 cup of mixture in each)

This recipe makes delicious veggie burgers that easily include leftover cooked vegetables or extra veggies that you have on-hand, whether fresh or frozen. The flavor will change a bit based on which veggies you use, but that’s the fun of this recipe! Experiment with it and enjoy! jk

1 cup red lentils
2 cups water
1-1/4 cup oats (any type), or more if needed
1 cup cooked rice of choice, or cooked potatoes (any kind)
2 cups any combination vegetables of choice, raw, cooked or frozen (and thawed)*
1 (6 oz) can tomato paste
2 Tbsp dried minced onion
2 Tbsp dried parsley
1 tsp dried oregano
1 Tbsp dried basil
2 tsp garlic powder
¼ tsp black pepper
1 tsp salt, or to taste (use less of including cooked vegetables that were already salted)
Water, as needed
1 to 2 Tbsp extra virgin olive oil, optional (use if pan frying the patties)

Place the red lentils in a pot with the 2 cups of water. Bring to a boil, then lower the heat and simmer for 10 minutes with a lid cocked on the pot, or until the lentils are tender and the water is absorbed. Remove from the heat and set aside to cool.

Place the oats in a food processor and pulse until coarsely chopped. Transfer oats to a large bowl; set aside. Add the cooked rice to the bowl, if using it. Or, if using mashed potatoes, add them to the bowl. If using other cooked potatoes that are in pieces, place them in the bowl of a food processor. Add the 2 cups vegetables of choice (see note below) to the food processor and pulse until finely grated (but not pureed). Transfer the vegetables to the bowl with the oats.

Transfer the cooled lentils to the bowl with the oats and vegetables. Add in the tomato paste and seasonings; stir well to combine. Add water as needed to make a mixture that holds together when lightly pressed together. If the mixture is too soft from too much liquid, add more processed oats until the mixture sticks together. If the mixture is too dry and will not hold together, add a little more water, until the mixture holds together when lightly pressed.

To bake the patties: Measure the mixture by ½-cup increments onto a baking tray lined with parchment paper or a silicone baking mat. Lightly press the mixture with your moist (from water or oil) fingers to form patties. Bake them in a 400°F oven until lightly browned on the first side, about 25 to 30 minutes. Flip the patties over and bake another 15 to 18 minutes, until the patties are lightly browned on the second side, and are firm to the touch, but still have a slight “give” when lightly pressed. Serve.

To pan fry the patties: Measure the mixture by ½-cup increments and place them on a plate or tray. Lightly press the mixture with your moist (from water or oil) fingers to form patties. Heat a large skillet over medium heat and add the 1 or 2 tablespoons of extra virgin olive oil. Transfer patties into the heated skillet and sauté on medium to medium-low heat, until the first side is brown and patties are starting to firm up. Watch them closely, as they can easily get overly browned.  Flip the patties over and continue cooking until both sides are browned and the patties are firm to the touch. They may take about 30 minutes to cook, since they do better at lower heat so they don’t burn. They may be flipped more than once, if needed.

The patties are excellent served with ketchup, salsa, kimchi, or any sauce of your choice, like garlic herb tahini sauce, Sriracha tahini sauce, tomato sauce, yogurt sauce, mustard sauce, or any other sauce you enjoy with a veggie burger.

Store extra patties in a covered container in the refrigerator. Use within 5 days. Patties may be frozen individually then transferred to a freezer container for later use. Use frozen patties within 6 months.

* If using raw vegetables, choose something that cooks quickly like zucchini, yellow squash or spinach. Place the raw vegetables in the food processor and pulse until finely chopped. When using frozen vegetables, place them in a colander under running water to thaw them out. Allow them to drain well, then add them to the food processor. If using already cooked vegetables, drain off any extra water before adding them to the food processor.

Some suggested vegetables that work well in this recipe would be raw zucchini, yellow squash, bell peppers, and/or spinach or baby greens. Already cooked vegetables that would work well include carrots, cabbage, cauliflower, parsnips, stir-fry blends, California blend, mixed vegetables, green beans, kale, or other cooked vegetables or blends that you enjoy. Just about any frozen and thawed vegetable or vegetable blend would work well as long as it can be eaten in the blanched state that it was in before being frozen. Frozen potatoes or other such vegetables that should not be eaten unless thoroughly cooked should not be used as a frozen and thawed item (unless you cook it before using it in the recipe).

About Judi

Julia W. Klee (Judi) began her journey enjoying “all things food” in elementary school when she started preparing meals for her family. That love of food blossomed into a quest to learn more and more about health and wellness as related to nutrition. She went on to earn a BS Degree in Food and Nutrition, then an MS Degree in Nutrition. She has taught nutrition and related courses at the college level to pre-nursing and exercise science students. Her hunger to learn didn’t stop upon graduation from college. She continues to research on a regular basis about nutrition as it relates to health. Her hope is to help as many people as possible to enjoy foods that promote health and wellness.

Black-Eyed Peas

Black-Eyed Peas 101 – The Basics

Black-eyed peas are a delicious legume that is popular in the American South (among other places around the world). If you’re not familiar with them, you’re missing out! Below is a comprehensive article all about black-eyed peas, from what they are to suggested recipe links. If you haven’t tried them before, I urge you to at least give them a try sometime with any recipe that sounds like a “go” for you and your family. I doubt you’ll regret it!

Enjoy!
Judi

Black-Eyed Peas 101 – The Basics

About Black-Eyed Peas
Despite their name, black-eyed peas (Vigna unguiculata) are actually a type of shelling bean in the cowpea family. Their pods can be up to two feet long. Black-eyed peas are native to Asia and Africa and have been cultivated since about 3,000 BC. According to early records, black-eyed peas were brought to the West Indies by West African slaves, then onward to America. They were originally used as food for livestock, but became a staple in the slaves’ diet. The fields were left untouched by northern soldiers who saw no value in the crops, so they became an important food for the Confederate South in America.

Black-eyed peas are still a staple in Southern (American) foods where they are commonly served with deep leafy vegetables such as collard or turnip greens. In the South, it’s customary to eat black-eyed peas and greens on New Year’s Day for good health and wealth in the New Year.

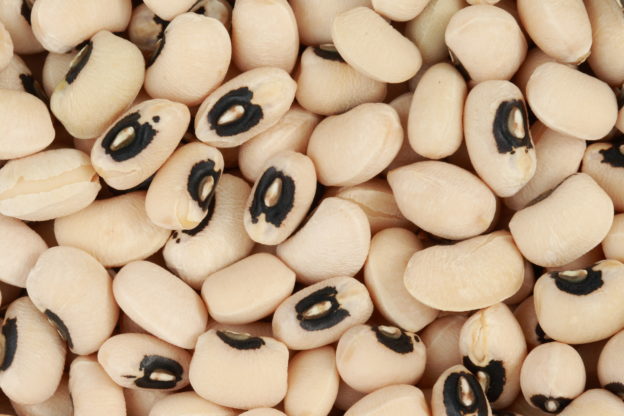
Black-eyed peas have a kidney shape and are white with a black eye in the center. The black “eye” forms where the pea attaches to its pod. They have a creamy texture and a flavor all their own, that can be described as nutty, earthy, and savory.

Nutrition and Health Benefits
As with all legumes, black-eyed peas are a healthful addition to the diet. One cup of cooked black-eyed peas has 160 calories, negligible fat, and 5 grams of protein. That same one cup also has substantial amounts of calcium, iron, magnesium, zinc, copper, manganese, folate, and Vitamins A and K. They are also a very good source of soluble fiber which is known to help lower cholesterol thereby warding off heart disease.

Folate. One cup of cooked black-eyed peas provides more than half of our daily folate needs. This crucial B-vitamin is not only important in preventing anemia, but is also critical for pregnant women in ensuring their offspring are not born with neural tube defects (spinal and brain issues).

Manganese. One cup of cooked black-eyed peas also provides roughly half of our daily needs for manganese. This mineral is a valuable antioxidant that helps to protect cellular structures from damage. It is also used in the formation of cartilage and the metabolism of carbohydrates, proteins, and fats.

Vitamin A (Beta-Carotene). One cup of cooked black-eyed peas provides a substantial amount of Vitamin A by way of its beta-carotene content. This important vitamin is critical for proper eye function and also skin health. It also is utilized in the maintenance of our mucous membranes in the respiratory and gastrointestinal tracts, helping to protect the body from invading pathogens. Vitamin A is also critical in the proper functioning of our immune system protecting us from pathogens that have entered the bloodstream.

All things considered, black-eyed peas are a very healthful food to include in your diet when you can. Their nutrient content can help to lower the risk of diabetes, improve blood pressure, decrease blood lipid levels thereby lowering the risk of heart disease, and reduce inflammation. All from a humble black-eyed pea!

How to Select Fresh Black-Eyed Peas
If you plan to shell the peas yourself, look for pods that appear fresh and tender. Avoid those that look dried out, blemished or moldy.

If you are shopping for fresh peas that have already been shelled, choose ones that look fresh and tender. Avoid those that look dry, wrinkly, or show signs of age and starting to spoil.

How to Store Fresh Black-Eyed Peas
Freshly harvested black-eyed peas are highly perishable and have a short shelf life. Unshelled peas should be kept in a cool, humid place (at 45°F to 50°F) for no more than 3 to 4 days after harvest. They should be shelled and cooked or frozen as soon as possible after being purchased.

Shelled, uncooked peas may be kept in the refrigerator in a covered container or plastic bag for no more than 7 days. Once cooked, black-eye peas should be stored in the refrigerator in a covered container and used within 3 to 5 days.

How to Prepare Fresh Black-Eyed Peas
Rinse the pods to remove any debris. Slim, very young black-eyed peas can be eaten in their pods, like green beans. The more mature peas should be removed from their pods before being cooked. To do that, gently squeeze the pod so it will separate at the seam. If that does not work, you can carefully cut along the seam with a knife. Allow the peas to drop into a bowl or container. Discard the pods. Rinse and drain the peas.

If your fresh peas have already been shelled, place them in a bowl of cold water and sort through them. Remove any damaged peas or those that have an off color. Drain the peas and rinse/drain them again until the water is clear and free of debris. Cook them right away, if possible. If you can’t cook them immediately, place them in a covered container in the refrigerator and cook them as soon as possible.

If the peas are to be cooked and eaten right away, they will need to be boiled in broth or water until tender. This takes anywhere from 30 minutes to 1 hour, depending upon how tender you like them. The cooking liquid may or may not be used in your dish, depending on the recipe and personal preferences.

If the peas are to be frozen, they will need to be blanched first. See the section (below) on “How to Freeze Fresh Black-Eyed Peas” for instructions.

How to Freeze Fresh Black-Eyed Peas
Rinse the pods to remove any debris, then remove the peas from the pods. To do that, gently squeeze the pod so it will separate at the seam. If that does not work, you can carefully cut along the seam with a knife. Allow the peas to drop into a bowl or container. Rinse and drain the peas. Rinse/drain them again until the water is clear. Discard the pods and any immature, over-mature, or damaged peas. Bring a large pot of water to boil and boil the peas for 2 minutes. Immediately transfer the peas to a bowl of ice water and allow them to cool for 2 minutes. Drain well and spread the peas out on a tray and blot dry with a paper towel. Place the tray in the freezer and allow the peas to freeze. Transfer the frozen peas to a freezer bag or container. Label with the date and return the peas to the freezer.

Alternatively, you could place your boiled, cooled and drained peas to a freezer bag, and lay the bag flat in the freezer. It will be helpful to move the bag occasionally as they freeze to avoid having them all frozen into one big lump.

For best quality, use your frozen peas within 6 months. They will be safe to eat beyond that, but the quality may deteriorate.

Fresh vs Dried vs Canned Black-Eyed Peas
Fresh. Fresh black-eyed peas are not commonly found in grocery stores. In areas where they are grown, they may be found at farmers’ markets or roadside stands. Other than that, they would be hard to come by in areas where they are not grown. So, most people don’t have fresh peas as an option.

Dried. Most grocery stores carry dried black-eyed peas year-round. They are a staple pantry item for many people and will keep at room temperature in an airtight container for 2 to 3 years. They are edible beyond that, although their quality may deteriorate. Since they have been shelled and soaking/cooking them is not a difficult process, dried black-eyed peas are a good item to keep in your food supply.

Canned. Canned black-eyed peas are found in most grocery stores. Their flavor and texture are comparable to dried peas that have been fully cooked. Some varieties are already seasoned. They are truly a convenience food in that they are ready to eat simply by opening the can and rinsing them, if desired. Canned black-eyed peas are an excellent option to keep in the pantry, especially in case of emergencies when there is a power outage.

How to Prepare Dried Black-Eyed Peas
Dried black-eyed peas can be prepared the same way you would prepare any dried bean or pea. First rinse and sort through the beans, removing any stones or other debris, and damaged peas. They should be “quick soaked” or “overnight soaked” first before being cooked. This is an important step because it reduces the compounds that can cause gas and bloating in some people when beans/peas are eaten.

Quick Soak Method: After the peas are rinsed and sorted, place them in a large pot of water. Bring everything to a rapid boil, and boil for 2 minutes. Remove the pot from the heat, cover with a lid, and allow the peas to sit in the hot water for 1 hour. Drain the soak water and rinse the peas. Then cook the peas by covering them with cold water in a large pot. Bring to a gentle boil, then lower the heat to simmer with the lid tilted. Allow them to cook until they reach the desired tenderness. This can take anywhere from 40 minutes to 2 hours, depending upon how tender you like them and how fast the water is boiling. See the “Important!” note below.

Overnight Soak Method: After the peas are rinsed and sorted, place them in a large pot of cold water. Cover the pot and let the peas soak overnight or at least 6 to 8 hours. Drain the soak water and rinse the peas. Then cook the peas by covering them with cold water in a large pot. Bring to a gentle boil, then lower the heat to simmer with the lid tilted. Allow them to cook until they reach the desired tenderness. This can take anywhere from 40 minutes to 2 hours, depending upon how tender you like them and how fast the water is boiling. See the “Important!” note below.

Important! When cooking dried peas or beans, do not add salt or any type of acid (such as lemon juice or vinegar) to the water early in the cooking process. This will cause the skins of the peas to toughen and they will not soften up like expected, even with extended cooking time. Save adding salt until they have already started to become tender. Add any acid at the end of cooking time, because adding it early can cause it to turn bitter.

Quick Ideas and Tips for Using Black-Eyed Peas
Here are some tips and ideas for using black-eyed peas…

* When cooking dried black-eyed peas after they have been soaked, do not add salt to the water early in the cooking process. When added early, the salt will cause the outer skin of the peas to toughen, making it hard to get them to soften as they cook. Add salt toward the end of cooking after the peas have already started to soften, or save the salt until the peas are used in a specific dish.

* When cooking dried black-eyed peas after they have been soaked, do not add any acid (such as lemon juice or vinegar) to the cooking water early in the cooking process. The acid will turn bitter when added too early. Wait until the peas are fully cooked, then drizzle them with a little acid of choice for flavoring.

* If you like the convenience of canned peas, but don’t want the additives found in canned foods, try buying dried peas, soaking and cooking them completely (or almost completely), and freezing them. You’ll have whatever amount of peas you need without added salt, etc., ready to go whenever you need them.

* Make a black-eye pea salad with peas, chopped tomatoes, corn, onion, avocado, bell pepper, cilantro and your favorite Italian dressing.

* Finely chop the vegetables (for the salad above), add a little cumin along with the salad dressing and turn it into a salsa.

* Make a black-eyed pea dip by blending black-eye peas with garlic, onions, tomatoes, cilantro, oil, balsamic vinegar, and salt and pepper to taste. Add a little sugar to sweeten the mix just a bit.

* Make a “sloppy Joe” type of mixture by sautéing (in oil or vegetable stock) some onion, garlic, bell pepper and carrots until tender. Stir in cooked black-eyed peas, some cooked grain of choice (i.e. rice, millet, couscous), Cajun seasoning (or a mix of paprika, thyme, oregano, salt, pepper, cayenne, garlic and onion powder), and 2 or 3 tablespoons of tomato paste. Add more vegetable broth for liquid as needed. Serve as-is, on toasted buns, or on a bed of cooked grain.

* Enjoy a traditional Southern (American) dish by serving cooked black-eyed peas on a bed of cooked grain (rice), with a side of deep leafy greens, and a slice of cornbread.

Herbs/Spices That Go Well with Black-Eyed Peas
Allspice, basil, bay leaf, cilantro, coriander, cumin, dill, garlic, ginger, marjoram, oregano, parsley, pepper, sage, salt, thyme

Foods That Go Well with Black-Eyed Peas
Proteins, Legumes, Nuts, and Seeds: Bacon, beans (in general), black beans, chicken, eggs, fish, ham, kidney beans, pork, poultry, and tahini

Vegetables: Arugula, bell peppers, cabbage, carrots, celery, chard (Swiss), chiles, greens (bitter; i.e. collards, mustard, turnip greens), mushrooms, onions, potatoes, scallions, shallots, spinach, tomatoes

Fruits: Lemon, olives, tamarind

Grains and Grain Products: Barley, corn, corn bread, rice

Dairy and Non-Dairy: Butter, cheese (i.e. feta), coconut butter, coconut milk, cream, yogurt

Other Foods: Agave nectar, barbecue sauce, capers, oil (i.e. olive, safflower, sunflower), tamari, vinegar (i.e. apple cider, balsamic)

Black-eyed peas have been used in the following cuisines and dishes…
African cuisine, burritos, Cajun cuisine, Caribbean cuisine, casseroles, chili (vegetarian), Creole cuisine, dips, gumbo, hummus, Indian cuisine, salads (i.e. bean, green, Hoppin’ John, tomato), soul food, soups, Southern (US) cuisine, stews, succotash, “Texas caviar”

Suggested Flavor Combos Using Black-Eyed Peas
Combine black-eyed peas with any of the following combinations…

Bell peppers + celery + onions
Brown rice + onions
Coconut milk + sticky rice
Corn + dill
Feta cheese + tomatoes
Garlic + greens
Onions + tomatoes
Pumpkin + rice

Recipe Links
Hoppin’ John https://thepioneerwoman.com/cooking/hoppin-john/

Avocado Black-Eyed Pea Salad https://www.callmepmc.com/avocado-black-eyed-pea-salad/

Avocado Black-Eyed Pea Salsa https://www.allrecipes.com/recipe/213030/avocado-and-black-eyed-pea-salsa/

Black-Eyed Pea Salad with Avocado and Jalapeno https://www.tasteofhome.com/recipes/black-eyed-pea-salad-with-avocado-and-jalapeno/

Southwestern Black-Eyed Pea Salad https://www.shelikesfood.com/southwestern-black-eyed-pea-salad/

Avocado and Black-Eyed Pea Salsa https://www.epicurious.com/recipes/member/views/avocado-and-black-eyed-pea-salsa-53032281

Cowboy Caviar https://www.culinaryhill.com/cowboy-caviar-recipe/#wprm-recipe-container-26521

Black-Eyed Pea Casserole with Cornbread Crust https://www.rachaelhartleynutrition.com/blog/2015/12/black-eyed-pea-and-greens-casserole-with-cornbread-crust

Black-Eyed Pea Hummus https://www.gritsandpinecones.com/black-eyed-pea-hummus/#wprm-recipe-container-19643

Lucky and Spicy Black-Eyed Pea Salad Recipe http://www.vietworldkitchen.com/blog/2010/12/spicy-black-eyed-pea-salad-recipe.html

Zannie’s Black-Eyed Pea Dip https://thepioneerwoman.com/cooking/zannies-black-eyed-pea-dip/

Southern Black-Eyed Peas (Vegan) https://healthiersteps.com/recipe/southern-black-eyed-peas-vegan/

Vegan Black-Eyed Peas https://www.thespruceeats.com/vegetarian-black-eyed-peas-1001609

Creole Black-Eyed Peas https://blog.fatfreevegan.com/2008/01/creole-black-eyed-peas.html

Black-Eyed Peas with a Healthy Twist https://www.justapinch.com/recipes/side/other-side-dish/black-eyed-peas-with-a-healthy-twist.html

Black-Eyed Peas with Bacon and Pork https://www.foodnetwork.com/recipes/patrick-and-gina-neely/black-eyed-peas-with-bacon-and-pork-recipe-1920605

Black-Eyed Pea Salad https://www.foodnetwork.com/recipes/patrick-and-gina-neely/black-eyed-pea-salad-recipe-1910721

Resources
http://www.foodreference.com/html/fblackeyedpea.html

https://www.specialtyproduce.com/produce/Black_Eye_Peas_6584.php

https://foodcombo.com/find-recipes-by-ingredients/black-eyed-peas

https://www.stilltasty.com/fooditems/index/16567

https://www.latimes.com/food/la-xpm-2012-sep-15-la-fo-rosh-hashanah-rec1-20120915-story.html

https://healthyeating.sfgate.com/health-benefits-blackeyed-peas-4253.html

https://www.livestrong.com/article/414892-health-benefits-of-black-eyed-peas/

https://cookforgood.com/how-to-shell-fresh-black-eyed-peas-and-field-peas/

https://www.aces.edu/blog/topics/food-safety/fresh-from-the-farm-alabama-recipes-fresh-black-eyed-peas-and-other-southern-peas-best-vinaigrette-for-pea-salad/

Cooperative Extension Service, The University of Georgia. (1993) So Easy to Preserve. 3rd edition. Athens, GA: Cooperative Extension Service.

Page, Karen. (2014) The Vegetarian Flavor Bible. New York, NY: Little, Brown and Company.

About Judi
Julia W. Klee (Judi) began her journey enjoying “all things food” in elementary school when she started preparing meals for her family. That love of food blossomed into a quest to learn more and more about health and wellness as related to nutrition. She went on to earn a BS Degree in Food and Nutrition, then an MS Degree in Nutrition. She has taught nutrition and related courses at the college level to pre-nursing and exercise science students. Her hunger to learn didn’t stop upon graduation from college. She continues to research on a regular basis about nutrition as it relates to health. Her hope is to help as many people as possible to enjoy foods that promote health and wellness.
Black-Eye Pea and Kale Soup

Black-Eye Pea and Kale Soup

We all know that soup is popular in the cold months, and for good reason! But I’m one of those who enjoys soup just about any time of year. So, it’s never off the menu for us.

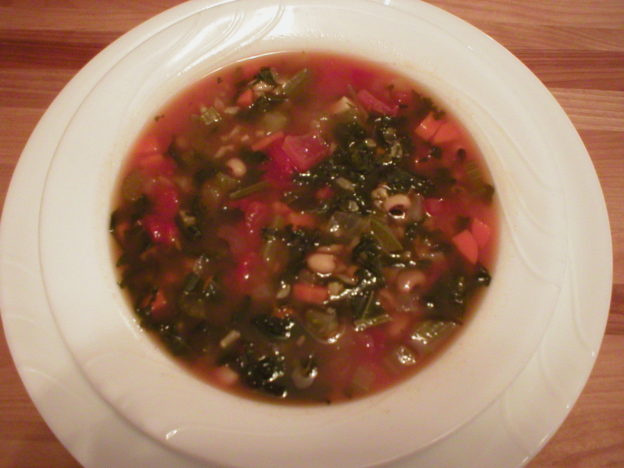
Here’s a delicious soup that combines black-eye peas, rice, tomatoes, and kale…a wonderful combination of ingredients! AND it’s loaded with great nutritional impact. On top of that, I developed the recipe to be really simple to put together. So, it’s a win-win for anyone who opts to try it!

Below is a video link where I demonstrate how to make the soup. The written recipe is below the video. I hope this helps!

Enjoy!
Judi

Black-Eye Pea and Kale Soup
Makes About 10 Cups of Soup (5 Meal-Size Servings)

6 cups vegetable broth
2 cups water
2 cups cooked black-eye peas (or 1 (15 oz can) black-eye peas)
1 (14.5 oz) can diced tomatoes (any type), with the juice
½ cup uncooked rice of choice
4 cups chopped kale
3 cloves garlic, chopped
1 cup chopped onion
½ cup chopped bell pepper
1 cup chopped carrot
1 cup chopped celery
2 dried Bay leaves
1 Tbsp dried parsley flakes
1 tsp dried thyme
1 tsp dried basil leaves
Salt and black pepper to taste

Place all ingredients in a large pot with a lid.* Bring to a boil, then cover the pot and reduce the heat to simmer. Cook, stirring occasionally, for 1 hour, until all vegetables are tender and flavors blended. Remove bay leaves and serve.

Leftover soup should be stored in a covered container in the refrigerator and used within 5 days. Extra soup may also be frozen, and will be best if used within 6 months.

* Optional step based on your preference. If preferred, you can first sauté the vegetables in 1 or 2 tablespoons of extra virgin olive oil. Sauté them briefly, just until they start to soften. Then add the remaining ingredients and follow the directions from there. Or, you can add a little oil to the bowl as the soup is served, as a finishing touch. The added oil will give the soup a greater depth of flavor.

About Judi

Julia W. Klee (Judi) began her journey enjoying “all things food” in elementary school when she started preparing meals for her family. That love of food blossomed into a quest to learn more and more about health and wellness as related to nutrition. She went on to earn a BS Degree in Food and Nutrition, then an MS Degree in Nutrition. She has taught nutrition and related courses at the college level to pre-nursing and exercise science students. Her hunger to learn didn’t stop upon graduation from college. She continues to research on a regular basis about nutrition as it relates to health. Her hope is to help as many people as possible to enjoy foods that promote health and wellness.
Chickpeas

Chickpeas 101 – The Basics

If you’re wondering about chickpeas, from what they are to how to use them, you’re in the right place! Below is a comprehensive article all about chickpeas!

Enjoy!
Judi

Chickpeas 101 – The Basics

About Chickpeas
Chickpeas are members of the Fabaceae plant family. They originated in the Middle East, where they are still widely used. Researchers have evidence that chickpeas were consumed as far as 7,000 years ago, with evidence that they were cultivated as far back as 3,000 BC. From the Middle East, chickpeas slowly made their way around the world. Today, the main commercial producers of chickpeas are India, Pakistan, Turkey, Ethiopia, and Mexico.

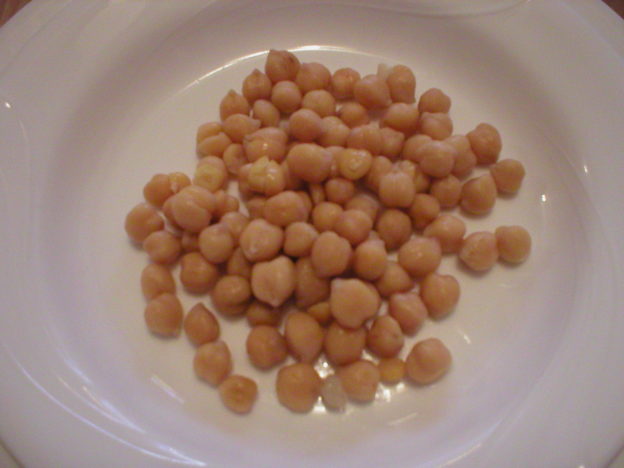
Chickpeas have developed many names around the world, including garbanzo beans, garbanzos, grams, Bengal grams, Egyptian peas, and besan (when ground into flour). There are different varieties of chickpeas commonly grown, with some being green, black, brown, red, or the very familiar tan color. “Kabuli” are large and beige with a thin skin. This is the type commonly found in American grocery stores. “Desi” chickpeas are small and dark with yellow interiors. The Desi type chickpeas are about half the size of the Kabuli chickpea that Americans are familiar with. This is the most popular type of chickpea worldwide. They have a thicker seed coat than the Kabuli type. “Green” chickpeas are younger and have a sweeter flavor than the other types. They are similar to green peas.

Chickpeas are the seeds of the plant, grown for their highly nutritious qualities, including an abundance of fiber, protein and other nutrients. They have a mild, nutty flavor and buttery texture. Chickpeas are naturally gluten-free.

Nutrition Tidbits and Health Benefits
Chickpeas contain a lot of antioxidants, protein, fiber and other nutrients too. Their antioxidants not only combat free-radicals in the body, but also appear to have anti-inflammatory effects. This alone makes them powerful foods to include in the diet.

Chickpeas also supply a lot of protein, with 1 cup of cooked chickpeas providing over 14 grams. That same cup of cooked chickpeas also provides over 12 grams of fiber, along with a lot of molybdenum, manganese, folate, copper, phosphorus, iron, zinc, and B-vitamins. One cup of cooked chickpeas has about 270 calories. They have a low glycemic index, so they are digested and absorbed slowly, without a large spike in blood sugar.

Selecting Chickpeas: Dried vs Canned
Dried: Chickpeas are sold dried or canned. Dried chickpeas are usually prepackaged but are sometimes sold in bulk bins. Make sure there is no sign of moisture or insect damage when selecting dried chickpeas. When purchasing from bulk bins, also make sure there is a good turnover of product in the bins so you can be assured they are as fresh as possible.

Canned: Most grocery stores carry canned chickpeas and they are a great staple food to keep in the pantry when time is short. They can simply be used from the can when needed for a salad or hummus, or heated briefly in cooked foods. Many people use the liquid from canned chickpeas (called aquafaba) as an egg white substitute and when making vegan meringues.

The nutritional value of canned chickpeas is good when compared to some other canned foods. The value of most nutrients is lowered by about 15% in canned chickpeas, with the exception of folate, which is lowered by 45% when compared to the folate level in dried chickpeas. There is some concern with the BPA content of canned goods. If you are avoiding BPA from canned foods, be sure to look for cans labeled as BPA-free. Also, some canned chickpeas may contain additives like salt and/or calcium chloride (a firming agent). If those additives are concerns for you, then dried chickpeas may be a better option. However, organic canned chickpeas should contain little to no additives with the exception of salt. Some brands may carry salt-free options in BPA-free cans.

Aquafaba
Aquafaba is what many people call the liquid in canned chickpeas. (Note that this does not apply to the liquid in other types of canned beans.) Due to its thick nature, this liquid can be used straight from the can as a substitute for egg whites in cooking. It can also be whipped into meringues and marshmallows.

Mix aquafaba with some cream of tartar and whip as you would egg whites. The fluff will hold together well and lighten quick breads and muffins. According to Bob’s Red Mill, use 1/8 teaspoon of cream of tartar with ½ cup (8 tablespoons) of aquafaba. For more information on how to use aquafaba as an egg replacer, please visit their site at https://www.bobsredmill.com/blog/featured-articles/a-guide-to-aquafaba/

To use aquafaba, it’s helpful to first shake the unopened can of chickpeas. Open and drain the can into a fine mesh strainer over a bowl, separating the canned peas from their liquid. Briefly whisk the liquid to blend the starches that may have settled on the bottom of the can, then measure it as needed for a recipe. Fresh aquafaba can be stored in a covered container in the refrigerator for up to 1 week.

Extra aquafaba can easily be frozen for later. Freeze it in 1 tablespoon increments in an ice cube tray. When frozen, transfer the cubes to a labeled freezer bag. It may easily be thawed in the microwave, if desired. Aquafaba will keep for about 2 months in the freezer.

See also: A Guide To Aquafaba at https://minimalistbaker.com/a-guide-to-aquafaba/

Chickpea Flour
Chickpea flour is available in some grocery stores, and can be purchased online. Most chickpea flour available is made from raw chickpeas. When using this type of flour, be sure it is used in a recipe where it is well-moistened and also cooked in some way. This will make it more digestible. Otherwise, the finished product may be hard to digest and could cause excessive gas. Because it is usually made from raw chickpeas, this type of flour should not be eaten raw.

How to Store Chickpeas
Dried chickpeas should be stored in an airtight container in a cool, dry, dark place. They will keep well for about a year. The longer they are stored, the drier they will become and may take longer to cook. It’s helpful to rotate your supply of dried chickpeas (like all foods), using the “first-in, first-out” method (cook your oldest chickpeas first). Once cooked, chickpeas should be stored in the refrigerator in a covered container and used within four days.

As with most, if not all canned foods, canned chickpeas should have a “best by” date stamped on the can. For best quality, use them before that date. Store cans in a cool, dry place.

How to Prepare Dried Chickpeas
Dried chickpeas should first be sorted and examined so you can remove any stones, debris, or damaged beans. Then they should be rinsed well and drained. Before actual cooking, chickpeas should be soaked which makes them more digestible. There are two methods for soaking chickpeas.

Quick-soak method: Place the sorted and rinsed beans in a large pot with about 2 to 3 parts of water to 1 part of chickpeas. Bring the contents to a boil. Cook, uncovered, for 2 minutes. Remove the pot from the heat, cover, and allow the chickpeas to soak for 2 hours. Then drain and rinse the chickpeas. Add fresh water to the pot and bring it to boil. Lower the heat and simmer until they are tender. The time will vary depending upon how dry the beans were. Drain, then use as planned.

Traditional soaking method: This method involves a longer soaking time, but may actually be preferred because it further reduces compounds in the chickpeas that may cause gas when they are eaten. After the peas are sorted, rinsed and drained, place them in a large pot with at least 3 to 4 parts of water per 1 part of chickpeas. Cover the pot and allow them to soak for at least 6 to 8 hours, up to 12 hours. Drain, then fill the pot with fresh water. Bring them to boil, lower heat and simmer gently until the chickpeas are tender. The time will depend upon how long they soaked and how dry they were initially. Some directions call for cooking up to 2 hours, but I have found that they usually cook faster than that. Drain, then use as planned.

Note! When cooking any type of dried pea or bean, be sure not to add any acid nor salt to the water early on when cooking the pea or bean. Doing so will make the outer shell tough which makes the dried pea or bean hard to cook, and they may not soften like you expect. If you want to salt the water or add an acid (like lemon juice or vinegar), only add it when the peas or beans are almost finished cooking and no sooner.

One cup of dried chickpeas yields about three cups cooked. Cooked chickpeas should be stored in a covered container in the refrigerator and used within four days.

Freezing Chickpeas
Sorted, rinsed and soaked, but uncooked chickpeas may be frozen in covered containers. After soaking, drain them well, then place them in an airtight freezer container. They will keep in the freezer for up to 1 year.

If you want to cook dried chickpeas in advance and have them whenever needed, simply drain your cooked chickpeas and place them in a labeled freezer bag. Flatten the bag, lay them down in the freezer and allow them to freeze. Frozen, cooked chickpeas will keep well for 1 year. However, some resources state that they should be used within 6 months for best quality.

Quick Tips and Ideas for Using Chickpeas
* Make an easy hummus by blending chickpeas with olive oil, fresh garlic, tahini and lemon juice.

* Add a nutritional punch to your salads by topping them with some chickpeas.

* Make an easy pasta dish by topping cooked pasta with chickpeas, olive oil, crumbled feta cheese and fresh oregano.

* Add some chickpeas to vegetable soup to enhance its flavor, texture and nutritional value.

* Add chickpeas to a roasted veggie and quinoa salad.

* Add chickpeas to your favorite stir-fry.

Herbs/Spices That Go Well With Chickpeas
Basil (and Thai basil), bay leaf, capers, cardamom, cayenne, cilantro, cinnamon, cloves, coriander, cumin, curry powder and spices, dill, garlic, ginger, mint, mustard seeds, oregano, paprika, parsley, pepper (black and white), rosemary, saffron, sage, salt, sumac, tarragon, thyme, turmeric

Foods That Go Well with Chickpeas
Proteins, Nuts, Seeds: Almonds, beef, cashews, chicken, lentils, pine nuts, pistachios, seeds (i.e. pumpkin, sesame), tahini, walnuts

Vegetables: Artichokes, bell peppers, cabbage, carrots, cauliflower, celery, chard (Swiss), chiles, cucumbers, eggplant, fennel, green beans, greens (bitter, like beet greens), greens (salad), kale, mushrooms, onions, potatoes, scallions, spinach, squash (summer), sweet potatoes, tomatoes, zucchini

Fruits: Apples, apple cider, apple juice, apricots (dried), avocados, citrus (lemon, lime, orange), coconut, currants, mangoes, olives, pumpkin, tamarind

Grains and Grain Products: Bread, bulgur, corn, couscous, farro, millet, pasta, polenta, quinoa, rice, tortillas, wheat berries

Dairy and Non-Dairy: Buttermilk, cheese (cheddar, feta, goat, Parmesan), coconut milk, yogurt

Other Foods: Mayonnaise, oil, soy sauce, tamari, vinegar

Chickpeas have been used in the following cuisines and foods:
North African cuisine, chana masala, chili (vegetarian), curries, dips, falafels, Greek cuisine, hummus, Indian cuisine, Italian cuisine, Mediterranean cuisines, Mexican cuisine, Middle Eastern cuisines, Moroccan cuisine, salad dressings, salads, soups (i.e. minestrone, tomato, vegetable), spreads, stews, tabbouleh, veggie burgers

Suggested Flavor Combos Using Chickpeas
Combine chickpeas with the following combos…
Apricots + pistachios + tahini
Basil + brown rice + curry
Basil + cucumbers + feta cheese + garlic + red onions
Bulgur + eggplant + mint + quinoa
Cayenne + feta cheese + garlic + spinach + tomatoes
Chiles + cilantro + lime
Coriander + cumin + mint + sesame seeds
Cumin + eggplant
Garlic + lemon + tahini
Mint + onions + yogurt
Potatoes + saffron + Thai basil
Spinach + sweet potatoes

Recipe Links
Garlic Dip http://www.whfoods.com/genpage.php?tname=recipe&dbid=223

Minted Garbanzo Bean Salad http://www.whfoods.com/genpage.php?tname=recipe&dbid=191

Healthy Veggie Salad http://www.whfoods.com/genpage.php?tname=recipe&dbid=311

Curried Mustard Greens and Garbanzo Beans with Sweet Potatoes http://www.whfoods.com/genpage.php?tname=recipe&dbid=41

Chickpea Soup https://www.thespruceeats.com/revithosoupa-chickpea-soup-1706136

Carrot Hummus https://www.thespruceeats.com/carrot-hummus-4772801

Honey Roasted Chickpea Butter https://www.thekitchn.com/recipe-honey-roasted-chickpea-butter-239671

How to Make Crispy Roasted Chickpeas in the Oven https://www.thekitchn.com/how-to-make-crispy-roasted-chickpeas-in-the-oven-cooking-lessons-from-the-kitchn-219753

Risotto with Caramelized Onions, Mushrooms, and Chickpeas https://fakeginger.com/risotto-with-caramelized-onions-mushrooms-and-chickpeas/

Crispy Roasted Chickpeas https://steamykitchen.com/10725-crispy-roasted-chickpeas-garbanzo-beans.html

Coconut Ginger Chickpea Soup https://www.bonappetit.com/recipe/coconut-ginger-chickpea-soup

Spiced Chickpeas and Greens Frittata https://www.bonappetit.com/recipe/spiced-chickpeas-and-greens-frittata

Shaved Brussels Sprouts Salad with Cauliflower Steaks and Crispy Chickpeas https://producemadesimple.ca/5-ingredient-recipe-shaved-brussels-sprouts-salad-with-cauliflower-steaks-and-crispy-chickpeas/

Mediterranean Avocado Chickpea Pasta Salad with Lemon Basil Vinaigrette https://www.ambitiouskitchen.com/mediterranean-avocado-chickpea-pasta-salad/

Chickpea Flour Chocolate Chip Cookies https://www.ambitiouskitchen.com/chickpea-flour-chocolate-chip-cookies/

20 Amazing Things You Can Do With Aquafaba https://www.vegansociety.com/whats-new/blog/20-amazing-things-you-can-do-aquafaba

19 Aquafaba Recipes That Prove Chickpea Water is Not as Gross as It Sounds https://greatist.com/eat/aquafaba-recipes

The 25 Best Vegan Aquafaba Recipes You Never Knew Could Be Vegan https://www.veganfoodandliving.com/the-25-best-vegan-aquafaba-recipes-you-never-knew-could-be-vegan/

Resources
https://bienasnacks.com/blogs/biena-blog/chickpeas-information-faqs

http://www.whfoods.com/genpage.php?tname=foodspice&dbid=58

https://www.liveeatlearn.com/chickpeas/

https://www.thespruceeats.com/using-dried-chickpeas-in-moroccan-cooking-2394969

https://www.americastestkitchen.com/guides/vegan/what-is-aquafaba

https://www.bobsredmill.com/blog/featured-articles/a-guide-to-aquafaba/

Page, Karen. (2014) The Vegetarian Flavor Bible. New York, NY: Little, Brown and Company.

About Judi
Julia W. Klee (Judi) began her journey enjoying “all things food” in elementary school when she started preparing meals for her family. That love of food blossomed into a quest to learn more and more about health and wellness as related to nutrition. She went on to earn a BS Degree in Food and Nutrition, then an MS Degree in Nutrition. She has taught nutrition and related courses at the college level to pre-nursing and exercise science students. Her hunger to learn didn’t stop upon graduation from college. She continues to research on a regular basis about nutrition as it relates to health. Her hope is to help as many people as possible to enjoy foods that promote health and wellness.
Almond Rice Crackers

Almond Rice Crackers

If you’re looking for an easy, fast, gluten-free and vegan cracker to make, you’ve found it! These crackers are a favorite in our house and they are simple and quick to make. A win-win for us! Below is a video showing how to make them. The written recipe is below.

Enjoy!
Judi

Almond-Rice Crackers

Makes enough for 1 sheet pan (30 to 45 crackers)
½ cup almond flour
½ cup brown rice flour
1 Tbsp flax meal
¼ tsp salt
1 Tbsp extra virgin olive oil
¼ cup milk of choice, or more if needed*

Makes enough for 2 sheet pans (double the recipe)
1 cup almond flour
1 cup brown rice flour
2 Tbsp flax meal
½ tsp salt
2 Tbsp extra virgin olive oil
½ cup milk or choice, or more if needed*

Combine all ingredients in a bowl. Stir until well combined. Cover bowl and allow mixture to rest for 30 minutes to 1 hour (can be placed in the refrigerator during this time) to allow flour to soak up moisture. Check the dough after it has rested for about 15 minutes. If mixture does not hold together well, add more liquid, 1 tablespoon at a time, mixing well after each addition. It has enough liquid when it is slightly moist and holds together well without being crumbly.

Preheat oven to 350°F. Transfer the cracker dough onto a silicone baking mat or a sheet of parchment paper large enough to cover a baking sheet. Cover the dough with a sheet of waxed paper about the size of the baking mat or parchment paper. Roll the dough into a rectangle shape no more than 1/8-inch thick. Remove the top waxed paper and discard it. With a pizza cutter or a butter knife, score the dough into roughly 1-1/2-inch squares for crackers.

Place the sheet on the rack in the middle of the oven and bake for 20 to 25 minutes, until crisp and golden. Crackers along the outer edges will brown first, so remove them as they bake and return the rest to the oven. When all are baked remove the pan from the oven and cool remaining crackers on a wire rack. Serve or store in an airtight container at room temperature.

* If preferred, water may be used in place of milk, but the crackers will not have as much flavor as when made with milk.

If you want to add extra flavors to your crackers, go ahead!
Here are some possibilities:

Black pepper, rosemary, finely chopped cranberries and pepitas (or other dried fruit, nuts or seeds), garlic and Italian herbs, rosemary, thyme, chives, and parsley, Italian seasoning and Parmesan cheese

About Judi
Julia W. Klee (Judi) began her journey enjoying “all things food” in elementary school when she started preparing meals for her family. That love of food blossomed into a quest to learn more and more about health and wellness as related to nutrition. She went on to earn a BS Degree in Food and Nutrition, then an MS Degree in Nutrition. She has taught nutrition and related courses at the college level to pre-nursing and exercise science students. Her hunger to learn didn’t stop upon graduation from college. She continues to research on a regular basis about nutrition as it relates to health. Her hope is to help as many people as possible to enjoy foods that promote health and wellness.

Quick and Easy Banana Oat Cookies

Quick and Easy Banana Oat Cookies

Here’s a REALLY fast and easy banana oat cookie that can be made in no time in the food processor, if you have one. Otherwise, mix them by hand, no issues! They’re perfect for anyone wanting to reduce added sugar and fat in their diet. They’re great as a dessert, snack, or even a breakfast cookie.

Here’s a video showing how to make the cookies. The recipe is below the video.

Enjoy!
Judi

Quick and Easy Banana Oat Cookies
Makes About 18 Small Cookies

2 cups oats (any type)
½ tsp baking soda
1 tsp ground cinnamon*
2 ripe bananas
2-4 Tbsp milk of choice, or more if needed**
½ cup add-ins, optional

Place the oats, baking soda and cinnamon (if you are adding it) in a food processor and process until the oats are a coarse flour. It does not need to be ultra-fine. Slice the bananas and add them plus the milk to the food processor. Pulse until the bananas are pureed and the mixture comes together. If the mixture seems crumbly and a bit dry, add more milk, 1 tablespoon at a time until the mixture is moist and comes together, but is not overly wet.

Transfer the mixture to a bowl and stir in up to ½ cup of any combination of add-in ingredients you want. Mix well. Cover the bowl and allow the mixture to rest for about 15 minutes so the oats can soak up some liquid. After the soaking time, the mixture should be moist and still hold together, not dry and crumbly. If it is dry, add a little more milk until it is moist and holds together.

Preheat oven to 350°F. Line a baking sheet with parchment paper or a silicone baking mat. With a tablespoon or a #40 cookie scoop (which holds 1-3/4 tablespoons), divide the mixture on the prepared baking sheet. Slightly flatten each mound with your fingers. Bake on the rack in the middle of the oven for 13 to 16 minutes, until they are set and starting to brown. Remove from the oven, cool, and enjoy!

* The cinnamon can be omitted if you feel the flavor won’t blend with your preferred add-in ingredients.

**The amount of milk needed will vary depending on the size of the bananas used, and the type of add-ins you choose. Batches made with larger bananas will need less milk than batches made with smaller bananas. Add enough to make a very moist, but not sopping wet batter.

Optional add-ins:
You can add any one or combination of embellishments and flavorings to your cookies. Nuts, seeds, dried fruits, flavorings, and chips of various sorts all work well. Get creative! Here are some examples:

Chopped Nuts or Seeds
Walnuts
Pecans
Almonds
Peanuts
Pistachios
Pepitas
Sunflower Seeds
Sesame Seeds
Flaxseeds
Dried Coconut

Chopped Dried Fruits
Raisins
Cranberries
Cherries
Figs
Currants
Apples
Peaches
Apricots

Flavorings (Of course, add only small amounts of these!)
Vanilla extract
Vanilla bean
Cocoa powder
Orange zest
Orange extract
Nutmeg

Chips
Chocolate chips
Peanut butter chips
Butterscotch chips
White chocolate chips
Cinnamon chips
Mint chocolate chips
Caramel chips
This list is growing with what’s becoming available in stores.

About Judi
Julia W. Klee (Judi) began her journey enjoying “all things food” in elementary school when she started preparing meals for her family. That love of food blossomed into a quest to learn more and more about health and wellness as related to nutrition. She went on to earn a BS Degree in Food and Nutrition, then an MS Degree in Nutrition. She has taught nutrition and related courses at the college level to pre-nursing and exercise science students. Her hunger to learn didn’t stop upon graduation from college. She continues to research on a regular basis about nutrition as it relates to health. Her hope is to help as many people as possible to enjoy foods that promote health and wellness.