Author Archives: Judi

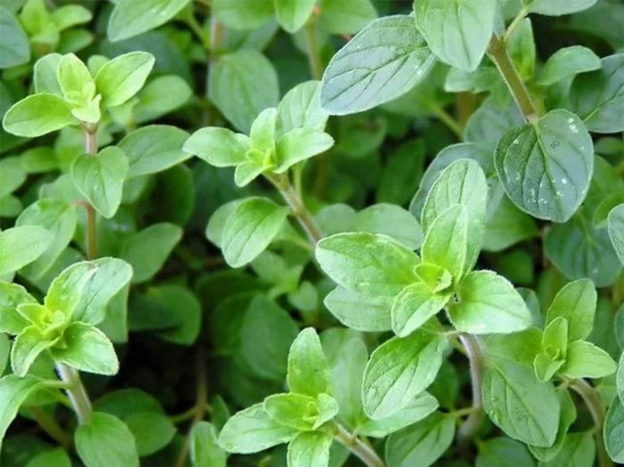
Spearmint

Spearmint (Mint) 101 – The Basics


Spearmint 101 – The Basics

About Spearmint
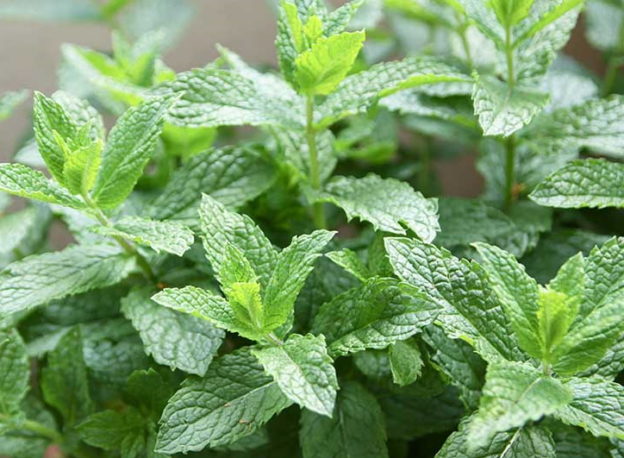
When someone uses the general term, “mint,” they are usually referring to spearmint, Mentha spicata. This same perennial herb has also been called garden mint, lamb’s mint, Our Lady’s mint, spire mint, and sage of Bethlehem.

Spearmint is native to the Mediterranean region, where it has long been a popular herb used as both food and medicine. In ancient times, mint was known as an herb of hospitality. The leaves were used to clean and scent tables and floors. It has been stuffed in pillows and mattresses and scattered on floors to cover odors and deter pests and rodents. Mint was also used with other herbs in tombs as an aromatic. The Romans brought mint to Europe. Mint was carried to America by early English settlers who used it medicinally, to make tea, and as an aromatic for the body and home.

Nutrition and Health Benefits
Mint is rich in Vitamin A, Vitamin C, and folate, along with the trace minerals manganese and iron. It also contains some calcium and magnesium.

Digestive Upsets. Mint tea has been used to help relieve nausea, cramping, and indigestion.

Respiratory Problems. Inhaling steam scented with mint has been used to help relieve respiratory problems such as asthma and bronchitis.

Antibacterial Agent. Spearmint is added to many toothpastes and mouthwashes. In addition to freshening the breath, spearmint has been found to contain antimicrobial properties that can help kill harmful bacteria in the mouth. Furthermore, research has shown that spearmint essential oil can help destroy harmful bacteria, such as E. coli and Listeria, that cause foodborne illnesses.

Lowers Blood Sugar. Animal studies have shown that spearmint tea may help to lower blood sugar in people with diabetes. Human studies in this area are lacking, but the animal studies that have been conducted are promising.

Reduces Stress. In many countries, spearmint tea is commonly used to induce relaxation and reduce stress. Animal studies have shown that spearmint tea does, in fact, produce such an effect. The menthol in the leaves may be responsible for this effect. So, if you’re feeling stressed, enjoy a cup of mint tea! Furthermore, mint aromatherapy has been used to help ease mental sluggishness and agitation.

Relieves Arthritis. Animal and human studies have found that spearmint can help relieve arthritis pain. People who drank spearmint tea twice a day for 16 weeks had reduced stiffness, pain, and physical disability from arthritis of the knee.

How to Select Spearmint
Look for fresh mint leaves that are bright green and not wilted. If possible, smell them. Their aroma will clue you into their degree of freshness. If they have no aroma, they’re not fresh. If your bunch of leaves was tied together with a twist tie or rubber band, remove it when you get it home.

How to Store Fresh Spearmint
Fresh spearmint is delicate and can bruise easily. If it was purchased in a closed plastic container, store it dry in the refrigerator, in that same container until you’re ready to use it. Wait to wash it until you’re ready to use it.

If your mint leaves were bundled, they may be stored in a couple different ways. First, you can store them like cut flowers, in the refrigerator. Place the stems, cut side down in a glass or jar with a small amount of water. Cover them loosely with a plastic bag and store them in the refrigerator. Change the water every day or two.

Another way to store fresh mint leaves would be to spread them out on a SLIGHTLY damp paper towel or cloth. Roll the towel or cloth like a jelly-roll and place that loosely in a plastic bag. Store it in the refrigerator. Try to use your stored fresh mint within a week.

How to Preserve Mint
Freeze. Fresh mint may be washed, removed from stems, chopped, then frozen in ice cube trays with water. Transfer the frozen cubes to a freezer bag or container and use them when you want to add mint flavor to cold beverages or any cooked dish calling for mint.

Fresh mint may also be washed, dried, then frozen whole in an airtight plastic bag. This mint would be best used in pesto, sauce, or jelly.

Dry. There are several ways that fresh mint leaves can be dried.

(1) Wash the mint leaves while still on the stems. Carefully dry the leaves, then remove the stems. Place the leaves on a baking tray in a single layer. Be sure the leaves are completely dry before proceeding. Place the tray in a warm oven at its lowest temperature or 180°F until the leaves are dry. It may take two hours or longer. Watch them carefully so they do not burn. Allow them to cool completely, then store them in an airtight container. The dried leaves may be left whole or crumbled. If crumbled, sift them through a screen to remove any remaining stems.

(2) Fresh mint leaves may also be dried in a dehydrator. Prepare the leaves as detailed above and lay them in a single layer on a mesh dehydrator tray. Follow the manufacturer’s directions for the recommended temperature and length of time to dry the leaves.

(3) Yet another way to dry fresh spearmint would be to wash and dry the leaves completely. They may be removed from the stems or left on. Place them in a paper bag and close the bag by folding over the top edges. Lay the bag on its side and shake the bag to disburse the leaves so they’re not in a big clump. Place the bag away from a heat source and sunlight. Two or three times a day, shake the bag and turn it over to “toss” the leaves around, then lay it on its side again. Continue to do this until the leaves are completely dry. This may take a week or more. Once dry, remove the leaves from the stems, if not already done and transfer them to an airtight container.

After your dried mint leaves have been placed in their storage container, check the container after a few days to be sure there is no moisture inside. This would indicate that the leaves were not completely dry, and will invite decay. If moisture is found, remove the leaves and dry them again.

Quick Ideas and Tips for Using Spearmint
* Recipes that call for “mint” generally mean spearmint, so the two terms are usually interchangeable.

* For a quick dessert or snack, combine sliced strawberries, mint leaves, and yogurt.

* Make an easy mint tea by placing 5 to 10 torn mint leaves in a mug. Muddle (smash) them just a bit with a wooden spoon. Pour hot (not boiling) water over the leaves and allow them to steep for 5 to 10 minutes. Removing the leaves is optional. Enjoy!

* To make mint tea using dried leaves, steep 1 teaspoon of dried leaves in a cup of hot water for about three minutes. Strain and enjoy!

* Add 3 or 4 fresh mint leaves to your favorite chocolate or berry smoothie.

* Make a delicious strawberry salad that can be eaten as it is, used as a topping for a green salad, or as a topping for your favorite bread along with some goat or ricotta cheese. Combine 2 cups of sliced strawberries with 10 to 20 chopped fresh mint leaves, an equal number of chopped fresh basil leaves, and 3 to 4 tablespoons of your favorite balsamic vinegar. Enjoy!

* Dress up diced watermelon with equal parts of chopped fresh mint and basil leaves, some feta cheese, and a sprinkle of sea salt.

* Add fresh mint leaves to plain or sparkling water for a nice refresher. Better yet, freeze mint leaves with water in ice cube trays. Cool your water with mint ice cubes.

* When ingesting spearmint, use only dried or fresh leaves. Use spearmint essential oil for aromatherapy or dilute it in a carrier oil when massaging it on the body.

* Add fresh mint leaves to a mixed fruit salad to make it extra special.

* Make a simple refreshing sachet by placing some dried mint leaves in a small square of fabric or cheesecloth. Tie the ends together and place it in drawers, closets, shoes, or anywhere you want to freshen with the aroma of mint.

* Here’s a fun activity if you like mint-chocolate. Wash and dry fresh mint leaves. One at a time, dip each leaf in your favorite melted chocolate. Place the leaves on a wax paper-lined dish. When all the leaves have been dipped, place the dish in the refrigerator until the chocolate has hardened. Enjoy!

* Try adding finely chopped mint leaves to your favorite chocolate pudding or ice cream.

* If you only have dried spearmint and need fresh, or vice versa, here’s the conversion rate: 1 part of dried mint = 3 parts of fresh. Example: 1 teaspoon of dried mint is equivalent to 1 tablespoon of chopped fresh mint.

* When adding fresh spearmint to a cooked dish, add it toward the end of cooking, or when cooking is finished, for best flavor. When adding dried spearmint to a cooked dish, add it early during cooking so it will have time to rehydrate and release its flavor.

Herbs and Spices That Go Well with Spearmint
Basil, cardamom, cilantro, coriander, dill, lemongrass, lovage, parsley

Foods That Go Well with Spearmint
Proteins, Legumes, Nuts, Seeds: Almonds, beans (esp. black, green, white), bean shoots, beef, cashews, chicken, chickpeas, lamb, lentils, lima beans, peanuts, peas, pine nuts, pistachios, pork, salmon (and other seafood), turkey, veal

Vegetables: Artichokes, asparagus, beets, bell peppers, broccoli, Brussels sprouts, cabbage, carrots, cauliflower, chiles, chives, cucumbers, eggplant, endive, garlic, ginger, jicama, kale, lettuce, marinated vegetables, mushrooms, onions, potatoes, radishes, scallions, shallots, spinach, squash (winter and summer), tomatoes, zucchini

Fruits: Apples, berries (esp. blueberries, raspberries, strawberries), citrus fruits (in general), coconut, figs, fruits (in general, dried and fresh), grapefruit, grapes and grape juice, lemon, lime, mangoes (green), melon (esp. honeydew), olives, oranges and orange juice, papaya (esp. green), peaches, pears, pineapple, watermelon

Grains and Grain Products: Barley, corn, couscous, grains (in general), millet, noodles (Asian, esp. rice), pasta, quinoa, rice, wheat berries

Dairy and Non-Dairy: Cheese (i.e., feta, ricotta), coconut milk, cream, yogurt

Other Foods: Bourbon, chocolate, gin, rum, sugar (esp. brown), vinegar (esp. balsamic, white wine)

Spearmint has been used in the following cuisines and dishes…
Asian cuisines, beverages (juleps, lassis, lemonades, mojitos, teas), cakes, candies, chutneys, curries, desserts, frostings, ice cream, Indian cuisine, jellies and jams, Mediterranean cuisines, Middle Eastern cuisine, Moroccan cuisine, pestos, pies, pilafs, raitas, risotto, salads (bean, fruit, grain, green, Thai, vegetables), salsas, sauces, soups, Southeast Asian cuisines, stuffings, tabbouleh, teas, Vietnamese cuisines

Suggested Food and Flavor Combos Using Spearmint
Add spearmint to any of the following combinations…

Artichokes + chiles
Balsamic vinegar + berries
Balsamic vinegar + peaches + ricotta cheese
Bell peppers + chiles + garlic + papaya + pineapple
Cardamom + ginger + lemon
Chiles + cilantro + garlic + olive oil + vinegar
Chiles + lemon + shallots + sugar
Citrus + zucchini
Cucumber + yogurt
Feta cheese + lentils
Feta cheese + peas + rice
Lemon + strawberries
Olive oil + white beans + white wine vinegar

Recipe Links
20 Recipes That Use Fresh Mint https://www.thekitchn.com/10-recipes-that-use-fresh-mint-kitchn-recipe-roundup-188533

50 Ways to Cook with Fresh, Fragrant Mint https://www.epicurious.com/ingredients/get-fresh-with-mint-recipes-gallery

20 Recipes for Mint Lovers https://www.foodandwine.com/seasonings/herbs/mint/mint

14 Recipes That Freshen Up Dinner with Mint https://www.brit.co/dinner-recipes-with-mint/

Thai Ground Beef Recipe with Mint, Carrots, and Peppers https://eatingrichly.com/thai-ground-beef-recipe-with-mint-carrots-and-peppers/

Spiced Beef Stew with Carrots and Mint https://www.epicurious.com/recipes/food/views/spiced-beef-stew-with-carrots-and-mint-237295

63 Fresh Mint Recipes to Help You Use Up That Bumper Crop https://www.tasteofhome.com/collection/fresh-mint-recipes/

Middle Eastern Tomato Salad https://kalynskitchen.com/recipe-favorites-middle-eastern-tomato/

27 Fresh Recipes for Leftover Mint https://www.taste.com.au/quick-easy/galleries/recipes-leftover-mint/0hgpmndk

18 Recipes for Leftover Mint https://www.theguardian.com/lifeandstyle/2014/aug/26/18-recipes-for-leftover-mint

Resources
https://www.elizabethrider.com/10-ways-use-fresh-mint/

https://kalynskitchen.com/cooking-with-fresh-mint/

https://www.specialtyproduce.com/produce/Mint_308.php

https://nutritiondata.self.com/facts/spices-and-herbs/226/2

https://www.healthline.com/nutrition/spearmint#TOC_TITLE_HDR_12

https://www.encyclopedia.com/plants-and-animals/plants/plants/spearmint

https://www.thespruceeats.com/make-your-own-dried-mint-1706225

https://www.meghantelpner.com/blog/10-amazing-things-you-can-do-with-mint/

https://www.epicurious.com/ingredients/how-to-buy-and-store-mint-peppermint-spearmint-article

Page, Karen. (2014) The Vegetarian Flavor Bible. New York, NY: Little, Brown and Company.


About Judi

Julia W. Klee (Judi) began her journey enjoying “all things food” in elementary school when she started preparing meals for her family. That love of food blossomed into a quest to learn more and more about health and wellness as related to nutrition. She went on to earn a BS Degree in Food and Nutrition, then an MS Degree in Nutrition. She has taught nutrition and related courses at the college level to pre-nursing and exercise science students. Her hunger to learn didn’t stop upon graduation from college. She continues to research on a regular basis about nutrition as it relates to health. Her hope is to help as many people as possible to enjoy foods that promote health and wellness.

Grapefruit

Grapefruit 101 – The Basics


Grapefruit 101 – The Basics

About Grapefruit
Grapefruits are large citrus fruits related to oranges, lemons and pomelos. Their flesh can be white, pink or red (ruby). Their skin color is yellow, sometimes with a pinkish hue. Grapefruits can range from 4 to 6 inches in diameter. Some have seeds, while others do not. They are juicy, tart and tangy with an underlying sweetness.

Grapefruits were discovered in Barbados in the 18th century. Botanists believe they were a natural cross breeding between the orange and pomelo, a citrus fruit that was brought to Barbados from Indonesia in the 17th century. The resulting fruit was named “grapefruit” in 1814 in Jamaica. The name reflects the fact that it grows in clusters like grapes.

Grapefruit trees were planted in Florida in the early 19th century. They became a commercial crop later that century. Florida is still a major grapefruit producer in America, along with California, Arizona, and Texas. Other countries that grow grapefruits commercially include Israel, South Africa, and Brazil.

Nutrition and Health Benefits
Grapefruits are an excellent source of Vitamin A and Vitamin C. They also supply a lot of pantothenic acid, copper, fiber, potassium, biotin, and Vitamin B1. Like most plant foods, grapefruit also contains health-promoting phytochemicals. One fresh pink grapefruit provides well over half the recommended daily intake of Vitamin C.

Immune Support. Being rich in Vitamin C, grapefruit supports the immune system, helping to fight symptoms and severity of colds and flu. This vitamin also helps to neutralize free radicals thereby reducing inflammation associated with asthma, osteoarthritis, and rheumatoid arthritis. By reducing inflammation through its Vitamin C content, grapefruit can also help to reduce the risk for cardiovascular disease, stroke, and cancer.

Lycopene. Red and pink grapefruits (but NOT white grapefruit) are rich in lycopene, a type of carotenoid. Lycopene appears to have anti-tumor effects through its capacity to fight free radicals in the body. Free radicals are unstable molecules that damage cells in their path. Antioxidants, such as lycopene, neutralize such harmful molecules, preventing damage such as inflammation, cardiovascular disease, and cancer.

Limonoids. Grapefruits are rich in phytonutrients called limonoids. This class of compounds fights tumor formation by sparking the liver to make toxic compounds more water-soluble so they can be excreted from the body. In laboratory tests, limonoids have been shown to help fight cancers of the mouth, skin, lung, breast, stomach, and colon.

Lower Cholesterol. Research studies have found that both white and red grapefruits lowered LDL cholesterol when grapefruit was added to the diet for a period of 30 days. Red grapefruit was found to be more than twice as effective at lowering triglyceride levels than white grapefruit. The researchers concluded that adding fresh red grapefruit could be beneficial for people with high cholesterol and triglyceride levels. [IMPORTANT NOTE: Compounds in grapefruit are known to increase blood levels of several prescription drugs, including statins. If you fall in this category, it would be wise to have the blood levels of your medications monitored if you suddenly increase your intake of grapefruit.]

DNA Repair. A flavonoid, naringenin, that is concentrated in grapefruit has been shown to help repair damaged DNA in human prostate cancer cells, as published in the Journal of Nutritional Biochemistry. The risk of prostate cancer increases with age. With age comes cellular division. The more we age, the more times our cells have divided. With each division, there is greater chance for DNA mutations to happen. Repairing DNA is one of the body’s main defense mechanisms against developing cancer. Naringenin helps to restore damaged DNA, thereby lowering the risk of cancer.

Precautions. As mentioned in the section “Lower Cholesterol” above, if you are taking certain prescription drugs, you may need to consult with your doctor before increasing your intake of grapefruit juice. When combined with grapefruit juice, some drugs, including cyclosporine, calcium channel blockers, the antihistamine terfenadine, the hormone estradiol, statin drugs, and the antiviral agent saquinavir may become more potent. This is because compounds in grapefruit slow the normal detoxification processes in the intestines and liver, hindering the body’s ability to break down and eliminate these drugs.

How to Select Grapefruit
Choose grapefruits that are firm and feel heavy for their size. They should have plump, glossy skin. Grapefruits do not need to be uniform in color to be of good quality. Skin discolorations and small scratches do not affect the quality of the fruit.

Signs of age and decay include an overly soft spot near the stem end of the fruit. Areas that appear waterlogged should also be avoided when choosing grapefruits. Also avoid those that are overly wrinkled or rough.

How to Store Grapefruit
Store grapefruits at room temperature for up to a week, or up to three weeks in the refrigerator crisper drawer (set on low humidity, with the air vents open). Grapefruits are juicier when at room temperature, so it may be helpful to allow them to warm up before eating, if they were stored in the refrigerator.

How to Prepare a Grapefruit
Even though you very likely won’t be eating the peel, do rinse them off with cool water before cutting into your grapefruit. It’s important to rinse off any bacteria that may be lingering on the surface so you don’t transfer it onto the flesh that you will eat, when cutting into it with a knife.

Grapefruits may be cut in half horizontally, then sectioned with a knife along the membranes. A spoon can then be used to remove the flesh. Grapefruits may also be cut into quarters so you can fold the peel back and release the flesh that way. Remove as much of the white pith in the process, since that is rather bitter. The sections can be cut as desired. They can also be eaten like oranges, peeling the grapefruit with a knife.

Here’s a video demonstrating ways to cut grapefruit, …

Quick Ideas and Tips for Using Grapefruit
* Try a salad with red grapefruit sections, avocado slices, and slivered fennel on a bed of arugula and other salad greens. Top with a citrus or honey mustard vinaigrette dressing.

* Try a grapefruit salsa by combining chopped grapefruit sections, avocado, mango, chili peppers, lime and grapefruit juice, olive oil, and lots of chopped herbs (basil, cilantro, or mint). Use as a topping for fish, chicken, or for scooping up with bread or chips.

* Grapefruit picked earlier in the season will be tarter than those picked late in the season. They are at their peak season from early winter through Spring.

* Add grapefruit sections to a smoothie. Blend together 1 medium grapefruit (peeled and seeds removed), 1 large sweet apple, 1 large banana, 2 cups fresh spinach, about ½ cup milk of choice (or water or orange juice), 2 or 3 ice cubes, and ½ tsp fresh grated ginger (optional).

* Are you looking for a way to make grapefruit taste better without loading it with sugar? LIGHTLY sprinkle just a LITTLE salt on your cut grapefruit. Yes, salt. NOT a lot. Just a little will cut the sourness or bitterness, and actually make it taste sweeter.

* Try a simple citrus salad for a quick snack or dessert. Combine cut grapefruit and orange sections with some vanilla yogurt, and a drizzle of honey (optional). Give it a little stir and you’re done. You could dress it up more with a sprinkle of ground flax seeds and/or a little granola for crunch.

* Try adding grapefruit sections to your favorite morning oatmeal. Round it out with some coconut milk and a drizzle of honey, if you want the added sweetness. Top it with toasted walnuts for some added crunch.

* For something different, try broiled grapefruit. Cut the grapefruit in half (horizontally) and remove the seeds. Place cut side up on a baking sheet and sprinkle each half with 1 to 1-1/2 tablespoons of brown sugar. Broil until the sugar has melted and started to bubble, about 3 to 8 minutes. Remove the pan from the oven and allow the grapefruit halves to cool just a bit. Enjoy while it’s still warm!

Herbs and Spices That Go Well with Grapefruit
Basil, cardamom, chili pepper flakes, cilantro, cinnamon, cloves, coriander, mint, mustard, nutmeg, parsley, rosemary, salt, tarragon, vanilla

Foods That Go Well with Grapefruit
Proteins, Legumes, Nuts, Seeds: Almonds, beef, cashews, chicken, fish, hazelnuts, pistachios, pork, salmon, scallops, shrimp, sunflower seeds, walnuts

Vegetables: Artichokes (Jerusalem), arugula, beets, cabbage (i.e., napa), celery, celery root, chicory, chiles, cucumber, endive (Belgian), fennel, ginger, greens, jicama, kale, scallions, spinach, watercress

Fruits: Avocados, bananas, cherries, coconut, dates, kiwi, lemon, lime, melon, oranges, passion fruit, pears, pineapple, pomegranates, raspberries, strawberries

Grains and Grain Products: Bulgur (wheat), farro, millet, oats, quinoa, rice, wild rice

Dairy and Non-Dairy: Cheese (i.e., feta, Parmesan, ricotta), coconut cream, mascarpone, yogurt

Other Foods: Agave nectar, caramel, honey, maple sugar, maple syrup, mustard, oil (olive), soy sauce, sugar (i.e., brown, coconut, date), vinegar (i.e., champagne, rice wine, sherry, white wine), vodka, wine (i.e., sparkling)

Grapefruits have been used in the following cuisines and dishes…
Compotes, drinks (i.e., sparkling wine cocktails), granita, ices, salad dressings, salads (i.e., fruit, grain, green), sauces, smoothies, sorbets

Suggested Food and Flavor Combos Using Grapefruit
Add grapefruit sections to any of the following combinations…

Arugula + olive oil
Arugula + hazelnuts + pomegranates
Avocado + salad greens + fennel
Honey + mint
Maple syrup + strawberries


Recipe Links

21 Delicious Ways to Cook with Grapefruit https://www.self.com/gallery/delicious-grapefruit-recipes

Top 4: Grapefruit Recipes https://www.sprouts.com/healthy-living/top-4-grapefruit-recipes/

29 Sweet and Tangy Grapefruit Recipes https://www.epicurious.com/ingredients/10-sweet-and-tangy-grapefruit-recipes-gallery

14 Ways to Upgrade Your Grapefruit Game https://www.delish.com/cooking/g1332/grapefruit-recipes/

Pink Detox Salad https://www.cookingclassy.com/pink-detox-salad/

32 Great Grapefruit Recipes https://www.tasteofhome.com/collection/great-grapefruit-recipes/

9 Grapefruit Recipes Better Than Just Dumping Sugar on Top https://greatist.com/eat/grapefruit-recipes#1

Grapefruit Smoothie Bowl https://www.hummusapien.com/grapefruit-smoothie-bowl/#tasty-recipes-22986

11 Unexpected Ways to Use Grapefruit https://www.foodbeast.com/news/unexpected-ways-to-use-grapefruit/

Broiled Grapefruit https://www.williams-sonoma.com/recipe/broiled-grapefruit.html

Freekeh Tabbouleh with Grapefruit https://www.forksoverknives.com/recipes/amazing-grains/freekeh-grapefruit-tabbouleh/

Grain Salad with Toasted Walnuts, Dates, and Grapefruit https://walnuts.org/recipe/grain-salad-with-toasted-walnuts-dates-and-grapefruit/

Ancient Grain Salad with Avocado and Grapefruit https://www.taste.com.au/recipes/ancient-grain-salad-avocado-grapefruit/49ba980a-599b-4c53-9761-862198d98939

Grapefruit Grain Salad with Roasted Chickpeas https://www.onegreenplanet.org/vegan-recipe/grapefruit-grain-salad-roasted-chickpeas-vegan/

Millet Salad with Grapefruit, Olives and Chickpeas https://www.lastingredient.com/millet-salad-with-grapefruit-olives-and-chickpeas/

Farro and Spinach Salad with Grapefruit and Goat Cheese https://www.self.com/recipe/farro-spinach-salad-grapefruit-goat-cheese

California Wild Rice, Arugula, Grapefruit, Toasted Pecan Salad https://wholegrainscouncil.org/recipes/california-wild-rice-arugula-grapefruit-toasted-pecan-salad

Black Rice Salad with Avocado and Grapefruit https://www.thekitchn.com/vegetarian-lunch-black-rice-salad-with-avocado-and-grapefruit-166905#post-recipe-8301

Pink Grapefruit, Black Bean, and Rice Salad Recipe https://www.womanandhome.com/us/recipes/pink-grapefruit-black-bean-rice-salad/

Grapefruit-Coconut Oatmeal http://www.theoatmealartist.com/grapefruit-coconut-oatmeal/

Grapefruit Marmalade https://www.allrecipes.com/recipe/272814/grapefruit-marmalade/

Grapefruit Baked Oatmeal with Walnut Streusel http://immaeatthat.com/2016/01/28/grapefruit-baked-oatmeal-walnut-streusel/


Resources
https://www.finecooking.com/article/grapefruit

https://producemadesimple.ca/grapefruit-go-well/

https://minimalistbaker.com/grapefruit-green-smoothie/#_a5y_p=3119340

http://www.whfoods.com/genpage.php?tname=foodspice&dbid=25#nutritionalprofile

https://www.thekitchn.com/salted-grapefruit-266959

http://howsweetthisisblog.com/2014/02/five-fresh-grapefruit-recipes-even-dont-like-grapefruit/

https://www.allrecipes.com/recipe/215980/simple-broiled-grapefruit/

Page, Karen. (2014) The Vegetarian Flavor Bible. New York, NY: Little, Brown and Company.

About Judi

Julia W. Klee (Judi) began her journey enjoying “all things food” in elementary school when she started preparing meals for her family. That love of food blossomed into a quest to learn more and more about health and wellness as related to nutrition. She went on to earn a BS Degree in Food and Nutrition, then an MS Degree in Nutrition. She has taught nutrition and related courses at the college level to pre-nursing and exercise science students. Her hunger to learn didn’t stop upon graduation from college. She continues to research on a regular basis about nutrition as it relates to health. Her hope is to help as many people as possible to enjoy foods that promote health and wellness.
Banana-Strawberry Nice Cream

Banana-Strawberry Nice Cream

Here’s a simple recipe for a refreshing, healthful dessert. It makes a lot, so it can easily feed two people for a nice, light dessert or snack. To see a video demonstration on how to make this delicious mixture, watch below!

Enjoy!
Judi

Banana-Strawberry Nice Cream
Makes 2 Servings

1 Frozen banana
4 Large strawberries, fresh or frozen
10 Red grapes, fresh or frozen
2 to 4 Tbsp Extra creamy oat milk OR coconut milk

Combine all ingredients in a blender and process until smooth, thick and creamy. Add more milk (of choice) to make it softer, if needed. Enjoy!

Tip: If using all frozen fruit, more milk may be needed to help it blend up and become creamy. If using some fresh fruit, less milk can be used to make it a creamy texture. Add more milk, and maybe even some veggies of choice, and make this into a delicious smoothie!


About Judi

Julia W. Klee (Judi) began her journey enjoying “all things food” in elementary school when she started preparing meals for her family. That love of food blossomed into a quest to learn more and more about health and wellness as related to nutrition. She went on to earn a BS Degree in Food and Nutrition, then an MS Degree in Nutrition. She has taught nutrition and related courses at the college level to pre-nursing and exercise science students. Her hunger to learn didn’t stop upon graduation from college. She continues to research on a regular basis about nutrition as it relates to health. Her hope is to help as many people as possible to enjoy foods that promote health and wellness.
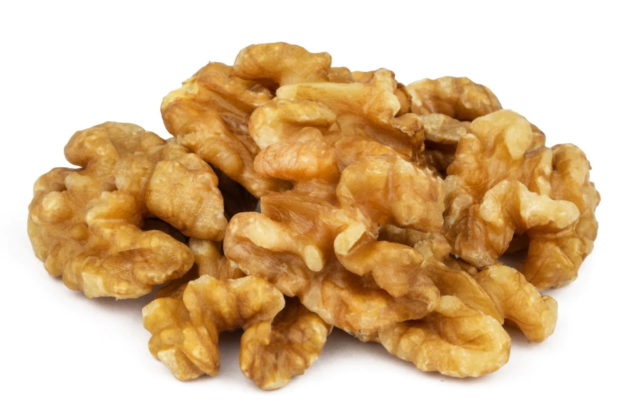
Walnuts

Walnuts 101 – The Basics


 Walnuts 101 – The Basics

About Walnuts
Walnuts have been cultivated for thousands of years, with the different types having different origins. There are many different species of walnut trees, with the three most popular being the English (or Persian) walnut, the black walnut, and the white (or butternut) walnut. The English walnut is the most popular type in the United States. It has a thinner shell that is easily broken with a nutcracker. The black walnut has thicker shells that are harder to crack, and a pungent, distinctive flavor. The white walnut has a sweeter, oilier flavor than the other two common types of walnuts. It is not widely available and may be hard to find in grocery stores.

English walnuts originated in India and areas surrounding the Caspian Sea. Hence, it is also known as the Persian walnut. In the 4th century, Romans introduced walnuts to many European countries, where they have been grown ever since. Throughout history, walnut trees have been highly prized, not only for their very long lifespan, but for the fact that they produced food, medicine, shelter, dye, and lamp oil for many civilizations throughout history.

Black and white walnuts are native to North America, in the Central Mississippi Valley and Appalachian areas. Walnuts had an important role in the diets and lifestyles of both Native Americans and early European settlers.

Today, China is the largest commercial producer of walnuts, harvesting about 360,000 metric tons each year. The United States falls second in line, harvesting about 294,000 metric tons of walnuts annually. Within the United States, most walnuts are grown in California.

Nutrition and Health Benefits
Walnuts are an excellent source of anti-inflammatory omega-3 essential fatty acids. In fact, a 1/4-cup serving of English walnuts provides 113% of the recommended daily amount of omega-3 fats! They also contain noteworthy amounts of molybdenum, biotin, calcium, chromium, iron, magnesium, phosphorus, potassium, selenium, vanadium, and zinc. Walnuts also supply a lot of phytonutrients with important health benefits, along with Vitamin E.

As long as we don’t have a tree nut allergy, it is recommended that we eat about one ounce of walnuts or other nuts a day. With walnuts, that amounts to 7 whole walnuts or 14 walnut halves.

Cardiovascular Benefits. The benefits of walnuts on heart and circulatory health have been widely studied and verified by research. Walnuts contain compounds with strong antioxidant and anti-inflammatory properties that positively affect our blood pressure, blood composition (including blood cholesterol and fat levels), inflammation-regulating factors in the body, and flexibility of blood vessel walls. These benefits are attributed to the omega-3 fatty acids and other healthy fats found in walnuts, along with their generous supply of phytonutrients. Researchers have found that people who ate as few as four walnuts a day, showed improved biomarkers.

Metabolic Syndrome. Metabolic syndrome is a term that includes a number of simultaneous problems including high blood pressure, imbalanced blood fats and cholesterol (low HDL with high total cholesterol, LDL, and triglycerides), and obesity. Recent research has shown that eating one ounce of walnuts a day for 2 to 3 months can reduce the problems associated with metabolic syndrome. Furthermore, these benefits were achieved with the loss of belly fat and without weight gain (which one might expect from adding nuts to the diet). If you have metabolic syndrome, speak with your healthcare provider about adding some walnuts to your daily routine.

Benefits for Type 2 Diabetes. In addition to other health problems, people with Type 2 diabetes are particularly at risk for cardiovascular issues. Reducing those risks is usually a part of the healthcare plan for such patients. Repeated research on the health value of walnuts has shown improved responses in the cardiovascular system of individuals with Type 2 diabetes following meals containing a small amount of walnuts on a daily basis. A mere one ounce of walnuts daily has shown such benefits.

Anti-Cancer Benefits. Walnuts have shown measurable anti-cancer benefits due to their array of antioxidant and anti-inflammatory compounds. In particular, the risk of prostate and breast cancers has been shown to be reduced by the inclusion of walnuts in the diet. However, in this case, subjects included three ounces of walnuts per day in their foods instead of the usually recommended one ounce.

How to Select Walnuts
When buying whole walnuts still in their shells, select ones that feel heavy for their size. The shells should be intact and not cracked, pierced or stained. Those can indicate that the nuts inside have decayed.

Shelled walnuts are usually available prepackaged. They may be in halves, in pieces, or chopped. Look for the “Best by” date on the packaging and select one with the farthest date in the future to help ensure freshness.

When buying walnuts in bulk bins, be sure there is a fast turnover of the product, to help ensure they are fresh.  Avoid any that look rubbery or shriveled. If possible, smell them to be sure they are not rancid. If they have an “off” odor, choose something else.

How to Store Walnuts
Walnuts have a high fat content, which makes them very perishable. They will go rancid when exposed to warmth for long periods of time. Shelled walnuts should be kept in an airtight container in the refrigerator, where they will keep for six months. They may also be stored in the freezer, where they will keep for one year.

Walnuts that are still in their shells will keep best in the refrigerator. However, they may be kept in a cool, dry, dark place for up to six months.

If you notice an “off” odor to any walnuts that you have, they have become rancid and should be thrown away. Some have described the smell of rancid walnuts as being similar to paint thinner. If they don’t smell fresh, with the usual aroma that walnuts should have, throw them away. When in doubt, toss them out!

Quick Ideas and Tips for Using Walnuts
* Add toasted walnuts to your favorite green salad.

* To easily toast walnuts on the stove, heat a large frying pan over medium-high heat. Add walnuts to a dry pan, adding only enough to create a single layer. Cook for 5 minutes, stirring often. Transfer to a plate to cool. Don’t walk away during the process. Walnuts can burn fast!

* Try adding walnuts to your favorite smoothie.

* Try a simple salad with spinach, arugula, and/or mixed greens. Top the greens with sliced red onion, toasted walnuts, and raspberries. Top with a raspberry vinaigrette dressing.

* Add chopped walnuts to your breakfast oatmeal. Dress it up even more by topping it with vanilla yogurt.

* Wait to shell and/or chop walnuts until you’re ready to use them. Since they are very perishable, this will help to keep them fresh when you need them.

* Make your own trail mix with a mixture of walnuts and other nuts, seeds, and dried fruit of choice. Example: Chopped walnuts, slivered almonds, sunflower seeds, raisins, dried apple pieces, and diced dried apricots. Toss in some dried coconut for a little tropical flavor.

* Top yogurt with chopped walnuts and fresh fruit.

* Top roasted Brussels sprouts with toasted walnuts.

* Try a kale salad with diced fresh pears and chopped walnuts. Top with your favorite vinaigrette dressing.

* For added crunch, flavor and protein, add walnuts to brown rice in vegetarian dishes.

* Add chopped toasted walnuts to your favorite stuffed squash recipe.

* When eating shelled walnuts, try to include the thin skin that is found on the walnut meat itself. Some resources recommend removing it before eating the walnut. That’s simply because it has a slightly bitter flavor. However, that bitterness comes from important, very healthful compounds found only in the skin. In fact, 90% of the phenols found in walnuts are in that skin. So, if you can bear to eat it, do so for your own health benefits.

* Add chopped walnuts to your favorite poultry stuffing.

* Add walnuts to your favorite sautéed vegetables.

* Try homemade walnut granola. In a large bowl, combine ½ cup of honey, 3 tablespoons of molasses, 1 tablespoon of vanilla, a dash of salt, and a teaspoon each of spices, such as cinnamon, ginger and/or nutmeg. Stir well to combine the ingredients. Add 6 to 8 cups of rolled oats to the honey mixture and toss to coat well. Spread the mixture on a cookie sheet and bake at 275°F (135°C) for 45 minutes. Cool and mix in ½ to 1 cup of chopped walnuts. Enjoy!

* To roast walnuts, it’s best to do so at a low oven temperature to preserve the healthy qualities of the oils in the nuts. Spread walnuts on a cookie sheet and roast at 160-170°F (about 75°C) for 15 to 20 minutes. Allow to cool and enjoy!

Herbs and Spices That Go Well with Walnuts
Basil, cinnamon, cumin, nutmeg, parsley, salt, sage, thyme, vanilla

Foods That Go Well with Walnuts
Proteins, Legumes, Nuts, Seeds: Bacon, beans (in general), beef, cashews, chicken, eggs, fish, hazelnuts, hemp seeds, pork, pumpkin seeds, turkey

Vegetables: Artichokes, artichoke hearts, arugula, beets, bell peppers (esp. red roasted), cabbage, carrots, celery, celery root, chard, cucumbers, eggplant, endive, fennel, garlic, greens, leeks, lettuce, mushrooms, onions, parsnips, spinach, squash (summer and winter), sweet potatoes, tomatoes, zucchini

Fruits: Apples, apricots (esp. dried), avocados, bananas, berries, cherries, coconut, cranberries, currants, dates, figs, fruits (in general, dried and fresh), grapefruit, grapes, kumquats, lemon, olives, oranges (juice and zest), peaches, pears, plums (dried and fresh), pomegranate, pumpkin, quinces, raisins

Grains and Grain Products: Amaranth, barley, bulgur, couscous, whole grains (in general), muesli, oats, oatmeal, pasta, phyllo dough, quinoa, rice, spelt berries, wheat berries

Dairy and Non-Dairy: Butter, cheese, cream, ice cream, mascarpone, yogurt

Other Foods: Caramel, chocolate (dark, milk, white), coffee, honey, maple syrup, miso, molasses, oil, pomegranate molasses, sugar, vinegar (esp. sherry), wine (sweet)

Walnuts have been used in the following cuisines and dishes…
Baked goods (i.e., breads, cakes, cookies, muffins, pastries, tarts), baklava, cereals (hot), desserts (pies, fruit crisps), granola, Greek cuisine, pancakes, pastas, pâtés, pestos, pizzas, salads, sauces, snacks, soups, stuffings, tabbouleh, tapenade, trail mix

Suggested Food and Flavor Combos Using Walnuts
Add walnuts to any of the following combinations…

Apples + beets [in a salad]
Apples + cinnamon [in oatmeal]
Apples + wheat berries
Arugula + beets + feta cheese
Basil + eggplant
Beets + spinach
Roasted bell peppers + garlic + parsley [with pasta]
Blue cheese + onions
Bread crumbs + garlic + olive oil + Parmesan cheese
Butternut squash + sage
Carrots + raisins
Cheese + fruit
Cranberries + ginger + orange + vanilla
Figs + honey + yogurt
Mushrooms + thyme

Recipe Links
Sweet & Spicy Walnuts https://walnuts.org/recipe/sweet-spicy-walnuts/

Mexican Dark Chocolate Cinnamon-Coated Walnuts https://walnuts.org/recipe/mexican-dark-chocolate-cinnamon-coated-walnuts/

17 Delicious Sweet and Savory Walnut Recipes You’ll Go Nuts For https://morningchores.com/walnut-recipes/

40+ Nutty Walnut Recipes https://www.myrecipes.com/ingredients/recipes-with-walnuts

Roast Beef with Walnut, Thyme, and Sea Salt Crust https://fishernuts.com/recipes/entrees/beef-roast-with-walnut-thyme-and-sea-salt-crust

Chinese Honey-Glazed Beef and Walnuts https://www.daringgourmet.com/chinese-beef-with-walnuts/

Spicy Beef-Style Walnut Meat https://www.plantpowercouple.com/recipes/walnut-meat-beef-style/

Walnut Meat (4 Ways) https://simple-veganista.com/walnut-meat/

Walnut Recipes https://www.foodandwine.com/nuts-seeds/nuts/walnuts/easy-walnut-recipes

Beef with Candied Walnuts and Garlic https://www.rachaelrayshow.com/recipes/make-your-own-fancy-take-out-beef-with-candied-walnuts-and-garlic

Walnut Pear Yam Skillet https://walnuts.org/recipe/walnut-pear-yam-skillet/

Walnut Pear and Oat Nuggets https://walnuts.org/recipe/walnut-pear-and-oat-nuggets/

Pears with Walnut and Spinach with Citrusy Dressing https://walnuts.org/recipe/pears-with-walnut-and-spinach-with-citrusy-dressing/

Walnut Broccoli Apple Slaw https://walnuts.org/recipe/walnut-broccoli-apple-slaw/

Walnut Pear and Avocado Bowl https://walnuts.org/recipe/walnut-pear-and-avocado-bowl/

Creamy Egg Cups https://walnuts.org/recipe/creamy-egg-cups/

California Walnut Meatless Meatballs https://walnuts.org/recipe/california-walnut-meatless-meatballs/

Walnut Pear Quesadilla with Spicy Pear Salsa https://walnuts.org/recipe/walnut-pear-quesadilla-with-spicy-pear-salsa/

50 Crunchy Walnut Recipes for the Seriously Nutty https://www.tasteofhome.com/collection/walnut-recipes/

10 Easy and Delicious Ways to Use Walnut in Your Diet https://timesofindia.indiatimes.com/life-style/food-news/10-easy-and-delicious-ways-to-use-walnut-in-your-diet/photostory/67572243.cms

Unbelievable Walnut Crusted Chicken https://sallysbakingaddiction.com/unbelievable-walnut-crusted-chicken/

Stir-Fried Walnut Chicken https://www.tasteofhome.com/recipes/stir-fried-walnut-chicken/

Parsnip, Apple, and Carrot Salad https://producemadesimple.ca/carrot-parsnip-apple-salad/

Portobello Mushroom and Walnut Salad https://producemadesimple.ca/portobello-mushroom-walnut-salad/

Roasted Halibut with Walnut Crust https://www.epicurious.com/recipes/food/views/roasted-halibut-with-walnut-crust-240087

Turkey with Walnut-Parmesan Sauce https://www.foodandwine.com/recipes/turkey-with-walnut-parmesan-sauce

Walnut Crusted Pork Chops https://www.ketoresource.org/keto_recipes/keto-walnut-crusted-pork-chops-dinner-recipe/


Resources
https://walnuts.org/how-to/flavor-pairings-with-walnuts/

https://food.ndtv.com/food-drinks/walnut-for-weight-loss-5-easy-and-yummy-ways-to-include-walnuts-in-your-daily-diet-2199195

https://recipes.timesofindia.com/us/recipes/walnut-raspberry-salad/rs63227799.cms?_ga=2.44311140.1901786837.1609278519-359726741.1609278519

https://www.medicalnewstoday.com/articles/309834#diet

https://bottomlineinc.com/life/nuts/18-delicious-ways-to-enjoy-heart-healthy-walnuts

https://producemadesimple.ca/nuts/

http://www.whfoods.com/genpage.php?tname=foodspice&dbid=99

https://walnuts.org/how-to/how-to-buy-care/

https://www.thespruceeats.com/how-to-toast-walnuts-2216935

Page, Karen. (2014) The Vegetarian Flavor Bible. New York, NY: Little, Brown and Company.


About Judi

Julia W. Klee (Judi) began her journey enjoying “all things food” in elementary school when she started preparing meals for her family. That love of food blossomed into a quest to learn more and more about health and wellness as related to nutrition. She went on to earn a BS Degree in Food and Nutrition, then an MS Degree in Nutrition. She has taught nutrition and related courses at the college level to pre-nursing and exercise science students. Her hunger to learn didn’t stop upon graduation from college. She continues to research on a regular basis about nutrition as it relates to health. Her hope is to help as many people as possible to enjoy foods that promote health and wellness.
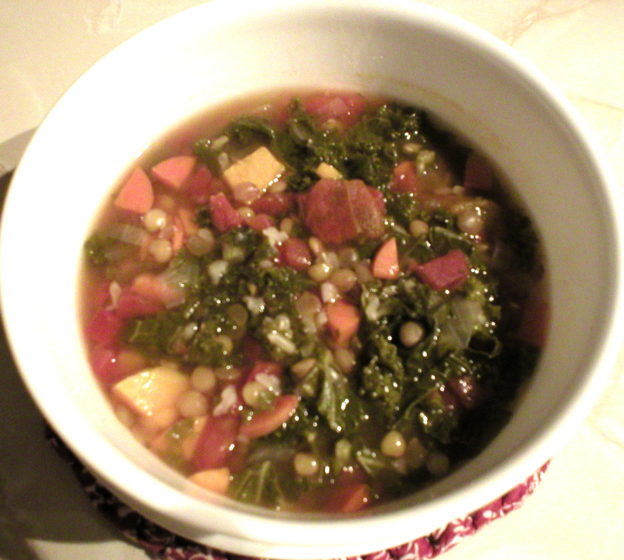
Lentil Soup with Sweet Potatoes and Kale

Lentil Soup with Sweet Potatoes and Kale

Here’s a delicious soup, made without added oil, is easy to put together and feeds a crowd. The recipe can easily be adjusted to make more or less, as needed. See a video demonstration below on how to make this soup. The recipe is below the video.

Enjoy!
Judi

Lentil Soup with Sweet Potatoes and Kale
Makes 8 Servings

8 cups vegetable broth
2 cups water
2-1/2 cups small sweet potato cubes (about 1 large sweet potato)
6 cups chopped kale (1 bunch)
1-1/2 cups sliced carrots
1 cup diced yellow onion
1 cup brown lentils, rinsed
2 (14.5 oz) cans diced tomatoes
½ cup rice of choice, rinsed
1-1/2 Tbsp dried parsley
1 Tbsp dried thyme
Salt to taste, optional

Add all ingredients to a large pot with a lid. Stir to combine the ingredients. Cover the pot and bring to a boil. Lower heat to simmer, stirring occasionally, for 45 minutes to 1 hour. Enjoy!

Tips: To shorten preparation time, you can use pre-cut fresh kale sold in the produce section of many grocery stores. If that’s not an option, you could also use frozen, chopped kale. One 12-ounce bag should be enough. If that’s not available, use most of a 16-ounce bag. Frozen, diced onions may be used, as well as frozen carrots and sweet potato cubes. When you use frozen vegetables in place of fresh, they will not absorb as much liquid as the fresh vegetables would, so you should omit the 2 cups of water to start with. As the soup cooks, if you want more broth, add the water or more vegetable broth.


About Judi

Julia W. Klee (Judi) began her journey enjoying “all things food” in elementary school when she started preparing meals for her family. That love of food blossomed into a quest to learn more and more about health and wellness as related to nutrition. She went on to earn a BS Degree in Food and Nutrition, then an MS Degree in Nutrition. She has taught nutrition and related courses at the college level to pre-nursing and exercise science students. Her hunger to learn didn’t stop upon graduation from college. She continues to research on a regular basis about nutrition as it relates to health. Her hope is to help as many people as possible to enjoy foods that promote health and wellness.

Mung Beans

Mung Beans 101 – The Basics


Mung Beans 101 – The Basics

About Mung Beans
Mung beans are small, oval green beans that are members of the legume family. They are native to India, and have been cultivated for thousands of years. Their popularity led them to quickly spread throughout China and parts of Southeast Asia.

In the United States, they are often sold as sprouts in the produce department of some grocery stores, and many health food stores. Mung beans have a slightly sweet flavor and can be enjoyed in a variety of ways, both cooked and sprouted. They are often used in salads, soups, and stir-fries.

Nutrition and Health Benefits of Mung Beans
Mung beans are high in fiber, with a one cup serving providing around 15 grams, which is over half the daily recommended intake of fiber! They also are a good source of folate, manganese, Vitamin B1, phosphorus, iron, copper, potassium, and zinc. They also supply appreciable amounts of Vitamins B2, B3, B5, B6, and selenium. Mung beans are considered to be one of the best plant sources of protein since they are rich in essential amino acids. That’s a lot to say for the humble mung bean!

Antioxidants. Mung beans are high in assorted antioxidants. Antioxidants help to neutralize potentially harmful molecules, known as free radicals, in the body that can raise our risk for various diseases. High levels of free radicals cause cellular damage which increases inflammation, thereby increasing our risk for heart disease, cancer, diabetes, and assorted autoimmune diseases. Research studies have found that the antioxidants in mung beans can neutralize harmful free radicals known to cause lung and stomach cancers.

Interestingly, researchers have found that the number of antioxidants in sprouted mung beans increases up to six times more than those found in unsprouted mung beans.

Improved Cholesterol Levels. Animal studies have shown that the antioxidants in mung beans may lower levels of LDL cholesterol (low-density lipoprotein cholesterol) while also protecting it from harmful free radicals. Simultaneously, human studies have shown that an increased intake of legumes (in general) lowers our LDL levels.

Reduced Blood Pressure. It is estimated that one-third of Americans has high blood pressure. Mung beans are high in specific nutrients, namely potassium, magnesium, and fiber, that are known to lower blood pressure. Adults who consume more beans have been shown to have lower blood pressure. Reinforcing that point, studies demonstrated that specific proteins in mung beans have been found to suppress enzymes that naturally raise blood pressure. This is all the more reason to include legumes of any kind in your diet as often as you can!

Improved Digestive Health. Mung beans are particularly high in fiber and resistant starch. Together, they promote the movement of bowel contents and support the health of our gut by feeding bacteria in the lower intestines. Furthermore, the carbohydrates in mung beans appear to be easier to digest, promoting less flatulence than other legumes.

Improved Blood Sugar Levels. Mung beans have several properties that can help to control blood sugar. The high fiber and protein in mung beans work together to slow the release of sugar into the bloodstream. Animal studies have found that the antioxidants in mung beans lower blood sugar levels and help insulin to work more effectively.

Pregnancy Support. Pregnant women are advised to consume plenty of folate to prevent neural tube defects in their newborn children. Most people don’t get enough folate in their usual diets. Including mung beans in the diet while pregnant can help to fill that need. One cup of cooked mung beans provides 80 percent of the recommended daily intake of folate.

How to Select Mung Beans
Unless you live where mung beans are locally grown, the only ones you’ll find will be dried. They are sold whole and split, but whole mung beans are more common. They should be about ¼-inch long, brightly colored (usually deep green, but sometimes reddish-brown), smooth and oval in shape, and have smooth, undamaged skins (unless you purchased split mung beans).

How to Store Mung Beans
Store dried mung beans in an airtight container in a cool, dry place away from sunlight. For best results, use dried beans within a year. They will be very edible beyond that, but may take longer to cook. Dried beans dry out even more with age, so older ones will take longer to cook.

If you have store-bought mung bean sprouts, store them in the refrigerator in their original container and use them by the “Best by” date on the package. Do not wash the sprouts until you are ready to use them.

Unwashed bean sprouts that you grew yourself should be stored in the refrigerator in a plastic container or bag with a clean cloth or paper towel under the sprouts to absorb any excess moisture. Another paper towel or cloth may also be placed on top of them for moisture absorption. If you have a lot of sprouts in the container, you could layer the sprouts with more paper towels or cloths for moisture absorption. The container or bag can be left slightly open to allow for air flow to help keep the sprouts dry. They should be used within 5 days. Do not wash them until you are ready to use them.

Once you have cooked your mung beans, store them in the refrigerator for up to 5 days. If you cannot use them within that time, freeze them in an airtight container, and use them within three months.

How to Prepare Mung Beans

Soaking Mung Beans. Soaking dried mung beans before cooking is optional. Since they are small beans, they cook quickly. However, presoaking them helps to reduce their phytic acid content, making them easier to digest, and also allows them to cook faster. To soak mung beans, first sort through your dried mung beans and remove any damaged or discolored beans, along with any debris. Place them in a bowl or jar with a lid. Rinse then drain the beans. Then fill the bowl or jar with water and cover it. Allow the mung beans to soak for 8 to 12 hours. Drain the water, then rinse and drain them again. Your soaked mung beans can then be sprouted or cooked as desired.

Cooking Unsoaked Mung Beans. Presoaking mung beans before cooking is optional. Since they are small beans, they cook quickly. To cook mung beans that were not presoaked, first sort through your dried mung beans and remove any damaged or discolored beans, along with any debris. Rinse the dried mung beans well, then drain. The standard rule of thumb is to place one part of mung beans to three parts of water in a pot. Bring them to a boil, then reduce the heat to simmer. Cook them about 30 minutes, or until tender. Drain any remaining water, then use as desired. Store extra in a covered container in the refrigerator and use within 5 days.

Cooking Soaked Mung Beans. Soaked mung beans will cook faster than those that were not presoaked. Place one part of beans to three parts of water in a pot. Bring it to a boil, then reduce heat and simmer until they are tender to your liking. They will cook faster than those that were not soaked first, so monitor them so they do not overcook and become mushy. Drain any remaining water, then use as desired. Store extra in a covered container in the refrigerator and use within 5 days.

Sprouting Mung Beans
Mung beans may be sprouted in a jar or on a tray. They are easy to sprout, and are usable in as little as 2 days. For instructions on how to sprout mung beans in the simplest way, visit Mumm’s Sprouting Seeds on their mung bean page at  https://mumms-seeds.sherpaonline.io/products/cat/66

Judi in the Kitchen video demonstration of growing mung bean sprouts in a jar, start to harvest … https://youtu.be/Ky0LWJw1uNs

To grow thick, long mung bean shoots, sprout them on a plate or tray under a cloth or paper towel. On the third day, add some weight on top. A plate or book may be enough to provide some added weight while still allowing air flow (which is vital, or the sprouts may spoil). For detailed instructions, visit the Sprout House at https://sprouthouse.com/blog/how-to-grow-fatter-tender-mung-beans/

Quick Ideas and Tips for Using Mung Beans
* Presoaking mung beans is optional. They are small and quick to cook, compared with other beans like kidney beans. However, they may be soaked for up to 12 hours (8 hours is usually enough) to remove gas-causing compounds, if preferred.

* Split mung beans, with the outer hull removed, are called moong dal. The split version has slightly less fiber and cooks faster than the whole beans.

* Mung beans don’t have to be sprouted. They can also be pressure-cooked, sautéed, simmered, and stir-fried (in addition to being sprouted).

* The US Dry Bean Council recommends adding ¼ teaspoon of baking soda per pound of dried beans to cooking water. This helps them to soften up and cook faster. This will be especially helpful if your beans have been stored for over a year. The older they are, the drier they get and the longer they take to cook.

* If you can take the time, sprouting mung beans before cooking them is a valuable step in reducing their phytic acid, which reduces the absorption of specific minerals in a meal.

* Unsoaked dried mung beans will triple in bulk when boiled. So, one cup of unsoaked mung beans will yield three cups of cooked. When cooking soaked and/or sprouted mung beans, they will not soak up quite as much water, so they will not quite triple in yield.

* Add mung beans to a stir-fry with broccoli and cabbage.

* Try using mung beans in place of lentils in a recipe.

* Include cooked mung beans in minestrone or vegetable soup.

* If you overcooked mung beans, simply blend them with your favorite hummus ingredients to make mung bean hummus.

* Add mung bean sprouts or cooled cooked mung beans to lettuce or other wraps.

* If you bought mung beans for the sake of sprouting them, store them in the refrigerator or freezer for extended germination life.

Herbs and Spices That Go Well with Mung Beans
Bay leaf, cayenne, cilantro, cinnamon, coriander, cumin, dill, garam masala, ginger, mustard seeds, parsley, salt, turmeric

Foods That Go Well with Mung Beans
Proteins, Legumes, Nuts, Seeds: Beef, lentils, peas (i.e. split), pork, shrimp, sugar snap peas, tempeh, tofu

Vegetables: Bell peppers, bok choy, broccoli, cabbage (esp. napa), carrots, chiles, chives, garlic, greens (in general), leeks, mushrooms, onions, spinach, tomatoes, vegetables (in general)

Fruits: Coconut, lemon, lime

Grains and Grain Products: Bulgur, grains (in general), millet, noodles (esp. Asian), rice

Dairy and Non-Dairy: Coconut milk, ghee, yogurt

Other Foods: Oil

Mung Beans have been used in the following cuisines and dishes…
Asian cuisines, casseroles, Chinese cuisine, curries, dals, gravies, hummus, Indian cuisine, moong dal, mujadara, pancakes, pilafs, purees, salads, sauces, soups, Southeast Asian cuisines, sprouts (mung bean), stews

Suggested Food and Flavor Combos Using Mung Beans
Add mung beans to any of the following combinations…

Bulgur + olive oil + onions
Cumin + garlic + ginger + onions and/or coriander

Recipe Links
Ayurvedic Spinach-Mung Detox Soup [Vegan] https://www.onegreenplanet.org/vegan-recipe/ayurvedic-spinach-mung-detox-soup-vegan/

Mung Bean and Coconut Curry https://www.heynutritionlady.com/mung-bean-and-coconut-curry/#wprm-recipe-container-8430

Mung Beans with Caramelized Onions and Nigella [Fennel] Seeds https://thehappyfoodie.co.uk/recipes/mung-beans-with-caramelised-onions-and-nigella-seeds

Mung Bean Soup https://www.liveeatlearn.com/mung-bean-soup/

One-Pot Mung Bean Stew https://www.makingthymeforhealth.com/one-pot-coconut-mung-bean-stew/

Mung Bean Hummus https://www.101cookbooks.com/archives/mung-bean-hummus-recipe.html

Mung Bean and Kale Soup https://skinnyms.com/mung-bean-and-kale-soup-recipe/

Mung Bean Noodles Braised with Shrimp https://www.chinasichuanfood.com/braised-mung-bean-noodles-with-shrimps/

Mung Bean + Cilantro Falafel Tacos http://www.dollyandoatmeal.com/blog/2015/3/16/mung-bean-cilantro-falafel-tacos

Sprouted Mung Bean Burger with Mint-Cilantro Chutney https://holycowvegan.net/sprouted-mung-bean-burger-with-mint-cilantro-chutney/

Summer Veggie Mung Bean Salad https://thekitchenpaper.com/summer-veggie-mung-bean-salad/

Tangy Raw Cauliflower Salad https://www.giverecipe.com/tangy-raw-cauliflower-salad/#tasty-recipes-12117

Vegetable Stir-Fry Mung Bean Noodles https://healthynibblesandbits.com/vegetable-stir-fry-mung-bean-noodles/

Hearty Mung Bean Stew with Kale https://theminimalistvegan.com/mung-bean-stew/

Mung Bean Salad https://rouxbe.com/recipes/1923-mung-bean-salad

Philippine Mung Beans in Coconut Milk https://www.food.com/recipe/philippine-mung-beans-in-coconut-milk-176928


Resources
https://www.heynutritionlady.com/how-to-cook-mung-beans/

https://www.heynutritionlady.com/how-to-cook-mung-beans/

https://www.urmc.rochester.edu/encyclopedia/content.aspx?contenttypeid=76&contentid=16081-1

https://www.healthline.com/nutrition/mung-beans#TOC_TITLE_HDR_2

https://www.wise-geek.com/how-do-i-choose-the-best-mung-beans.htm#

https://www.thespruceeats.com/how-to-store-dried-beans-1389336

https://whattocooktoday.com/how-to-keep-mung-bean-sprouts.html

https://www.littwellness.com/blog/soakthosebeans

http://www.foodforawakening.com/mung-beans/

https://www.healthline.com/nutrition/mung-beans#TOC_TITLE_HDR_2

https://pubmed.ncbi.nlm.nih.gov/19149749/

https://www.healthline.com/nutrition/mung-beans#TOC_TITLE_HDR_4

https://www.ncbi.nlm.nih.gov/pmc/articles/PMC6627095/

https://www.wholefoodsmarket.com/tips-and-ideas/archive/many-ways-mung-beans

https://www.livestrong.com/article/553811-how-to-eliminate-the-phytic-acid-in-beans/

Page, Karen. (2014) The Vegetarian Flavor Bible. New York, NY: Little, Brown and Company.


About Judi

Julia W. Klee (Judi) began her journey enjoying “all things food” in elementary school when she started preparing meals for her family. That love of food blossomed into a quest to learn more and more about health and wellness as related to nutrition. She went on to earn a BS Degree in Food and Nutrition, then an MS Degree in Nutrition. She has taught nutrition and related courses at the college level to pre-nursing and exercise science students. Her hunger to learn didn’t stop upon graduation from college. She continues to research on a regular basis about nutrition as it relates to health. Her hope is to help as many people as possible to enjoy foods that promote health and wellness.
Baking Soda

The Many Uses of Baking Soda (What It Is and How To Use It)


What is baking soda?
Baking soda is sodium bicarbonate. It is an alkaline compound that will produce carbon dioxide gas when combined with an acid. It is found in nature in crystalline form, and is ground into a fine powder for culinary and household use.

How is it used in baking?
Baking soda is used as a leavening agent in baked goods that contain an acidic ingredient. When it comes in contact with an acid, such as vinegar, citrus juice, buttermilk, yogurt or cream of tartar, it forms carbon dioxide gas bubbles. The small bubbles get trapped in the food batter, causing it to inflate, or rise. The batter is then baked immediately.

Baking soda is often used in baked goods (such as quick breads, pancakes, muffins, cakes and fried foods) that contain acidic ingredients so it will create the leavening or rise in the finished product. Since the reaction with acid occurs quickly, the leavening time is much shorter than when yeast is used as a leavening agent. When baking soda is used as a leavening agent, the foods are cooked immediately. When the food is heated, the leavening is “fixed” in place so the expansion caused by the gas bubbles becomes set. If the food is not baked immediately, the gas bubbles may deflate and the product may not rise as expected.

Tip: When using baking soda in a baked product, be sure to add it to the dry ingredients before liquid ingredients are added. Stir or whisk the dry ingredients well to combine everything before liquid is added. Otherwise, if the baking soda is not disbursed well, the finished product may have large holes in it.

Is baking soda the same thing as baking powder?
Although baking powder does contain baking soda, the two are not the same thing. Baking powder is a mixture of baking soda, one or more acid salts (usually cream of tartar and sodium aluminum sulfate), and cornstarch (to absorb moisture so a reaction won’t take place until liquid is added to a batter). Baking powder usually causes two reactions at different times. This type of baking powder is often referred to as “double acting baking powder.” The first reaction takes place when liquid is added to the batter. The acid and baking soda in the baking powder react causing bubbles to form in the batter. The second reaction takes place when the batter is placed in the oven. The gas bubbles expand, causing the baked product to expand even further. The heat in the oven causes the expanded batter to “set” maintaining the lift or rise.

Since there are two reactions when baking powder is used, there can be a slight delay (15 to 20 minutes) before the product is baked, and leavening will still occur. Baking powder is typically used in recipes that do not contain acidic ingredients.

Shelf Life of Baking Soda vs Baking Powder
When stored in an airtight container in a cool, dry place, baking soda has an indefinite shelf life, although some producers recommend buying fresh baking soda every three years.

Baking powder should also be kept in an airtight container in a cool, dry place. It generally has a shelf life of six months to one year. Check the “Best by” date on the canister to determine its age. Discard baking powder when it is no longer active.

How to Test the Activity of Baking Powder
Place ½ teaspoon of baking powder in a bowl. Pour ¼ cup of boiling water over the baking powder. It should immediately bubble up violently. If it does, it’s still good. If it doesn’t bubble up, it is old and should be discarded. To see a demonstration of how this is done, view my video here…

How to Test the Activity of Baking Soda
Mix ¼ teaspoon of baking soda with 2 teaspoons of vinegar. The mixture should bubble up immediately. If it does not, the baking soda needs to be replaced. To see a demonstration of how this is done, view my video here…

Are baking soda and baking powder interchangeable in recipes?
No, the two are not interchangeable in recipes.

What happens if you use too much baking soda or baking powder in a recipe?
Too much baking soda added to a recipe may cause a soapy flavor and a coarse, open crumb (very large air bubbles/spaces in the finished product). Baking soda can cause cocoa powder to redden when baked. This is a normal reaction and the origin for the name “Devil’s Food Cake”.

Too much baking powder can cause the product to taste bitter. It can also cause the batter to rise too fast, then collapse, resulting in a flattened baked product. For instance, cakes made with too much baking powder will be sunken in the middle and have a coarse crumb (extra-large cells or air spaces).

What can I do with baking soda besides bake with it?
THIS is where the list gets long. Beside using baking soda as a leavening agent in baked goods, it has MANY other uses in the kitchen and around the house. The following is just a smattering of possibilities, since new uses for baking soda are being found all the time.

In the Kitchen
* Baking soda is well known for its ability to absorb odors. A small bowl or box of baking soda is often placed in refrigerators, freezers, or other enclosed areas to absorb odors. Replace it once a month for best results.

* Rubber gloves in the kitchen can get wet inside and smelly. To keep them fresh, sprinkle a little baking soda inside them. You’ll also find they are easier to slip on and off.

* Loosen baked on grease by sprinkling baking soda in the pan. Add some dish detergent and hot water. Allow the pan to soak for a while. The pan will be easier to clean. [NOTE: Do not use baking soda on aluminum cookware or bakeware. It will react with the aluminum and may discolor the pan.]

* Help to soften dry beans when you cook them and make them less gas-producing, add a little baking soda to the soaking water. This can be especially helpful if the beans are old…the older the are, the drier they get, and the longer it takes to cook them. Shorten the cooking time by adding baking soda to the soaking water. Add 1/4 teaspoon of baking soda per pound of beans in one gallon of water. Rinse them well after being soaked. A little baking soda may also be added to the cooking water. A mere ¼ teaspoon may be added to the cooking water to soften the beans and help them to cook faster. This is due to the alkalizing effect of the baking soda.

* Baking soda is mildly abrasive. This property makes it an effective agent for removing stains from coffee mugs, kitchen counters, microwaves, and kitchen tiles, along with grease stains. Make a paste with a little baking soda and a small amount of water. GENTLY rub it on the stained area with a sponge or cloth. When in doubt, do a test rub in an inconspicuous place. Rinse with plain water and buff the area dry. To see a video demonstration of how to remove stains from a coffee mug, watch this…

* Neutralize trash odors. If your kitchen trash can has an odor, sprinkle some baking soda in it to help neutralize the odors.

* Make fluffy omelets by adding ¼ teaspoon of baking soda to every three eggs used in the omelet. Don’t be tempted to add more baking soda, as it may make the eggs taste bland. Also, don’t oversalt your eggs since baking soda contains sodium.

* Baking soda has been found to remove chemical residues from the surface of conventionally-grown fruits and vegetables. Soak the food in a solution of 1 teaspoon of baking soda to 1 to 2 cups of water for 12 to 15 minutes. Rinse the food well, pat it dry, then store it and use it as usual. Note that this removes chemical residues from the surface. It will not remove chemicals that have soaked into the food. [This is a procedure I use on a regular basis and I can say from personal experience that it works. Here’s a video I have on this topic…

* Baking soda has been used to remove tarnish from silverware. Line a baking pan with aluminum foil. Add 1 tablespoon of baking soda to the foil-lined pan. SLOWLY pour in ½ cup of white vinegar. (Yes, there will be a reaction!) Pour in one cup of boiling water, then place your tarnished silver in the pan. The tarnish should begin to disappear almost immediately. Most of the silverware can be removed within 30 seconds. Heavily stained silverware may take up to one minute to be cleaned. Rinse your cleaned silverware in plain water and wash as usual. The tarnish will be left as a residue at the bottom of the baking pan. Discard it and the foil, then wash the pan.

* Another way to clean tarnished silverware is to gently rub a paste of three parts of baking soda to one part of water onto the silverware with a soft cloth or sponge. Rinse and dry.

* Make a paste of baking soda and water and rub it on plastic containers to remove stains.

* Try baking soda as a natural oven cleaner. [Note that this should be used only on conventional ovens, not self-cleaning ovens.]  Sprinkle baking soda on the bottom of the oven, while avoiding getting it on the heating element. Spray with a water bottle to dampen the baking soda. The sides can be cleaned by spreading on a paste made of 3 parts of baking soda with 1 part of water. Allow it to sit overnight. Scrub it off in the morning. Rinse thoroughly.

* Use baking soda and vinegar to remove burned on milk from a [NON-ALUMINUM] pot. This is a trick that I learned a long time ago and it has worked many times for me and my video viewers as well. Simply sprinkle a generous amount of baking soda on the burned milk in the pot. Add enough water to the pot to cover the burned area by about one inch. Add a generous portion of white vinegar to the pot. (Notice there are no specific measurements here…that’s deliberate!) The mixture will bubble vigorously. Turn the stove on high and bring the mixture to a boil. (Monitor it carefully because the baking soda and vinegar will quickly bubble up and raise within the pot. If it gets too high, lift the pot off the stove briefly and the bubbles will go back down.) Allow the mixture to boil for about 5 minutes. Turn off the heat and allow the pot to sit on the burner until the mixture cools completely. The pot is ready to be washed. The burned area should lift off easily with little scrubbing. Here’s a video where I demonstrated this technique …

* For an effective homemade cleaning solution for your refrigerator, simply mix 1 teaspoon of baking soda in a quart of warm water. Use the solution to wipe off the refrigerator, inside and out.

* To deodorize and clean your garbage disposal, pour 1 cup of baking soda down the drain while simultaneously running warm water. Then run your disposal for one minute, while running warm water, until all the baking soda is gone. This will help keep the grinding mechanism free of grease.

* To remove odors from plastic containers, first wash the container well. Then add 2 tablespoons of baking soda and fill the container with hot water. Place the lid on the container and shake well to dissolve the baking soda. Allow it to soak for 2 hours up to overnight (especially with strong odors). Wash the container well. This method can also work with juice pitchers, thermal bottles, lunch boxes, and any glass or plastic food container.

* To remove odors from your hands after preparing foods like garlic, onions or fish, wet your hands, sprinkle on some baking soda. Rub your hands together well, then rinse and dry.

* If the inside of your microwave is REALLY dirty with a lot of baked-on splattered food, baking soda can come to the rescue. Mix 2 tablespoons of baking soda with 1 cup of water in a microwave-safe bowl. Let this solution boil in the microwave on high for a few minutes, so that moisture collects on the inside walls of the microwave. Remove the bowl, then use paper towels to wipe down the inside of the microwave, including the door, and door seal. Then wipe it all down again with a damp sponge or cloth.

* To deodorize a wood cutting board, apply a paste of 3 parts of baking soda to 1 part of water. Leave the paste on for about 10 minutes. Rinse well, then dry.

* Remove black heel marks from kitchen linoleum or vinyl flooring with baking soda and a damp sponge or nylon scrubber. Rinse and dry the area.

* If you’re baking and a recipe calls for baking powder and you don’t have any, use ½ teaspoon of baking soda plus 1 teaspoon of cream of tartar in place of 2 teaspoons of baking powder. Since this is not a “double-acting” baking powder substitute, bake the item immediately after the liquid and dry ingredients are mixed together.

Personal Care
* Baking soda has been used to relieve heartburn or acid reflux. Dissolve a teaspoon of baking soda in a glass of water and drink the mixture slowly. Note that baking soda is high in sodium. If you need to restrict your sodium intake, this tactic may not be recommended for you. Check with your healthcare practitioner first. Also, do not drink this on a regular basis as it may cause metabolic alkalosis if ingested too often.

* Some people have used a baking soda solution as a mouthwash. Add ½ teaspoon of baking soda to a half glass of warm water. Swish around your mouth as usual. This will increase the pH of your mouth, which can inhibit the growth of bacteria. It also has been found to freshen the breath.

* Baking soda has been found to soothe canker sores inside the mouth. Rinse your mouth with baking soda mouthwash (as in the previous bullet point…1/2 teaspoon of baking soda in half a glass of warm water) once a day until the sore heals.

* Toothpaste with baking soda has been found to whiten teeth and remove dental plaque more effectively than toothpaste without baking soda. This is believed to be due to the mild abrasiveness and antimicrobial properties of baking soda.

* Some people use baking soda as an effective deodorant. Patting your armpits with a little baking soda can help to neutralize the acidic waste products of bacteria that cause the odor.

* A baking soda bath is often recommended to soothe itchy skin from insect bites and bee stings. Add 1 to 2 cups of baking soda to a tub of warm water. Soak in the tub for 10 to 40 minutes. Rinse with fresh water afterwards and drink plenty of water. If you don’t want to bother with a bath, just make a paste of baking soda and a little water. Apply the paste to the affected area and allow it to sit for a little while until the itching or stinging sensation stops. Rinse the paste off with cool water.

* For sunburn relief, add a few heaping tablespoons of baking soda to a bath tub along with a cup of oats. Fill the tub with cool water and soak for 15 to 20 minutes. Do not scrub the skin. Dab yourself dry with a towel afterwards.

* Sooth the irritation from vaginal yeast infections with a baking soda bath. A 2014 study found that baking soda killed Candida cells that led to yeast infections. Furthermore, baking soda has been found to have antifungal affects.

* Help sooth diaper rash by soaking the baby’s bottom in a baking soda bath for 10 minutes, three times a day. Use 2 tablespoons of baking soda in a tub of water. Pat the baby dry (do not rub the skin).

* Make a soothing foot bath by soaking feet for 10 minutes in a solution of 4 tablespoons (1/4 cup) of baking soda in 4 cups of warm water. This will relieve tired feet, soften calluses, and soothe athlete’s foot.

* To keep hair combs and brushes clean and free of oils, soak them overnight in a solution of 1 teaspoon of baking soda in one cup of water. In the morning, rinse them off and you’re ready to start your day!

* A baking soda bath can help relieve the itching and redness from eczema. Add ¼ cup baking soda to the bath water. Soak in the tub for 10 to 15 minutes. Pat the skin with a towel to remove excess water, and apply moisturizer to the skin afterwards, while the skin is still damp.

* Irritation from poison ivy and poison oak can be relieved with a baking soda bath. Dissolve ½ cup of baking soda in a tub of warm water. Soak up to 30 minutes.

* Urinary tract infections can be relieved with a baking soda bath. Add ¼ cup of baking soda to the bath water. Adults, soak up to 30 minutes. Young children should soak for 10 to 15 minutes. Do this twice a day.

* Baking soda can be used to remove odors from shoes. Put two tablespoons of baking soda in the center of a thin cloth. Gather the corners of the cloth and secure the edges with a rubber band or string. Place a sachet inside each smelly shoe. Remove the sachet when you’re ready to wear the shoe.

Safety of Baking Soda Baths. Generally, baking soda baths are considered to be safe and well-tolerated by most people. However, do not take a baking soda bath if you are pregnant or breastfeeding, have high blood pressure, have diabetes, have open wounds or serious infections, or are prone to fainting.

Around the House
* If you enjoy air fresheners in your home, try a homemade baking soda air freshener. Place 1/3 cup of baking soda in a small jar. Add 10 to 15 drops of your favorite essential oil. Cover the jar opening with a clean cloth and secure it with a string, ribbon or rubber band. When the scent starts to fade, gently shake the jar a few times. Add more essential oil as needed.

* Use baking soda to help whiten your laundry. Add ½ cup of baking soda to your washer along with your usual laundry detergent. The baking soda can help to remove stains from your clothes. Also, it will soften the water, so you may be able to use less laundry detergent.

* Baking soda can act as a multi-purpose cleaner in the bathroom. Make a paste with baking soda and a little water. The paste can be used to clean bathroom sinks, tiles, bathtubs, and showers. Use a sponge to apply the paste to scrub the area you want to clean. Allow it to sit for 15 to 20 minutes. Wipe the area down with a damp cloth afterwards.

* To clean your toilet bowl, routinely sprinkle some baking soda in the bowl and scrub with a toilet brush. For stained bowls, pour in ½ cup of baking soda and ½ cup of white vinegar. Scrub with a toilet brush, then flush. Be careful when doing this in case the bubbling action splashes upward!

* To remove perspiration stains from clothing, make a paste of baking soda and a little water. Rub the paste into the stained area and let it sit for one hour, then launder as usual.

* Did you accidentally spill a little gasoline on your clothes? Remove the odor by sprinkling the stained area with some baking soda. Place your clothes in a trash bag and seal it up. Let them sit there for a few days, then launder as usual.

* Is it winter and you’ve run out of ice melt? Sprinkle a little baking soda on the ice on your steps. It will provide some traction and melt the ice. Unlike rock salt, it won’t damage indoor or outdoor surfaces.

* For a safe way to clean your toothbrush, let it soak in a baking soda and water solution overnight.

* Do you have clogged bathroom drains? For a simple drain cleaner, start by pouring a cup of boiling water down the drain to help loosen things up. Mix one cup of baking soda with 1 cup of salt.  Place ½ cup to 1 cup of white vinegar in a separate measuring cup. Alternately spoon the baking soda and salt mixture into the drain, flushing it with a little white vinegar to help the dry mixture go down to the clog. Be careful, as it will bubble up! Once all the dry mixture and vinegar have been placed in the drain, cover with the drain plug and wait for 15 minutes. Then pour a large pot of boiling water down the drain. This will clear most clogs.

* Mop your tile floors clean with a solution of ½ cup of baking soda in a bucket of warm water.

* Make cloth diapers easier to clean by first soaking them in a solution of ½ cup of baking soda in 2 quarts of warm water. They should come out cleaner when laundered.

* Help keep cut flowers longer by adding a teaspoon of baking soda to the water in the vase.

* Help to keep your kitty’s litter box smelling fresh by sprinkling the bottom of the box with baking soda before adding litter. Use about one cup of baking soda to three pounds of litter. If you need to clean the box but are short on time, sprinkle some baking soda on top and give it a light stir. This will help keep odors in check for a short while until you can change the litter.

Resources
https://www.thespruceeats.com/what-is-baking-soda-p2-1328637

https://www.joyofbaking.com/bakingsoda.html

https://www.davidlebovitz.com/how-to-tell-if-baking-powder-is-still-good/

https://www.healthline.com/nutrition/baking-soda-benefits-uses#2.-Mouthwash

https://www.healthline.com/health/baking-soda-bath

https://pmaonline.com/posts/adult-primary-care/8-ways-to-treat-sunburn-at-home/

https://www.almanac.com/content/best-baking-soda-uses

https://www.liquidplumr.com/diy-plumbing-tip/how-baking-soda-and-vinegar-cleans-drains/

https://www.thankyourbody.com/uses-for-baking-soda/

https://www.networx.com/article/6-ways-not-to-use-baking-soda

https://www.readersdigest.ca/home-garden/tips/5-things-do-baking-soda/

https://www.cooksillustrated.com/articles/1745-can-baking-soda-make-beans-cook-faster

http://www.eatingwell.com/article/292167/the-weird-reason-you-should-be-adding-baking-soda-to-your-beans/

https://www.tasteofhome.com/article/degassing-beans/

https://nutritionfacts.org/questions/does-adding-baking-soda-to-soaking-beans-reduce-raffinose/

https://skillet.lifehacker.com/make-extra-tender-beans-with-a-little-baking-soda-1842156539

https://www.healthline.com/nutrition/10-baking-powder-substitutes#TOC_TITLE_HDR_5

https://www.armandhammer.com/

Baker, Jerry. (2006) Grandma Putt’s Old-Time Vinegar, Garlic, Baking Soda, and 101 More Problem Solvers. USA: American Master Products, Inc.

Ciullo, Peter A. (1995) Baking Soda Bonanza. New York, NY: Harper Collins Publishers, Inc.


About Judi

Julia W. Klee (Judi) began her journey enjoying “all things food” in elementary school when she started preparing meals for her family. That love of food blossomed into a quest to learn more and more about health and wellness as related to nutrition. She went on to earn a BS Degree in Food and Nutrition, then an MS Degree in Nutrition. She has taught nutrition and related courses at the college level to pre-nursing and exercise science students. Her hunger to learn didn’t stop upon graduation from college. She continues to research on a regular basis about nutrition as it relates to health. Her hope is to help as many people as possible to enjoy foods that promote health and wellness.
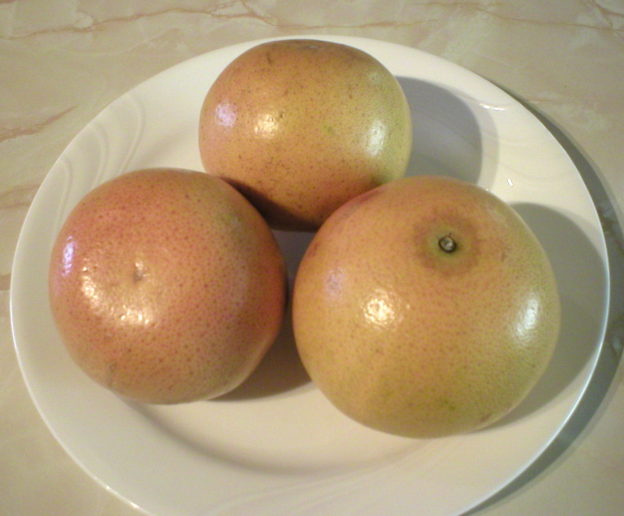
Raspberry Nice Cream

Raspberry Nice Cream

If you’re looking for a fast, healthy, easy and delicious dessert, this is it! And it has only three ingredients! This is a healthy alternative to ice cream that can’t be beat. Below is a video demonstration of how to make Raspberry Nice Cream. The written recipe is below the video.

Enjoy!

Judi

Raspberry Nice-Cream
Makes 2 Servings

1 frozen banana, peeled and sliced
1 cup frozen raspberries
1/3 to 1/2 cup coconut milk

Place all ingredients in a blender or food processor. Process until thick and smooth. Enjoy!

Note: If you want this to be sweeter, simply add any sweetener of choice, to taste. Dates or red grapes are healthy sweetener options that would work very well. Dates or red grapes are healthy sweetener options that would work very well.

Celery

Celery 101 – The Basics


Celery 101 – The Basics

About Celery
The celery we are most familiar with, that we commonly see in just about any grocery store, is green to pale-green in color, with long, firm stalks, and leafy ends. The variety is Pascal celery. Interestingly, there are many other types of celery that are usually smaller than Pascal celery. The colors can vary from white to deep gold, and even red. Celery is a botanical cousin to carrots, parsley, dill, fennel, cilantro, parsnip, anise, caraway, chervil, and cumin.

Many different types of celery are commonly grown around the world and are often referred to as “wild celery.” Pascal celery was cultivated as far back as 1000 B.C in parts of Europe and the Mediterranean. It was used as a medicinal plant in ancient Egypt. There is also evidence that ancient Greek athletes were awarded celery leaves to commemorate a win.

Around the world, celery is often served as a major vegetable in a meal, rather than an addition to salads, or a flavoring agent in soups and stews, like it is commonly used in America. Also, the large root ball, celery root, is often prized as a food in other parts of the world, over the stalks that are so popular in the United States.

Today, the United States produces over 1 billion pounds of celery each year. The average American adult eats about 6 pounds of celery annually. The United States exports about 200 million pounds of celery annually to Canada. Despite that, a substantial amount of celery consumed in the United States is imported from Mexico.

Nutrition and Health Benefits
Celery is an excellent source of Vitamin K and molybdenum. It also contains a lot of folate, potassium, fiber, manganese, pantothenic acid, Vitamin B2, copper, Vitamin C, Vitamin B6, calcium, phosphorus, magnesium, and Vitamin A (carotenoids).

Antioxidant and Anti-Inflammatory Support. Celery is VERY rich in phytonutrients that have antioxidant and anti-inflammatory properties. These compounds include Vitamin C, beta-carotene, and manganese. But the antioxidant support provided by celery goes far beyond that. There are at least a dozen other compounds found in celery that demonstrate such benefits. Animal studies have shown that celery extracts have lowered the risk of oxidative damage to body fats and blood vessel walls. They have also been shown to prevent inflammatory reactions in the digestive tract and blood vessels. The extracts were even found to help protect the digestive tract and liver from damage due to acrylamides, which are harmful compounds that can form in foods during the frying process.

Further research on celery juice and extracts has demonstrated that celery has powerful anti-inflammatory effects by decreasing levels of specific factors that promote inflammation. This helps to keep those factors in check, preventing unwanted inflammation.

Digestive Tract Support. Celery contains specific pectin-based fibers that have been shown to have anti-inflammatory benefits. Animal studies have found that extracts of these compounds in celery appear to improve the integrity of the stomach lining, lowering the risk of stomach ulcers, and providing better control of stomach secretions.

Cardiovascular Support. Many cardiovascular diseases, including atherosclerosis, are promoted by oxidative stress and inflammation in the bloodstream. Because of the anti-inflammatory and antioxidant properties already found in celery, researchers are taking interest in celery for its potential cardiovascular health benefits.

Cancer Prevention. Because compounds in celery have been found to have such strong antioxidant and anti-inflammatory benefits, researchers are taking note of celery for its possible anti-cancer benefits. Human research in this area has yet to be conducted, but there has been speculation that celery may help to prevent stomach, colon, and bladder cancers.

Sodium Content. Celery contains about 35 milligrams of naturally-occurring sodium per stalk. If you are on a reduced sodium diet, your intake of celery should be monitored to help you keep track of your sodium intake.

How to Select Celery
Choose celery that looks crisp, with a clean bright green color, few blemishes, and with a tightly formed bunch. Avoid those that are limp, or with yellow or brown patches, especially in the leaves, as this indicates age.

How to Store Celery
Celery should be stored in the refrigerator. There are a number of ways to store celery to keep it crisp. But note that nothing will keep celery crisp forever. It’s full of water and the refrigerator is a very dry environment, so celery tends to wilt easily. Here are some easy ways to help minimize water loss and keep it crisp longer.

(1) When you get your celery home, simply pull the original bag upward and secure a twist tie or rubber band around the top of the bag. This will help minimize water loss, while still allowing for air flow because the original bags that celery are packed in have air holes along the length of the bag.

(2) Remove the celery from the base and wrap the stalks in aluminum foil. This method is effective in keeping celery crisp and fresh for extended periods of time.

(3) Celery may be stored in a closed container. There are long plastic containers made specifically for storing celery. They usually have a mesh insert that celery can rest on, allowing for air flow around the stalks as they are stored.

(4) Celery may also be stored in any plastic container it will fit in. The stalks may need to be removed from the base, and even cut in half so they will fit in the container, and that is fine for this purpose. It is helpful to place a paper towel or clean cloth under the celery pieces. This will soak up any excess moisture that forms in the container, while maintaining a humid environment, helping to maintain its crispness.

If your celery has become somewhat dehydrated and limp, simply sprinkle the stalks with a little water, or place them cut side down in a little water in a jar or glass. Place that in the refrigerator. They should crisp up within a couple hours or overnight. Then remove them from the glass or jar and continue to store them as usual. [If left in the water for a prolonged time, the internal cells of the celery will eventually burst from trying to absorb more water than they can hold. This will cause the stalks to collapse and be very limp.]

If possible, use your celery within one week of purchase for optimal flavor, texture and nutrient retention.

How to Prepare Fresh Celery
Remove the stalk from the base of the bunch. Wash the leaves and stalk under cool running water. Cut the stalk as desired for your recipe. If the outside of the stalk contains fibrous strings, they may be removed by making a small cut into the outside with a knife. The stringy fibers may then be peeled away and discarded.

For a simple way to cut celery with little to no strings, watch my video… https://youtu.be/jIu6IkX9Fv8

How to Preserve Celery
If you cannot use your celery within a reasonable amount of time, it may be frozen or dehydrated for later use. However, when thawed or rehydrated, the texture will be soft. It will be suitable for being immediately added to cooked dishes, like soups, stews, stocks, sauces, and casseroles. Dehydrated celery may also be ground up and used as a seasoning. Previously frozen or dehydrated celery will not be appropriate for eating fresh, such as in salads or being stuffed for a crispy snack, since it will be soft.

Freezing Celery. Wash your celery well and shake off excess water. Cut the celery into the size pieces you will need them to be when used later. Celery may be frozen with or without being blanched first. However, blanched celery will keep longer with a better quality and flavor than celery that was not blanched.

To freeze celery without blanching it first, wash it and cut the celery stalks, as described above. The prepared pieces may simply be placed in a freezer bag and stored in the freezer. To prevent it from freezing into one big lump, it can first be spread out on a parchment paper-lined tray and placed in the freezer. When frozen, transfer the celery pieces to an air-tight freezer container or bag. Label with the date and use it within 3 months for best flavor and quality.

Unblanched, finely diced celery may also be frozen in ice cube trays. Place a measured amount of celery pieces in each cell of an ice cube tray. Fill with water, then place in the freezer. When frozen, transfer the cubes to an air-tight container. These would be suitable for adding to soups and stews or any cooked food where added liquid would be used.

To freeze celery by blanching, first prepare your celery pieces as described above. Then steam them or boil them for 1 to 2 minutes (depending on the size of the pieces). Immediately transfer your blanched celery pieces to a bowl of cold water to quickly cool them down. After they are cooled, drain them well and spread them out on a parchment paper-lined tray in the freezer. When frozen, transfer your blanched celery pieces to an air-tight freezer container or bag. Label the container with the date and use them within one year for best quality.

Dehydrating Celery. Celery may be dehydrated in a dehydrator or oven. Some resources consider blanching celery before dehydrating to be an optional step. However, celery that is dried without being blanched may turn an unappetizing tan color. Whereas celery that was blanched first will maintain its green color. The choice is yours!

To blanch celery before dehydrating, bring a pot of water to boil. Meanwhile, wash the celery. Cut the celery into desired size pieces and boil them for 1 to 2 minutes (depending on the size of the pieces). Immediately transfer them to a bowl of cold water to quickly chill them down. Drain them well.

Dehydrator. To dry your celery pieces in a dehydrator, arrange them in a single layer on a dehydrator tray. Follow the manufacturer’s instructions for time and temperature for drying your celery. Usually 135°F is the recommended temperature for dehydrating vegetables. The celery will be dry when it is very brittle, and has no sign of moisture inside when broken open. Store it in an air-tight jar away from heat and sunlight. For extended storage, it is helpful to place an oxygen absorber packet in the jar. Properly dehydrated celery will keep for many years.

Oven. Prepare the celery pieces as directed above. Set your oven at its lowest temperature. If it will not go below 150°F, the oven door will need to be left slightly open by propping a towel or wooden spoon inside the door. This will waste a lot of energy. If you plan to dehydrate a lot of food, investing in a dehydrator may be a sound investment.

If possible, arrange the prepared celery pieces in a single layer on a small screen or rack over a baking tray. This will allow for air flow as the celery dries. If you don’t have a mesh screen or rack, the celery pieces may be placed directly on a baking tray. They should be stirred occasionally as they dry so they will dry evenly and completely. The process may take 6 to 8 hours for them to dry completely. They should feel completely dry and crisp with no sign of moisture inside when broken open. When done, remove them from the oven and allow them to cool completely. Store them in jars with tight-fitting lids or air-tight containers. Placing an oxygen absorber in the container will help to prolong the shelf-life of your dried celery.  Store it away from heat and sunlight, and it should keep well for years.

Note that celery will shrink a lot as it dries. Using a very fine mesh screen or rack will help to keep the pieces from falling through during the drying process.

To rehydrate dehydrated celery. Simply add 3 parts of water to 1 part of dehydrated celery in a bowl. Allow the celery to sit for 20 minutes up to 2 hours, until fully rehydrated. The length of time will depend upon how big the pieces were before they were dried. If desired, dehydrated celery can simply be added to soups or stews without rehydration, since they will be cooked in liquid for enough time to allow the vegetables to become rehydrated. Just be sure there is enough liquid in your pot to compensate for the rehydration process.

Equivalents. When examining rehydrating charts from various resources, the equivalents vary somewhat. It may depend upon how big the celery pieces were when they were fresh. Larger pieces may yield a greater conversion rate than those that were cut very small. So, consider the following equivalents to be rough estimates, since there is a lot of variation based on the resource.

According to “Seed to Pantry School,” an online DIY food school, one tablespoon of finely chopped fresh celery is equivalent to ½ teaspoon dried. That’s a 6-fold increase in volume from dried to fresh of finely chopped celery. Note that the celery was very finely chopped.

According to Harmony House Foods, that sells dehydrated foods online, one cup of dehydrated celery yields 3-1/4 cups when hydrated. That’s a little more than a 3-fold increase in volume when rehydrated. Obviously, their celery pieces were not cut as small as those in the above conversion comparison by “Seed to Pantry School.”

According to Honeyville, that sells freeze-dried foods online, ½ cup of freeze-dried celery will yield 1 cup when rehydrated. That’s only a two-fold increase in volume. Also, USA Emergency Supply, another online seller of dehydrated foods, states that celery doubles in volume when rehydrated in cool water.

Suggestion for Rehydration Equivalents.  Test a small amount of your own dehydrated celery by measuring a small amount of your dried celery. Place it in a bowl and cover it with plenty of water. Allow it to sit until the celery is completely rehydrated, then measure the celery. This will give you the conversion rate of what you have available. Then you can determine how much dried celery to add to a dish so you can follow the recipe appropriately.

Quick Ideas and Tips for Using Celery
* Are you looking for a simple snack that has some crunch? Try celery stalks! Dress them up by stuffing them with whatever you have that sounds good at the moment…cream cheese, any nut butter, or even cottage or ricotta cheese. Or just dip them in your favorite salad dressing.

* Make a quick salad by combining chopped celery, apples, grapes, and walnuts or pecans. Top it with your favorite dressing or a little olive oil and white-wine vinegar.

* For some crunch, add diced celery to your favorite tuna, chicken, egg, macaroni, or potato salad.

* Make an easy vegetable salad by combining diced celery, tomatoes, and sweet onion. Add a little cucumber if you have it available. Top it with your favorite vinaigrette or other salad dressing.

* Don’t discard the celery leaves. They are perfectly edible and taste like celery. Also, they contain a lot of Vitamin C, calcium, and potassium. Why not just use them along with the celery stalks? They work especially well in salads. Or, freeze them and add them later to soups, stews, sauces, or stock.

* If you’re cooking celery, research has found that most (83 to 99 percent) of the antioxidants in celery were retained when celery was steamed, even after 10 minutes. However, when celery was blanched for 3 minutes, or boiled for 10 minutes, 38 to 41 percent of the antioxidants were lost.

* To retain most of the nutrients in celery, wait to cut it up until you’re ready to use it. Studies found that nutrients in celery were lost, even when it was cut up the night before it was to be used (despite being stored in the refrigerator).

* If your celery has wilted and become soft, sprinkle some water on it and return it to the refrigerator. You may also place wilted celery stalks, cut side down, in a little water in a tall glass or jar. Place it in the refrigerator and it will crisp up quickly (in a couple hours to overnight). Once crispy, remove it from the glass and store it as usual.

* Celery leaves can be used to substitute for parsley in pretty much any dish.

Herbs and Spices That Go Well with Celery
Anise seeds, basil, bay leaf, caraway, celery salt, celery seeds, chervil, cloves, cumin, dill, lovage, marjoram, parsley, pepper, rosemary, salt, tarragon, thyme, turmeric

Foods That Go Well with Celery
Proteins, Legumes, Nuts, Seeds: Almonds, almond butter, bacon, beans (in general), beef, chestnuts, chicken, chickpeas, eggs, hazelnuts, lentils, nuts (in general), peanuts, peanut butter, peas, pecans, pistachios, pork, shrimp (seafood in general), snow peas, sunflower seeds, turkey, walnuts

Vegetables: Artichokes, beets, bell peppers, broccoli, cabbage, carrots, cauliflower, celery root, chives, cucumbers, endive, fennel, garlic, greens (in general), kohlrabi, leeks, mushrooms, onions, potatoes, radishes, scallions, shallots, squash (winter and summer), tomatoes, turnips, water chestnuts, watercress

Fruits: Apples, grapes, lemon, lime, oranges, pears, pineapple, raisins, strawberries

Grains and Grain Products: Barley, bread crumbs, bulgur, corn, pasta, rice

Dairy and Non-Dairy: Butter, browned butter, cheese (esp. Blue, cheddar, cream, goat, Parmesan, Swiss), cream, yogurt

Other Foods: Capers, maple syrup, mayonnaise, mustard (Dijon), oil (esp. nut, olive, walnut), soy sauce, vinegar

Celery has been used in the following cuisines and dishes…
Casseroles, cocktails (i.e. Bloody Marys), crudités, curries, gratins, mirepoix (celery + carrots + onions), risotto, salads (egg, fruit, pasta, potato, vegetable), sauces, slaws, soups (i.e. celery, celery root, potato, vegetable), stews, stir-fries, stocks (i.e. vegetable), stuffed celery, stuffings

Suggested Food and Flavor Combos Using Celery
Add celery to any of the following combinations…

Almond butter + raisins
Apples + walnuts
Carrots + onions
Cheese + fruit + nuts
Cucumbers + mustard
Garlic + tomatoes
Oranges + pecans
Parsley + tomatoes
Pistachios + yogurt

Recipe Links
Simple Celery Soup https://www.feastingathome.com/celery-soup/#tasty-recipes-25110

28 Non-Boring Ways to Use Celery https://www.tasteofhome.com/collection/non-boring-celery-recipes/

35 Recipes That Feature Celery—From Toast to Cocktails https://www.bonappetit.com/recipes/slideshow/celery-recipes

22 Delicious Ideas for Celery That You Will Crave All the Time https://food.allwomenstalk.com/delicious-ideas-for-celery-that-you-will-crave-all-the-time/

Braised Celery https://www.foodnetwork.com/recipes/alton-brown/braised-celery-recipe-1939479

23 Celery Recipes That Prove There’s Much More to It Than Ants on a Log https://www.epicurious.com/ingredients/celery-recipes-salad-soup-stew-gallery

Lentil and Chicken Soup with Sweet Potatoes and Escarole https://www.epicurious.com/recipes/food/views/lentil-and-chicken-soup-with-sweet-potatoes-and-escarole

Ideas for Using Celery Leaves https://triedandsupplied.com/saucydressings/what-to-do-with-celery-leaves/

Unexpectedly Tasty Celery Recipes That Are Easy to Make https://www.cheatsheet.com/culture/unexpectedly-tasty-celery-recipes-that-are-easy-to-make.html/

Celery Salad with Dates, Almonds and Parmesan https://cookieandkate.com/celery-salad-recipe/#tasty-recipes-24740


Resources
https://food.allwomenstalk.com/delicious-ideas-for-celery-that-you-will-crave-all-the-time/

http://www.whfoods.com/genpage.php?tname=foodspice&dbid=14

https://www.cuisineathome.com/tips/cure-for-limp-celery/

https://culinarylore.com/how-to-guides:make-limp-celery-crisp-again/

https://www.hgtv.com/outdoors/gardens/garden-to-table/can-you-freeze-celery

https://www.thespruceeats.com/how-to-make-dehydrated-celery-1327565

https://www.ncbi.nlm.nih.gov/pmc/articles/PMC6017442/

https://shop.honeyville.com/dehydrated-celery.html

https://www.harmonyhousefoods.com/Rehydration-Chart_ep_40.html

https://www.healthycanning.com/dehydrating-celery

https://honeyville.com/blog/before-and-after-rehydration/

https://www.usaemergencysupply.com/information-center/all-about/all-about-dehydrated-vegetables#link6

https://seedtopantryschool.com/dehydrate-celery-make-powder-conversion-amounts/

Page, Karen. (2014) The Vegetarian Flavor Bible. New York, NY: Little, Brown and Company.

The University of Georgia Cooperative Extension Service. (1993) So Easy to Preserve. 3rd ed. Athens, Georgia: The University of Georgia College of Agricultural and Environmental Sciences.

MacKenzie, Jennifer, Jay Nutt, and Don Mercer. (2015) The Dehydrator Bible. Ontario, Canada, Toronto: Robert Rose, Inc.


About Judi

Julia W. Klee (Judi) began her journey enjoying “all things food” in elementary school when she started preparing meals for her family. That love of food blossomed into a quest to learn more and more about health and wellness as related to nutrition. She went on to earn a BS Degree in Food and Nutrition, then an MS Degree in Nutrition. She has taught nutrition and related courses at the college level to pre-nursing and exercise science students. Her hunger to learn didn’t stop upon graduation from college. She continues to research on a regular basis about nutrition as it relates to health. Her hope is to help as many people as possible to enjoy foods that promote health and wellness.
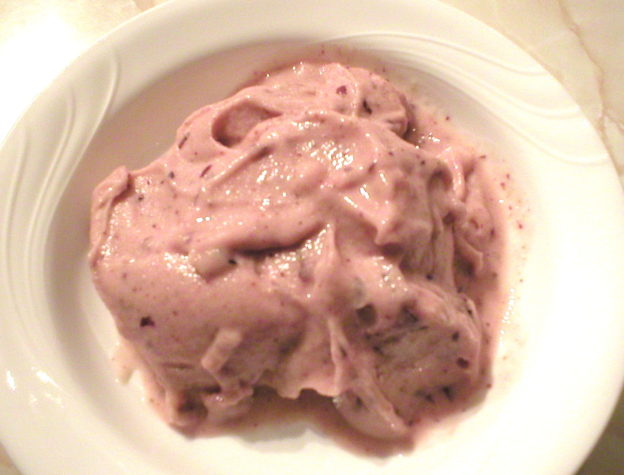
Kale Vegetable Soup

Kale Vegetable Soup

Here’s a delicious soup recipe that really isn’t hard to put together, so don’t let the ingredients list scare you! See the tips section for suggestions on how you can cut preparation time by using pre-cut vegetables and/or canned veggies from the grocery store. This soup is really delicious, so it’s worth giving it a try! See the video demonstration on how to make this soup. The written recipe is below the video.

Enjoy!
Judi

Kale Vegetable Soup
Makes About 6 Servings

1 small bunch of kale, washed and finely chopped (about 6 cups)
2 (14.5 oz) cans diced tomatoes
1 (15.5 oz) can of black beans (or beans of choice), rinsed and drained
6 cups vegetable broth (OR 4 cups of vegetable broth + 2 cups of water)
1-1/2 cups diced white potato (1 large potato)
1-1/2 cups sliced carrots
1 cup corn
1 cup diced yellow onion (or 3 Tbsp dried onion flakes)
½ cup steel-cut oats, OR rice (of choice), OR another grain of choice
1 Tbsp dried parsley flakes
2 tsp dried thyme
Salt to taste, optional

Place all ingredients in a large pot that has a lid. Cover the pot and bring everything to a boil. Lower the heat and simmer until everything is tender, about 45 minutes. Stir the soup occasionally as it cooks. Taste and adjust seasoning, if needed. Enjoy! Store leftover soup in a covered container in the refrigerator and use within 4 days.

Tips:

To make things easier with less prep work, you could use frozen diced onions so you don’t have to dice them yourself.

You could use already shredded or sliced carrots from the grocery store. OR you could use 1 can of sliced carrots (drained). OR you could even use frozen carrot slices.

For the potatoes, you could use frozen diced potatoes, OR one can of diced potatoes, drained.

If you opt for using canned vegetables you could reduce the liquid by one cup, if desired, to reduce the amount of broth in the soup (canned vegetables will not absorb as much liquid as fresh vegetables).

Also, if you don’t want to add any grain (like the oats or rice) to the soup, you could increase the corn to 1-1/2 or 2 cups to compensate (one whole can of corn should be enough).

If you don’t want to cut up the kale from a fresh bunch, you could buy pre-cut kale in bags. Beware that the pieces are often rather large and may be too large for soup, so a little chopping may still be needed.